Making an Adze – Part 3

Pt 3 – Making and fitting the handle.
Since I don’t use factory made drifts to shape the eyes of my tools, they don’t take factory made handles, which means that have to make every handle that I use.
Making and fitting a handle to an eyed tool such as an
First off, material choice. For long handled axes then ash, hickory and elm are the most common choices, all being tough and elastic. For short handles such as this adze, you could use pretty much any hardwood as strength isn’t likely to be an issue. I’ve used ash here because I have it and was making a bunch of larger axe handles at the same time, something with a little elasticity is good for impact tools such as these as it doesn’t transmit shock to the hand like a harder wood such as oak does. In practice, you won’t notice much difference really.
Secondly, grain orientation. I you look at old school books on woodland work and tools, axe handles are often made from radial splits of a log. That gives the most handles per log and the growth rings run across the handle giving a lot of flex and shock absorption; just think about a wooden archery bow, that is how they are arranged.
If you have a curvy handle like most modern axes (based on 19th and
People will debate this fact all day long but
Ok, on with the making.
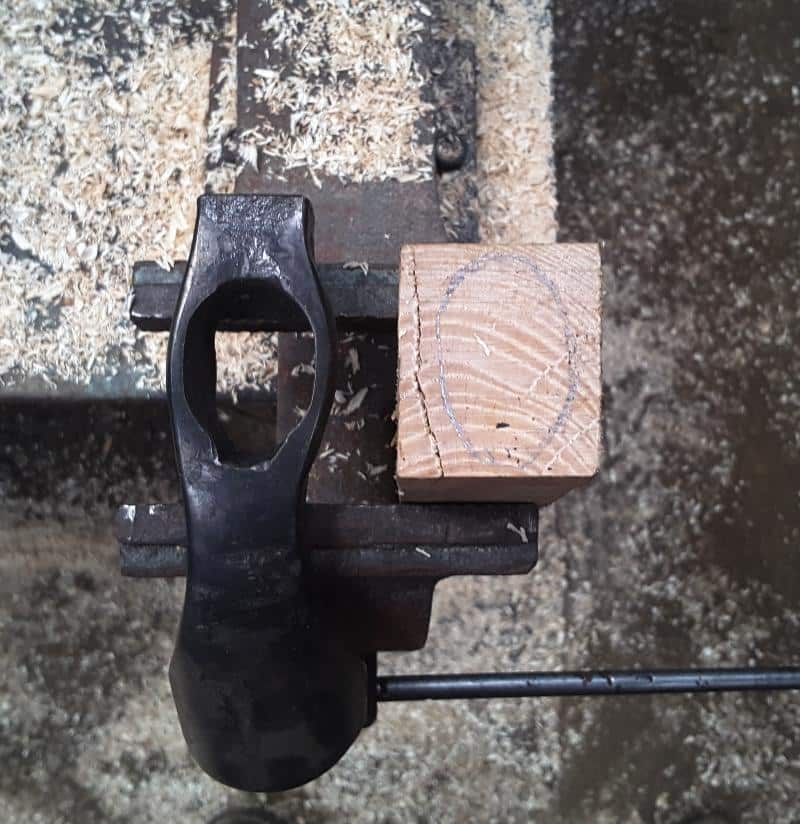
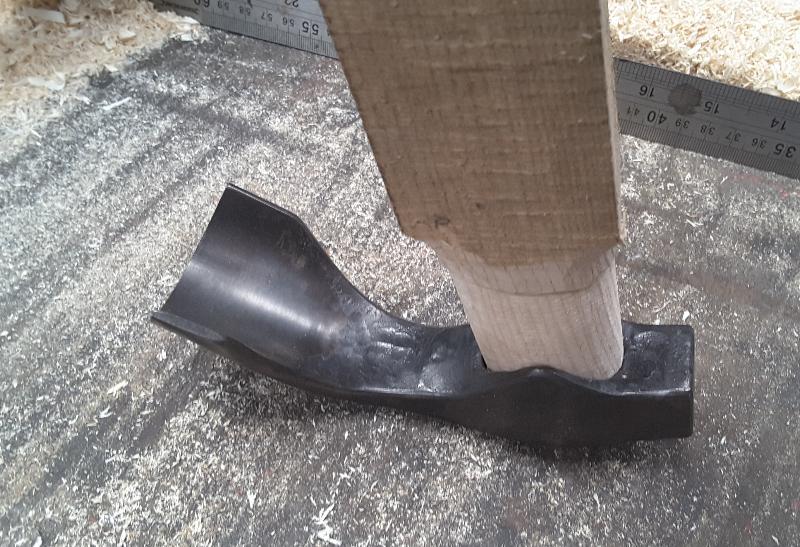
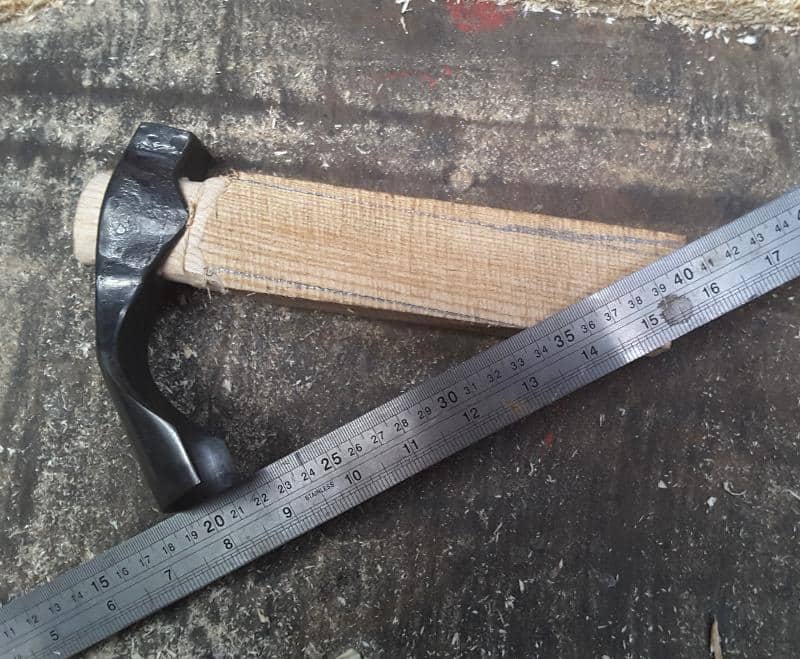
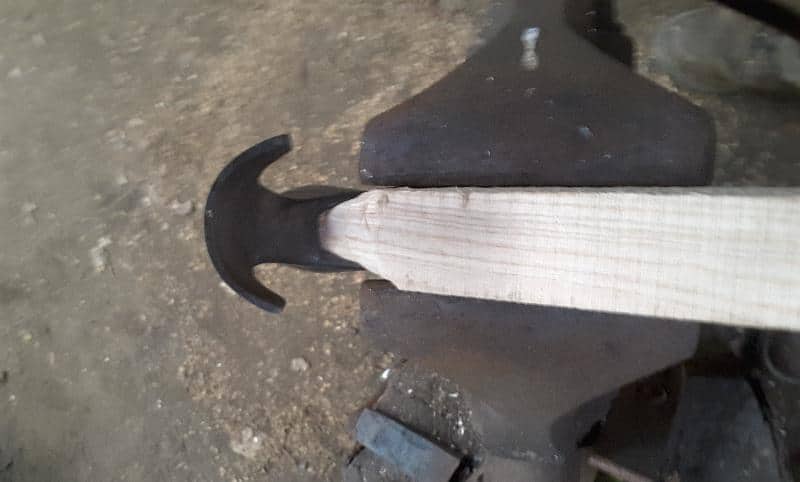
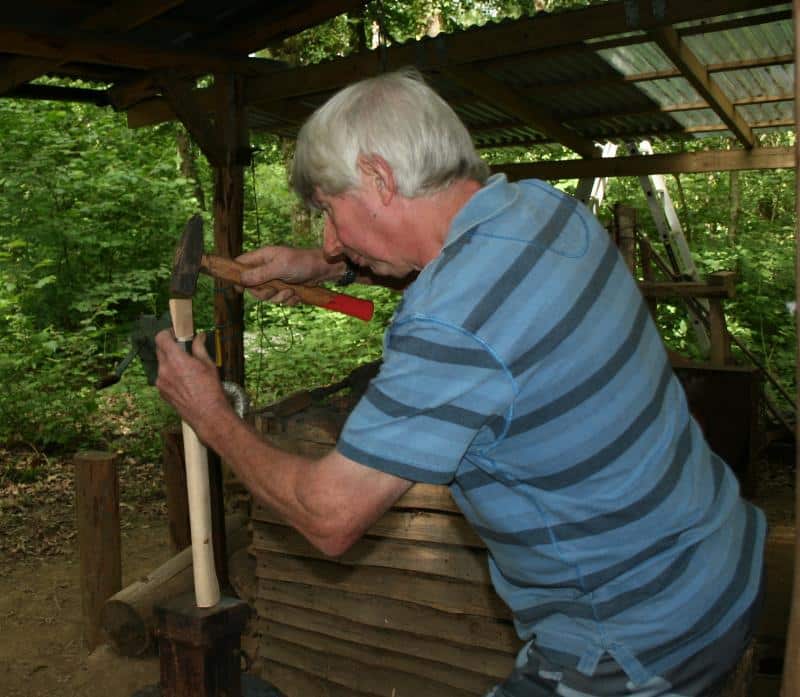
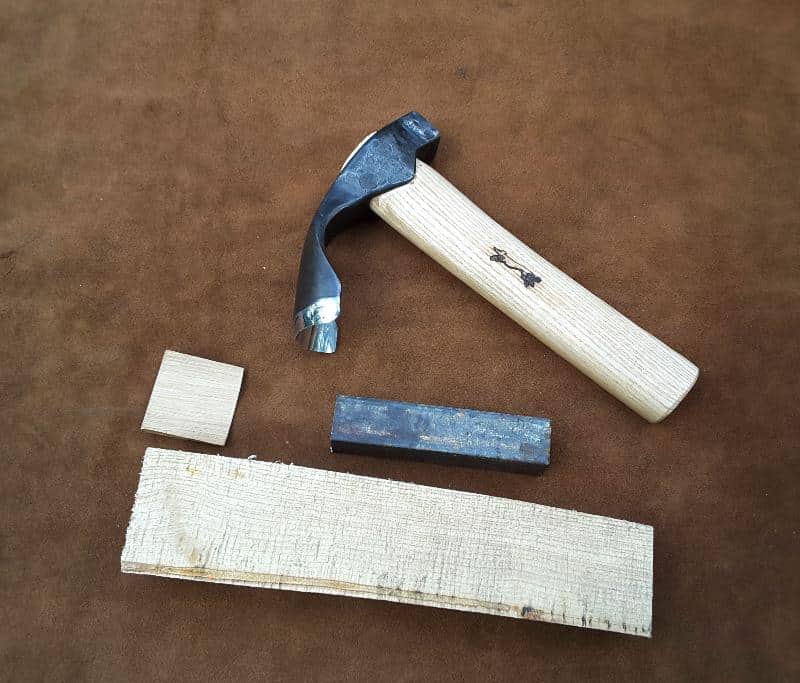
Having selected my piece of wood (ie dry, well-seasoned native hardwood with no splits or cracks), I saw it off to a couple of inches longer than I need and draw around the inside of the adze eye on the end. Then using axes and drawknives (or an angle grinder and belt sander!) I shave the end of the wood until it just begins to fit into the eye. I shave from just a bit further than the head will take up and to a very gradual taper.
Once the first few mm
The wood that was inside the eye will be black and compressed from the fitting (if it is clean, then I took too much off and is less than perfect fit). Assuming that the head didn’t go all the way on in the first fitting, the wood
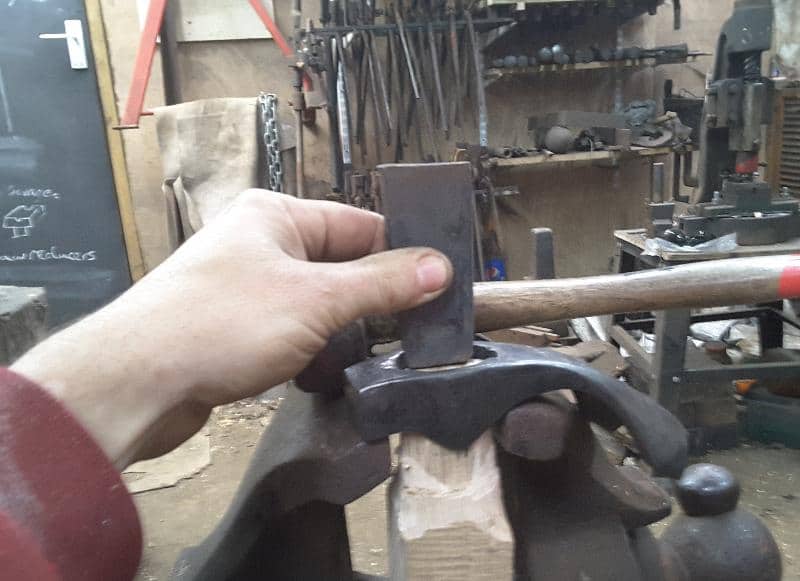
Now that the head is on I begin shaping the handle. I always use a piece of wood that is larger than I need, so if the head refuses to go on straight, I can just carve the handle straight instead. First the profile shape of the handle is drawn on the side of the wood and carved out OVERSIZE by whatever means I am using. Then I do the same to the top view; this is my chance to straighten things up if needed.
If I’m teaching, then all of the
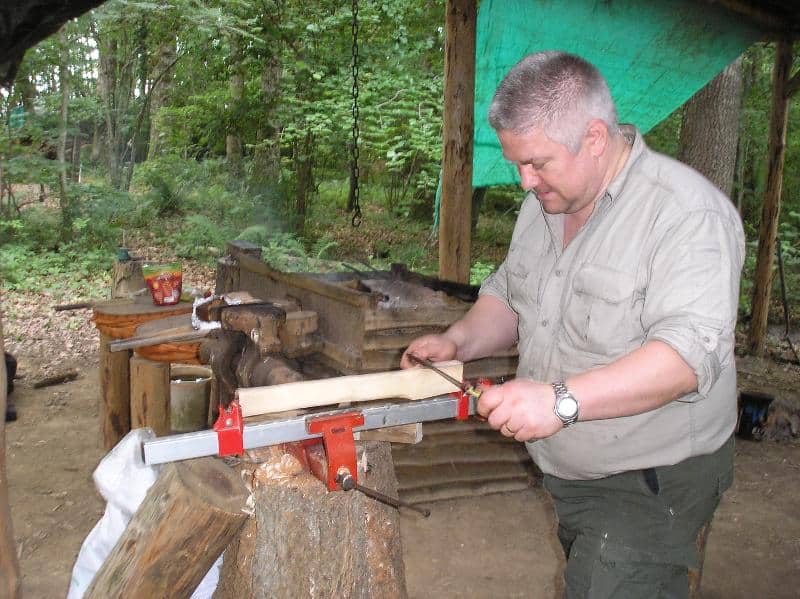
Before final
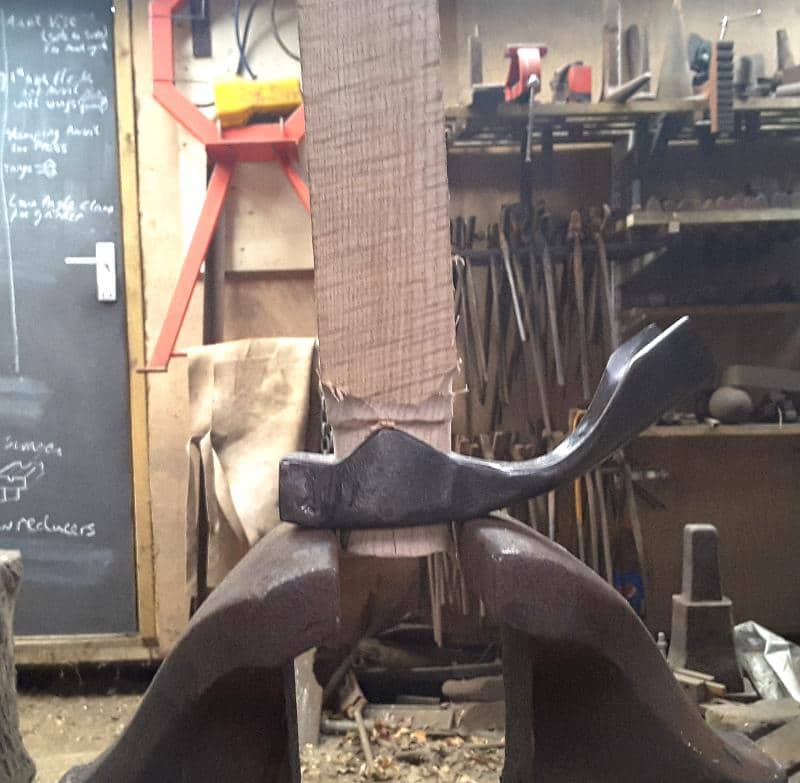
Wedges can be made from anything that is harder than the handle itself, in this
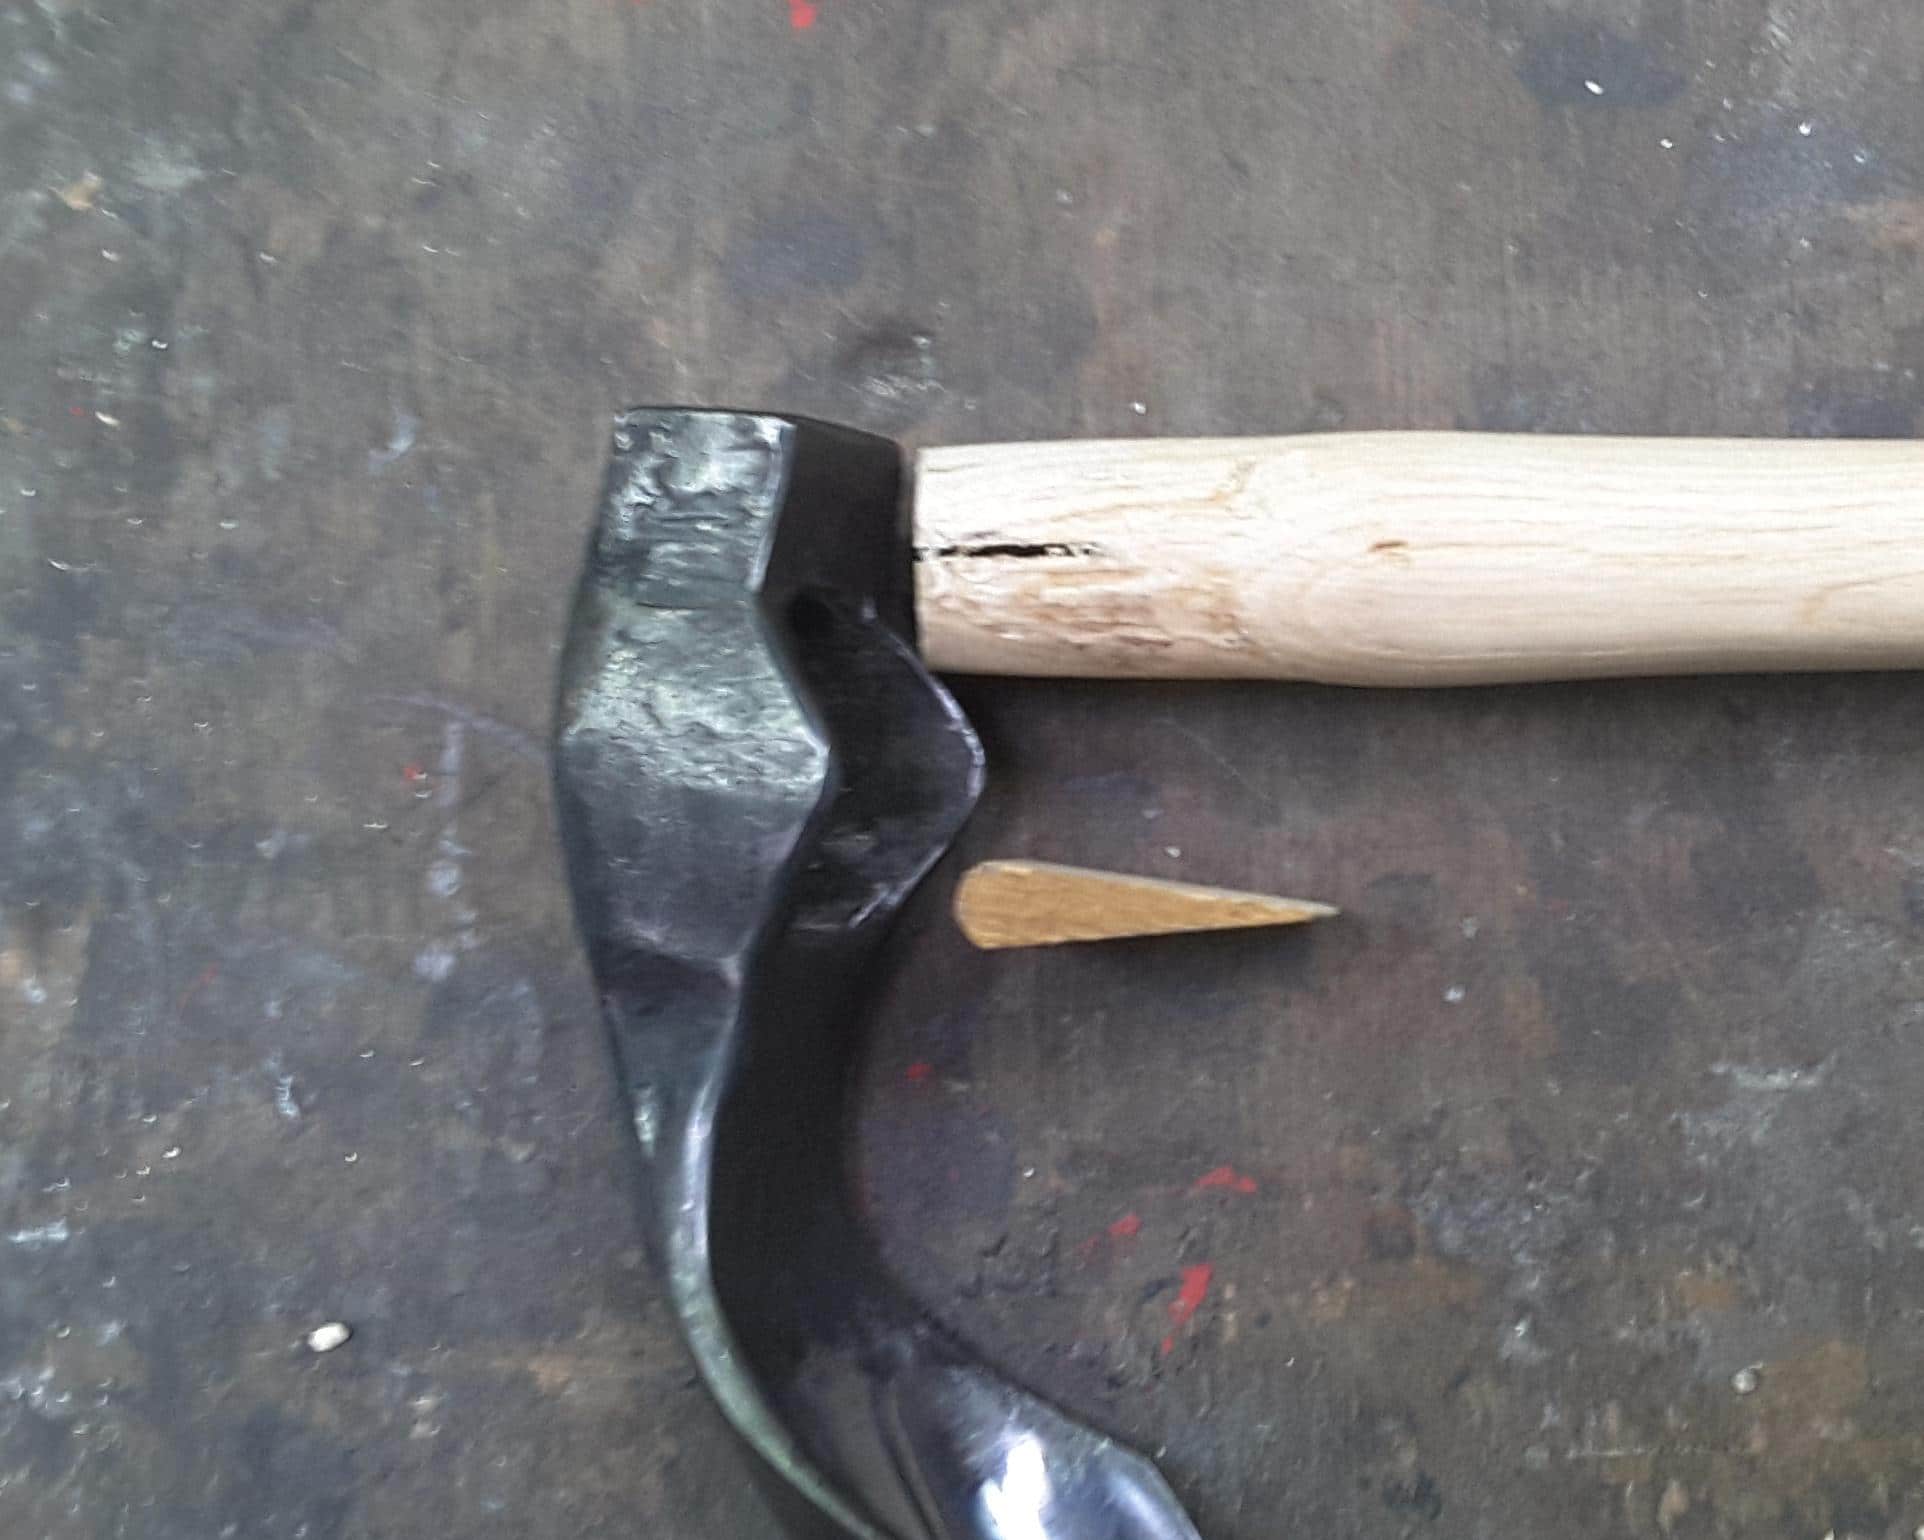
In either
If doing it myself, I hold the handle just below the head in mid-air and strike the wedge until it stops moving; I don’t teach that method as it requires a strong grip to avoid
I don’t normally fit a metal wedge as well as the wooden one. If I’ve fitted the handle properly then the metal wedge isn’t needed for tightening and if the handle works loose later in life (which it could do if stored in a very dry house or the wood
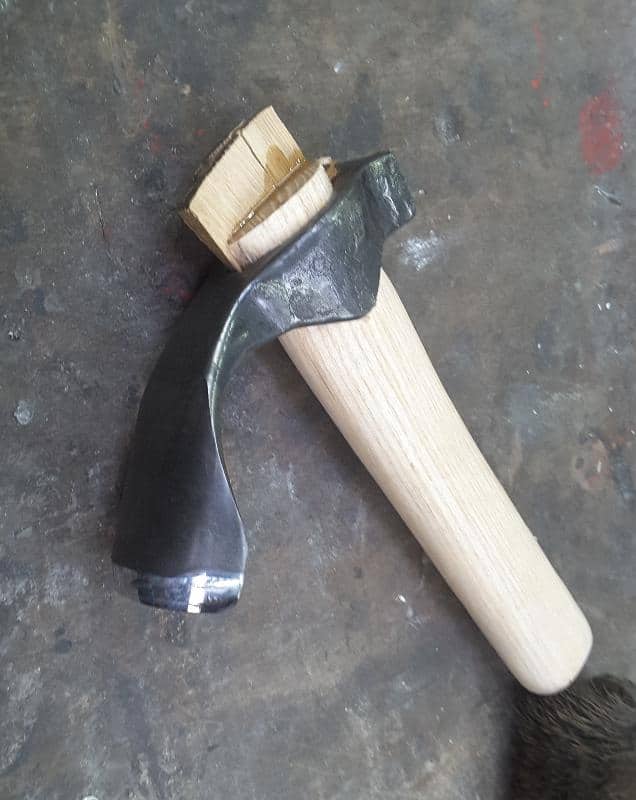
With the wedge fitted, it is trimmed off, along with the back end of the handle (which can get damaged in the fitting). Finally the handle oiled up with Danish oil. I usually sharpen the edge before final fitting to make life easier. In which case, that’s it, job done.
One shiny new adze ready to carve a bowl!
This is the last part of our series on making an Adze by Dave Budd, you can read more about him and see his work on his website DaveBudd.com
Part one – Making an Adze is here
Part two – Making an Adze is here