A few people have expressed an interest in the Magikelly / Wanderingstar hammock system so here it is from start to finish.
I will put this up in a different way to the way I do normally. Usually I would pitch the tarp first then if it rains, everything else can be done under cover. However on a sunny day like today, its often nice to pitch hammock first (and then have a kip in the sun for an hour).
To begin with, here is the full system in its stuff sacks.
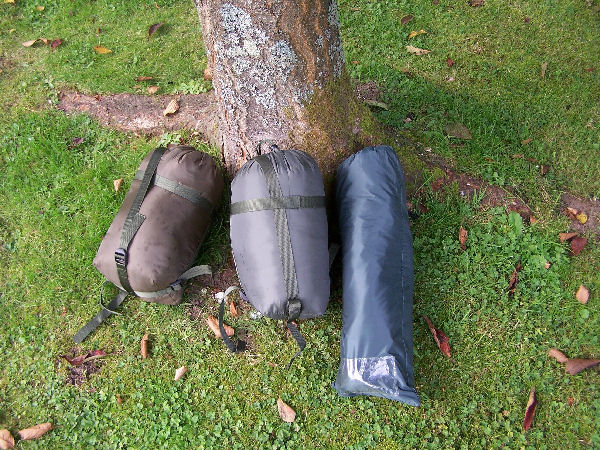
The long thin stuff sack contains the hammocks, climbing tape for suspending the hammock, a 3m x 3m tarpaulin and a mosquito net. The other two bags contain an under blanket which suspends beneath the hammock and a quilt for use inside the hammock.
Unpacking the long stuff sack reveals the following elements
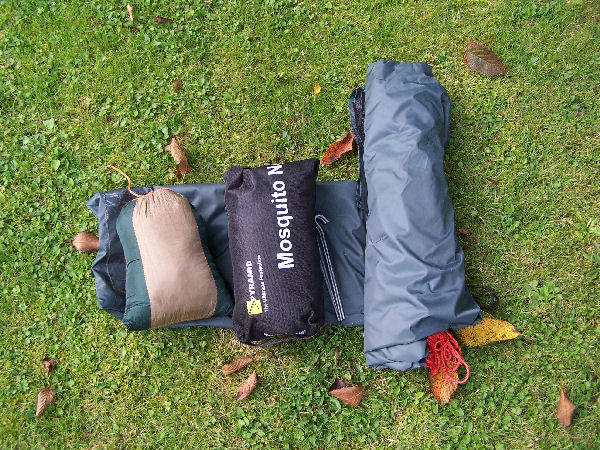
On the left is the group buy hammock sil nylon and packs into its own pocket that later forms a handy bag attached to the hammock side wall for things that might be wanted in the night. It packs to half the size of a bag of sugar.
In the centre is a group buy mozz net in its own bag. More on this later.
On the right is a Tatonka 3m by 3m sized sil nylon tarp. Rolled tight this occupies about the size of a 2lb bag of sugar. Again more later.
To begin with, lets sling the hammock. Opening the hammock stuff sack reveals the following items
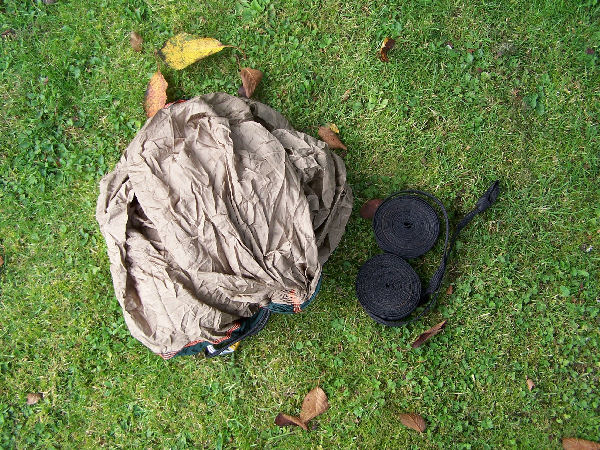
What you can see here is a nylon hammock and two 5m lengths on climbing tape. The climbing tape has several advantages over rope in attaching a hammock to a tree. Its flat so it grips better, it doesnt stretch as many ropes do and is far less prone to damage the bark of the tree.
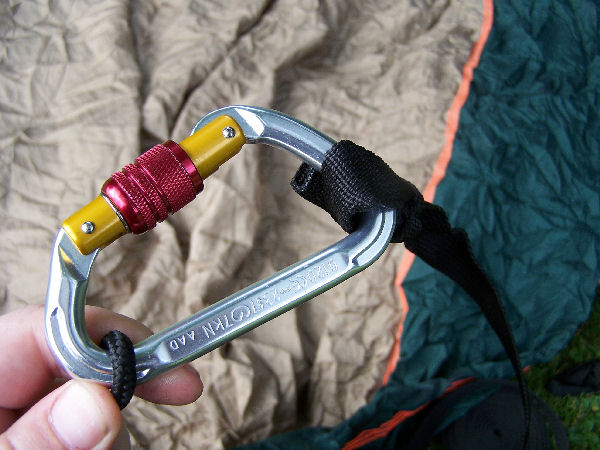
The cords on each end of the hammock are gathered in a metal hook when the hammock is supplied. I have removed these and replaced with (proper climbing strength) screw gate karabiners. I find these more secure and very easy to unclip if I want to add the mozzy net after slinging the hammock for example.
Now we need to find some suitable trees. We want two trees about 20 feet or more apart. Check both trees are sound, have no diseased limbs, heavy overhangs etc. I prefer to have the hammock out from under any branches partly to avoid any possibility of anything falling, but also to stop the persistent drip after rain from the leaves. Avoid beech trees if possible they have a tendency to shed large branches especially if there is rain after a dry spell.
A nice healthy apple and cherry will do
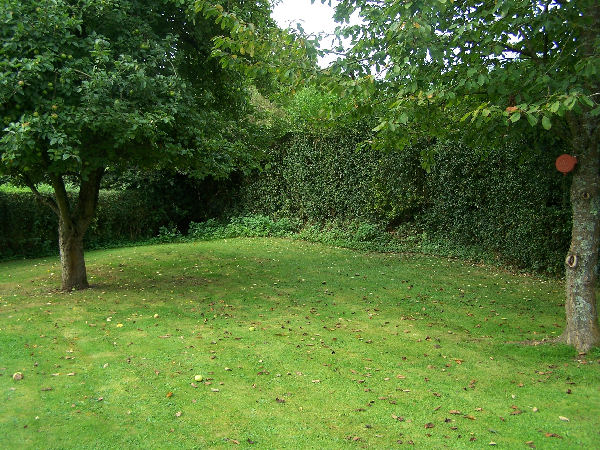
So we position the hammock on the floor and then tie up one end. I like to use an evenk hitch (aka falconers knot) for the first end a quick release knot that lets me slide the climbing tape up the tree.
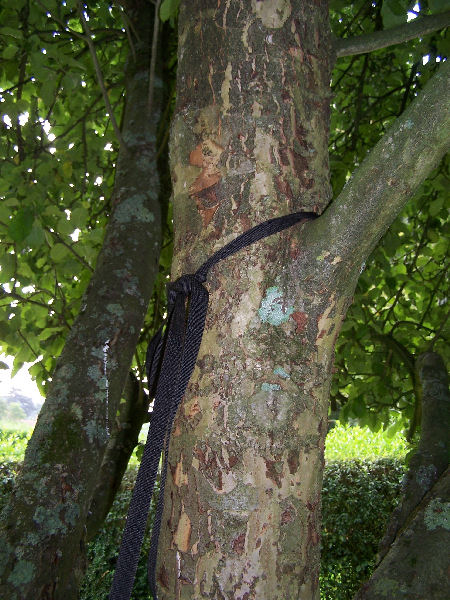
I use a tautline hitch at the other end since it lets me take slack out of the tapes.

I dont like my hammock bar tight as some pitch them just taught enough to keep me off the ground. The hammock will drop considerably with weight on it!
Its worth noting that everyone has their own way of tying a hammock feel free to invent your own
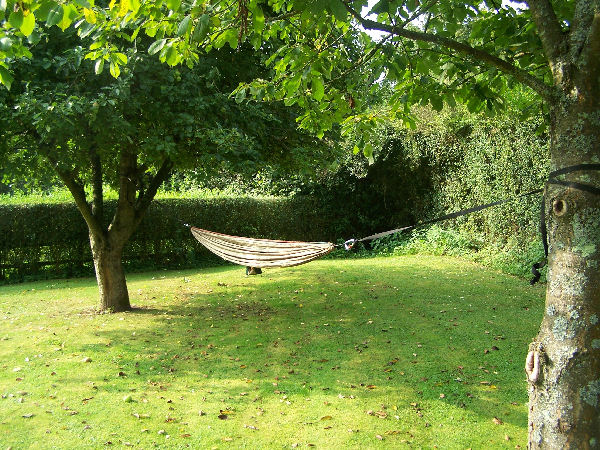
Now, sleeping in a hammock is different to sleeping on the ground. The greatest source of heat loss is cold air under your back. A sleeping bag wont really help with this as it will become compressed between your back and the hammock and not trap any air. One solution is to use a partially inflated Thermarest type mat inside the hammock that will wrap around you to some extent when you lie on it. Other people use reindeer skins inside the hammock that are great insulators. Better still though is an underblanket. An underblanket is slung underneath the hammock it insulates from outside and so is not compressed between back and hammock.
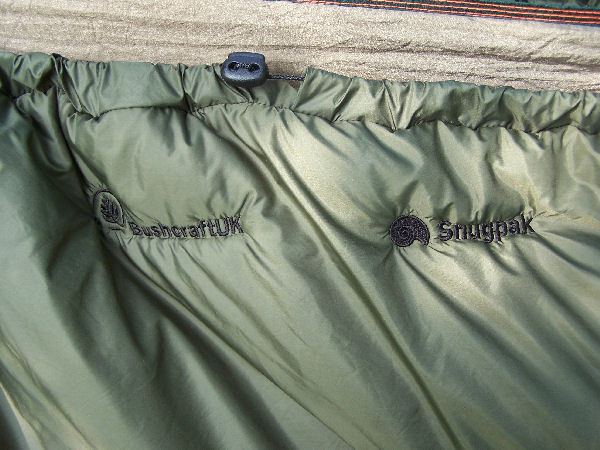
This is how the underblanket looks
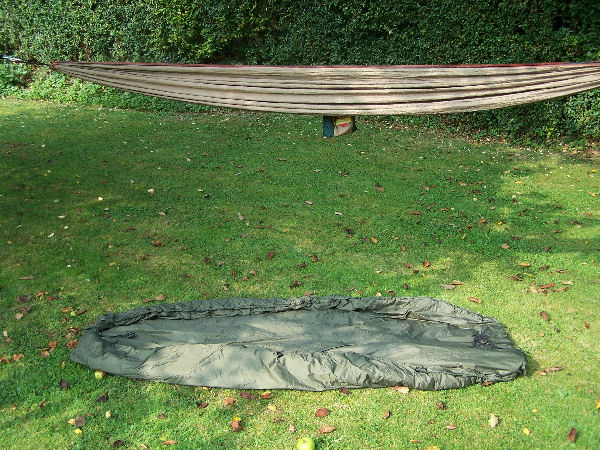
There are two sets of shock cords running through the underblanket that allow both ends to be attached around the hammock like this
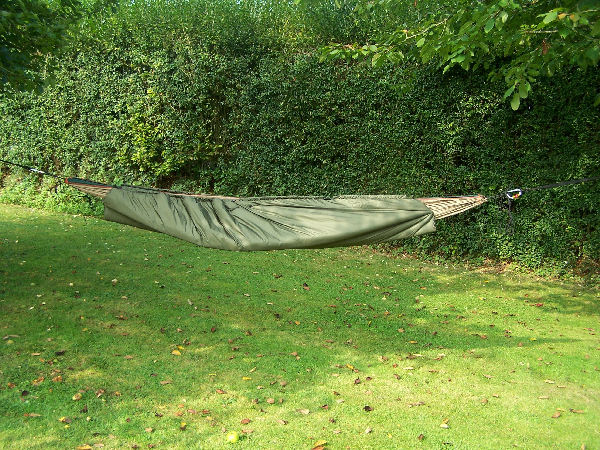
There is a sprung toggle halfway down the side of the blanket that allows the blanket to be raised and lowered to regulate heat when lying inside. Put some slack into this, sling the underblanket tight, then adjust from inside.
Best climb inside for a kip then J. You can see how the hammock enfolds me and the shaow line from the cocoon formed by the underblanket.
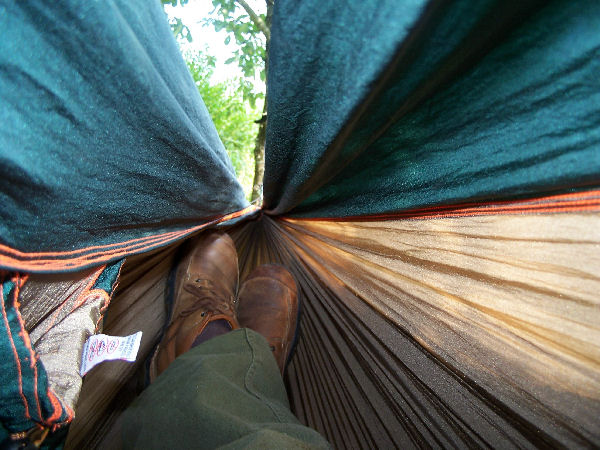
So my back is warm now my front.
A sleeping bag has two major disadvantages in a hammock. Firstly you are carrying more than you need to (in that the part underneath you does not insulate being compressed). Secondly they are a right pain to get into and out of inside a hammock.
Enter the quilt! Of course you can use an unzipped sleeping bag, wool blanket or even a bed quilt but this is the best solution I have seen!
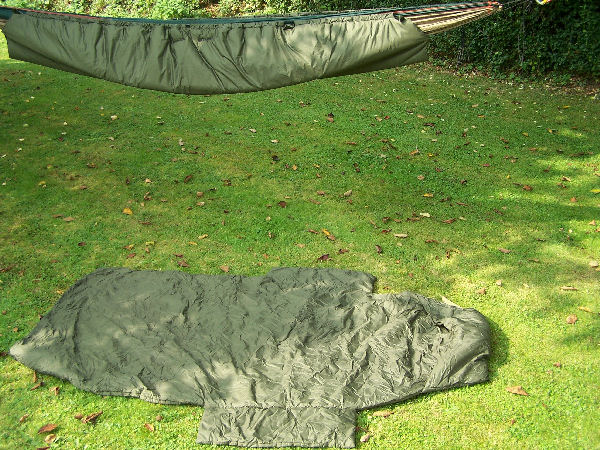
As you can see this is a top quilt made from compressible sleeping bag like material. There is a bucket to tuck your feet into and two side panels to tuck under your back to stop the quilt coming adrift in the night.
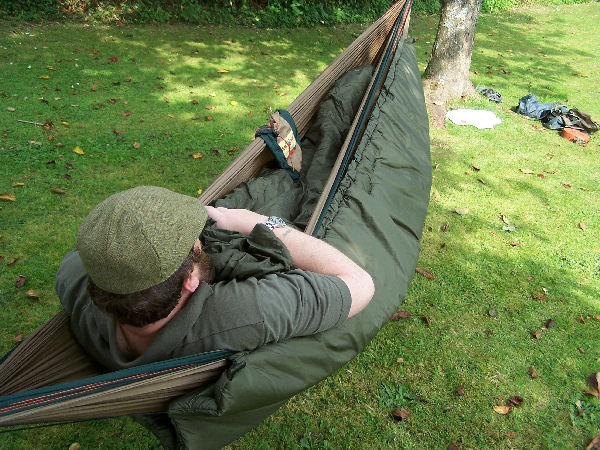
Simplicity itself to get into and out of and much smaller than a sleeping bag! Im half pulling myself out here so that you can see the arrangement. When you lie down its like being in a big warm cocoon (but from outside you cant see much).
Thats the basic warmth taken care of now lets get dry!
A tarp is suspended above the hammock. I use a 3m by 3m square tarp. Some use longer or shorter types. They can be pitched as a diamond to increase front to back length or as a square to increase working / sitting area underneath. I vary mine by the weather and the pitch site.
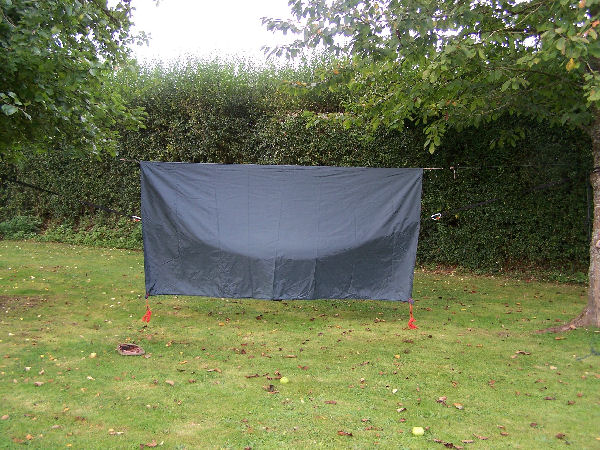
Paracord is quite sufficient to make a ridgeline for your tarp it wont be bearing any weight after all. A useful trick is to attach another piece of paracord at each end of the tarp and tie to the ridgeline in a prussic knot. This allows the tarp to be stretched tight along the ridgeline and to be re-positioned along the ridge. Leaving a trailing end on the knot acts as a drip line meaning water wont run along the ridgeline inside the tarp.
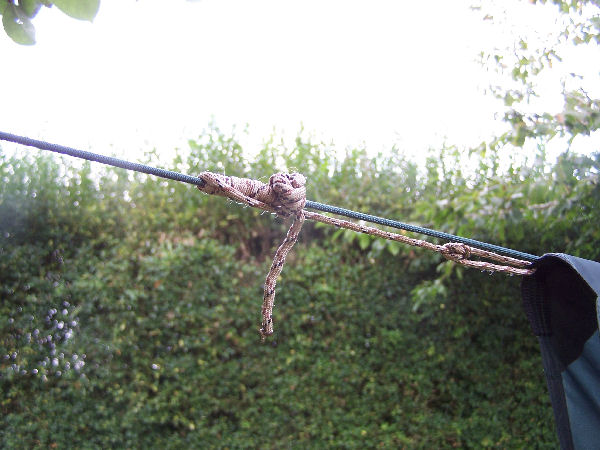
A guy line is attached to each corner of the tarp. I sue orange ones in company they save many a trip and stumble. If on my own or wanting to blend in I use green ones.
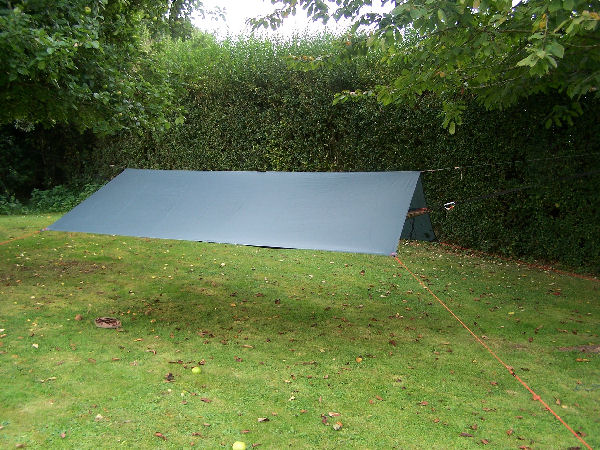
As you can see, this tarp leaves lots of room underneath to sit, cook etc. and is more than big enough to protect from even sideways rain.
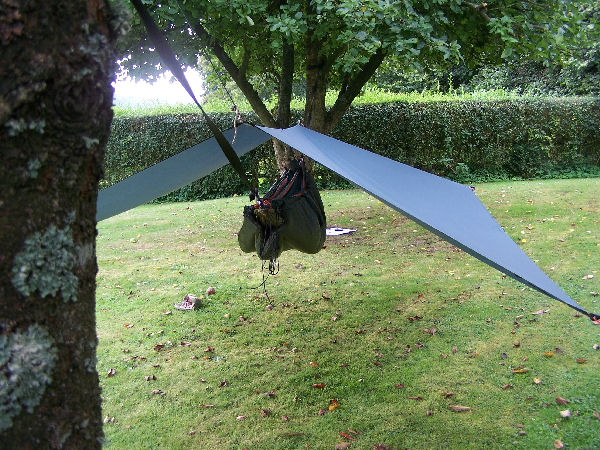
Okay, the last thing we need to be aware of is midges, gnats, mosquitoes and all manner of nasty biting flying things. Enter the net!
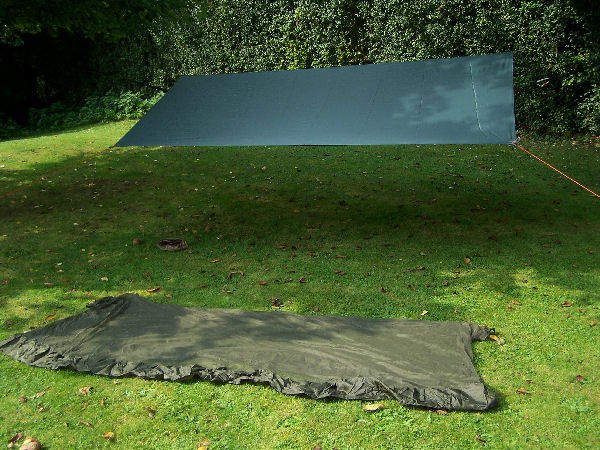
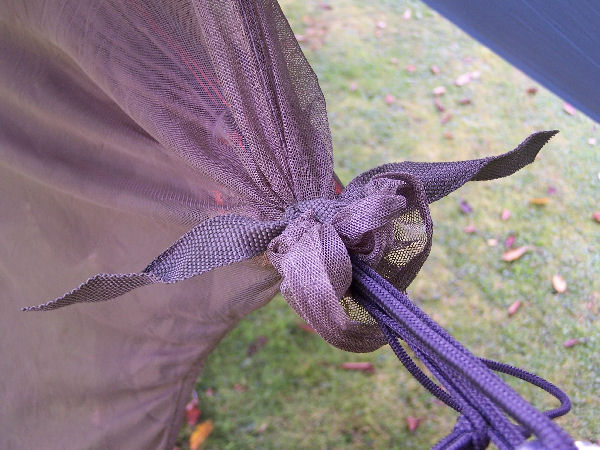
The mos net has three loops above it to suspend it from the ridge line of the tarp. I added mini karabiners to mine so I can snap it on and off without un-pitching the tarp. The hammock ties fit through a hole in each end of the net. The net has ties to seal the hole against flying things.
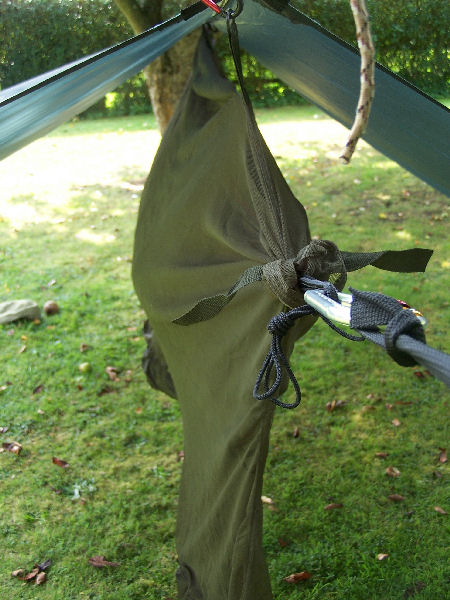
When fully pitched your entire hammock is fully enclosed. You can get into and out of the hammock through the hole in the bottom of the net.
Thats the full system rigged one nice, discrete camp that doesnt mind if its on a hill, or if the ground is marshy.
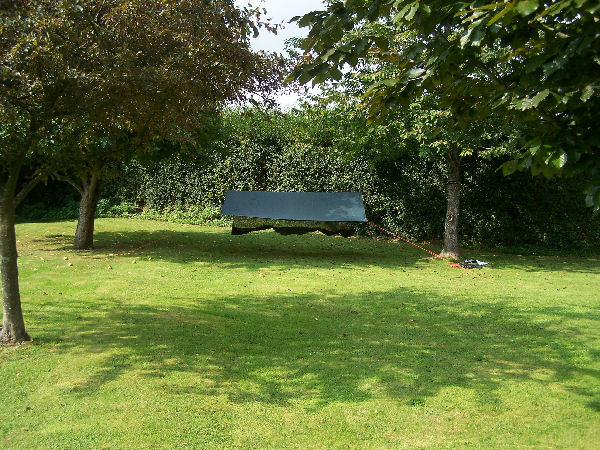
There are a few other little comforts that can be added two sticks sharpened and banged in the ground beside the hammock make a great place to put your boots. A head torch or small lantern can be clipped to the ridge line to give a reading light. A tripod can be erected under the tarp to keep your pack out of the dirt. A leather arm chair can no, perhaps not
The nice thing with the hammock system though is flexibility.
Midday nap on a nice day?
Just sling your hammock (you can use it as a chair too).
Warm summer night?
Just hammock and the quilt will do.
Near water (or in Scotland)?
Add the mozzie net.
Cold?
Add an underblanket.
Wet?
Put the tarp up.
Stopped for a brew in the rain?
Just sling the tarp to keep the rain off.
Im sure you get the idea.
Red
I will put this up in a different way to the way I do normally. Usually I would pitch the tarp first then if it rains, everything else can be done under cover. However on a sunny day like today, its often nice to pitch hammock first (and then have a kip in the sun for an hour).
To begin with, here is the full system in its stuff sacks.

The long thin stuff sack contains the hammocks, climbing tape for suspending the hammock, a 3m x 3m tarpaulin and a mosquito net. The other two bags contain an under blanket which suspends beneath the hammock and a quilt for use inside the hammock.
Unpacking the long stuff sack reveals the following elements

On the left is the group buy hammock sil nylon and packs into its own pocket that later forms a handy bag attached to the hammock side wall for things that might be wanted in the night. It packs to half the size of a bag of sugar.
In the centre is a group buy mozz net in its own bag. More on this later.
On the right is a Tatonka 3m by 3m sized sil nylon tarp. Rolled tight this occupies about the size of a 2lb bag of sugar. Again more later.
To begin with, lets sling the hammock. Opening the hammock stuff sack reveals the following items

What you can see here is a nylon hammock and two 5m lengths on climbing tape. The climbing tape has several advantages over rope in attaching a hammock to a tree. Its flat so it grips better, it doesnt stretch as many ropes do and is far less prone to damage the bark of the tree.
The cords on each end of the hammock are gathered in a metal hook when the hammock is supplied. I have removed these and replaced with (proper climbing strength) screw gate karabiners. I find these more secure and very easy to unclip if I want to add the mozzy net after slinging the hammock for example.

Now we need to find some suitable trees. We want two trees about 20 feet or more apart. Check both trees are sound, have no diseased limbs, heavy overhangs etc. I prefer to have the hammock out from under any branches partly to avoid any possibility of anything falling, but also to stop the persistent drip after rain from the leaves. Avoid beech trees if possible they have a tendency to shed large branches especially if there is rain after a dry spell.
A nice healthy apple and cherry will do

So we position the hammock on the floor and then tie up one end. I like to use an evenk hitch (aka falconers knot) for the first end a quick release knot that lets me slide the climbing tape up the tree.

I use a tautline hitch at the other end since it lets me take slack out of the tapes.

I dont like my hammock bar tight as some pitch them just taught enough to keep me off the ground. The hammock will drop considerably with weight on it!
Its worth noting that everyone has their own way of tying a hammock feel free to invent your own

Now, sleeping in a hammock is different to sleeping on the ground. The greatest source of heat loss is cold air under your back. A sleeping bag wont really help with this as it will become compressed between your back and the hammock and not trap any air. One solution is to use a partially inflated Thermarest type mat inside the hammock that will wrap around you to some extent when you lie on it. Other people use reindeer skins inside the hammock that are great insulators. Better still though is an underblanket. An underblanket is slung underneath the hammock it insulates from outside and so is not compressed between back and hammock.
This is how the underblanket looks

There are two sets of shock cords running through the underblanket that allow both ends to be attached around the hammock like this

There is a sprung toggle halfway down the side of the blanket that allows the blanket to be raised and lowered to regulate heat when lying inside. Put some slack into this, sling the underblanket tight, then adjust from inside.

Best climb inside for a kip then J. You can see how the hammock enfolds me and the shaow line from the cocoon formed by the underblanket.

So my back is warm now my front.
A sleeping bag has two major disadvantages in a hammock. Firstly you are carrying more than you need to (in that the part underneath you does not insulate being compressed). Secondly they are a right pain to get into and out of inside a hammock.
Enter the quilt! Of course you can use an unzipped sleeping bag, wool blanket or even a bed quilt but this is the best solution I have seen!

As you can see this is a top quilt made from compressible sleeping bag like material. There is a bucket to tuck your feet into and two side panels to tuck under your back to stop the quilt coming adrift in the night.

Simplicity itself to get into and out of and much smaller than a sleeping bag! Im half pulling myself out here so that you can see the arrangement. When you lie down its like being in a big warm cocoon (but from outside you cant see much).
Thats the basic warmth taken care of now lets get dry!
A tarp is suspended above the hammock. I use a 3m by 3m square tarp. Some use longer or shorter types. They can be pitched as a diamond to increase front to back length or as a square to increase working / sitting area underneath. I vary mine by the weather and the pitch site.

Paracord is quite sufficient to make a ridgeline for your tarp it wont be bearing any weight after all. A useful trick is to attach another piece of paracord at each end of the tarp and tie to the ridgeline in a prussic knot. This allows the tarp to be stretched tight along the ridgeline and to be re-positioned along the ridge. Leaving a trailing end on the knot acts as a drip line meaning water wont run along the ridgeline inside the tarp.

A guy line is attached to each corner of the tarp. I sue orange ones in company they save many a trip and stumble. If on my own or wanting to blend in I use green ones.

As you can see, this tarp leaves lots of room underneath to sit, cook etc. and is more than big enough to protect from even sideways rain.

Okay, the last thing we need to be aware of is midges, gnats, mosquitoes and all manner of nasty biting flying things. Enter the net!

The mos net has three loops above it to suspend it from the ridge line of the tarp. I added mini karabiners to mine so I can snap it on and off without un-pitching the tarp. The hammock ties fit through a hole in each end of the net. The net has ties to seal the hole against flying things.

When fully pitched your entire hammock is fully enclosed. You can get into and out of the hammock through the hole in the bottom of the net.

Thats the full system rigged one nice, discrete camp that doesnt mind if its on a hill, or if the ground is marshy.

There are a few other little comforts that can be added two sticks sharpened and banged in the ground beside the hammock make a great place to put your boots. A head torch or small lantern can be clipped to the ridge line to give a reading light. A tripod can be erected under the tarp to keep your pack out of the dirt. A leather arm chair can no, perhaps not
The nice thing with the hammock system though is flexibility.
Midday nap on a nice day?
Just sling your hammock (you can use it as a chair too).
Warm summer night?
Just hammock and the quilt will do.
Near water (or in Scotland)?
Add the mozzie net.
Cold?
Add an underblanket.
Wet?
Put the tarp up.
Stopped for a brew in the rain?
Just sling the tarp to keep the rain off.
Im sure you get the idea.
Red
