Some recent shots
- Thread starter brancho
- Start date
-
Hey Guest, Early bird pricing on the Summer Moot (29th July - 10th August) available until April 6th, we'd love you to come. PLEASE CLICK HERE to early bird price and get more information.
You are using an out of date browser. It may not display this or other websites correctly.
You should upgrade or use an alternative browser.
You should upgrade or use an alternative browser.

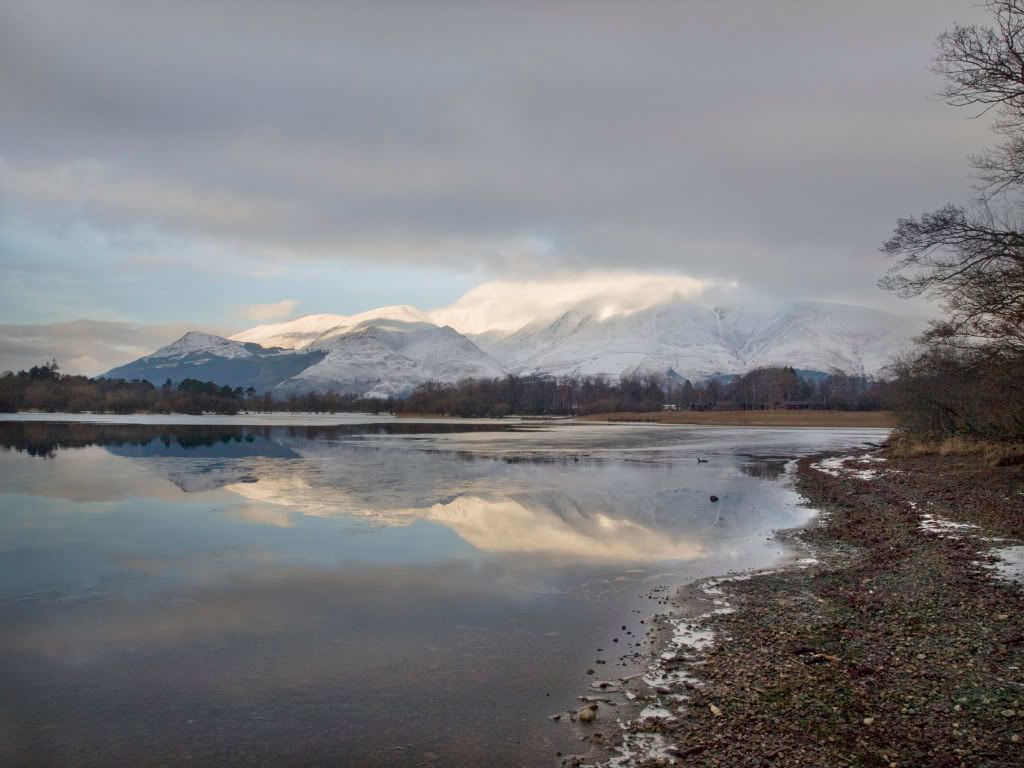
Gorgeous..! The first one would look wonderful framed.... my only comment, would be it could have done with something on the right side (near the corner) just to draw your eye up to the mountains... but thats being VERY piccy...
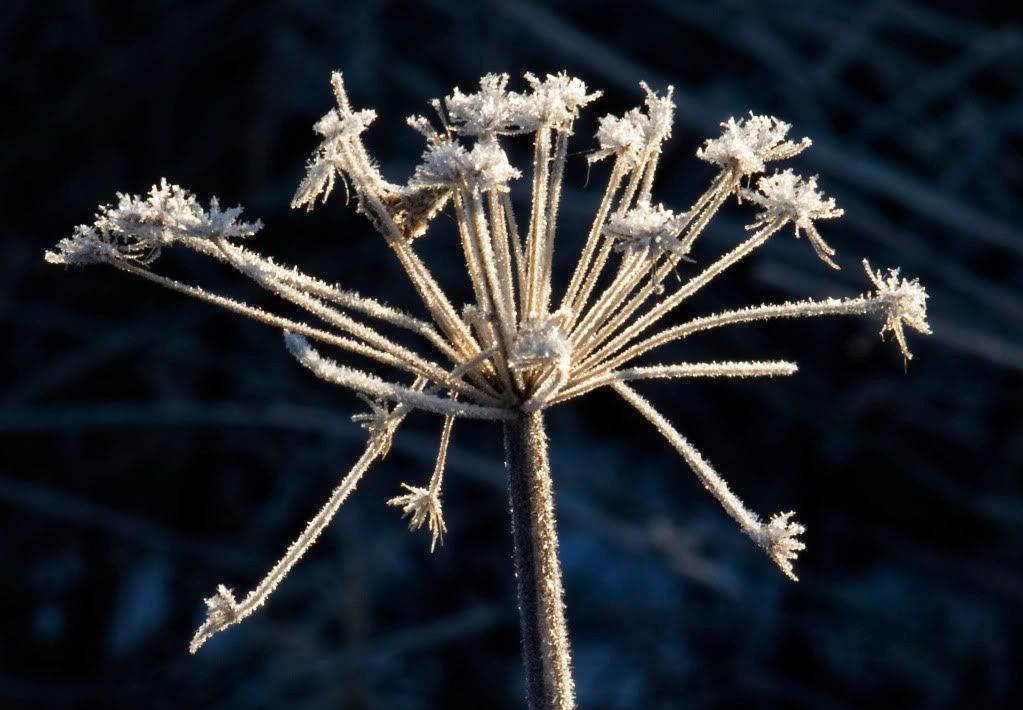
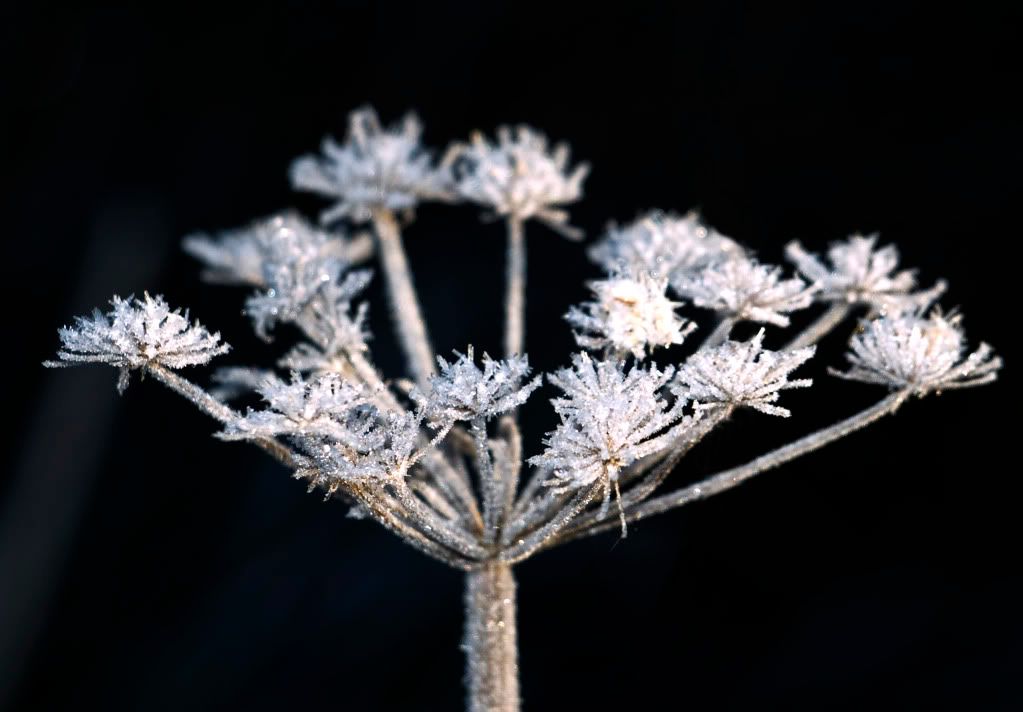
2nd shot is better than the third, as more completely in focus, and truly shows the wonder of nature at its best.
Great shots Brancho.......
2nd shot is better than the third, as more completely in focus, and truly shows the wonder of nature at its best.
Great shots Brancho.......

mate if you lik them thats all that counts love them all remember the old saying take pics leave foot prints and they all have a memory for you so who cares what people think they are your memories and i think they are great
my only comment, would be it could have done with something on the right side (near the corner) just to draw your eye up to the mountains... but thats being VERY piccy.
I was aware of that when I took it but I was struggling to find something other than two ducks the dog was sacring away.
The Landscape is just down the road as simaon says at Derwent water. The tide mark from the floods a month ago was about 8ft above where I was stoodLovely shots Alf, where did you take them?
Nice shots Alf, the first one of Derwent could do with a bit more contrast, cracking shots there.
I see that now I will have another go at sorting it when I get the chance.
Riggers I see your point but I was looking for comments like simons to try and improve them. I am only getting into using a DSLR to its full potential and I working my way through using photoshop and RAW.
I think the hogweed ones are fine as they are Alf, Photoshop can be very daunting lots you can do with it, I know loads of folk who just tweek with it and its perfect for that, Waylands your man if you want to start messing about with layers which is fun to do and can create some very nice results.
All the best.
All the best.
Simon
I am working with layers already an the Derwent water shot is a split RAW cinversion if you know what that means.
I am working with layers already an the Derwent water shot is a split RAW cinversion if you know what that means.
Simon
I am working with layers already an the Derwent water shot is a split RAW cinversion if you know what that means.
Its been a while tbh Alf, I've not used photoshop in a few years always found the layers abit confusing, keep meaning to go on a little course at the college down the rd. You not got an ND filter?.

Its been a while tbh Alf, I've not used photoshop in a few years always found the layers abit confusing, keep meaning to go on a little course at the college down the rd. You not got an ND filter?.
No ND filter still building my kit (after years without an SLR) and anyway that can be done easily with RAW in PS.
I have been learning from Gigital Photo Magazine which is rather good.
No ND filter still building my kit (after years without an SLR) and anyway that can be done easily with RAW in PS.
I have been learning from Gigital Photo Magazine which is rather good.
Nice one Alf. I always shot on film digital is new to me only got one this year.
the first one - if you'd been lower to the ground and showed more land/water than grey sky would have been cracking. the shape of the shore would have led your eye to the hills behind perfectly. I like the other two, particularly the last.
actually, composition apart, there is another problem with the first shot (sorry)
it's underexposed by about a stop. the problem you have is that the light reflecting on the snow is fooling the meter into the underexposure, and to fix it, you cant just whack up the levels as the snow with light on it will be even more burnt out.
The fix is to use the red channel as an inverted layer (ie protecting the burn out), and lift the rest, but not to the point that it looks unnatural. you can then add a layer mask and paint in what you want to lighten. If you're not sure how to do this I can talk you through it, but it is THE way to adjust exposure in images rather than using levels or curves across all the channels.
Overlander
I know what you mean about the composition and if I had taken my tripod I would most likely have shot from a lower angle (and I still should have) but I could have done with some wellies to get a different angle.
On the exposre fron the front it was shot RAW and adjusted to prevent blowing the highlights what you see is two RAW conversions blended in photoshop to recover the foreground detail and again if had used a tripod I would have taken different exposures to blend together.
not sure why you're converting the file twice then "blending" them together?
you dont need to do that, any changes can be made using the red, green and blue channels using layers.
When you adjust an image, whether its a RAW file or not, unless you do the adjustments via the channels you cant keep the shape of the image and its features. eg if you raise the curves in the middle, everything brightens, but it isnt proportional to its shape. if you think of a beachball which is brighter on one side and a gradation of light toward the other, if you raise the curve the whole thing just brightens with the curve. if you use the green channel to isolate the highlights and the shadows, you can then keep the shape of the light and raise or lower the contrast in a proportional way. I'll talk you through it if you want, it ll revolutionise your post production. I'm a professional photographer and that is the way to make adjustments in such a manner, particularly if youre going to be printing from the files
ok gotcha. I do think though that the channels solution is the better one.
If you open both your 1st derwentwater image and your second in photoshop, compare the histograms. in the first, you see a peak off the top on the left side (shadow detail loss), on the second, you see more data loss on the right of the image (more blown snow than the first one).
If you open the first image again, then look at the histogram and the layers palette, click background and you see the channels below in the box, rgb, then red, green, blue. click the red channel, the image goes a water grey/black/white. then to to image, calculations. a box pops up. makes sure that red is selcted in the channels box in both boxes, then choose multiply. at the bottom, pick "new channel". you 'll see this

this creates an alpha channel. its a seperation of the red elements of the image (the brighter the bits in it, the more red. blow outs and skin etc is always the red.
so, now go to image calculations again, and when the box pops up you ll see its darker again, like this

this is further isolating the problem areas. at the bottom of the box where it says "result" click the drop down and choose "selection". you ll see a broken line around the snow on the hill, and the reflection on the water. then click rgb in the layers palette, then hit the option button on it (the half moon black white circle) and choose curves. a new box pops up and you can drag the curve up from the middle to lift all the white areas (the hill snow will be affected too, but fear not). When you do this it does it in proportion. all the shapes are maintained and you are ONLY affecting the red areas from the channel. so now what you see is a big lift all over, which is causing more blow out on the hill. so..
hit the wing menu (three small lines, top right of the layers palette) and choose "new group from layers" - a box pops up which says group one. ok that. then hold down the alt key, and press the square with a circle in it in your layers pallette. this creates a layer mask, and you see a little black box pop up in the palette. making sure you select white on the left hand side colour choice (the two squares overlapping on the left of screen ), then pick brush, whatever size you want, and brush over the areas you want to lighten (make sure your opacity is set to 100%).
you ll see immediately that this brightens the snow and reflection whereever you brush. it wont brighten dark areas, only bright and pale-ish.
If you then want to do this with the dark areas, just do it again using the same alpha channel you already set up, but when the calculation box pops up, tick the "invert" boxes - all the white areas are the dark areas and the ones youre going to change. choose selection and go the same with a curve layer.
the contrast is sorted out via the green channel. i ll tell you how to do that if you want. anyway, the end result i get is

if you download that and open it, check the histogram now, and compare it to the original. all this is irrelevant if youre not going to print it by the way, but if you are, you ll need to sort out the blow outs in the right way.
hope that helps, and let me know if you want me to tell you how to do contract correctly (ie not by just using curves or the contrast slider)
by the way, the banding see in the sky is due to the low res image, it wouldnt do that on the high res
If you open both your 1st derwentwater image and your second in photoshop, compare the histograms. in the first, you see a peak off the top on the left side (shadow detail loss), on the second, you see more data loss on the right of the image (more blown snow than the first one).
If you open the first image again, then look at the histogram and the layers palette, click background and you see the channels below in the box, rgb, then red, green, blue. click the red channel, the image goes a water grey/black/white. then to to image, calculations. a box pops up. makes sure that red is selcted in the channels box in both boxes, then choose multiply. at the bottom, pick "new channel". you 'll see this
this creates an alpha channel. its a seperation of the red elements of the image (the brighter the bits in it, the more red. blow outs and skin etc is always the red.
so, now go to image calculations again, and when the box pops up you ll see its darker again, like this
this is further isolating the problem areas. at the bottom of the box where it says "result" click the drop down and choose "selection". you ll see a broken line around the snow on the hill, and the reflection on the water. then click rgb in the layers palette, then hit the option button on it (the half moon black white circle) and choose curves. a new box pops up and you can drag the curve up from the middle to lift all the white areas (the hill snow will be affected too, but fear not). When you do this it does it in proportion. all the shapes are maintained and you are ONLY affecting the red areas from the channel. so now what you see is a big lift all over, which is causing more blow out on the hill. so..
hit the wing menu (three small lines, top right of the layers palette) and choose "new group from layers" - a box pops up which says group one. ok that. then hold down the alt key, and press the square with a circle in it in your layers pallette. this creates a layer mask, and you see a little black box pop up in the palette. making sure you select white on the left hand side colour choice (the two squares overlapping on the left of screen ), then pick brush, whatever size you want, and brush over the areas you want to lighten (make sure your opacity is set to 100%).
you ll see immediately that this brightens the snow and reflection whereever you brush. it wont brighten dark areas, only bright and pale-ish.
If you then want to do this with the dark areas, just do it again using the same alpha channel you already set up, but when the calculation box pops up, tick the "invert" boxes - all the white areas are the dark areas and the ones youre going to change. choose selection and go the same with a curve layer.
the contrast is sorted out via the green channel. i ll tell you how to do that if you want. anyway, the end result i get is
if you download that and open it, check the histogram now, and compare it to the original. all this is irrelevant if youre not going to print it by the way, but if you are, you ll need to sort out the blow outs in the right way.
hope that helps, and let me know if you want me to tell you how to do contract correctly (ie not by just using curves or the contrast slider)
by the way, the banding see in the sky is due to the low res image, it wouldnt do that on the high res
Similar threads
- Replies
- 9
- Views
- 515
- Replies
- 5
- Views
- 386
- Replies
- 19
- Views
- 404
- Replies
- 1
- Views
- 259