I picked up some leather at the Wilderness Gathering in the summer, and received a leathercraft toolkit for my bday.
I'm heading to Lapland in Feb with Wild Human, so with a bit of downtime between jobs, I thought I'd have a crack at making a sheath for my Silky Gomboy Outback.
I watched a handful of videos to give myself an idea of the process, made a checklist of various steps and then invariably ended up getting extra bits and pieces from Amazon and, thankfully, a fantastic leather shop I found in London.
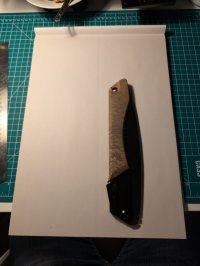
Started by tracing out the saw on an A3 pad
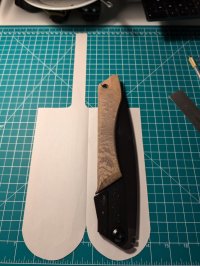
Then drew and cut out the template. (For future reference, I'd move the belt loop slightly further away from the centre.)
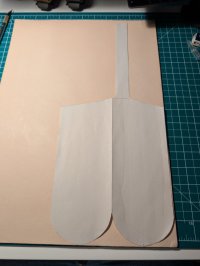
Translating the template to the skin-side of the leather
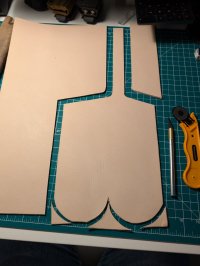
The leather work piece

Checking that there's nothing obviously wrong with the dimensions - seems okay.
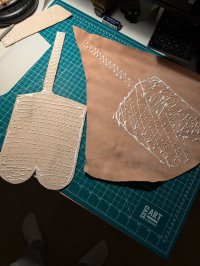
But, looking at some sheaths available to buy online and some of the YouTube vids, I got a bit worried that my 2.5mm leather might not be thick enough. So I backed it with another 1mm sheet I had.
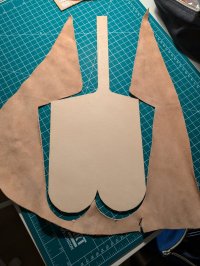
Now a ~3.5mm work piece which felt more robust
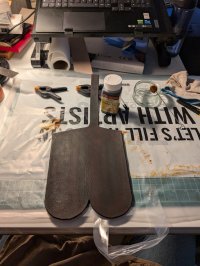
Dyeing (front and back, avoiding the internal edge which would be glued)
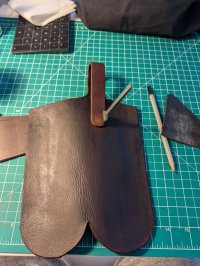
Having glued the belt loop in place, now punching the stitching holes. I then grooved them out so the thread wouldn't sit proud of the leather
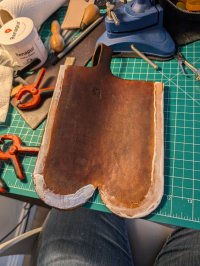
Buttering up the internal edges for glueing
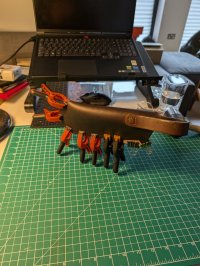
Little sheath-ipede clamped up while the glue goes off
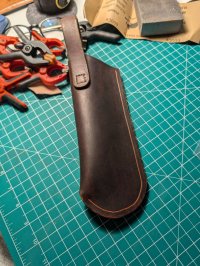
Now the glue's taken, so I used an adjustable stitch groover to mark out the stitch line
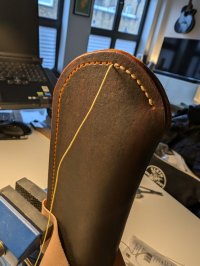
And having whammed the stitching chisel along the groove, began the process of saddle stitching
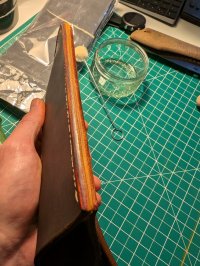
All stitched up, now starting to burnish the edge of the sheath. This involved sanding with 320grit, burnishing with water, sanding with 600grit, burnishing with water then finally sanding/polishing with 3000grit and burnishing with leather balsam on linen. Before the final step, I re-dyed the edge. I'll give the edge a final finish when I get some proper edge compound like Tokonole. I had some brown Fiebing's Edge Kote, but having tried some just around the belt loop, decided it looked a bit naff.
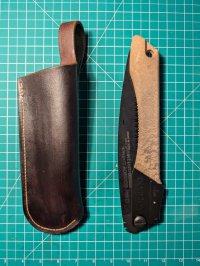
Giving the whole thing a sponge over with Renapur balsam: the finished product.
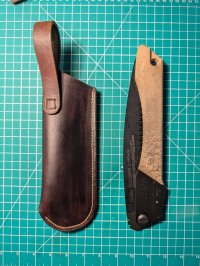
Pretty pleased with the stitching overall. Definitely something that takes practice and quite knackering on the hands, especially doing the last few back stitches
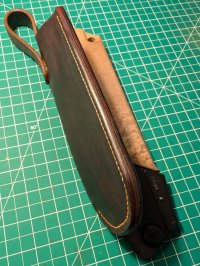
Dyed and burnished edge
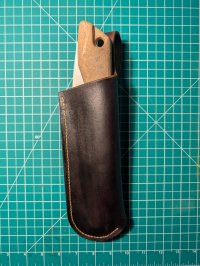
Fits like the proverbial glove. Very snug, definitely won't shake loose, but not impossible to draw out either.
This was my first leather project and I'd guess it took me about 8-10 hours over 4 days.
Really happy with how it turned out, really enjoyed the process and now looking for my next project. The girlfriend has hinted that she'd like a belt...
Cheers all,
F.
I'm heading to Lapland in Feb with Wild Human, so with a bit of downtime between jobs, I thought I'd have a crack at making a sheath for my Silky Gomboy Outback.
I watched a handful of videos to give myself an idea of the process, made a checklist of various steps and then invariably ended up getting extra bits and pieces from Amazon and, thankfully, a fantastic leather shop I found in London.

Started by tracing out the saw on an A3 pad

Then drew and cut out the template. (For future reference, I'd move the belt loop slightly further away from the centre.)

Translating the template to the skin-side of the leather

The leather work piece

Checking that there's nothing obviously wrong with the dimensions - seems okay.

But, looking at some sheaths available to buy online and some of the YouTube vids, I got a bit worried that my 2.5mm leather might not be thick enough. So I backed it with another 1mm sheet I had.

Now a ~3.5mm work piece which felt more robust

Dyeing (front and back, avoiding the internal edge which would be glued)

Having glued the belt loop in place, now punching the stitching holes. I then grooved them out so the thread wouldn't sit proud of the leather

Buttering up the internal edges for glueing

Little sheath-ipede clamped up while the glue goes off

Now the glue's taken, so I used an adjustable stitch groover to mark out the stitch line

And having whammed the stitching chisel along the groove, began the process of saddle stitching

All stitched up, now starting to burnish the edge of the sheath. This involved sanding with 320grit, burnishing with water, sanding with 600grit, burnishing with water then finally sanding/polishing with 3000grit and burnishing with leather balsam on linen. Before the final step, I re-dyed the edge. I'll give the edge a final finish when I get some proper edge compound like Tokonole. I had some brown Fiebing's Edge Kote, but having tried some just around the belt loop, decided it looked a bit naff.

Giving the whole thing a sponge over with Renapur balsam: the finished product.

Pretty pleased with the stitching overall. Definitely something that takes practice and quite knackering on the hands, especially doing the last few back stitches

Dyed and burnished edge

Fits like the proverbial glove. Very snug, definitely won't shake loose, but not impossible to draw out either.
This was my first leather project and I'd guess it took me about 8-10 hours over 4 days.
Really happy with how it turned out, really enjoyed the process and now looking for my next project. The girlfriend has hinted that she'd like a belt...
Cheers all,
F.
Last edited:


