My Mother-In-Law donated an old sewing machine she doesn't use any more and on Saturday I set it up in an attempt to figure out how to use it.
Failing miserably having sat looking at the manual and the machine for about a half hour I gave up and phoned my Mum. Mums are great aren't they!! Between us we figured out how to thread the top cotton and Mum showed me the basics of the bobbin, stitch length, tension and zig zag.
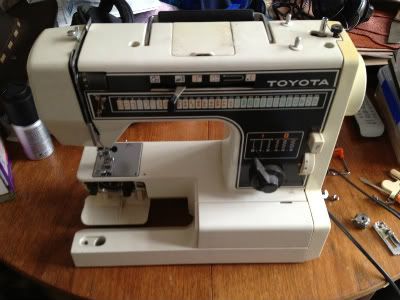
The machine is a Toyota 7001 model of an unknown age. It's way overkill for what I want, with lots of embroidery cams and other stuff, but, for a freebie I am not going to knock it!
I have had some old ripstop in a bag under the stairs for around 14 years and having found it I wanted to make something. But What? I know snake skins/hammock tubes! Sweet!
The hammock is just a cheapo Tenth Wonder Jungle (I think) hammock from eBay, but it's comfy.
So, using the basic pattern from Just Jeff's website I was off.
Marking the line to cut up 72" of ripstop was um interesting...
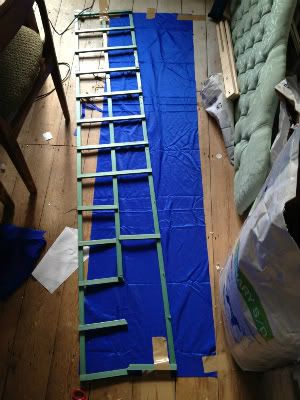
Yes, that's a piece of trellis from the garden. The only thing long enough to draw the line against! I cut the ripstop with scissors, but went out yesterday afternoon and bought a really cheap soldering iron today.
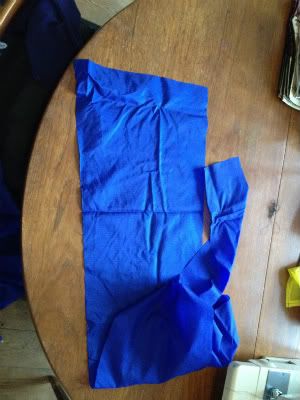
Once cut I seamed the ends and then ran a seam down the edge. Turn the right way and job's a goodun. These were only going to be my "prototype" or "practice" tubes and I was fully intending to check 'em and make some "proper" ones.
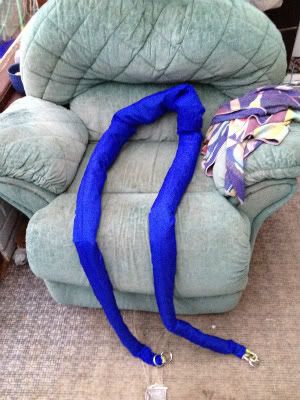
A minor issue I found was that once on the hammock the skins were far too tight at the ends.
Thinking about it for 24 hours I realised that rather than chuck them, I would measure my hammock and see if I could cut the ends off and re-stitch. They were measuring about 70 inches each and I was able to cut 9 inches or so off each one, re-seam and test again.
The fit was much better and the ripstop I had cut off meant there wasn't so much overlay in the middle, only 5 inches now.
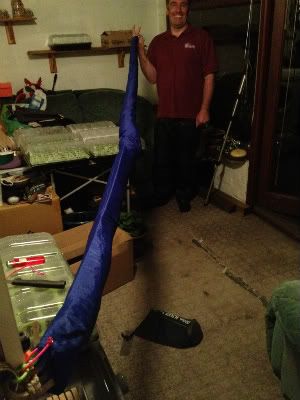
Last job was to put an eyelet in the suspension end, just to stop the tube from riding up the hammock.
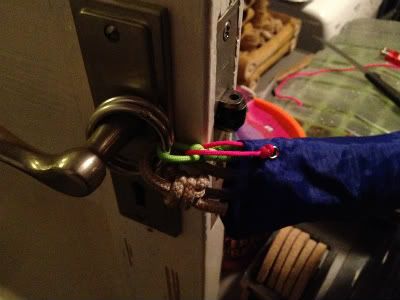
I have to say that I am really pleased with the way they have turned out and will be staying on the hammock. I have even measured a friend's hammock tonight to make some tubes for his. He's using sailbags at the moment!
Best bit is it still fits in its bag...
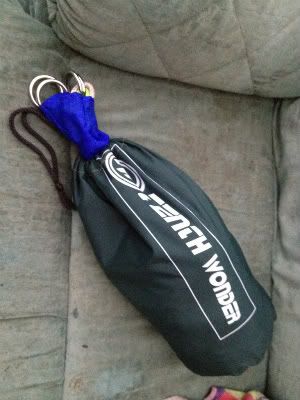
This pic was taken before I had cut a re-seamed the ends, there's no eyelets or pink cord on at the moment.
Next up: Finish the ridgeline bag. I prototyped in yellow ripstop that had stains in it, for sewing practice and to see if it would work. Gonna use some black stuff and make a decent one with some velcro tabs on it. Then: Tarp from some 1.5 oz shocking pink ripstop (another find - I think I was going to make a play sail at one point.. Honest!), a basic hammock and a hammock chair to go on a tripod...
Then the wife wants new curtains for the dining room, the nets in the living room shortened a new dress....
Failing miserably having sat looking at the manual and the machine for about a half hour I gave up and phoned my Mum. Mums are great aren't they!! Between us we figured out how to thread the top cotton and Mum showed me the basics of the bobbin, stitch length, tension and zig zag.

The machine is a Toyota 7001 model of an unknown age. It's way overkill for what I want, with lots of embroidery cams and other stuff, but, for a freebie I am not going to knock it!
I have had some old ripstop in a bag under the stairs for around 14 years and having found it I wanted to make something. But What? I know snake skins/hammock tubes! Sweet!
The hammock is just a cheapo Tenth Wonder Jungle (I think) hammock from eBay, but it's comfy.
So, using the basic pattern from Just Jeff's website I was off.
Marking the line to cut up 72" of ripstop was um interesting...

Yes, that's a piece of trellis from the garden. The only thing long enough to draw the line against! I cut the ripstop with scissors, but went out yesterday afternoon and bought a really cheap soldering iron today.

Once cut I seamed the ends and then ran a seam down the edge. Turn the right way and job's a goodun. These were only going to be my "prototype" or "practice" tubes and I was fully intending to check 'em and make some "proper" ones.

A minor issue I found was that once on the hammock the skins were far too tight at the ends.
Thinking about it for 24 hours I realised that rather than chuck them, I would measure my hammock and see if I could cut the ends off and re-stitch. They were measuring about 70 inches each and I was able to cut 9 inches or so off each one, re-seam and test again.
The fit was much better and the ripstop I had cut off meant there wasn't so much overlay in the middle, only 5 inches now.

Last job was to put an eyelet in the suspension end, just to stop the tube from riding up the hammock.

I have to say that I am really pleased with the way they have turned out and will be staying on the hammock. I have even measured a friend's hammock tonight to make some tubes for his. He's using sailbags at the moment!
Best bit is it still fits in its bag...

This pic was taken before I had cut a re-seamed the ends, there's no eyelets or pink cord on at the moment.
Next up: Finish the ridgeline bag. I prototyped in yellow ripstop that had stains in it, for sewing practice and to see if it would work. Gonna use some black stuff and make a decent one with some velcro tabs on it. Then: Tarp from some 1.5 oz shocking pink ripstop (another find - I think I was going to make a play sail at one point.. Honest!), a basic hammock and a hammock chair to go on a tripod...
Then the wife wants new curtains for the dining room, the nets in the living room shortened a new dress....
