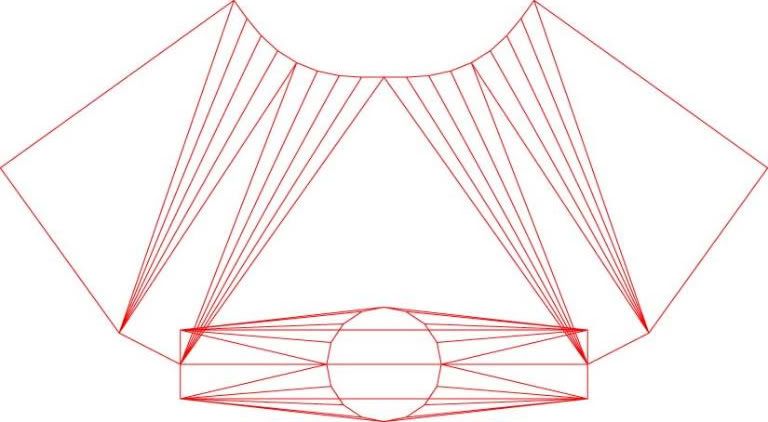
Some of you may remember I designed and built a wood stove that packs flat last year, heres the link to that thread. Anyway although it worked, it was a "bit" rough and there was a few things needing tweaking. A member here kindly offered to laser cut me one, when I had finished the design and this is the result;
This one again is made completely from stainless, 1 mm rather than the mishmash of the previous one, I think that helped with the thermal expansion problems I had with the first one, created some new ones though
Its 6" wide by 8" deep and 5" tall inside the firebox.
The photos were taken at the Comriecroft meet in Perthshire a couple of weekends ago.
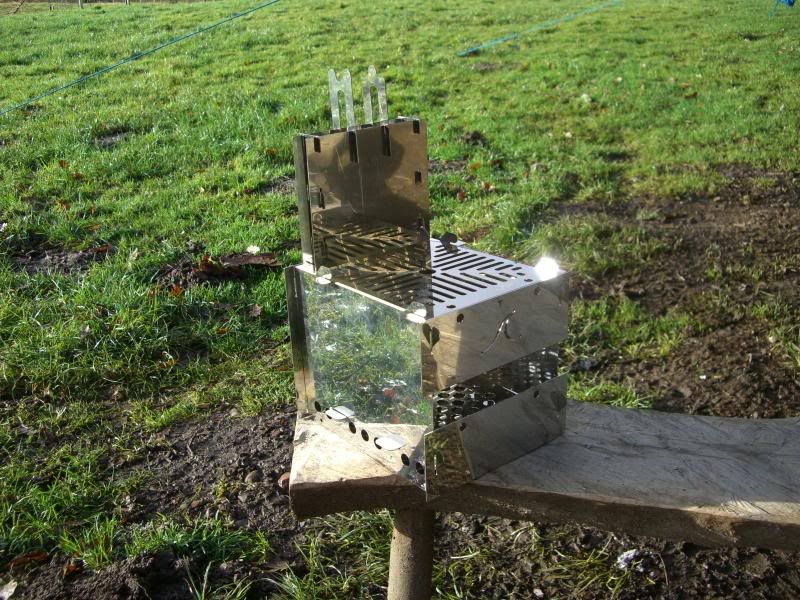
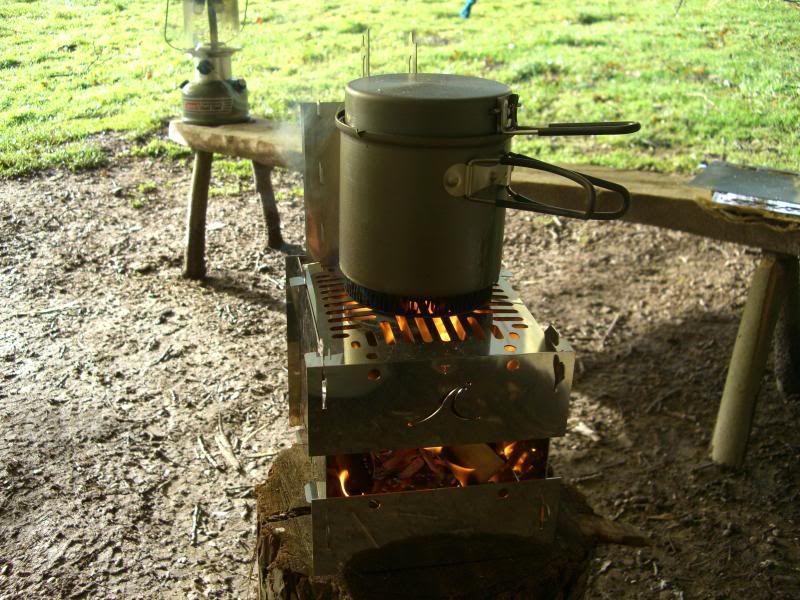
Here it is in its 2 guises, first for cooking
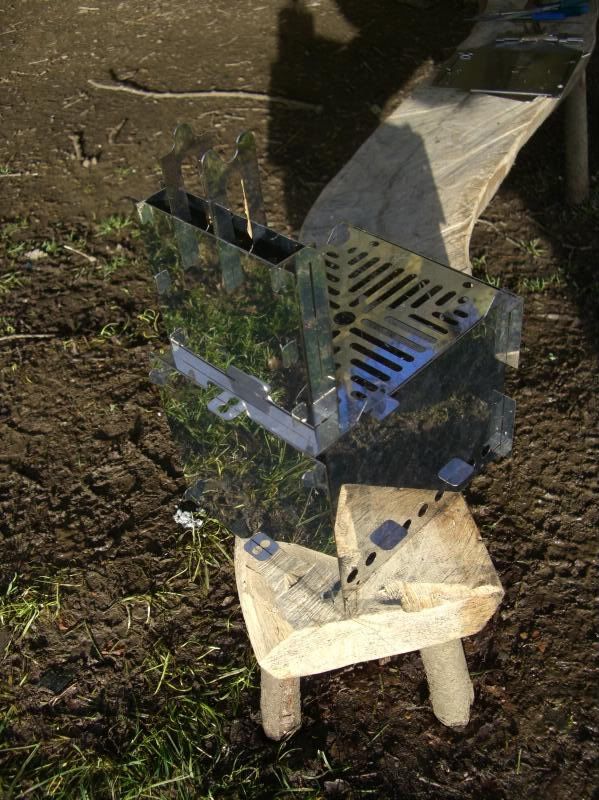
Theres a set of fold up feet for it too, but I didnt have time to fit them
2nd for heating
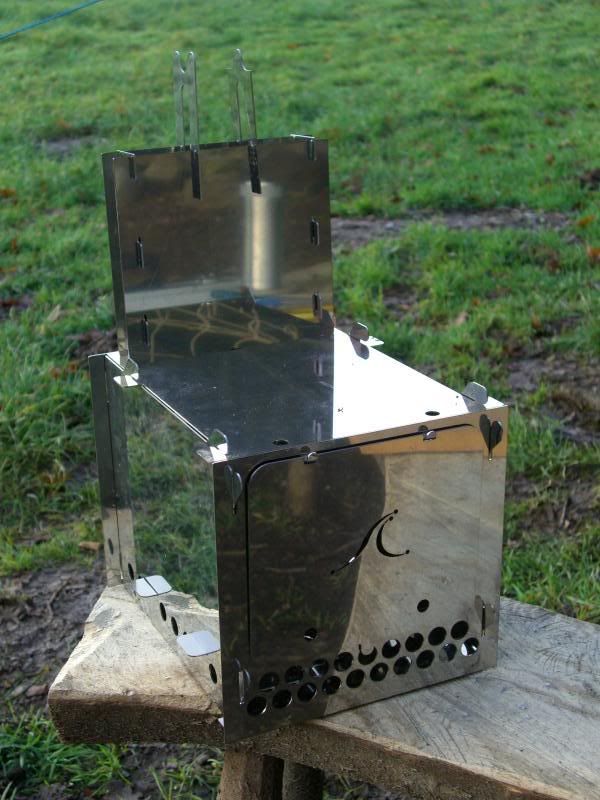
Take a good look, its never going to look this shiny again
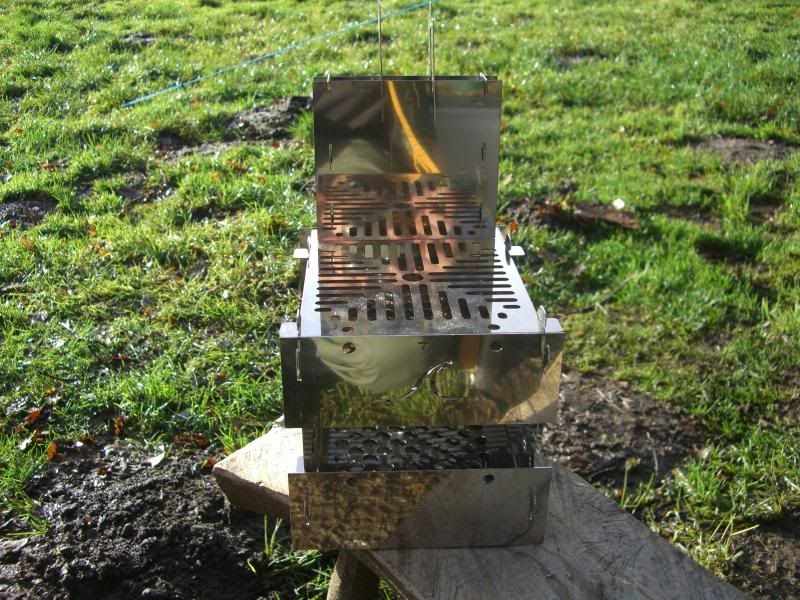
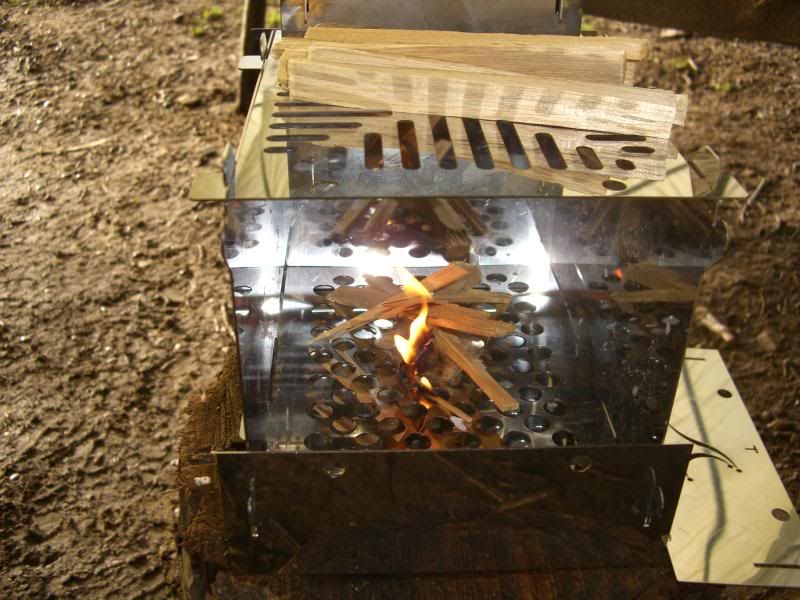
The reason for the drain like cut outs on the top plate is because, the original had a solid top and it took quite a while to heat up, especially if you wanted to do a fry up, this one had no problems, with that, I cooked the (my) usual bushcrafter breakfast, full fry up, but it could also simmer pasta, and on Saturday night I simmered a haggis for an hour on it, no problem, I did cheat a little however, I used coal, you just have to have a good bed of embers and make sure you keep the ash pan clear to allow a decent draw.
The little plates on top of the chimney were for a quick boil (have a look at the videos on the first one, the flames were shooting out at least a foot), but the spread was too small, I'll have to rethink that one.
The first burn
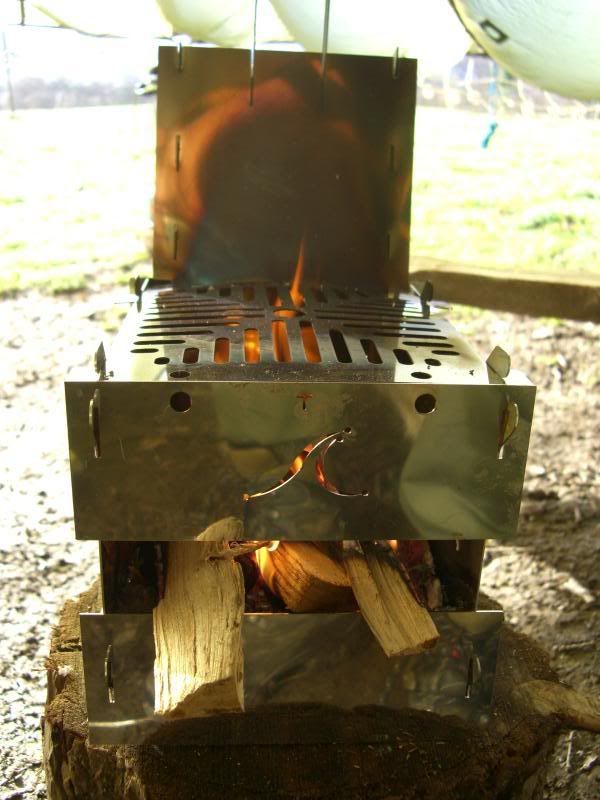
You can see in this picture that the top plate warped with the heat, it didnt cause a problem, and more importantly, it came apart very easily when it was time to pack up, Since then I've taken it apart hot and cold, also switched from cooking to heating set up, with the fire box packed full of burning wood.
Theres still a few things I'm not happy with, and I think Spoony is going to give it a review, as he had one out with him a couple of weekends ago.
Stephen
This one again is made completely from stainless, 1 mm rather than the mishmash of the previous one, I think that helped with the thermal expansion problems I had with the first one, created some new ones though
Its 6" wide by 8" deep and 5" tall inside the firebox.
The photos were taken at the Comriecroft meet in Perthshire a couple of weekends ago.
Here it is in its 2 guises, first for cooking
Theres a set of fold up feet for it too, but I didnt have time to fit them
2nd for heating
Take a good look, its never going to look this shiny again
The reason for the drain like cut outs on the top plate is because, the original had a solid top and it took quite a while to heat up, especially if you wanted to do a fry up, this one had no problems, with that, I cooked the (my) usual bushcrafter breakfast, full fry up, but it could also simmer pasta, and on Saturday night I simmered a haggis for an hour on it, no problem, I did cheat a little however, I used coal, you just have to have a good bed of embers and make sure you keep the ash pan clear to allow a decent draw.
The little plates on top of the chimney were for a quick boil (have a look at the videos on the first one, the flames were shooting out at least a foot), but the spread was too small, I'll have to rethink that one.
The first burn
You can see in this picture that the top plate warped with the heat, it didnt cause a problem, and more importantly, it came apart very easily when it was time to pack up, Since then I've taken it apart hot and cold, also switched from cooking to heating set up, with the fire box packed full of burning wood.
Theres still a few things I'm not happy with, and I think Spoony is going to give it a review, as he had one out with him a couple of weekends ago.
Stephen
")