This is an accompanying article to my write up on pressure canning found here..http://www.bushcraftuk.com/forum/showthread.php?t=79938. Its a simpler and more accesible technique for those who want to preserve fresh fruit and veg without preservatives and chemicals.
Some foods do not need the superheated steam of pressure canning to sterilise them (generally high acid or high sugar foods that have anti microbial properties in the recipe).
You can buy specialist "water bath canners" - but you can also get by with a large stock pot.
One thing I have learned - you can never have enough large pans when preserving large quantites of food!
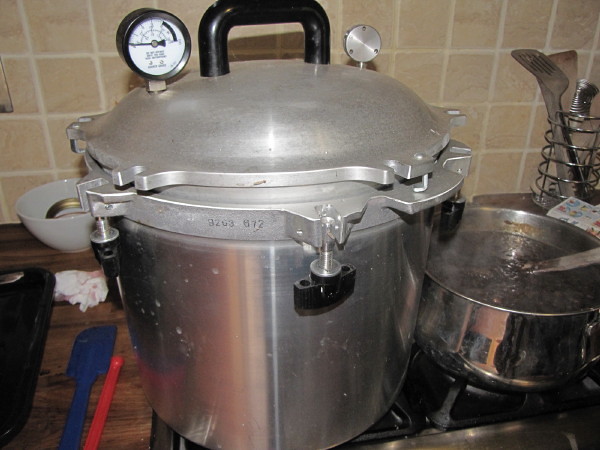
On this occasion I used stock pots for preparing the food and a pressure canner for sealing the jars (without the lid sealed so no pressure built up)
Today we were canning Rhubarb - we were using small (250ml / half pint) wide mouthed jars. This is mainly because my wife likes the rhubarb with home made yoghurt for breakfast.

1 Rhubarb Patch by British Red, on Flickr
The rhubarb was washed, trimmed to 1" lengths and put in a large bowl. There were about four quarts (litres) of rhubarb. Two pints of sugar were added and the rhubarb tossed in the sugar. This was set aside for four hours

2 Washed trimmed and add sugar by British Red, on Flickr
After four hours the sugar has drawn out some of the rhubarb juice - this is enough to cook the fruit in without adding water.

3 Juice extracted by British Red, on Flickr
Then the canning lids are placed in a small saucepan and covered with water. This is brought up to a gentle simmer until the lids are needed.
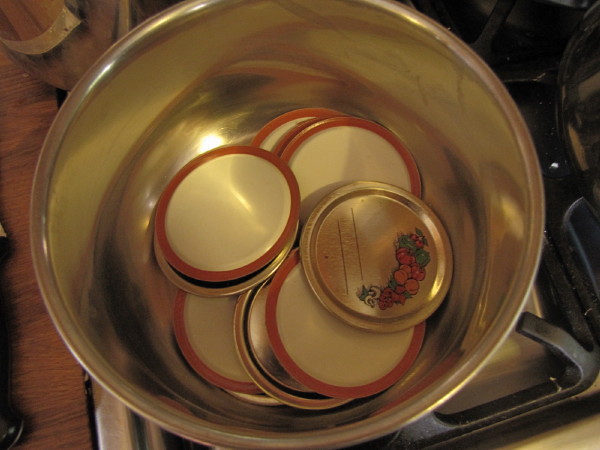
4 Lids in pan by British Red, on Flickr
The canning rings are set aside until later
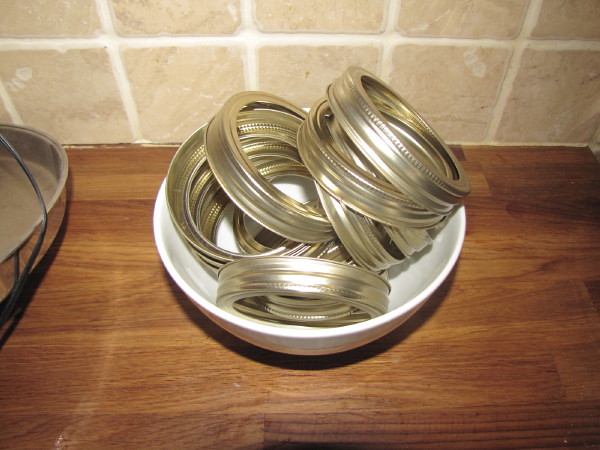
5 Rings set aside by British Red, on Flickr
The jars are placed in a large stock pot and covered with simmering water
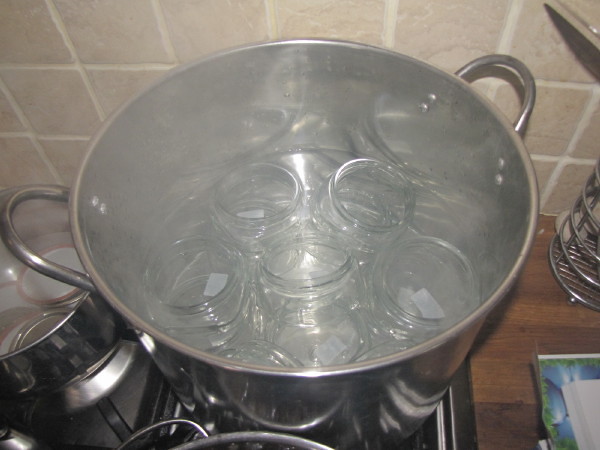
6 Jars simmered by British Red, on Flickr
Next the rhubarb was placed in a large pan, brought to the boil and simmered for just 30 seconds (it will get more cooking during canning)
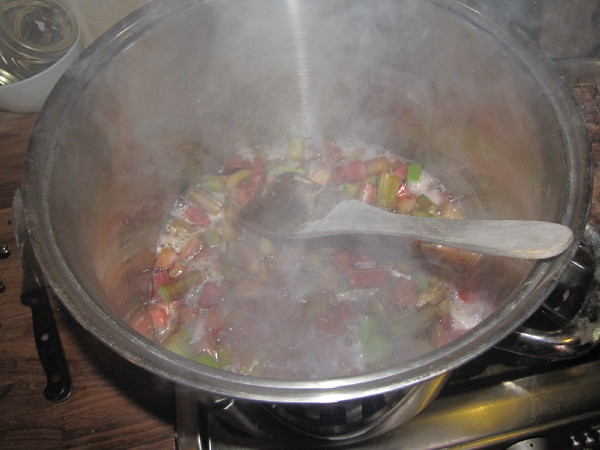
7 Bring to boil by British Red, on Flickr
Lift out and drain a jar (jar lifting tongs really help)
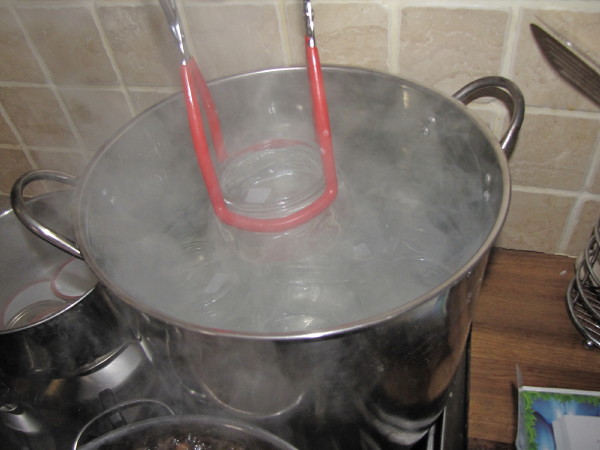
8 Remove Jars by British Red, on Flickr
Ladle in the rhubarb and ensure enough syrup goes in to cover the fruit
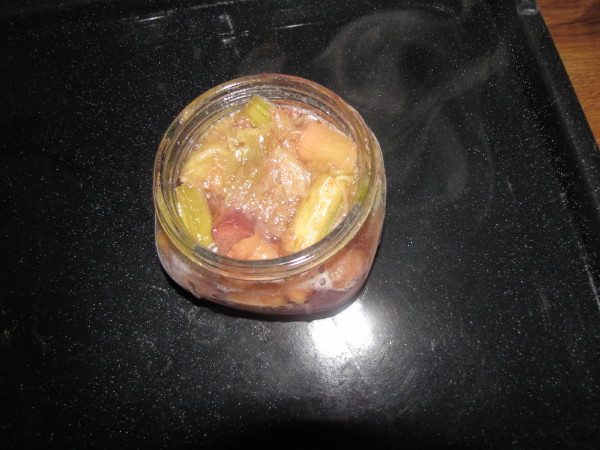
9 Add filling by British Red, on Flickr
Use a soft spatula to remove any air bubbles
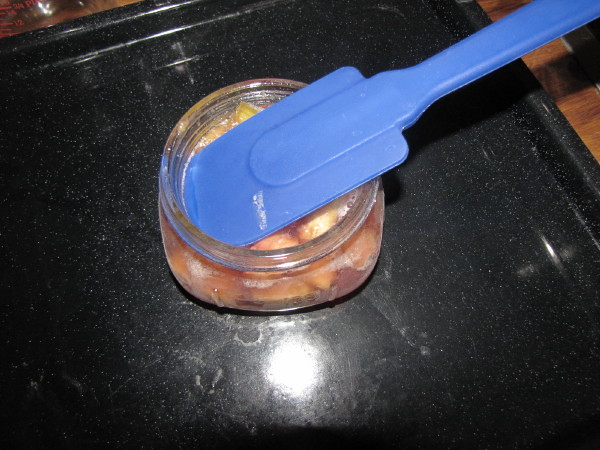
10 remove air bubbles by British Red, on Flickr
Wipe the rim and threads clean of any syrup - it would prevent a preoper seal
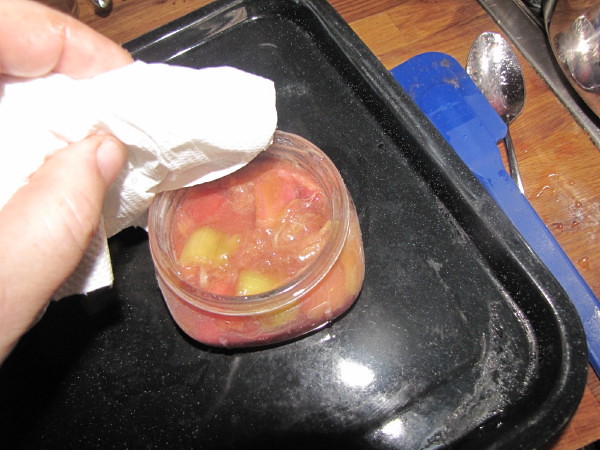
11 wipe rim and threads by British Red, on Flickr
Use a lid lifter (magnet on a stick) to remove a lid from the hot water and pop on top of the jar
12 Lid lifter by British Red, on Flickr
Screw on a ring - just finger tight

13 finger tighten rings by British Red, on Flickr
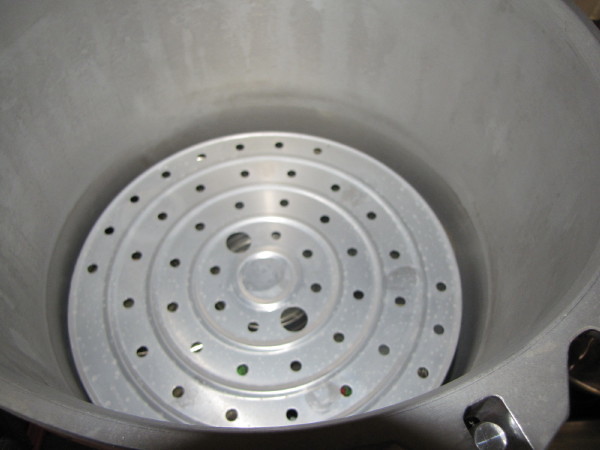
Set up your water bath canner (big pan) with a rack (metal object with holes in to stop jars sitting on the bottom - a wire cake tray works well)

14 canner and rack by British Red, on Flickr
Arrange your jars so they don't touch each other or the walls
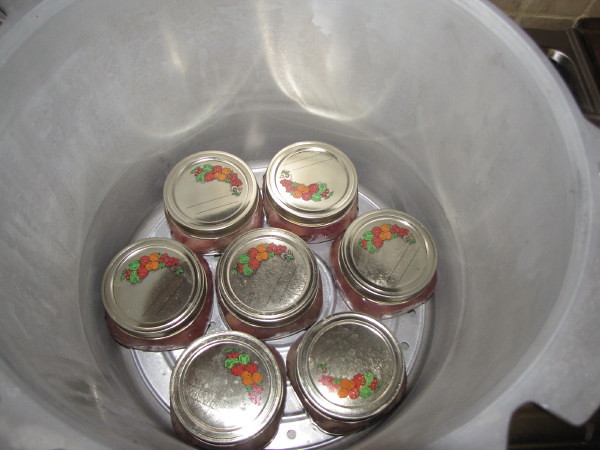
15 spaced out jars by British Red, on Flickr
If you have more jars, ad another rack on top
16 second rack by British Red, on Flickr
Then add more jars. when you have finished, fill with water so that there is an inch above the top jars

17 second row of jars - 1" water cover by British Red
, on Flickr
Pop on a loose lid and bring to the boil. Boil for the time called for in the recipe (ten minutes in this case). This is known as "processing".
18 loose lid by British Red, on Flickr
Not that the lid of my canner is not sealed up - its just a big pan for this recipe.
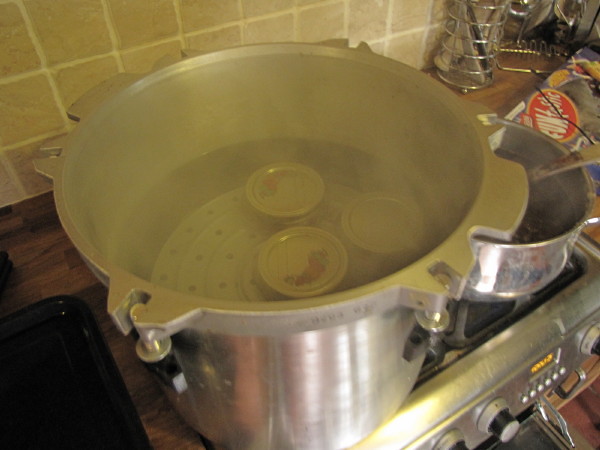
You want a proper rolling boil for processing - not a simmer

19 rolling boil by British Red, on Flickr
After processing, let the jars cool in the pan for five minutes
20 five minutes cool by British Red, on Flickr
Carefully lift out the jars keeping them level. The lids haven't set yet and tilting could break the seal. Set the jars on a tea towel to cool.

21 lift out level by British Red, on Flickr
Cover with another towel - this will also absorb any water on the lids. Don't rub or dry the lids - you will break the seal!
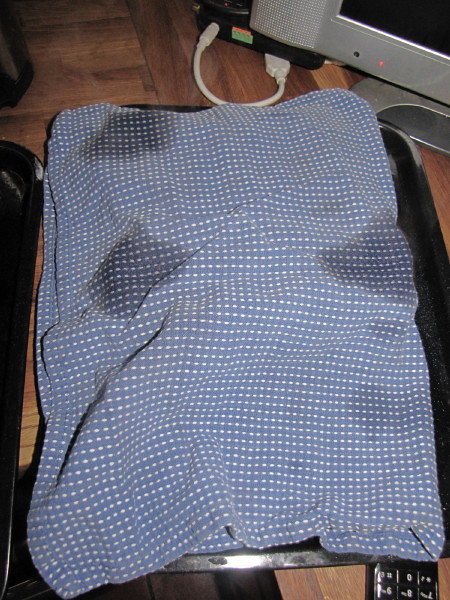
22 cover and cool 24 hours by British Red, on Flickr
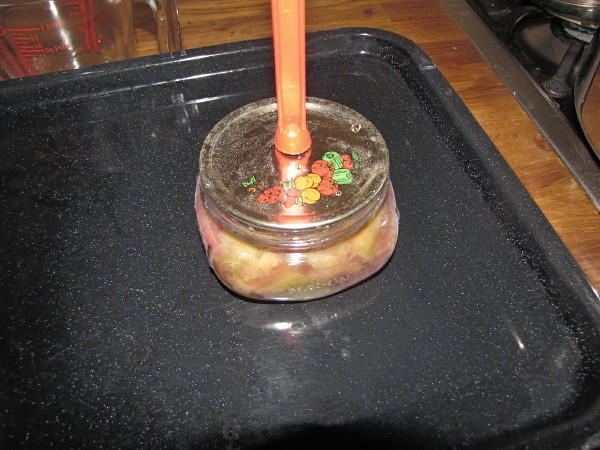
Leave to cool for 24 hours. At this time check that every lid has "pinged" (beed sucked in to form a good seal).
The rings can be removed now - the lids are stuck down
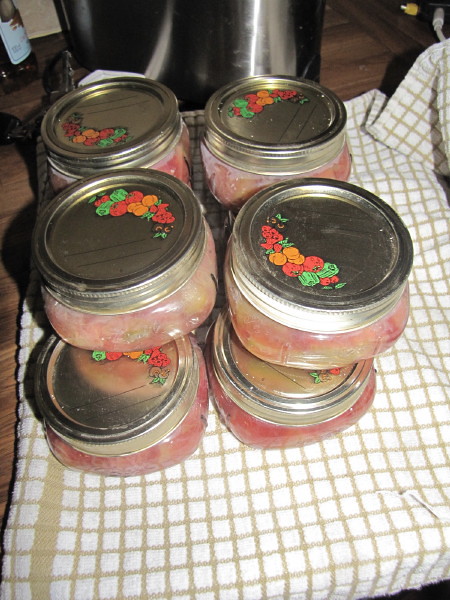
23 check seal by British Red, on Flickr
Red
Some foods do not need the superheated steam of pressure canning to sterilise them (generally high acid or high sugar foods that have anti microbial properties in the recipe).
You can buy specialist "water bath canners" - but you can also get by with a large stock pot.
One thing I have learned - you can never have enough large pans when preserving large quantites of food!
On this occasion I used stock pots for preparing the food and a pressure canner for sealing the jars (without the lid sealed so no pressure built up)
Today we were canning Rhubarb - we were using small (250ml / half pint) wide mouthed jars. This is mainly because my wife likes the rhubarb with home made yoghurt for breakfast.
1 Rhubarb Patch by British Red, on Flickr
The rhubarb was washed, trimmed to 1" lengths and put in a large bowl. There were about four quarts (litres) of rhubarb. Two pints of sugar were added and the rhubarb tossed in the sugar. This was set aside for four hours
2 Washed trimmed and add sugar by British Red, on Flickr
After four hours the sugar has drawn out some of the rhubarb juice - this is enough to cook the fruit in without adding water.
3 Juice extracted by British Red, on Flickr
Then the canning lids are placed in a small saucepan and covered with water. This is brought up to a gentle simmer until the lids are needed.
4 Lids in pan by British Red, on Flickr
The canning rings are set aside until later
5 Rings set aside by British Red, on Flickr
The jars are placed in a large stock pot and covered with simmering water
6 Jars simmered by British Red, on Flickr
Next the rhubarb was placed in a large pan, brought to the boil and simmered for just 30 seconds (it will get more cooking during canning)
7 Bring to boil by British Red, on Flickr
Lift out and drain a jar (jar lifting tongs really help)
8 Remove Jars by British Red, on Flickr
Ladle in the rhubarb and ensure enough syrup goes in to cover the fruit
9 Add filling by British Red, on Flickr
Use a soft spatula to remove any air bubbles
10 remove air bubbles by British Red, on Flickr
Wipe the rim and threads clean of any syrup - it would prevent a preoper seal
11 wipe rim and threads by British Red, on Flickr
Use a lid lifter (magnet on a stick) to remove a lid from the hot water and pop on top of the jar
12 Lid lifter by British Red, on Flickr
Screw on a ring - just finger tight
13 finger tighten rings by British Red, on Flickr
Set up your water bath canner (big pan) with a rack (metal object with holes in to stop jars sitting on the bottom - a wire cake tray works well)
14 canner and rack by British Red, on Flickr
Arrange your jars so they don't touch each other or the walls
15 spaced out jars by British Red, on Flickr
If you have more jars, ad another rack on top
16 second rack by British Red, on Flickr
Then add more jars. when you have finished, fill with water so that there is an inch above the top jars
17 second row of jars - 1" water cover by British Red
, on Flickr
Pop on a loose lid and bring to the boil. Boil for the time called for in the recipe (ten minutes in this case). This is known as "processing".
18 loose lid by British Red, on Flickr
Not that the lid of my canner is not sealed up - its just a big pan for this recipe.
You want a proper rolling boil for processing - not a simmer
19 rolling boil by British Red, on Flickr
After processing, let the jars cool in the pan for five minutes
20 five minutes cool by British Red, on Flickr
Carefully lift out the jars keeping them level. The lids haven't set yet and tilting could break the seal. Set the jars on a tea towel to cool.
21 lift out level by British Red, on Flickr
Cover with another towel - this will also absorb any water on the lids. Don't rub or dry the lids - you will break the seal!
22 cover and cool 24 hours by British Red, on Flickr
Leave to cool for 24 hours. At this time check that every lid has "pinged" (beed sucked in to form a good seal).
The rings can be removed now - the lids are stuck down
23 check seal by British Red, on Flickr
Red
")

")