Constructing a bed out of natural materials is one of those overlooked and under appreciated skills until you actually have to make one and sleep on it.
I've made three now (not masses I know but is all a learning curve) four if you count the rebuild of one I made when I did the Hunter Gatherer Challenge last October.
the first couple were very rudimentary and whilst I slept I didn't have the best nights sleep and woke up one morning convinced I had developed a pressure sore.
Last week when I had a pass to camp I decided it was time I made myself a decent bed at my woods and thought I would document the process for anyone who may be interested.
First of all I have to say I had materials readily available and already a plan in my mind as to what to do before I got to my woods, I didn't intend to incorporate the bed into a natural shelter although it would be simple enough to do so.
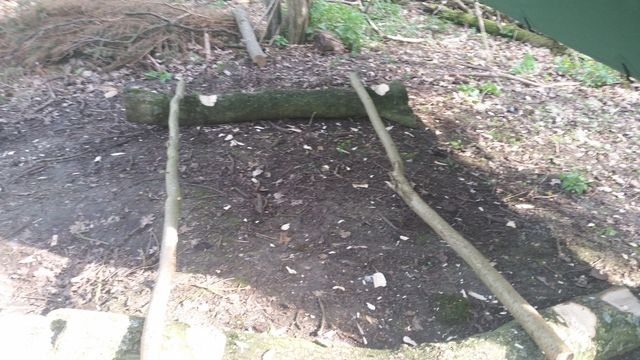
1- Measure out the size of the bed taking into consideration if you are a night time fidget, back sleeper or side sleeper. Also, by measuring the size of the bed if you are constructing a natural shelter you know the approximate size of the shelter you will have to build which prevents having a bed and shelter that you will not fit into.
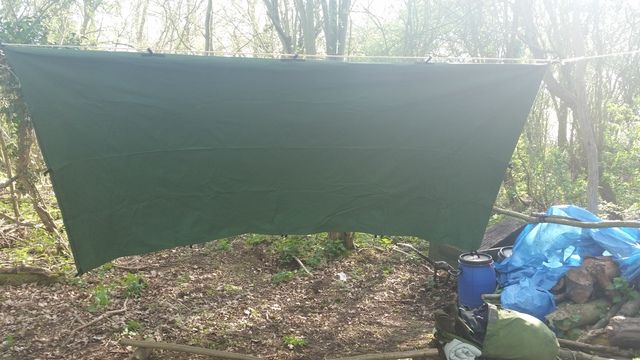
2 Get overhead protection up, here I am using one of Bilmop5's 3m x 3m canvas tarps. It could easily be a natural shelter, rock overhang etc. By having the overhead protection up if the weather is less than ideal you and your kit will be protected from the worst of it, as it happened I needed the tarp up to provide shade from the glorious sunshine.
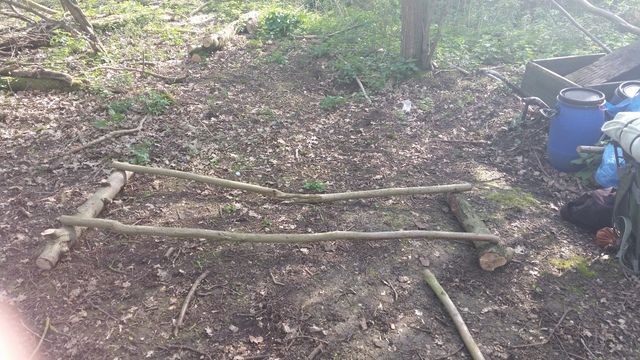
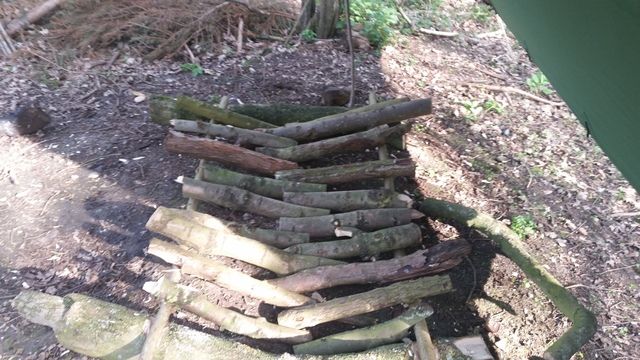
3 Find two large logs that will act as the head and foot of the bed and two long thinnish sticks that will act as the sides, these are best measured to ensure they are taller than you as otherwise your feet or head will overhang the end of the bed and spoil your well earned rest. Cut notches into the head and foot logs, these will prevent the sides from rolling out when you put the mattress material on and also your body weight.
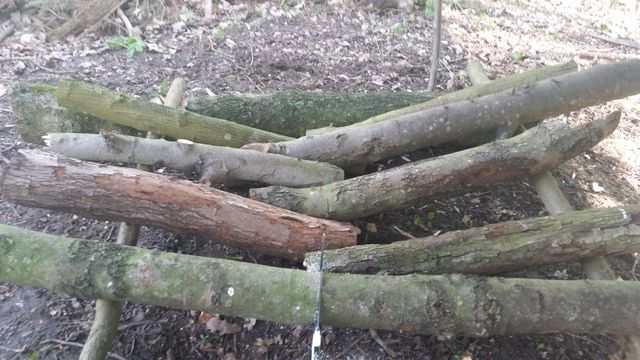
4 Collect the mattress logs and fill in the space between head and foot, I put mine in at angles as I am a side sleeper and wanted/needed more padding around my knees, hips and shoulders, it also means that you use less padding material in the next stage and acts as a natural funnel pushing the padding into the centre.
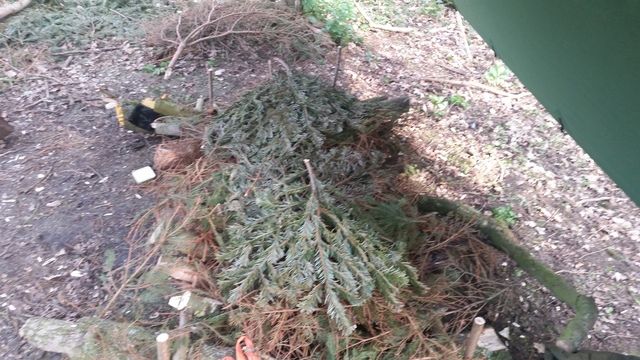
5 Add padding/insulation material to the mattress. Here I have used pine branches but other materials are as effective depending on what you have available. You do need to remember that your body weight will compress the padding and thus decrease the insulation/cushioning effects so be generous, gather plenty, lay down on it to test if there is any areas that need more adding. Also take time to remove any thicker sticks in the padding. It's a small thing, you may wish to skip it but trust me you will regret it in the middle of the night. It's a pain having to try and strip out thick stuff at oh gods its late o'clock (I did this just after I had taken the picture but didn't see the point of photographing it again)
6 One thing that may be overlooked is pegs, why do you need pegs? Simples, to prevent the whole frame from deciding to collapse in middle of the night you need something to prevent the logs from rolling and the easiest way to do this is to add pegs to the four corners. You can just make out the pegs here hidden behind my kitchen area, apologies for the photo I forgot to take a specific picture of the pegs.
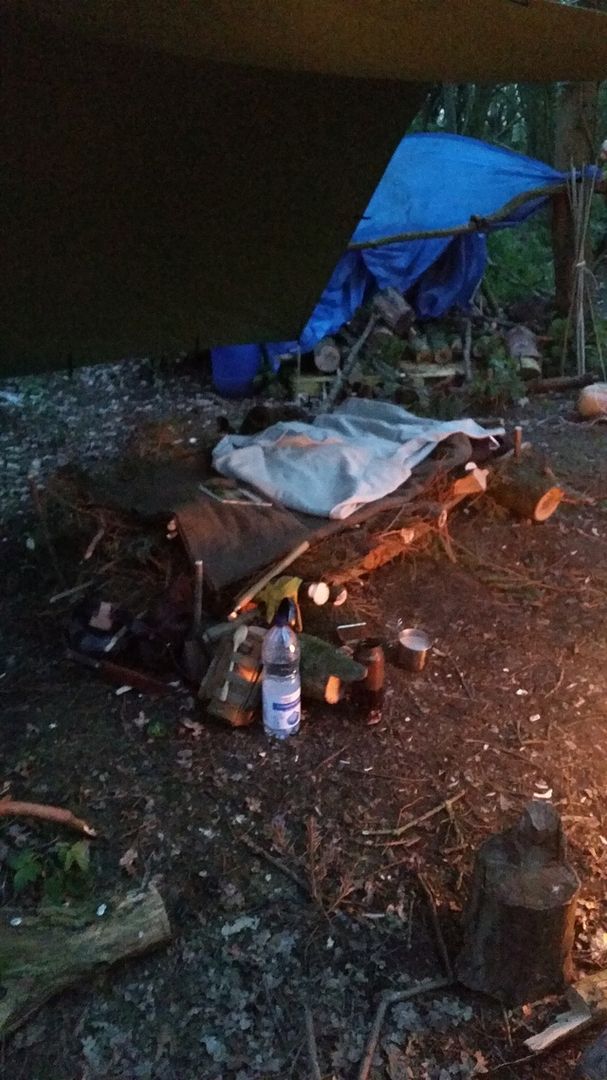
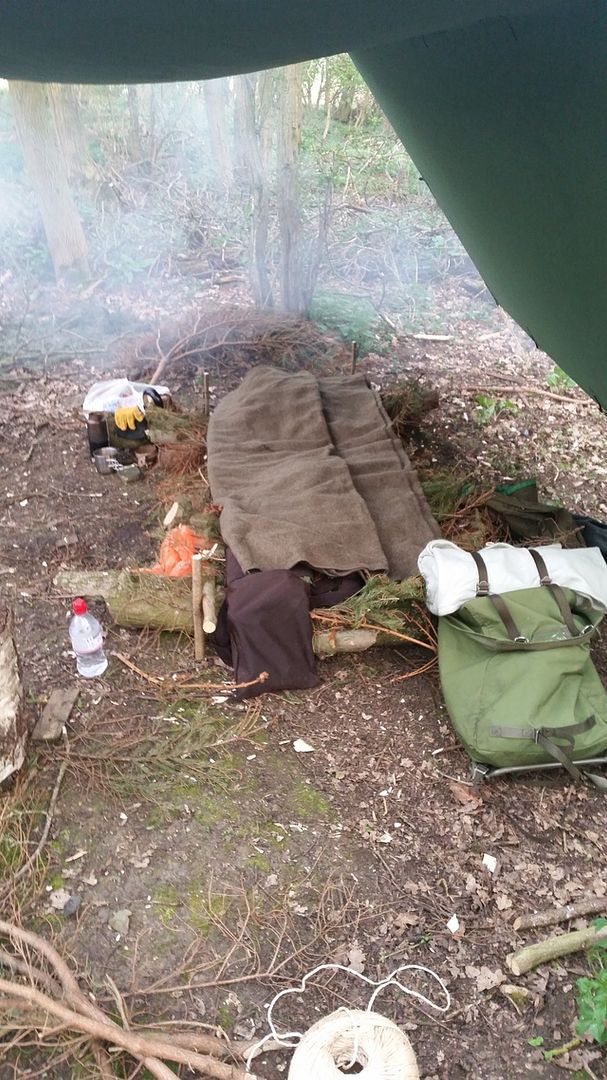
7 The bed is now complete and can be slept upon as it is, however I had some wool blankets with me, so I put the thicker Dutch Army wool blanket down on top of the padding material and then had the thinner and softer merino wool blanket on top of the Dutch one.
I started my nights sleep wrapped in the merino wool blanket in a diamond wrap on top of the Dutch wool blanket. When I woke at two am as the fire had burnt down I wrapped myself in the merino blanket still diamond style and then pulled the Dutch one over me as well. A handy hint here- if you are planning on relying on a fire to provide extra warmth or all the warmth have a good collection of firewood ready to add before you bed down for the night, I made this error on the Hunter Gatherer and soon learnt from my mistake trust me.
The tools used to construct this bed were a Silky pocket boy folding saw and a Gransfors Bruks outdoor axe which only saw use when I was cutting the support notches into the head and foot log, I could of lashed the sides onto the support logs if I had not had my outdoor axe.
If I was to change the equipment for ideal wish list I think a small bow saw would of sped the construction of the bed up but not massively and the silky performed fine it just took a little while as it had a smaller cutting area.
If I was using this bed in colder weather then I would of had the tarp dropped lower and built a reflector behind the fire to bounce heat back onto me, the fire would also of been built closer to my bed.
I hope this has been of interest to folks.
I've made three now (not masses I know but is all a learning curve) four if you count the rebuild of one I made when I did the Hunter Gatherer Challenge last October.
the first couple were very rudimentary and whilst I slept I didn't have the best nights sleep and woke up one morning convinced I had developed a pressure sore.
Last week when I had a pass to camp I decided it was time I made myself a decent bed at my woods and thought I would document the process for anyone who may be interested.
First of all I have to say I had materials readily available and already a plan in my mind as to what to do before I got to my woods, I didn't intend to incorporate the bed into a natural shelter although it would be simple enough to do so.
1- Measure out the size of the bed taking into consideration if you are a night time fidget, back sleeper or side sleeper. Also, by measuring the size of the bed if you are constructing a natural shelter you know the approximate size of the shelter you will have to build which prevents having a bed and shelter that you will not fit into.

2 Get overhead protection up, here I am using one of Bilmop5's 3m x 3m canvas tarps. It could easily be a natural shelter, rock overhang etc. By having the overhead protection up if the weather is less than ideal you and your kit will be protected from the worst of it, as it happened I needed the tarp up to provide shade from the glorious sunshine.

3 Find two large logs that will act as the head and foot of the bed and two long thinnish sticks that will act as the sides, these are best measured to ensure they are taller than you as otherwise your feet or head will overhang the end of the bed and spoil your well earned rest. Cut notches into the head and foot logs, these will prevent the sides from rolling out when you put the mattress material on and also your body weight.

4 Collect the mattress logs and fill in the space between head and foot, I put mine in at angles as I am a side sleeper and wanted/needed more padding around my knees, hips and shoulders, it also means that you use less padding material in the next stage and acts as a natural funnel pushing the padding into the centre.


5 Add padding/insulation material to the mattress. Here I have used pine branches but other materials are as effective depending on what you have available. You do need to remember that your body weight will compress the padding and thus decrease the insulation/cushioning effects so be generous, gather plenty, lay down on it to test if there is any areas that need more adding. Also take time to remove any thicker sticks in the padding. It's a small thing, you may wish to skip it but trust me you will regret it in the middle of the night. It's a pain having to try and strip out thick stuff at oh gods its late o'clock (I did this just after I had taken the picture but didn't see the point of photographing it again)

6 One thing that may be overlooked is pegs, why do you need pegs? Simples, to prevent the whole frame from deciding to collapse in middle of the night you need something to prevent the logs from rolling and the easiest way to do this is to add pegs to the four corners. You can just make out the pegs here hidden behind my kitchen area, apologies for the photo I forgot to take a specific picture of the pegs.

7 The bed is now complete and can be slept upon as it is, however I had some wool blankets with me, so I put the thicker Dutch Army wool blanket down on top of the padding material and then had the thinner and softer merino wool blanket on top of the Dutch one.
I started my nights sleep wrapped in the merino wool blanket in a diamond wrap on top of the Dutch wool blanket. When I woke at two am as the fire had burnt down I wrapped myself in the merino blanket still diamond style and then pulled the Dutch one over me as well. A handy hint here- if you are planning on relying on a fire to provide extra warmth or all the warmth have a good collection of firewood ready to add before you bed down for the night, I made this error on the Hunter Gatherer and soon learnt from my mistake trust me.

The tools used to construct this bed were a Silky pocket boy folding saw and a Gransfors Bruks outdoor axe which only saw use when I was cutting the support notches into the head and foot log, I could of lashed the sides onto the support logs if I had not had my outdoor axe.
If I was to change the equipment for ideal wish list I think a small bow saw would of sped the construction of the bed up but not massively and the silky performed fine it just took a little while as it had a smaller cutting area.
If I was using this bed in colder weather then I would of had the tarp dropped lower and built a reflector behind the fire to bounce heat back onto me, the fire would also of been built closer to my bed.
I hope this has been of interest to folks.
")

