I was in Homebase a few weeks ago with the intention of buying one of the Fiskars mini hatchets I'd seen in there before. Unfortunately they had none in stock but they did have some 1 1/2 lb Wilkinson Sword camp axes in there so I decided to buy one of those instead.
After getting it home I realised I'd need to modify it a bit to suit me so I decided to put a step-by-step guide up here to show how I went about it.
I don't know enough to be able to class this as a tutorial, so think of it more as a demonstation with pictures.
First step was to choose the axe. There were quite a few there so I went through them all and picked the one that's helve had the best grain and lined up properly with the head.
The helve had a nasty varnish coating on it which I decided to get rid of as it can stick to the hand and give blisters during heavy use. (I don't have a picture of it in it's original state so you'll have to take my word for it ) So first thing to do was get rid of the varnish.
I used 80 grit aluminium-oxide paper to give it a good rub down, then wiped the dust off with some rag.
The handle now needed protecting so out came the linseed oil.
I soaked some paper towel in linseed oil then wrapped it around the handle. Then I wrapped cling film around the paper towel and left it in the shed for a few days to soak in.
(note the rather useless rubber edge-guard - that'll go a bit later as well)
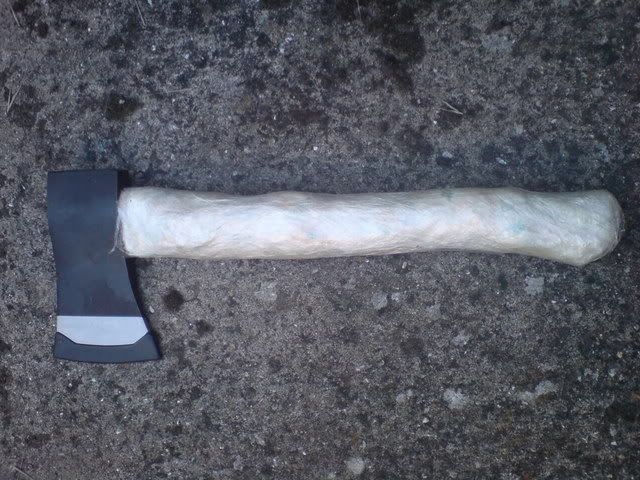
This is how it looked after a week when it was unwrapped. Very nice
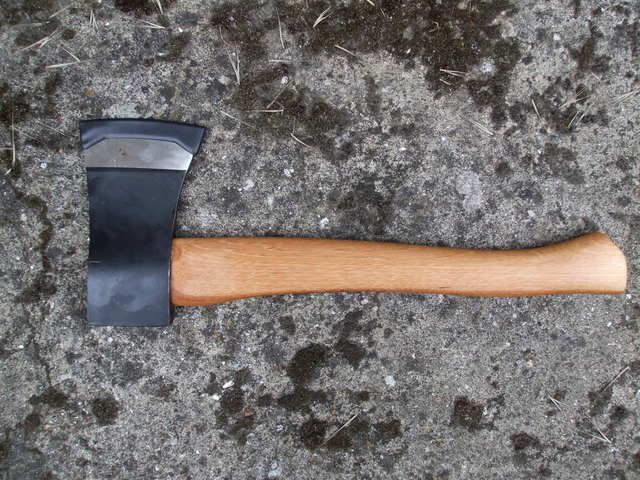
Next thing to do was reduce the head.
The head was a symmetrical shape but I didn't want the top curve of the head as I find it gets in the way when carving. So it would need to be flattened.
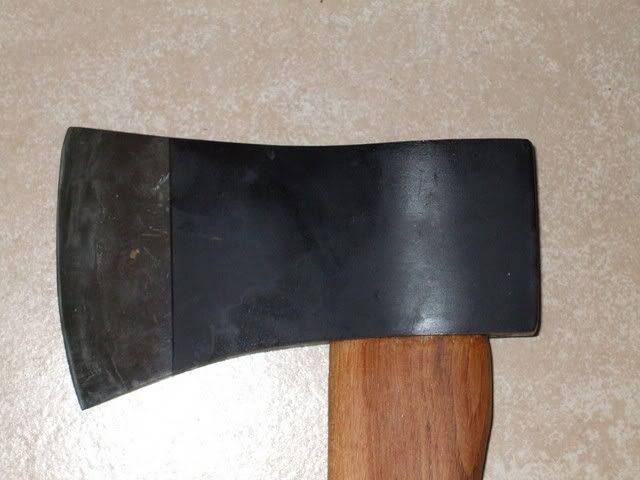
I marked up the metal to be removed with a permanent marker.
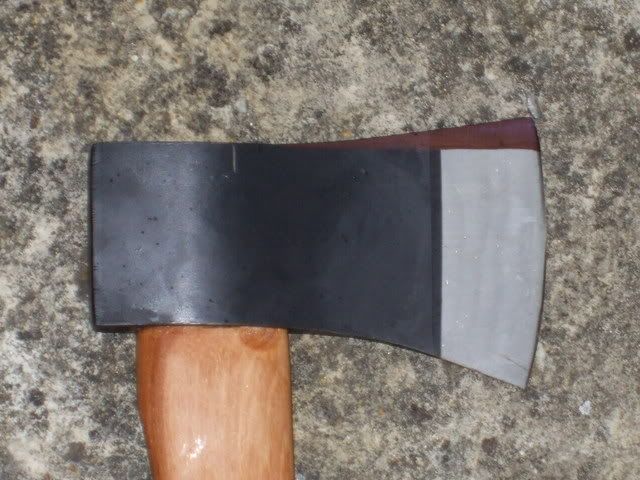
Next step was to clamp it firmly in the workbench and dig out the hacksaw and file.
I hacksawed the metal off just inside the shaded area so it could be finished with the file without removing too much metal. The sawing and filing was done slooowly so as not to ruin the hardness of the metal by over-heating.
This was a lot of work .
.
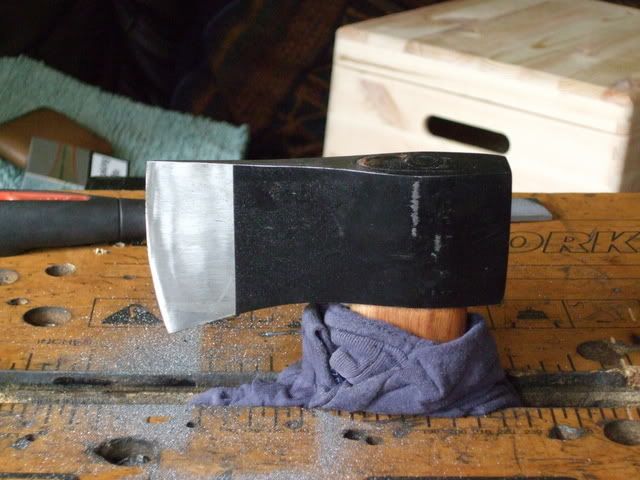
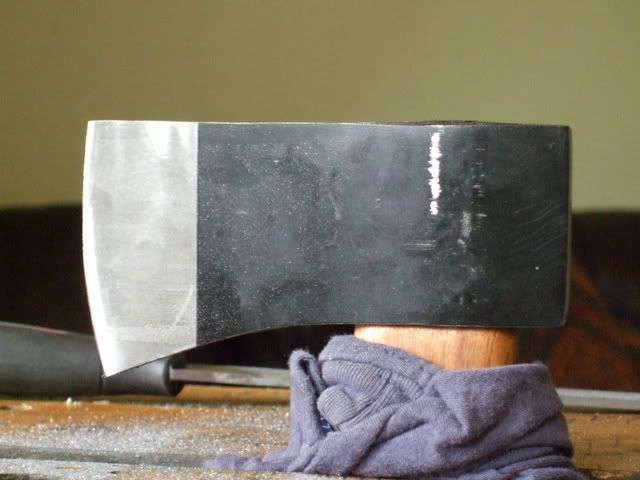
Removing the metal has also reduced the weight, which wasn't 1 1/2lb to start with, so the head is now just over 1lb which makes it alot easier and less tiring to use when carving.
The next step was to do away with that horrible black paint on the head. I know it's there for rust-proofing but I don't entirely trust it. I would prefer to have a clean head and use oil to prevent rust. At least then if it does rust I can see it, rather than it rusting away behind some nasty black paint.
I used 80 grit ali-oxide paper again, then gave it a basic finish with 320 grit wet'n'dry.
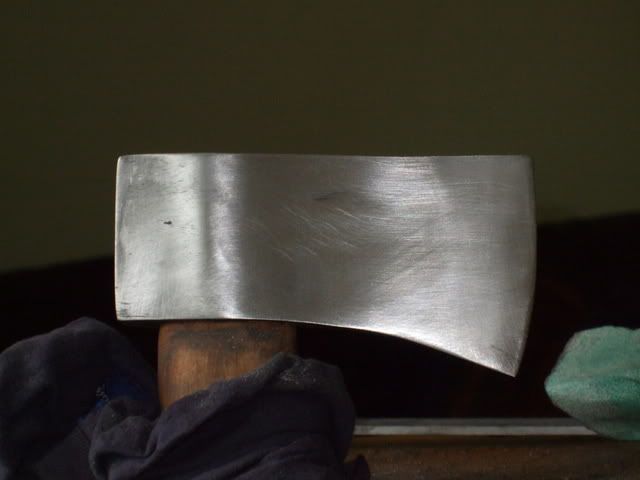
At this point I went to the Bushmoot (
 :swordfigh
  )
)
The axe however went to Dougster to be measured up and fitted with a proper sheath (mask) to replace that God-awful and frankly rather useless rubber guard that came with it.
Back from the 'moot and with a decent mask in my possession, I could now finish the head. The edge was taken off before it was given to Dougster to make his job a bit easier and safer, plus I was going to re-grind the edge at some point anyway so it seemed right to do it before handing it over.
I used a rough grit oil stone to grind a new edge on to the head. Next I used Japanese water-stones (1200g, 6000g) to hone then polish the edge.
I wanted to also give the head a good shine to it as I find it cuts through wood easier when the head is smooth and polished. I used 400g, 600g, 1200g, and 2500g wet'n'dry paper and a lot of elbow grease to get a good finish.
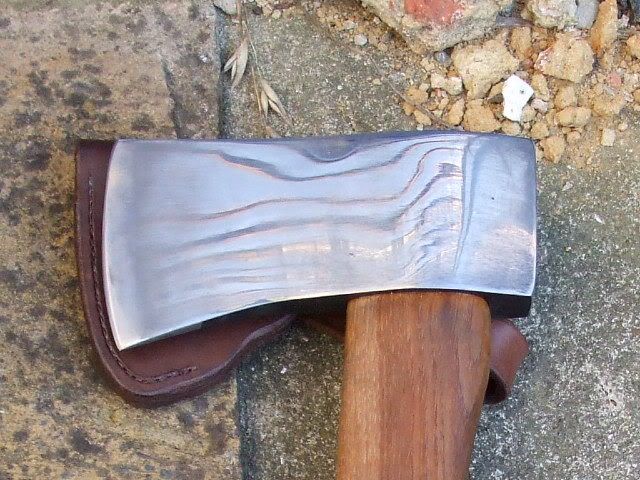
And here it is, finally finished!
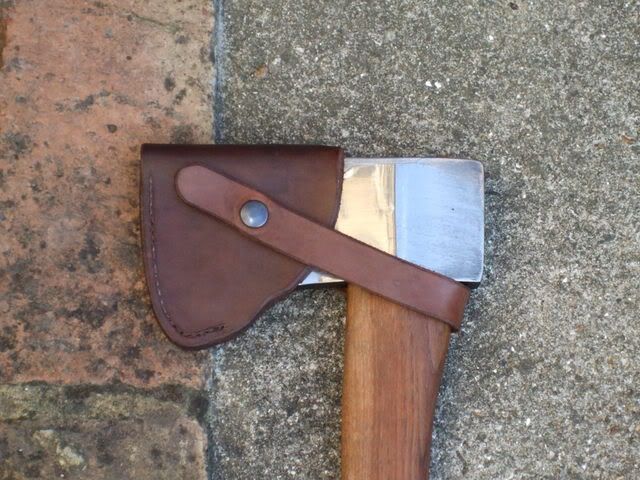
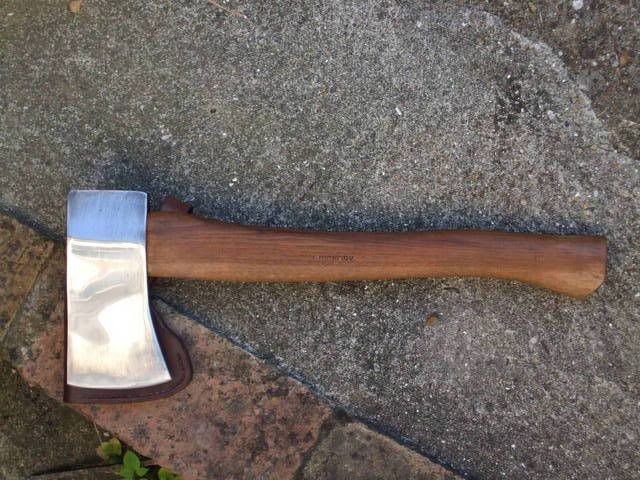
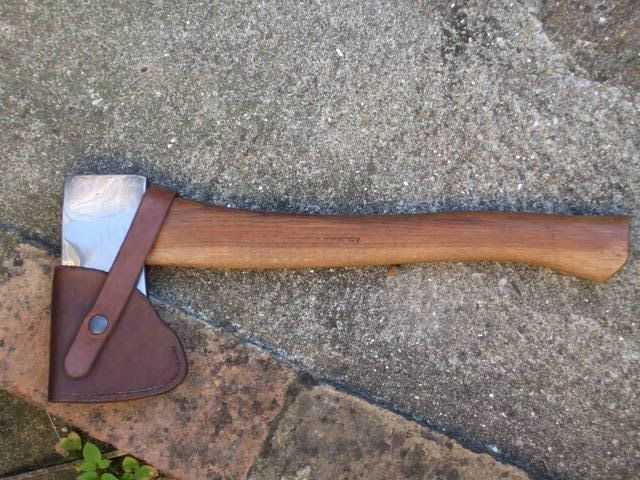
Many thanks to Dougster for the sheath - 10 out of 10 mate :You_Rock_
Hope that lot was interesting to someone, thanks for reading
After getting it home I realised I'd need to modify it a bit to suit me so I decided to put a step-by-step guide up here to show how I went about it.
I don't know enough to be able to class this as a tutorial, so think of it more as a demonstation with pictures.
First step was to choose the axe. There were quite a few there so I went through them all and picked the one that's helve had the best grain and lined up properly with the head.
The helve had a nasty varnish coating on it which I decided to get rid of as it can stick to the hand and give blisters during heavy use. (I don't have a picture of it in it's original state so you'll have to take my word for it
I used 80 grit aluminium-oxide paper to give it a good rub down, then wiped the dust off with some rag.
The handle now needed protecting so out came the linseed oil.
I soaked some paper towel in linseed oil then wrapped it around the handle. Then I wrapped cling film around the paper towel and left it in the shed for a few days to soak in.
(note the rather useless rubber edge-guard - that'll go a bit later as well)

This is how it looked after a week when it was unwrapped. Very nice

Next thing to do was reduce the head.
The head was a symmetrical shape but I didn't want the top curve of the head as I find it gets in the way when carving. So it would need to be flattened.

I marked up the metal to be removed with a permanent marker.

Next step was to clamp it firmly in the workbench and dig out the hacksaw and file.
I hacksawed the metal off just inside the shaded area so it could be finished with the file without removing too much metal. The sawing and filing was done slooowly so as not to ruin the hardness of the metal by over-heating.
This was a lot of work


Removing the metal has also reduced the weight, which wasn't 1 1/2lb to start with, so the head is now just over 1lb which makes it alot easier and less tiring to use when carving.
The next step was to do away with that horrible black paint on the head. I know it's there for rust-proofing but I don't entirely trust it. I would prefer to have a clean head and use oil to prevent rust. At least then if it does rust I can see it, rather than it rusting away behind some nasty black paint.
I used 80 grit ali-oxide paper again, then gave it a basic finish with 320 grit wet'n'dry.

At this point I went to the Bushmoot (

 :swordfigh
 The axe however went to Dougster to be measured up and fitted with a proper sheath (mask) to replace that God-awful and frankly rather useless rubber guard that came with it.
Back from the 'moot and with a decent mask in my possession, I could now finish the head. The edge was taken off before it was given to Dougster to make his job a bit easier and safer, plus I was going to re-grind the edge at some point anyway so it seemed right to do it before handing it over.
I used a rough grit oil stone to grind a new edge on to the head. Next I used Japanese water-stones (1200g, 6000g) to hone then polish the edge.
I wanted to also give the head a good shine to it as I find it cuts through wood easier when the head is smooth and polished. I used 400g, 600g, 1200g, and 2500g wet'n'dry paper and a lot of elbow grease to get a good finish.

And here it is, finally finished!


Many thanks to Dougster for the sheath - 10 out of 10 mate :You_Rock_
Hope that lot was interesting to someone, thanks for reading

 Have one question about the axe to me it look like a axe made in kina do some no if it are made there ?????