Honey Stove Review

Toadflax

Native
Mar 26, 2007
1,783
5
65
Oxfordshire
When Podcast Bob offered me the chance to review his new stove, the Honey Stove, I jumped at the chance to try out what is offered as a multi-fuel, multi-cooker, multi-pot stove. Part of the purpose of the review is to iron out design issues, so if any of my comments are negative, they are offered in a constructive manner.

It arrived today and, though I haven't had a chance to use it 'in anger', I had a look at a few configurations on the kitchen table this evening.

It comes flat packed in a small canvas bag, and weighs about 350g, so not ultra-lightweight, but not too heavy. (Excuse the hairs on the bag, my cat got onto it!)

honey_01.jpg


The stove itself is made of .7mm stainless steel, which looks at first sight to be rather flimsy but, once the stove is assembled, it does seem very sturdy (packing flat does have its advantages). It has six side panels, which assemble into a hexagon shape [hence the honey(comb) name], and three 'shelves', together with a mat for catching ash and protecting the ground from scorching, plus a set of instructions.

honey_02.jpg


The stove slots together, and initially seems a bit fiddly but after assembling once or twice, it does get quicker and easier. The middle shelf has a circular cut-out which looks like it is made for a trangia burner, but is too small for my SA trangia to sit in (and the SA trangia sits too high on top of the shelf), so I used the bottom shelf for placing the SA trangia burner. Clearly I need to try using this, but I had to assemble the burner into the stove so lighting may be a little tricky, and I'm not sure how I would get the cap on afterwards in order to extinguish the burner.

The crusader cup will sit on top of the unit, though the edges are a bit high and the handles of the cup mean that the cup doesn't sit completely flat. However, you should be able to use a round billy, either sitting on the rim, or inside it.

honey_03.jpg


The position of the middle shelf is such that you can use solid fuel tablets (army hexy in my case).

honey_04.jpg


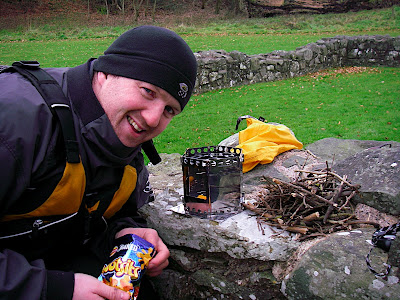
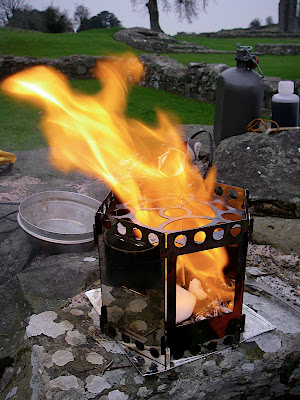
The stove is also designed as a wood burner, so I'm hoping to get out fairly soon to try it with the trangia and hexy and, of course, with wood so I'll report back once I get to do this.

My first impressions are that it looks interesting and, if it works well enough for meths, hexy and wood, it would mean that I only need to carry one stove with the flexibility to use whatever fuel is appropriate at the time.


Geoff
 

Toadflax

Native
Mar 26, 2007
1,783
5
65
Oxfordshire
Well, I'm unexpectedly at home today, after having had a tooth pulled out first thing this morning, so I've a good opportunity to try out the stove for my lunch. With a gaping hole in my gum, I don't want anything too chewy so a tin of soup seems a good idea.

It's tipping down with rain, so I took the Honey Stove up to the greenhouse to try it out. I thought I'd try hexy first, given that I use this or meths most of the time, due to not being able to light fires where I go out bimbling.

Assembling the stove is getting much quicker and easier now, and this time I put the bottom shelf (I'll call this the fire grate, because it is fairly solid and is used to form the base of a wood fire) in the middle position so that the hexy is fairly close to the top shelf. I put a canful of soup into my crusader cup and lit the hexy, pushing it under the cup with a bit of stick.

You can see that the crusader cup sits slightly off level (due to the handles catching on the rim of the stove), but it is very stable. I used a full hexy tablet (normally I would have used a half tablet in my crusader cooker base) but even so I was very impressed when the soup was fully heated in less than 4 minutes. The chimney effect of the stove seems to make the hexy burn faster /hotter than when it is in the crusader cooker base.

honey_05.jpg


Just out of interest, you can see that a 14cm billy will sit on top of the rim of the stove, and I also tried out a 12cm, which sits just nicely inside.

honey_06.jpg


I'm off now to try my SA Trangia burner for a cup of tea.

BRB


Geoff
 

Toadflax

Native
Mar 26, 2007
1,783
5
65
Oxfordshire
I've now tried the SA trangia.

The middle shelf has a circular cut-out to house a meths burner, but the SA trangia is too big so I had to sit the burner on the bottom shelf in the bottom position. Also, as I had to be able to place the burner inside the stove after assembling the stove, I had to leave out the top shelf too. This meant that there was nothing to support a pan smaller than the diameter of the stove (e.g. my crusader cup) so I had to add a couple of rod supports.

honey_07.jpg


With my "Warthog" crusader cup lid, it still took about 15 minutes to boil a cup of water, though much of this is a function of the SA trangia burner, which isn't the quickest of burners.

honey_08.jpg


Once the water had boiled, I had then to remove the rod supports, and brave myself to put the lid back on the burner from the top - normally, I can lift off the SA trangia surround and put the lid on the burner from the side, so reducing the risk of burning myself.

One way round this may be to remove the bottom shelf of the stove so that the trangia burner can sit on the ground (similar to the way the SA trangia works) and it can then be lifted off at the end of cooking to make it easier to extinguish the flame. However, this may mean that the burner is too far away from the pan, so may mean slower heating.

So I think my conclusion from this test is that for a meths burner, it would be good if the stove included either 'rod supports' or a shelf that could be fitted in a stable manner on top of the stove (and for myself) a middle shelf that would accommodate an SA trangia...or (if it wouldn't weaken the side panels too much) more sets of slots to allow more variation on the positioning of the shelves.


Geoff

PS: I haven't yet seen the video, so that may give me some more clues about how to use the stove.
 

Toadflax

Native
Mar 26, 2007
1,783
5
65
Oxfordshire
I've had a look at the video now, gives some good tips on usage, so I'm looking forward to trying the stove with wood.


Geoff
 

Podcast Bob

Full Member
Nice one Geoff. I don't have a SA Trangia to test it with, but why don't you just put the Trangia on the ground and then place in the middle grill and nothing else? That way you could just lift up the windshield/pot support arrangement and blow it out?

Incidentally the height difference for the Trangia to work most effectively between burner and pot is 38mm. This has been calculated into the design, so using a er 'non standard Trangia copy' (if there such a thing) which doesn't fit into the slot, means you have to juggle a bit. Hopefully the video helps a bit with ideas?
 

rik_uk3

Banned
Jun 10, 2006
13,320
27
69
south wales
Bob I received mine this morning, many thanks, and I'll be having a proper go with it the weekend (if not before). As said by others, assembly seems awkward at first, but do it a few times and it becomes much easier.

I've just tried it on my desk using a pukka Trangia burner, Crusader mug, metal lid and 500mls of water; two tent pegs across the top to allow a better flame spread on the mug and a rolling boil was achieved in 5 minutes 8 seconds, very good indeed considering the narrow base of the crusader mug and the lost heat because of this. I would expect a saving on that time using a wider based pot such as a 2 pint pan. I'll try the stove outdoors the weekend, and with luck mount a liquid fuel burner such as a Nova in the stove without mods to the panels; and take photo's

Good quality, and very sturdy when put together.
 

Glen

Life Member
Oct 16, 2005
618
1
61
London
I'll miss out on repeating a lot of the stuff that's already been said and offer a few ideas for developement instead.

I think the door should have the lugs pointing down rather than up, the reason for that is that it's the last piece that gets slotted into place, it's far easier to have the rest of the stove built resting on the floors and push the last piece down in place than it is to lift the almost complete stove up to slot the door in from below. OK I didn't really think about building the stove upside down, to eliminate that problem, till I wrote the above ;)

Also I think the door should be 2 seperate parts ( with downward facing lugs ) The advantages being, easier to put together, you can sit your pot, or even the crusader cup, ( I just tried it on the edge of a table so I had the fire door, only fixed at the bottom lug, hanging down below table height ) on the middle shelf, handle sticking out the fire door while using an alcohol burner on the base or even ground with no baseplate. As the stove sides would then be acting asa windshield it should improve performance in that alcohol burner mode, efficency not too much of a consideration for woodburning but for alcohol it could be..


I'd also suggest that the top and bottom ot each side have a very slight dip ( in line and same width as the 3 shelf slots ) that way the top plate could be just rested on the top of the stove should the user want to be able to access the say Trangia burner to add a simmer ring or put it out. As the shelf lugs protrude through the slots a few mm, when the shelf it rested on top it's be easy enough to lift it from a corner using a twig on these lugs or just poked through some of the many holes in the top plate.

I was very impressed by how solid it felt when slotted together, and how small it packs down, considering the lightness of the whole package and it's built size.

Am I the only one looking at it put together and keep being reminded of aTARDIS?
 

rik_uk3

Banned
Jun 10, 2006
13,320
27
69
south wales
Glen, just leave the top plate out altogether and you can access the Trangia burner direct, two pegs across the top act as pan supports?
 

Glen

Life Member
Oct 16, 2005
618
1
61
London
Glen, just leave the top plate out altogether and you can access the Trangia burner direct, two pegs across the top act as pan supports?

Yeah I had thought of that but if there is going to be any new developement it'd be an added extra.

I was also thinking, that maybe the middle height slots could be drilled out at the corners, to allow for thin tent pegs to be used in that position, it'd be a plus for the ultralighters and may make it easier to fit together too, whether it'll effect rigidness would need to be tested, though I doubt it.

Another plus for the 2 part firedoor ( no side uprights ) that you've made me realise is that it'd possibly make it easier to fit a gas ( eg Markhill )or multifuel burner as the pipes can more easily come out that way.

[update]

Just realised that if someone want to go even lighter then, with the addition of a extra ( homemade but might be an option to include one ) piece[1] you can use 3 sides and the fire door ( for wood ) or even 4 sides and a Vargo Triad or a mini pop can stove.

[1] the extra piece would be similar to the normal baseplate but square based, in squared configuration it really would need at least 1 shelf plate in place to maintain shape.
 

rik_uk3

Banned
Jun 10, 2006
13,320
27
69
south wales
It will be a tight fit to mount the Nova without drilling an access hole in a side, but this hole would also allow the use of a Primus Omnifuel, which apart from paraffin will burn Coleman/Naptha and standard gas cans

I'm going to have fun the weekend :)
 

spoony

Need to contact Admin...
Oct 6, 2005
1,402
12
55
tyne and wear
www.bike2hike.co.uk
I would possibly think about making the middle shelf a bit thicker maybe 1mm or 1.2mm, if using as a wood burning stove or even burning quite a few hexi blocks (ie cooking a meal-stew perhaps) i think the .7 will warp with the heat. Looks good though, do you have a price on these?
 

Podcast Bob

Full Member
Yeah the price and info is all on the site.

Like a few of these ideas, which tie in with a few of my thoughts and those of others. One customer had the brilliant idea which makes the whole unit act as a heat exchanger and windshield combined! And it works!

On pretty well any standard gas stove, (stove on top of gas set up) set it up with one of the two top grills in the middle position and just place it on the 3 prongs of the gas burner, with the pot on top of the grill. It transfers heat very easily and the protects the flames form the wind. But at the same time, there's enough air flow to prevent the gas cylinder from overheating.

Yes the .7mm metal does warp slightly when heat is applied, but I've been testing the prototypes for a very long time, and once stainless warps, it doesn't tend to get worse. Either way after about 30-40 uses, I'm still able to slot it together without any issues.

The whole point is not to assume you need all of it. Just mix and match to make a kit up which works for you and your current range of gear!
 

Toadflax

Native
Mar 26, 2007
1,783
5
65
Oxfordshire
I've just been up the garden trying it out with wood.

I started it with a bit of birch bark and used some nice dry remains of scrap wood.

honey_09.jpg


I used my crusader mug (again!) to boil a cup of tea,

honey_10.jpg


and it boiled up pretty quickly, with a rolling boil just under 6 1/2 minutes after lighting the birch bark.

honey_11.jpg


Not surprisingly for what is, in effect, a small twig burner, it does need fairly constant attention to keep the fuel topped up and burning well, however, it doesn't need very much fuel in order to boil a hot drink. I used a small handful.

honey_12.jpg


The leaflet talks about grilling (e.g. bannock) and I'd be interested to see (or hear from someone else) how well it works for this method of cooking. I'm interested to see if it can maintain sufficient embers to cook, say, a sausage without flames flaring up to char the food.

So far I've been pretty pleased with how it has worked for me. I like the flexibility of being able to use different fuels and the various ways in which it can be assembled to suit. What seemed initially to be fiddly assembly soon becomes routine.

It might be thought that it is a jack of all trades and master of none, but I wouldn't say that. I'd probably call it a fairly competent practitioner of all.

I'll be very interested to see how other people get on as they try using it.


Geoff
 

Rothley Bill

Forager
Aug 11, 2008
134
0
Rothley, Leicestershire
I got mine today PB and had a play with it for a while.

I think the cooker shows great flexibility and promise, but was very fiddly to put together for a start. The difficulty lies with the narrowness of the slots for the grills. If these slots were made wider it would remove the problems associated with assembly. That said its not really a negative as the stove got eaiser to assemble with each time and variation I tried.

I also had some problems with an SA trangia burner and opted to assemble with the burner in situ, as others have said there is then no chance of putting the burner out with the grills in place. But that said there is no need to put the top grill in place, if your pan is big enough to balance on top, the most sensible suggestion is to use tent pegs through the holes.

The stove is nice and stable with a big pan on top, I used my SA Trangia large dixey. That said it was on reasonable ground, I will try it out on rougher ground during the week.

It may be me but i'm not sure about the ash can, I can see why it is a thick sheet of aluminium foil, and it will stop scarring but it seems too little when compared to the rest of the stove, But that is just my opinion.

Next week I will let some of our scouts loose on the stove for a durability test, I do not think that the stove lacks durability, its made from 0.7 mm stainless feels bombproof and is very rigid in use.

Hopefully when the airline finds where it has sent my luggage, I will be able to take some photos.
 

decorum

Full Member
May 2, 2007
5,064
12
Warwickshire
I've been waiting to give this stove a bit of a trial since it arrived; It arrived on the same day I had an op on my ankle so I've had to wait just under 2 weeks to 'play' - and today the weather's been ... manky..

I had a few concerns about 'fiddliness'; especially if you lost some dexterity in cold, wet, windy weather. So todays weather could be seen as a blessing :D .


Like I mentioned, today's been manky and I wasn't about to get cold needlessly so I donned some mitts to put it together.


1st pic shows that there was no problem putting the Honey Stove together wearing mitts.


2nd pic shows the area surrounding the stove.


5 minutes later and my brew and breakfast are ready!


Having taken refuge from another downpour I thought I'd try a different set-up.
This time, instead of using all of the pieces, I went for the minimal approach. The next pic shows the top plate being used on its own in the center position. In this configuration the stove can be placed over the trangia burner - The stove didn't feel rigid in this set-up though and my advice would be to not do it this way.


Having decided that the top plate on its own didn't feel safe I put the mid plate in the botton position. Remember to put the burner in before you put the door panel back on! :eek:
When the burner plate is used in the lowest position the burner sits on the ground and might need insulating in colder weather.


Oh, and I've replaced the pouch that the stove arrived in with a home made one.


I haven't had an opportunity to burn wood in the stove yet but my initial thoughts on this little stove are positive and any niggles are very minor - I do like this stove!
 

Rothley Bill

Forager
Aug 11, 2008
134
0
Rothley, Leicestershire
Well I let the scouts loose on this stove and it has proved to be robust, we burned wood in it all night, with surprisingly little deformation.

Boiling time was about 7 minutes. For baking we added a square piece of 3mm stainless sheet on the top and cooked pancakes and bannock. This would be a very good addition to the stove, but could be made thinner and lighter. Its just what we had.

My concerns about the assembly of the stove are still there and widening the slots for the tabs will make the assembly even simpler. It will make the stove feel loose but I do not feel that will affect the stability of the stove.

We tried putting the stove over a gas burner as suggested here, the results were good, but I wonder why you would want to carry one. Personal preference I suppose.

The opinions on the stove were really positive, and the more I use the stove the more I like it. This will is a well thought out cracker of a stove.

Still no photos as KLM appear to have no idea where they have sent my luggage.
 

rik_uk3

Banned
Jun 10, 2006
13,320
27
69
south wales
Mounted a Primus Omnifuel in the stove, very good indeed.

I've used tent pegs instead of the top plate with is below the sides and limits the pot size too much for me

Works fine with the Trangia burner, very well with the Omnifuel and not tried wood yet but I will.

Why mount a gas or multifuel in it? Well, it will act as a windshield for these stoves, allow biger pans that a pukka Trangia setup and you still have the option to burn wood when the chance arises. If I get the chance I'll try it with a good sized pot, 6 - 10 pints and see how it holds up


Toadflax

Native
Mar 26, 2007
1,783
5
65
Oxfordshire
I had another go this evening, this time boiling up about 2 pints of water in a 14cm billy. You can see from the photo how the larger sized billy sits on top of the rim of the stove.

honey_13.jpg


Again I used small pieces of dry scrap wood and it took about 18 minutes to get a rolling boil (in an ambient temperature of 3 degC). As before, I found that the stove does need fairly constant attention to keep it burning well. I'd broken the wood down smaller this time, so it ignited fairly fast, and so didn't cause the fire to die down as new wood was added.

I wanted to try using it as a grill to do a bit of toast, but I wasn't able to build up a sufficient bed of embers to maintain the heat long enough - and adding more wood causes flames to rise which would have burned anything being grilled.

I still think it is a neat little unit, and I'd like to try it out 'in the wild' with some 'wild wood' (i.e. dry twigs rather than scrap timber) but I'm not sure where I can go round here where I'd get away with using what a lot of passers by would see as an open fire. Maybe I'll just gather some twigs on my next walk and try it out when I get home. With what I have tried so far (hexy, trangia and wood), it certainly works pretty well and there isn't much mess to clear up afterwards - it seems to burn the wood well so there is very little ash and it contains the fire well inside the stove, so I'd see it as a very low impact cooker.

I think I'd be happy to carry it out on a walk, to use it with a trangia burner as a backup, but primarily with locally gathered fuel.


Geoff
 

Drongo

Member
Aug 19, 2008
38
0
48
Lisburn
Well, I took the stove out for it's first trial yesterday and I was well chuffed at it's performance...

I gathered 2 large handfuls of dry hanging twigs from the ash tree that was next to where we put in at Annacloy on the Quoile in Co. Down and stuffed them into a small dry bag...

We stopped for lunch at Inch Abbey and I whipped it out...

I tried lighting it with Wotsits after reading another post on here, however the Wotsits I'd picked up were 'baked' and didn't work (although they did smell good)

So I resulted to a bit of Hexi Block that is at least 17 years old ( I had it from my days in the Army Cadets) and it lit easily after that...

I'd brought a tub of Irish Stew with me, and stuck that into my pot and instantly it started sizzling and bubbling around the edges and about 5 mins and one small handful of twigs later I was sittig down to a lovely pot of stew and crusty bread...

My mate Graeme then heated his stew in the same way and we still hadn't used even half the fuel we'd collected...

So we burnt off the rest of the twigs, warmed our frozen fingers, shook out tiny bit of fine ash from the bottom and packed it all way...

I didn't notice any warping of the stove either...

Good Points...
Easy to find fuel, even on a cold damp morning
Large door makes adding fuel easy
Loads of ventilation holes means the fuels combusts well
Very small pack size
Reasonably lightweight

Bad Points...
Apart from having to keep an eye on the fuel level as it burns out quick using twigs, I can't fault this great little cooker yet...

Wotsits and the 'Wood Pile'
IMGP2687.JPG


Cooking
IMGP2688.JPG


Hexi Blocks - The Small bit to the right is the same size of piece I used to light it, the larger piece was what was left (it exploded shortly after this photo (oops)
IMGP2690.JPG
 

BCUK Shop

We have a a number of knives, T-Shirts and other items for sale.

SHOP HERE