Good ideas for stuff to make with children :)

  • Hey Guest, Early bird pricing on the Summer Moot (29th July - 10th August) available until April 6th, we'd love you to come. PLEASE CLICK HERE to early bird price and get more information.

Toddy

Mod
Mod
Jan 21, 2005
38,937
4,570
S. Lanarkshire
There are a lot of parents on the forum and a lot of interest in finding things to do with them of a bushcrafty nature.

This thread is intended as one where we can collate good ideas that inform and encourage the development of practical skills. Basically if it uses natural materials in it's construction then it's a good idea :D

How rich the activity becomes depends on the folks making it.
For instance, Jonr's excellent whistle making tutorial uses Elder, but Elder, or Boortree, has many other uses too.
Fill in the blanks for the children and yourselves and we all learn :cool:

atb,
Mary
 

Toddy

Mod
Mod
Jan 21, 2005
38,937
4,570
S. Lanarkshire
This is a copy of a tutorial posted earlier on BcUK by Jonathon Ridgeon :D
http://www.jonsbushcraft.com/About me.htm
I will pm him and ask that he posts it under his own Avatar, but in the meantime I'll use it to kick start this thread of ideas :D

In this Tutorial I used fresh Elder wood that was still green. It is best to use dry dead wood, otherwise the wood may shrink and cause the whistle to stop working. The construction of the whistle is exactly the same if you use dry wood which I recommend.

We are taking advantage of elder wood because it has a very soft pith which can be easily removed to create a hollow tube.
To help you with your tree identification I have taken these photos of some Elder so that you know what you are looking for. The picture on the left shows typical thinner branches and leaves whereas the picture on the right shows the thicker trunk of the tree. Elder usually grows only a few meters tall and tends to grow in poor quality soil.

IMG_2160_small.jpg
IMG_2165_small.jpg


Cut a small branch that is already the correct width. You can see how thick this piece is in comparison to my fingers.
IMG_2216_small.jpg


It is important that the wood has a large pith in the centre because this will make plenty of room for the sound chamber, however you will want the layer of wood to be thick enough so that it is not fragile. A shoot of wood about 2 years old is usually good.
IMG_2224_small.jpg


Cut a section from your wood about a finger long.
IMG_2228_small.jpg


Scrape the bark off if you like.
IMG_2230_small.jpg


Push the pith out and scrape the inner walls with a small stick until totally free of pith.
IMG_2232_small.jpg


IMG_2233_small.jpg


IMG_2238_small.jpg


About 2cm in from the end you need to cut a notch in the whistle, a few cuts at 90 degrees and then some more at 45 degrees. The pictures explain it all...
IMG_2240_small.jpg


IMG_2246_small.jpg


IMG_2245_small.jpg


Now you need to make a small piece of wood to fit into the mouth end of the whistle. Carve a stick down to the correct diameter to fit the inside of the whistle. Test how well it fits by pushing it into the end of the whistle.
IMG_2255_small.jpg


To create the air passage carve a flat face on the side of the dowel.
IMG_2256_small.jpg


Cut the small piece of dowel to the correct length. (as long as from the mouth end of the whistle to the vertical cut of the notch)
The dowel should be a tight fit and will need no glue if it fits snugly.

Fit the dowel so that when you blow through the small gap the air runs level with the notch.
IMG_2259_small.jpg


Once you have fitted the dowel in the end you could carve the mouth end to a better shape if you like.
IMG_2264_small.jpg


You can see how the air passage is created by the flat side on the dowel.
At this point you can test the whistle to see if you get a sound. Put your finger over the other end to block it, then blow the whistle. You should get a nice clear sound.
IMG_2265_small.jpg


If you get sound you can block up the other end of the whistle with another piece of wood. Do the same as before but don't carve the side flat. No air should be able to pass through this end.
You get a higher pitched sound if you make the sound chamber smaller.
IMG_2274_small.jpg

IMG_2275_small.jpg


Your whistle is complete. You could add a loop of cordage so that it can be put onto a key ring if you like...
IMG_2277.jpg


15 More tutorials just like this one at www.jonsbushcraft.com
 
Last edited:
  • Like
Reactions: Brizzlebush

ammo

Settler
Sep 7, 2013
827
8
by the beach
This thread is a great idea. Destined to be a sticky, I only wish I had more to contribute than enthusiasm.. c'mon folks do it for the kids. Post your tips, tricks and hints.
 
  • Like
Reactions: Toddy

Toddy

Mod
Mod
Jan 21, 2005
38,937
4,570
S. Lanarkshire
That's actually a really good safe way for little ones to get to grips with taking bark off :approve: a cheap tattie peeler works very well for the job :)

cheers,
M
 

Toddy

Mod
Mod
Jan 21, 2005
38,937
4,570
S. Lanarkshire
Another copy and paste :) this time one of mine from years ago.
http://www.bushcraftuk.com/forum/showthread.php?t=39659

Tension trays/plates
These are the simplest of things to make, use up scrap materials, can be made with anything from willow to dockens, and are very useful indeed.
The little one that I show being made here took me about ten minutes, though I generally find it takes beginners a little longer.
It will work as a plate, keep a hot pot off the tent floor, insulate a pot or mug from the chill of the ground, and can be used as a steamer or draining tray. It's also a good base for seasonal collections of 'stuff' from acorns to pinecones and holly :)
Larger ones make dry comfortable seats or kneeling pads, boot racks, dish drainers, a dry bit under a hammock to put your stocking feet down onto, will stop a hot stove sinking through snow or provide a dry bed for a fire or a prop for one of those disposable bbq's.

For children who are not confident with a knife, either find a block that they can cut down onto when cutting up the weaving sticks or use pruners or the kitchen scissors :)
As I said, useful :approve:

Basically make a hoop. Cross two sticks through it and then fill in alternatively weaving pieces above the cross stick and then below. Trim the ends so they stick out a bit, thin the tips of the cross piece and thread back through. Finished, secure and takes little time.

IMG_9019.JPG

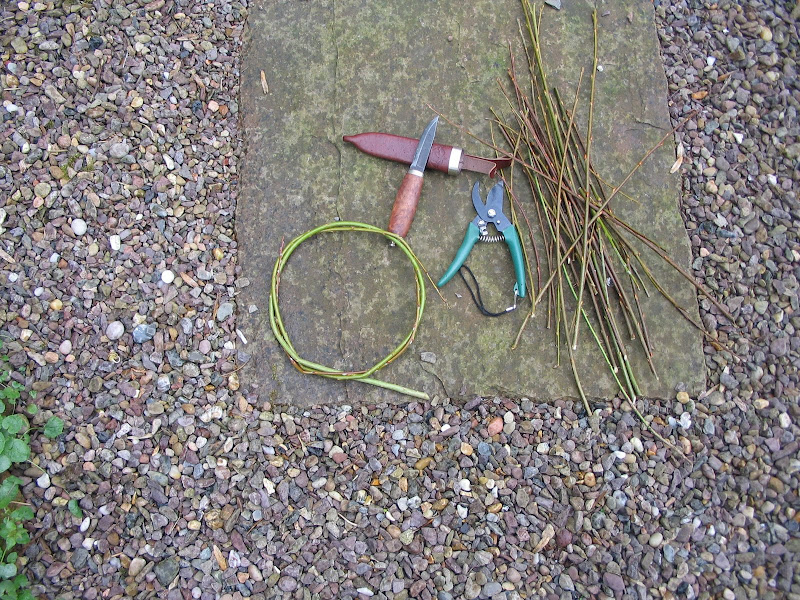
Offcuts of willow from basketry making, one long rod.

IMG_9020.JPG

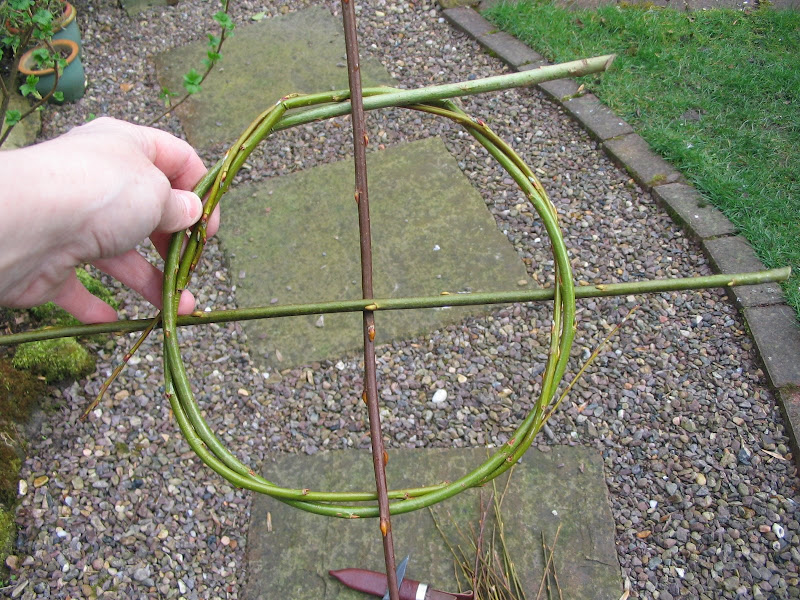
The rod made into a hoop.

IMG_9021.JPG

The cross piece in place.

IMG_9023.JPG

Next two weavers are threaded through. Notice they're threaded over, the cross is under.

IMG_9025.JPG

More weavers threaded into place. They could be cut to length when they're threaded.

IMG_9026.JPG

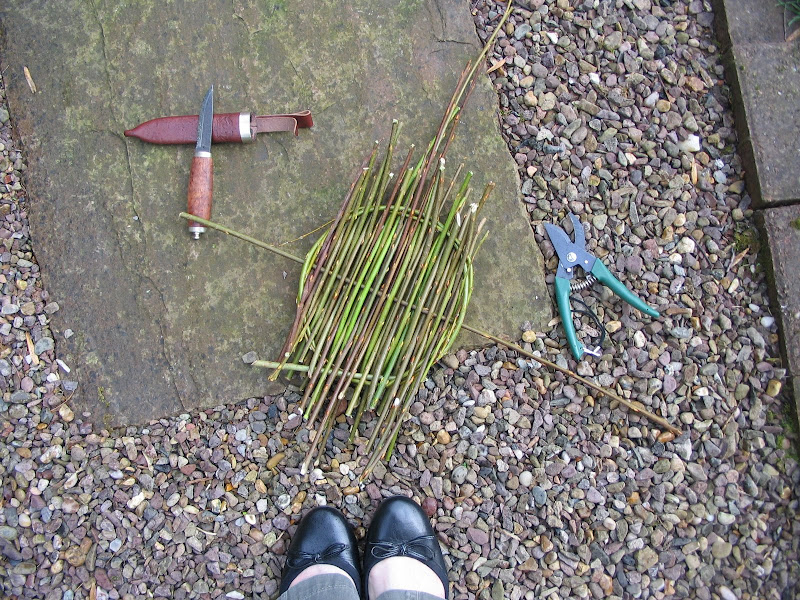
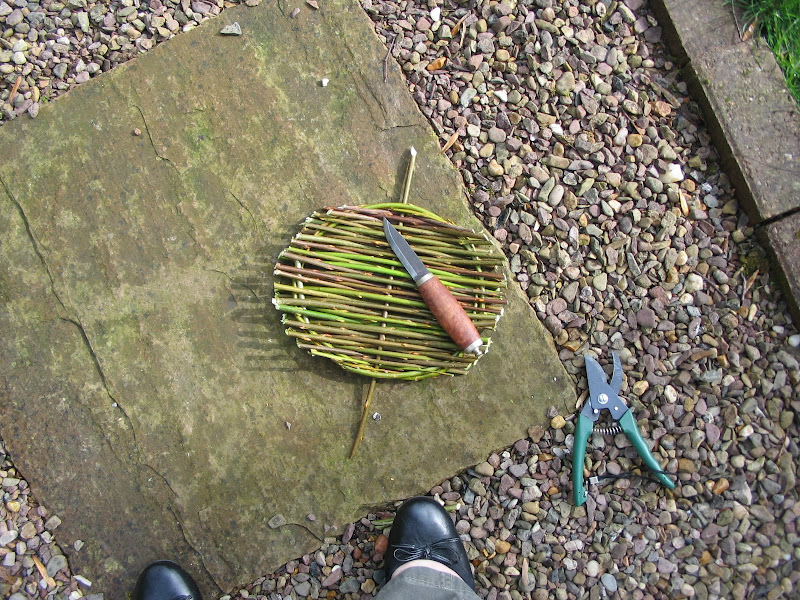
Finished threading weavers in until the gaps are filled.

IMG_9028.JPG

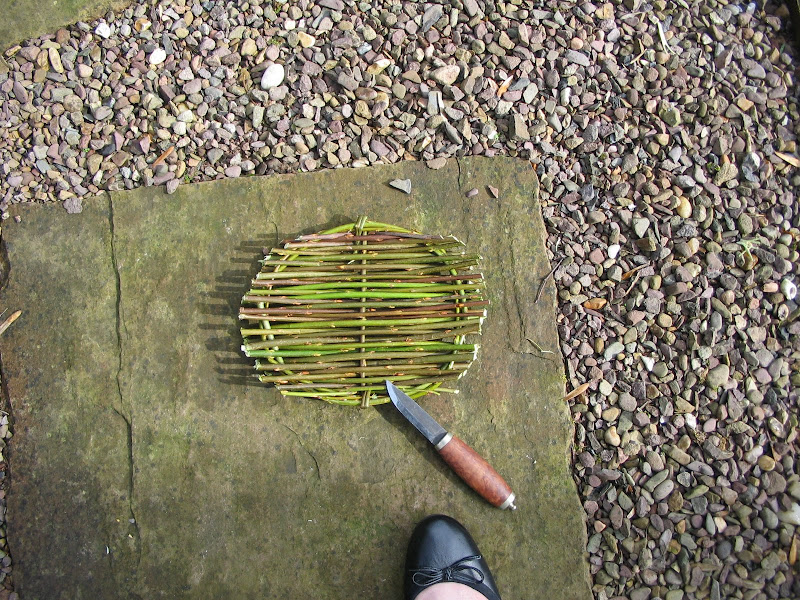
Tided off the ends of the weavers, leaving the original cross rod until last.

IMG_9029.JPG

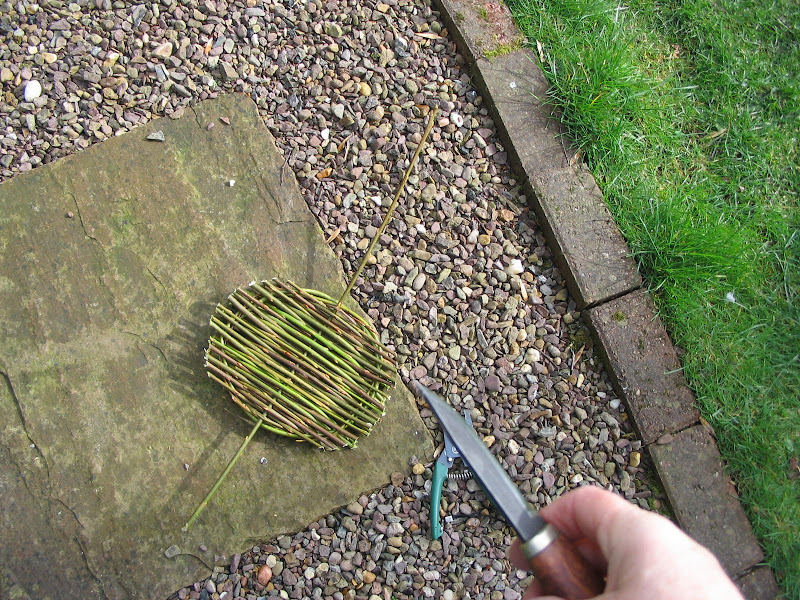
Trimmed the cross rod to 7 or 8 cms.

IMG_9031.JPG

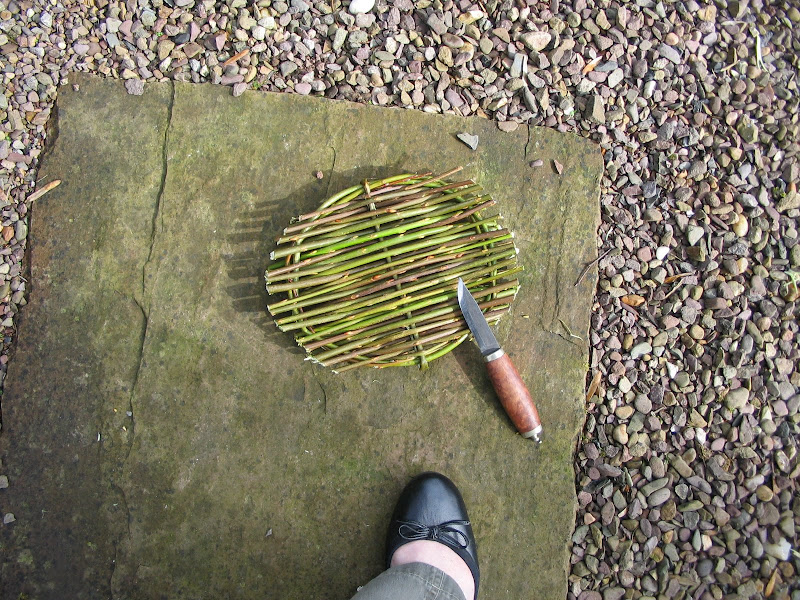
Cross rod thinned down and threaded back on itself. Not necessary but it stabilises things.

IMG_9032.JPG

Pared ends pushed parallel with the rod, nice and tidy and secure. Finished tray :D

The biggest one I've made was about 70cms and it lasted for about three years :cool:

I generally use willow, it's food safe, but I have used dockens in season, privet and split hazel (very firm ), marram grass and cat tail rushes for the weavers. It's one of those useful what do you have sort of makes.

The knife is a Bruseletto Troll and is another firm favourite

atb,
Toddy
 

Ecoman

Full Member
Sep 18, 2013
934
2
Isle of Arran
www.HPOC.co.uk
I don't have any pictures but Heather(6) and I made a candle holder from a piece of Birch. This is how:

1, Find a wind fallen Birch with a trunk of around 4" across and cut a 6" long section from it. The more silver and smooth the Bark, the better.

2, Take a tea light candle and line it up with the centre of one of the cut ends. Draw around it and then make the circle a few millimetres wider.

3, Using whatever tools you prefer (we cheated and used a cordless drill and a flat wood bit) cut out the hole to a depth of around 2cm. Then stand the Birch up so that the hole is facing upwards.

4, Take small cuttings of Holly with berries, mistletoe, sprigs of pine needles. Whatever you have to hand and would look good in the centre of the dinner table.

5, Using some brightly coloured ribbon (we used some wide flat gold lacy ribbon) tie the sprigs of holly etc, onto the side of the Birch.

6 If you like you can then use PVA glue to attatch glitter :)aargh4:), sequins, foil shapes, nuts etc onto the Birch to add extra decoration. Then leave the glue to dry for about an hour or so.

7, Place a tea light into the hole, light and enjoy.

You can even use wider pieces of wood and fit several tea lights into it, or if you have a long table you can get a long section and split it down the middle, then drill holes through the bark to take several tea lights or candles.

Not a difficult thing to do but it looks really effective and keeps the kids occupied for ages. It also gets then running around the woods looking for wood, holly and other decorations.
 
  • Like
Reactions: Toddy

Toddy

Mod
Mod
Jan 21, 2005
38,937
4,570
S. Lanarkshire
It would be good to see what you come up with too :D

I used to have a little bag that held all sorts of bits and pieces. A pinecone, a couple of shells, a bit of quartz, a seed head from nigella, cups from acorn, oakgalls, a coiled up bit of rush string, a freshwater pearl, a lump of lead rich rock, a bit of slate with fool's gold crystals, etc., It was a fascinating play quietly rummage through for a little boy when he was past the putting everything in his mouth stage :)

I made busy books too; the last one was for Coln18's son who was in hospital. Basically I made up fabric pictures and had things like a compass and a fresnel lens tied onto the fold of the book with cords.
Might make another one and take pictures.

atb,
Mary
 

simi

New Member
Jan 2, 2014
1
0
West Yorks
Hi.

I registered on the forum as I am planning to run some survival skills sessions at school with 10-11 year olds however the school may say no to fire and knives (!) so I needed some new ideas. Any suggestions? We are going to start with shelter building first from tarps and found wood (the school has a small wooded area with plenty of pre-cut wood). I have ran these sessions before at an outdoor centre but we always did something with firelighting and something with knives...

Cheers.
 

Khumbu8000

Member
Mar 27, 2011
12
0
Marlborough
I teach reception and we have fires once a fortnight and are about to start using knives.potato peelers too dangerous as get stuck. Hultafors safety knives 2.50 each, using them for battoning kindling.
My head is the daughter of ex Nottingham fire chief and was adamant no fires but then I wore her down. A decent risk assessment persuades. A year after giving in she put our school forward for a year 2 outdoor maths project involving other local schools as she saw the educational benefits. We all did firelighting and cooked up some tasty rabbit!
See muckymaths.blogspot.com. Goodluck
 

funky_rick

Tenderfoot
Jul 1, 2009
52
1
monmouth
how about stuff to make on a fire. e.g. chocolate oranges or banana's, exactly as they sound, get an orange, put a slit in the top stuff it with 6 or 7 chocolate buttons, foil wrap it and put on the fire for 15 mins or so.
 
Jan 2, 2014
5
0
Cornwall
Hello, newbie here!
'Sticky bread' is a great campfire food for kids to make. Just take a lump of bread dough and roll/ stretch it into a long sausage, wind it round a stick and cook it over the fire.
If you choose the right size stick, you can pull cooked bread off the stick and put a sausage in it. Delicious.
 

Snooky

Full Member
Nov 19, 2013
73
1
Tadley
Sticky bread gets my vote, did it with the Cubs just before xmas, bit of jam or nutela and they were all loving them

I have also made paracord bracelets/key rings with Cubs they enjoyed them and not too hard for kids to manage, just need help cutting and burning the ends
 

munkiboi182

Full Member
Jan 28, 2012
583
2
36
taverham, thorpe marriott, norfolk
when i do shelter building sessions with younger groups i get them to make "hedgehog houses". miniature debris shelters that will keep a stuffed toy dry from the pouring rain (watering can). for rainbows, girl guides, etc it works well using winnie the pooh as a theme and getting them to make eeyores stick house and making it into a bit of a story whereas beavers cubs etc i go with disneys robin hood theme
 

Crank Cuffin

Tenderfoot
Feb 18, 2005
56
0
Bognor Regis

Start with a stick approximately 9 inches long.
Whittle the hats on either end.
Start with the easier plain pointy hat and then try the trickier bobble on the other end.
If the bobble goes wrong it can be quickly restyled into another pointy hat. :p
Then, using a stop cut, carve on the faces.
Cut the stick in half making two gnomes
Paint their hats and faces using suitable paint (acrylic works)
Scouts enjoy making these.
 
Last edited:

ozzy1977

Full Member
Jan 10, 2006
8,558
3
46
Henley
Some great ideas here, keep them coming :)
My son (3) loves finding animal tracks I think that we are going to have to start taking casts of them
 

BCUK Shop

We have a a number of knives, T-Shirts and other items for sale.

SHOP HERE