Fellow babies,
As some of you know, I was looking for someone to rehandle a Cegga, but after a bit of advice, have decided to simply recondition the haft and make a collar guard myself. I normally keep all my thumbs attached to my feet, and don’t have much in the way of tools. This is my story.
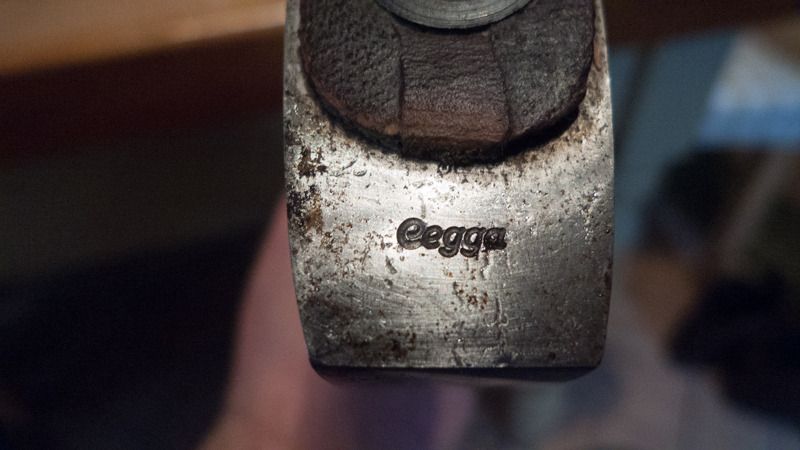
I picked up the axe two summers ago at a meet in Suffolk (hey guys!) for a very reasonable sum, so reasonable that I couldn't pass it up. It had a bit of handle damage, and the head had some tarnish, but there was no rust. It was, and still is, a great axe at a great price. I cleaned up the head; sharpened the edge; and oiled the haft with BLO. It performs very well. It's important to know that it gets medium-to-light use. A typical year finds me outside for 15 nights, give or take. I chop a bit of firewood and split a bit of tinder, but that's all. I'm not building super-shelters, living on a farm or trekking through Sweden. It's a damn fine camping axe, but the handle damage has always bothered me.
I had seriously considered swapping out the haft, but finding a 20" handle is difficult. All the handle places sell 16" and 24", but not 20". I could have bought a replacement GB or Wetterlings, but have no desire for a pretentious logo. Given that Cegga works at Hults, it’s likely that their 20" Trekking axe handle is probably what was used and it’s also likely to fit the head, and I found a replacement handle at Heinnie for a reasonable price. But after watching a ton of axe videos on Youtube, it became clear that my handle was not damaged enough to be worried about, so Heinnie remains bookmarked and ready to go should I ever need it. Instead of a new haft, I'm now making a collar guard, so back to Youtube I went.
Of all the collar guard videos, I found Mike at MCQ Bushcraft’s video the most instructive. He’s clear, uses simple tools, and made a very functional wet-formed guard that seems to be well within my comfort zone. So off I go into the world of small leather crafting. Granted: an axe collar might be the simplest of all leather projects, but some of you might appreciate how a fumbler like me gets on.
A very friendly BCUK member is kindly sending me an 8”x5” 3mm veg-tanned piece of leather, and I picked up some lacing at an online store whose name escapes me. I also bought a Draper Expert hole punch for the princely sum of £14. That Draper looks to be a great gizmo at a great price, and I intent to use it on other projects assuming that no limbs are lost making this crazy guard.
In preparation for the project, I resharpened the head first with a Sharpie marker and a Naniwa 1000 stone; went to the mousepad and wet-dry up to 2000; re-oiled the handle and dropped a bit glue into the crack. It’s now ready for leather.
The only question remaining is the role of beeswax under the guard, as Mike suggests. I don’t want the collar to slip, and initially like the idea of coating the haft under the guard with a bit of beeswax, but my sense is that doing so would prevent me from re-oiling that part of the handle in the future. The wet-formed guard should stay put if I form it into that narrower haft area directly under the head. But I like the idea of beeswax, so I really won’t know if I use it until the last minute.
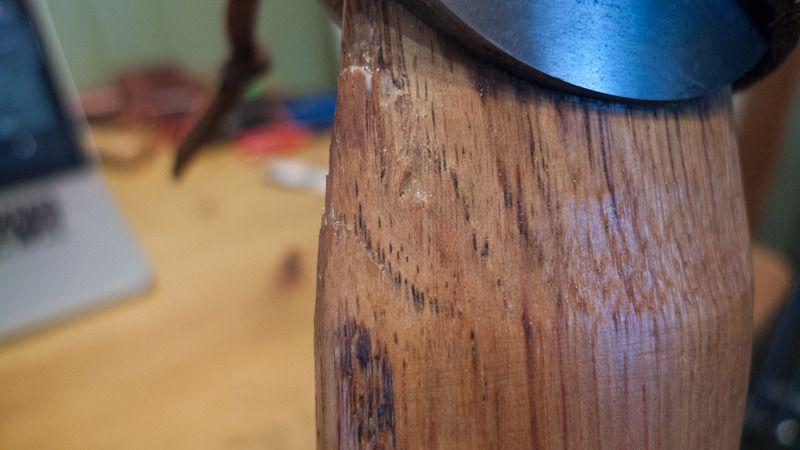
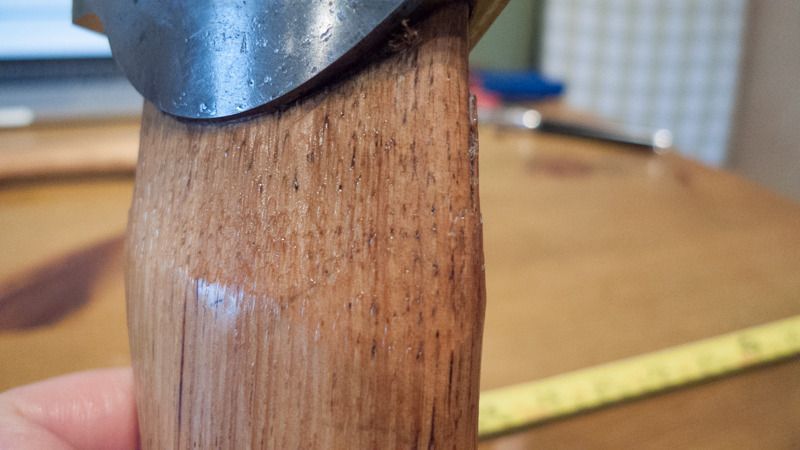
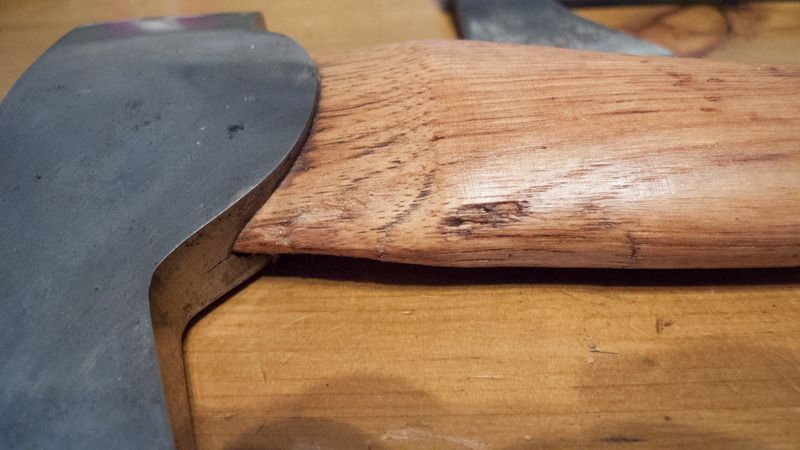
I’ve included a few photos of the axe and damage. These photos were taken this morning, after the BLO has dried, and immediately after I dropped a bit of glue into the crack.

As some of you know, I was looking for someone to rehandle a Cegga, but after a bit of advice, have decided to simply recondition the haft and make a collar guard myself. I normally keep all my thumbs attached to my feet, and don’t have much in the way of tools. This is my story.
I picked up the axe two summers ago at a meet in Suffolk (hey guys!) for a very reasonable sum, so reasonable that I couldn't pass it up. It had a bit of handle damage, and the head had some tarnish, but there was no rust. It was, and still is, a great axe at a great price. I cleaned up the head; sharpened the edge; and oiled the haft with BLO. It performs very well. It's important to know that it gets medium-to-light use. A typical year finds me outside for 15 nights, give or take. I chop a bit of firewood and split a bit of tinder, but that's all. I'm not building super-shelters, living on a farm or trekking through Sweden. It's a damn fine camping axe, but the handle damage has always bothered me.
I had seriously considered swapping out the haft, but finding a 20" handle is difficult. All the handle places sell 16" and 24", but not 20". I could have bought a replacement GB or Wetterlings, but have no desire for a pretentious logo. Given that Cegga works at Hults, it’s likely that their 20" Trekking axe handle is probably what was used and it’s also likely to fit the head, and I found a replacement handle at Heinnie for a reasonable price. But after watching a ton of axe videos on Youtube, it became clear that my handle was not damaged enough to be worried about, so Heinnie remains bookmarked and ready to go should I ever need it. Instead of a new haft, I'm now making a collar guard, so back to Youtube I went.
Of all the collar guard videos, I found Mike at MCQ Bushcraft’s video the most instructive. He’s clear, uses simple tools, and made a very functional wet-formed guard that seems to be well within my comfort zone. So off I go into the world of small leather crafting. Granted: an axe collar might be the simplest of all leather projects, but some of you might appreciate how a fumbler like me gets on.
A very friendly BCUK member is kindly sending me an 8”x5” 3mm veg-tanned piece of leather, and I picked up some lacing at an online store whose name escapes me. I also bought a Draper Expert hole punch for the princely sum of £14. That Draper looks to be a great gizmo at a great price, and I intent to use it on other projects assuming that no limbs are lost making this crazy guard.
In preparation for the project, I resharpened the head first with a Sharpie marker and a Naniwa 1000 stone; went to the mousepad and wet-dry up to 2000; re-oiled the handle and dropped a bit glue into the crack. It’s now ready for leather.
The only question remaining is the role of beeswax under the guard, as Mike suggests. I don’t want the collar to slip, and initially like the idea of coating the haft under the guard with a bit of beeswax, but my sense is that doing so would prevent me from re-oiling that part of the handle in the future. The wet-formed guard should stay put if I form it into that narrower haft area directly under the head. But I like the idea of beeswax, so I really won’t know if I use it until the last minute.
I’ve included a few photos of the axe and damage. These photos were taken this morning, after the BLO has dried, and immediately after I dropped a bit of glue into the crack.


Last edited:
")