Before I start, this is not an advert for my work! I just thought it would be nice to share with others last weekend's events and show a few pics of a youg lads fun day out. 
Last weekend I held an arrowmaking workshop, sadly it was undersubscribed but I went ahead with it anyway The intention was to go out to the woods and make some arrows from seasoned shoots of hazel or birch, fletch them and finish them off before shooting a small field course thatI'd set up
Unfortunately the weather turned against us, what with it raining the whole of saturday and most of sunday Still, the lad who was the sole surviving student for the saturday arrow course (others dropped off or various reasons, boilers blowing up, weather/illness, etc
  ) had also arranged to have an arrowhead making lesson on the day after. So we mixed up the weekend and did some arrow making and some forging on saturday follwed by finishing off and shooting on sunday. Here is how it went:
Saturday morning a very excited Richard hammond lookalike arrived at my workshop with his own bow and some lovely ethnographic arrows (forget where from, but well over 100 years old I reckon). After the obligatory health and saftey bit we selected three shoots to convert into straight shooting arrows.
We stripped the shoots with a knife (used as a scraper)and then started teh straightening over a fire. we then used some sanding block and abrasives to continue the straightening process, reduce teh diameter of the thick ends and to smooth the shafts. Then we re straightened a little over the fire
Next the nocks needed to be cut. To do this we used a couple of hacksaw blades taped together, then we opened the slot and sanded the inside with sandpaper wraopped around a blade. The nocks were shaped to hold the bowstring of our own bows so that a pluck of the string would let the arrow off. Not too tight and not too loose Using a knife we carved the ends of teh nock to give our fingers some clearance on either side of the shaft.
At this point we stopped with teh arrows and forged some arrowhead. James wnated to make a mail bodkin, leaf/diamond broadhead and a barbed head if possible. Other options would be a fire basket, target point, plate bodkin, large broadhead...
We made good progress before Jame's mum arrived to take him away for the evening (though we managed to leave via the pub ). We got the basic three heads forged out with only finishing to be done on sunday morning.
Sunday morning was spent finishing the filing of arrowhead and the finishing of the arrows themselves:
Using some cut goose feathers bought from Quicks (cheating I know, but I didn't want to make this too tricky fro cold fingers ) we fletched the arrows. Each feather was whipped with thread and secured with glue. After the feathers were stuck fast we cut them to the desired shapes, I went for fairly low profile 3" fletching as that's what i know works with my setup, james went for 5" Medival style fletching coz it look sgood
Next the piles were put in place. the shafts were cut with a taper tool just to get it centred, but some of the arrows were tipped with field piles while others were tipped with my own handmade target tips (around th 100grain mark i think).
Lastly the arrows were liberally oiled and waxed to repel some of the moisture. Decals were stuck on to help identify arrows around the shoot.
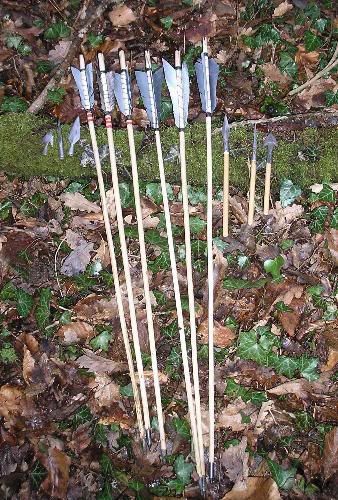
The finished arrows and heads

Mine are on the left and Jame's on the right
Luckily the weather relented for the afternoon and we were able to go out to the woods and try these babies out!
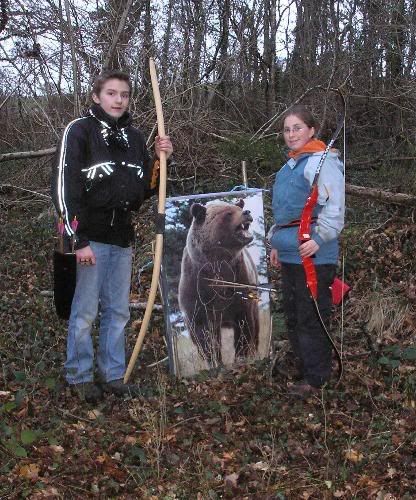
My better half, Charlotte, came along to make up numbers and halve an afternoon out. She of had a slightly more advanced setup than us with a modern recurve and alluminium arrows, but as she pointed out, she spent a lot of money on the kit and it hardly gets used!
After a couple of dozen practice arrows to work out where the things were going and just to varify that they were spined correctly for our bows, we went onto a small field course.
Currently it's a 15 target course setup as a Big Game round (unmarked distances, animal targets. Upto 3 arrows at each target with the first to hit scoring.) The targets are made of lamintated cardboard adn are a mixture or full size targets (ie rectangular with lots of background) and cut outs (the target is cut out to the shape of the animal, this is a poor-man's 3D).
The rain held off all afternoon and none of us lost an arrow, which in itself was a small miracle!
here is the biggest and longest shot

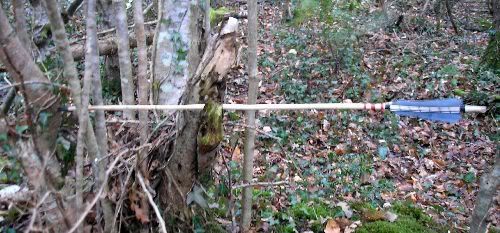
Only James managed to hit a tree. He did this from about 45yds!

No breakages luckily but the newly made arrows needed to be straightened throughout the course as the moisture affected them quite badly. A good time was had by all and the sun even came out for a short time
The course is still setup, so I'm off out there after lunch But I think I will use my shop bought shafts this time
Last weekend I held an arrowmaking workshop, sadly it was undersubscribed but I went ahead with it anyway
Unfortunately the weather turned against us, what with it raining the whole of saturday and most of sunday
Saturday morning a very excited Richard hammond lookalike arrived at my workshop with his own bow and some lovely ethnographic arrows (forget where from, but well over 100 years old I reckon). After the obligatory health and saftey bit we selected three shoots to convert into straight shooting arrows.
We stripped the shoots with a knife (used as a scraper)and then started teh straightening over a fire. we then used some sanding block and abrasives to continue the straightening process, reduce teh diameter of the thick ends and to smooth the shafts. Then we re straightened a little over the fire
Next the nocks needed to be cut. To do this we used a couple of hacksaw blades taped together, then we opened the slot and sanded the inside with sandpaper wraopped around a blade. The nocks were shaped to hold the bowstring of our own bows so that a pluck of the string would let the arrow off. Not too tight and not too loose
At this point we stopped with teh arrows and forged some arrowhead. James wnated to make a mail bodkin, leaf/diamond broadhead and a barbed head if possible. Other options would be a fire basket, target point, plate bodkin, large broadhead...
We made good progress before Jame's mum arrived to take him away for the evening (though we managed to leave via the pub
Sunday morning was spent finishing the filing of arrowhead and the finishing of the arrows themselves:
Using some cut goose feathers bought from Quicks (cheating I know, but I didn't want to make this too tricky fro cold fingers
Next the piles were put in place. the shafts were cut with a taper tool just to get it centred, but some of the arrows were tipped with field piles while others were tipped with my own handmade target tips (around th 100grain mark i think).
Lastly the arrows were liberally oiled and waxed to repel some of the moisture. Decals were stuck on to help identify arrows around the shoot.
The finished arrows and heads

Mine are on the left and Jame's on the right
Luckily the weather relented for the afternoon and we were able to go out to the woods and try these babies out!
My better half, Charlotte, came along to make up numbers and halve an afternoon out. She of had a slightly more advanced setup than us
After a couple of dozen practice arrows to work out where the things were going and just to varify that they were spined correctly for our bows, we went onto a small field course.
Currently it's a 15 target course setup as a Big Game round (unmarked distances, animal targets. Upto 3 arrows at each target with the first to hit scoring.) The targets are made of lamintated cardboard adn are a mixture or full size targets (ie rectangular with lots of background) and cut outs (the target is cut out to the shape of the animal, this is a poor-man's 3D).
The rain held off all afternoon and none of us lost an arrow, which in itself was a small miracle!
here is the biggest and longest shot

Only James managed to hit a tree. He did this from about 45yds!

No breakages luckily but the newly made arrows needed to be straightened throughout the course as the moisture affected them quite badly. A good time was had by all and the sun even came out for a short time
The course is still setup, so I'm off out there after lunch

