Ok chaps - I can't for the life of me remember if I ever posted this here before so mods please feel to move/ remove as necessary.
This is a very long read so go get a nice beverage and settle in - we seem to have a number of folks getting into blacksmithing at the minute and this is a post I wrote out some years ago for another forum that people have found helpful in the past so I thought I'd post it here too.
First of all I want to make it very clear that if you’re just starting out in blacksmithing you DO NOT NEED a “London Pattern anvil” to start hitting hot metal on. "Real" anvils are usually very expensive (your location in the world makes a big difference) not to mention relatively rare and hard to find.
All too often I see posts on forums or Facebook where a new smith has spent all of their spare cash because they “HAD” to have an anvil.
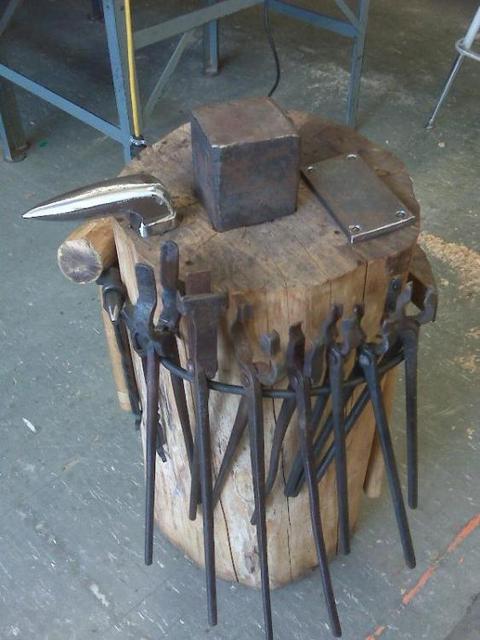
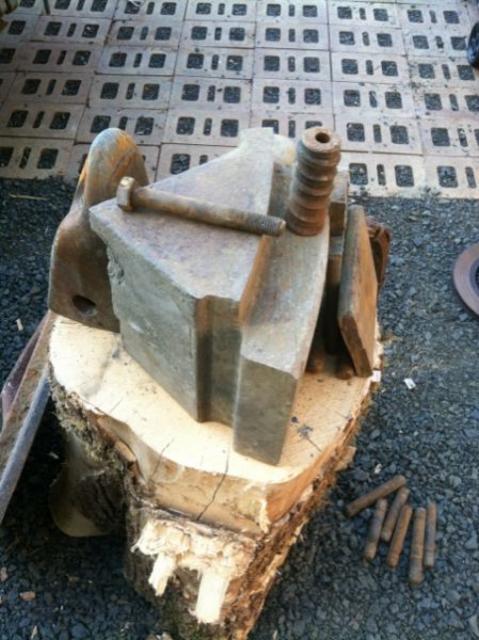
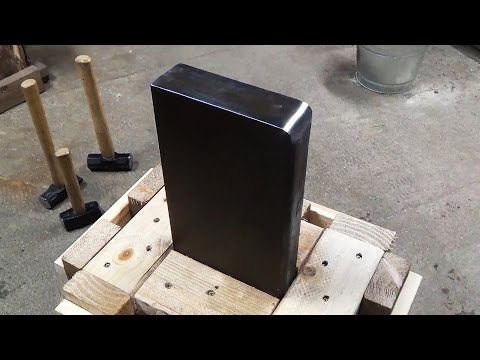
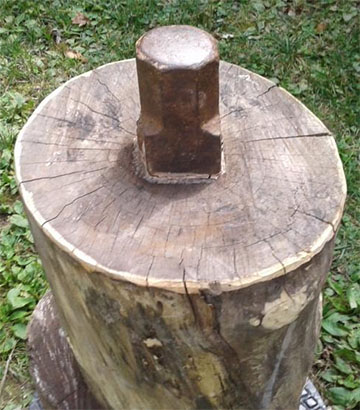
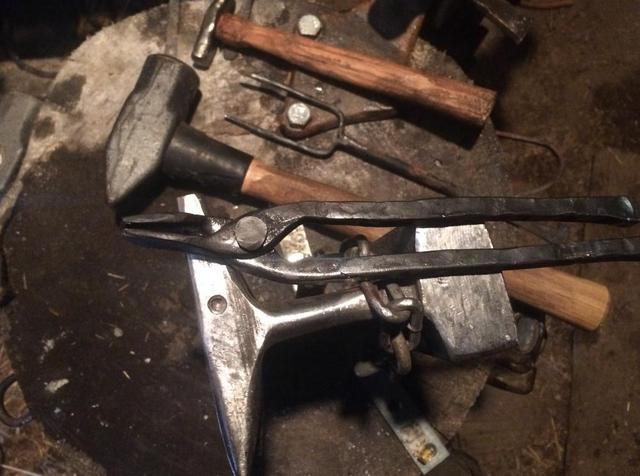
A large sledge hammer head, a section of rail track mounted vertically (more mass under the hammer) or any large chunk of scrap steel will make a perfectly serviceable anvil. Some are even better than a “real” anvil for one reason or another.
Also I’d like to make it very clear that this guide is aimed at newcomers to the craft and not seasoned smiths.
Also I’d like to note I’ve copied these images from the internet. All rights go to their respective owners. If you have an anvil that looks similar to the ones I’ve shown then please post them here so that we can use images from forum members. If anyone has issue with me using their image please let me know so I can take it down.
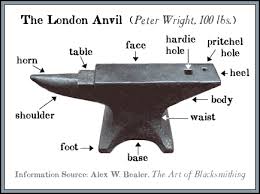
So this is the anatomy of an anvil:
Firstly lets look at a “Perfect” Anvil.
This is a brand new Refflinghaus anvil pictured on blksmth.com - The face is perfectly flat. The edges are straight and crisp. There’s nothing broken or missing. This is arguably the daddy of all anvils. A wonderful tool. If I could afford it I’d buy one. But the reality is I can’t.
Chances are that the anvil you are going to look at is very unlikely to look like the above. If it does you are either a) incredibly lucky or
 spending a great deal of money. Which is absolutely fine either way.
So you’ve saved up a wad of cash and have found an anvil within reasonable collecting distance. What do you need to know and what should you be looking for?
When going to view an anvil you need to bring a testing kit with you.
You will need:
A hammer
A 1” ball bearing
A ruler. (preferably metal)
A scraper if the anvil is covered in paint. More on all that later.
RULE NUMBER ONE: ALWAYS TAKE CASH WITH YOU AND BRING MORE THAN THE COST OF THE ANVIL!!!!
Step 1: Figure out what it’s made of.
The first thing for me would be to work out what it is made from. Generally speaking it really doesn’t matter at all. The only real thing you need to discern is whether or not it is made of cast iron. (the bad kind)
Just for your knowledge though: There are several materials anvils can be made from - in no particular order.
Wrought iron body with welded steel face.
The oldest construction method of the bunch. These anvils have a forged wrought iron body with a steel face welded to the top. There are numerous British and American makers that used this method and it makes a superb anvil. The fact that so many survive today is a testament to the quality of their construction methods. - Older anvils had the face plate made up of several different pieces of steel, as steel was harder to make in large sections. Notable makers include Mousehole Forge, Peter Wright, Hill, Isaac Nash, Henry Wright, Wilkinsons and many others.
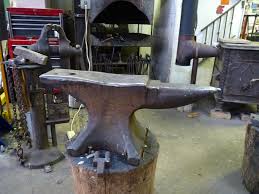
All forged anvils have identifying features that give away their construction. The most obvious is the presence of handling holes at the waste of the anvil and often a handling hole under the base of the anvil. This is where large tongs gripped the body while it was forged.
Another indication of forged construction is having a stamped makers mark, depressed into the steel rather than raised out of it.Forged wrought iron anvils have two very common “faults” - “delamination” and “sway”. More on these later.
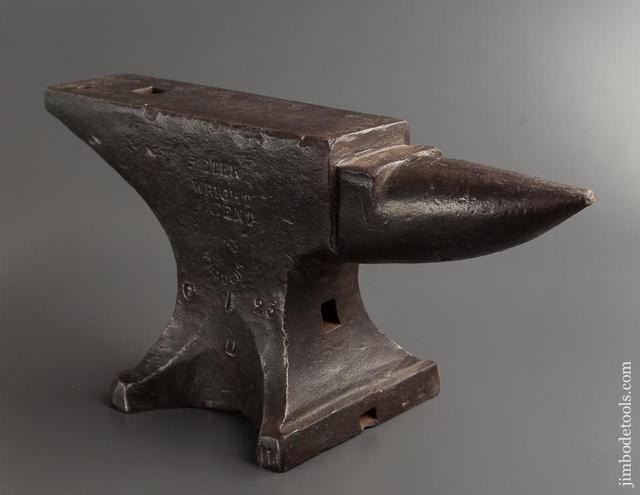

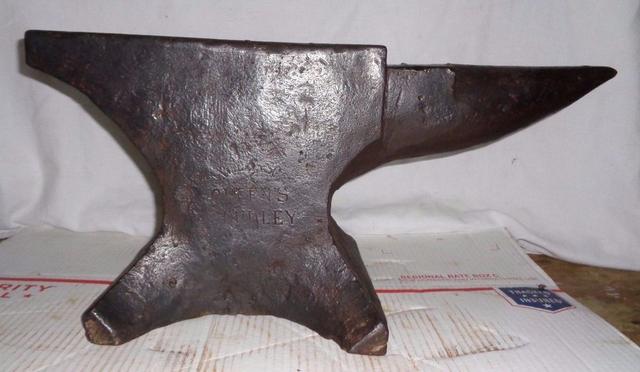
I’ve inserted an image of a forged anvil. This is a Peter Wright. Notice the handling holes at the waste and under the base. Also note the extra handling hole in the feet, this is characteristic of Peter and Henry Wright anvils. You can also make out the stamp in the picture.
Another thing to note here is that I often see beginners try to identify anvils for one another on Facebook with some very strong opinions on what the anvil “DEFINITELY” is. If you are trying to identify an anvil with no clear markings I would suggest asking the forum or PM me directly. There are too many armchair experts out there who quite frankly have absolutely no clue what they are talking about.
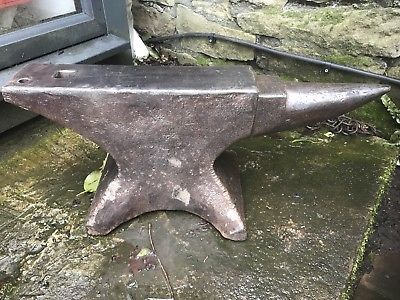
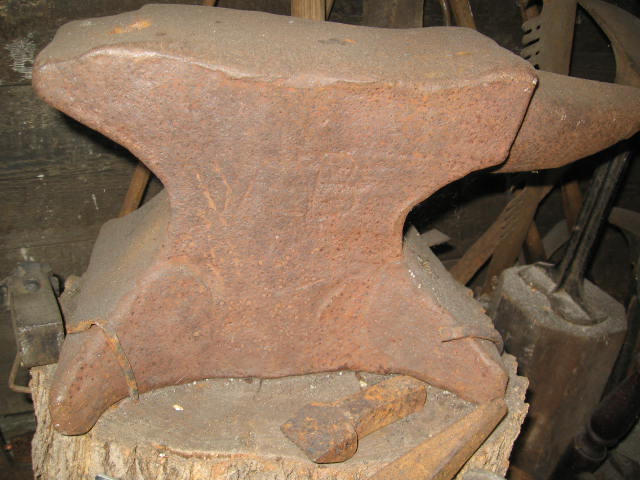
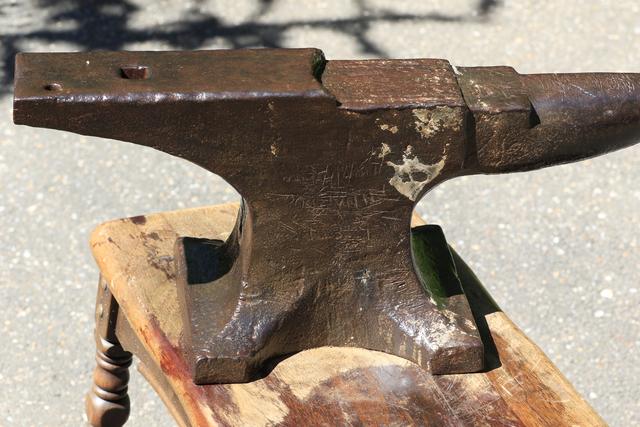
Case and point is that there were literally HUNDREDS of forges making anvils in Britain. Below is a forged English anvil. NOT ALL ENGLISH ANVILS ARE THE “MOUSEHOLE” BRAND. - A great many makers made anvils with the same features as Mousehole Forge. The above anvil shares all the features of a Mousehole but I don’t see a makers name. As such it is likely not made by Mousehole.

Cast Steel
With technological advances and cheaper steel makers were able to cast entire anvils. Depending on the maker these can be hard to identify but will typically lack handling holes of any kind. - The biggest giveaway to a cast anvil is raised lettering on the body.
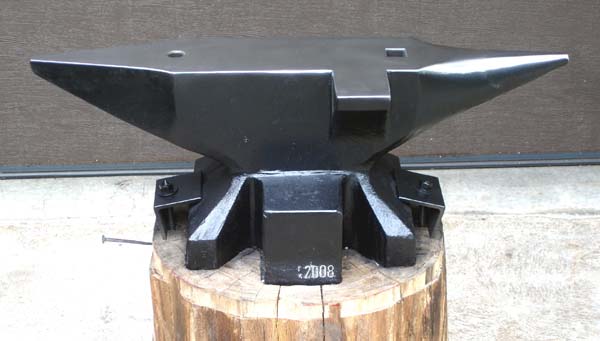
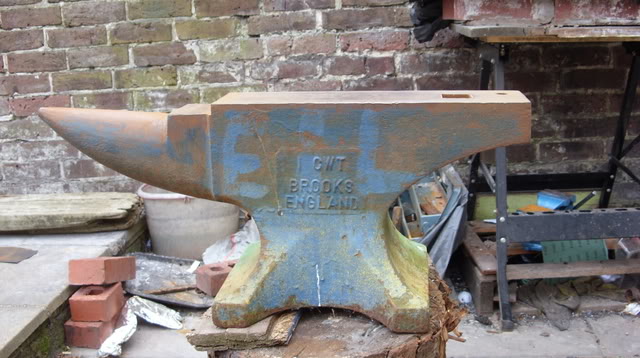
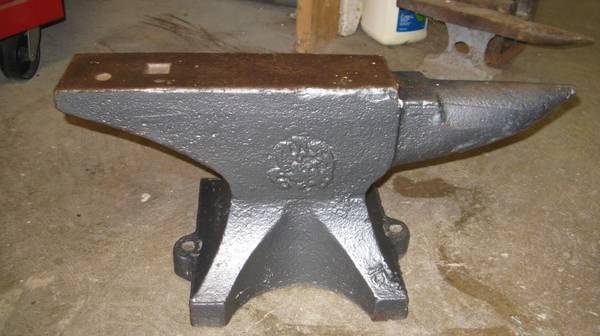
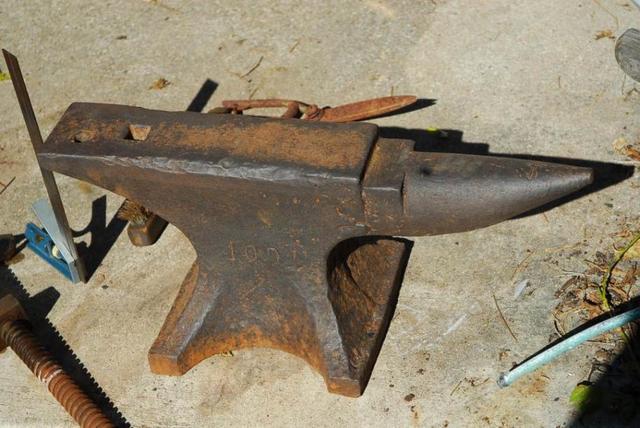
Below is an image of a Brooks anvil. Note the parting line running centrally up the anvil and the raised lettering on the side.
Cast anvils are generally less prone to sway, but it can happen. The issue many cast steel anvils have is chipped edges. More on this later.

Cast iron with welded steel face: (Henceforth called CISF) -
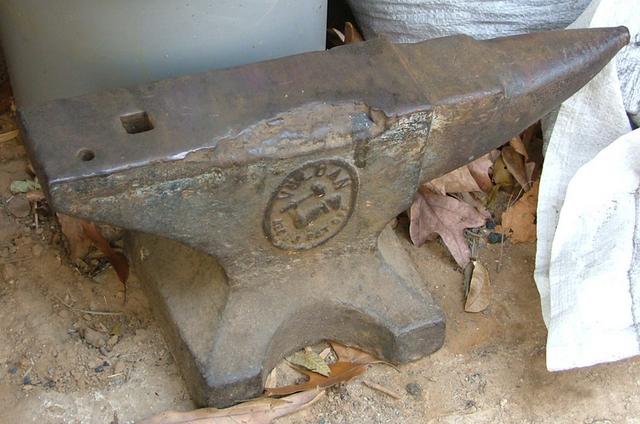
There are several American makers that constructed anvils in this way. Fisher, Badger, Star and Vulcan are the ones I know of though there may be a few more. These have a cast iron body with a steel face welded to it producing a perfectly good anvil. Though beware, Vulcan anvils are generally considered poorer quality as they had very thin face plates that were very likely to chip in use. Fisher face plates were quite hard I believe and are also prone to chipping. - It is worth noting that this method of construction produced an anvil which doesn’t “ring” and as such are relatively quiet. If the smith has concerns with noise, an anvil made this way would be a good investment.
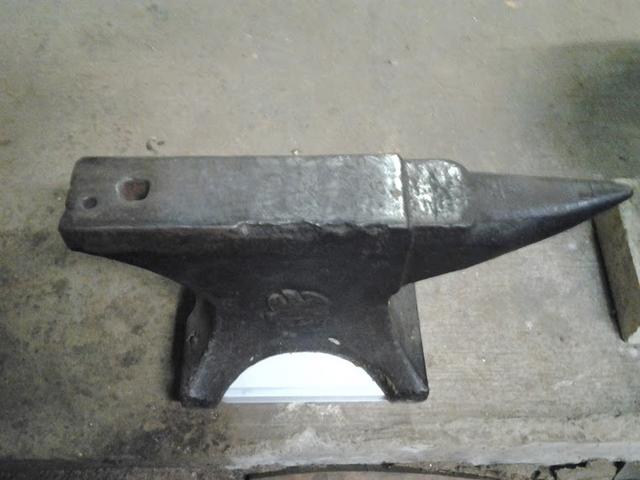
Below is an image of a Fisher anvil. Notice the raised numbers and makers mark indicating a cast anvil. If you are faced with an obviously cast anvil but do not recognise the makers mark, posting it to a Facebook group via your phone (assuming you have a smartphone) will often lead to a quick identification. HOWEVER google that maker yourself just to clarify it.
- Please note here that CISF anvils are not typically found in the UK. Some examples did make it over but these are few and far between. Should anyone happen to spot a Fisher anvil - I call dibs. I own one already and know of 3 others in the country.

Cast ductile iron
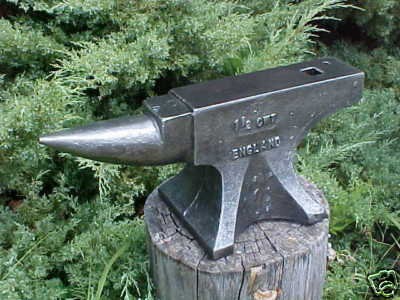
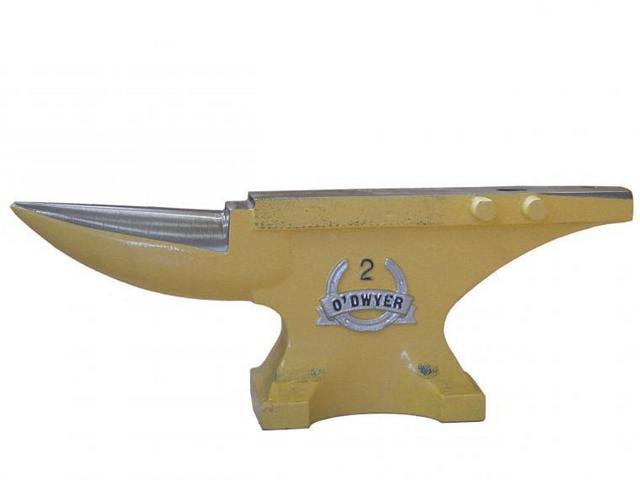
- the last of the decent anvil construction materials. Ductile iron is similar to cast iron but much much stronger. IT makes for a relatively soft anvil but is vastly superior to cast iron. I believe only a few modern makers use ductile iron - they are made specifically for farriers. Below is an O’Dwyer farriers anvil. Identification of these should be rather easy. - As an update I am told that O'Dwyer now use cast steel. As such it will only be their older models that use ductile Iron.

Cast iron:
- Finally the worst of all the materials. Cast iron is brittle, weak and frankly an awful material to make an anvil from. These will dent and chip in use and should really only be considered if you honestly have no access to a large sledge hammer head or chunk of scrap steel. The money spent on a new cast iron anvil should easily cover the cost of a cheap hardware store sledge hammer which will serve you far better in the long run.
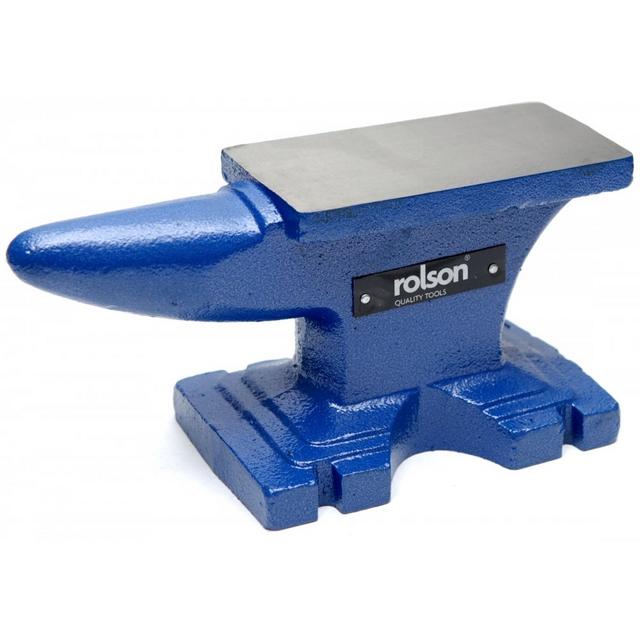
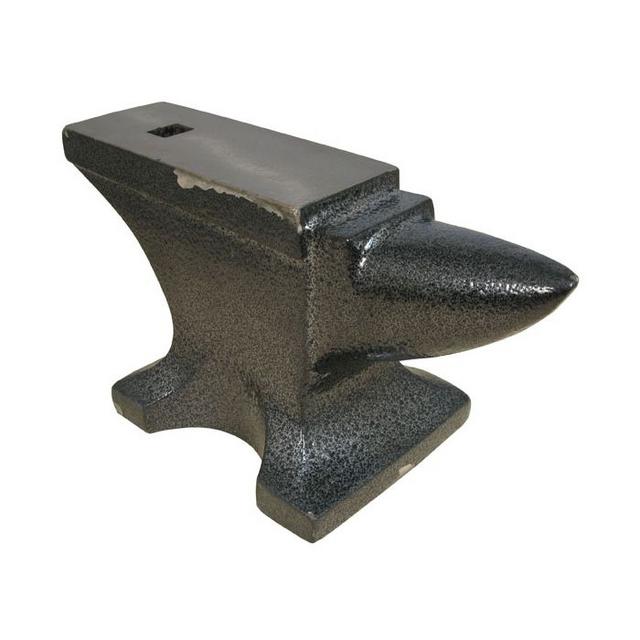
Cast iron anvils come in several shapes and forms. They are very easy to spot once you know what you're looking at. The proportions of the anvil will be wrong. The horn will likely be either very short and stubby or flat. Or both. The overall shape often looks wrong and they will typically be very small in size. Less than 20lbs in most cases. They often have no pritchel/ hardy hole or no hole at all. Sometimes the hardy hole is smaller than the pritchel hole. The cutting table will be very short if present. And they're almost always painted blue... Pictured are all cast iron junk anvils.


This is a very long read so go get a nice beverage and settle in - we seem to have a number of folks getting into blacksmithing at the minute and this is a post I wrote out some years ago for another forum that people have found helpful in the past so I thought I'd post it here too.
First of all I want to make it very clear that if you’re just starting out in blacksmithing you DO NOT NEED a “London Pattern anvil” to start hitting hot metal on. "Real" anvils are usually very expensive (your location in the world makes a big difference) not to mention relatively rare and hard to find.
All too often I see posts on forums or Facebook where a new smith has spent all of their spare cash because they “HAD” to have an anvil.
A large sledge hammer head, a section of rail track mounted vertically (more mass under the hammer) or any large chunk of scrap steel will make a perfectly serviceable anvil. Some are even better than a “real” anvil for one reason or another.
Also I’d like to make it very clear that this guide is aimed at newcomers to the craft and not seasoned smiths.
Also I’d like to note I’ve copied these images from the internet. All rights go to their respective owners. If you have an anvil that looks similar to the ones I’ve shown then please post them here so that we can use images from forum members. If anyone has issue with me using their image please let me know so I can take it down.
So this is the anatomy of an anvil:
Firstly lets look at a “Perfect” Anvil.
This is a brand new Refflinghaus anvil pictured on blksmth.com - The face is perfectly flat. The edges are straight and crisp. There’s nothing broken or missing. This is arguably the daddy of all anvils. A wonderful tool. If I could afford it I’d buy one. But the reality is I can’t.
Chances are that the anvil you are going to look at is very unlikely to look like the above. If it does you are either a) incredibly lucky or
So you’ve saved up a wad of cash and have found an anvil within reasonable collecting distance. What do you need to know and what should you be looking for?
When going to view an anvil you need to bring a testing kit with you.
You will need:
A hammer
A 1” ball bearing
A ruler. (preferably metal)
A scraper if the anvil is covered in paint. More on all that later.
RULE NUMBER ONE: ALWAYS TAKE CASH WITH YOU AND BRING MORE THAN THE COST OF THE ANVIL!!!!
Step 1: Figure out what it’s made of.
The first thing for me would be to work out what it is made from. Generally speaking it really doesn’t matter at all. The only real thing you need to discern is whether or not it is made of cast iron. (the bad kind)
Just for your knowledge though: There are several materials anvils can be made from - in no particular order.
Wrought iron body with welded steel face.
The oldest construction method of the bunch. These anvils have a forged wrought iron body with a steel face welded to the top. There are numerous British and American makers that used this method and it makes a superb anvil. The fact that so many survive today is a testament to the quality of their construction methods. - Older anvils had the face plate made up of several different pieces of steel, as steel was harder to make in large sections. Notable makers include Mousehole Forge, Peter Wright, Hill, Isaac Nash, Henry Wright, Wilkinsons and many others.
All forged anvils have identifying features that give away their construction. The most obvious is the presence of handling holes at the waste of the anvil and often a handling hole under the base of the anvil. This is where large tongs gripped the body while it was forged.
Another indication of forged construction is having a stamped makers mark, depressed into the steel rather than raised out of it.Forged wrought iron anvils have two very common “faults” - “delamination” and “sway”. More on these later.
I’ve inserted an image of a forged anvil. This is a Peter Wright. Notice the handling holes at the waste and under the base. Also note the extra handling hole in the feet, this is characteristic of Peter and Henry Wright anvils. You can also make out the stamp in the picture.
Another thing to note here is that I often see beginners try to identify anvils for one another on Facebook with some very strong opinions on what the anvil “DEFINITELY” is. If you are trying to identify an anvil with no clear markings I would suggest asking the forum or PM me directly. There are too many armchair experts out there who quite frankly have absolutely no clue what they are talking about.
Case and point is that there were literally HUNDREDS of forges making anvils in Britain. Below is a forged English anvil. NOT ALL ENGLISH ANVILS ARE THE “MOUSEHOLE” BRAND. - A great many makers made anvils with the same features as Mousehole Forge. The above anvil shares all the features of a Mousehole but I don’t see a makers name. As such it is likely not made by Mousehole.
Cast Steel
With technological advances and cheaper steel makers were able to cast entire anvils. Depending on the maker these can be hard to identify but will typically lack handling holes of any kind. - The biggest giveaway to a cast anvil is raised lettering on the body.
Below is an image of a Brooks anvil. Note the parting line running centrally up the anvil and the raised lettering on the side.
Cast anvils are generally less prone to sway, but it can happen. The issue many cast steel anvils have is chipped edges. More on this later.
Cast iron with welded steel face: (Henceforth called CISF) -
There are several American makers that constructed anvils in this way. Fisher, Badger, Star and Vulcan are the ones I know of though there may be a few more. These have a cast iron body with a steel face welded to it producing a perfectly good anvil. Though beware, Vulcan anvils are generally considered poorer quality as they had very thin face plates that were very likely to chip in use. Fisher face plates were quite hard I believe and are also prone to chipping. - It is worth noting that this method of construction produced an anvil which doesn’t “ring” and as such are relatively quiet. If the smith has concerns with noise, an anvil made this way would be a good investment.
Below is an image of a Fisher anvil. Notice the raised numbers and makers mark indicating a cast anvil. If you are faced with an obviously cast anvil but do not recognise the makers mark, posting it to a Facebook group via your phone (assuming you have a smartphone) will often lead to a quick identification. HOWEVER google that maker yourself just to clarify it.
- Please note here that CISF anvils are not typically found in the UK. Some examples did make it over but these are few and far between. Should anyone happen to spot a Fisher anvil - I call dibs. I own one already and know of 3 others in the country.
Cast ductile iron
- the last of the decent anvil construction materials. Ductile iron is similar to cast iron but much much stronger. IT makes for a relatively soft anvil but is vastly superior to cast iron. I believe only a few modern makers use ductile iron - they are made specifically for farriers. Below is an O’Dwyer farriers anvil. Identification of these should be rather easy. - As an update I am told that O'Dwyer now use cast steel. As such it will only be their older models that use ductile Iron.
Cast iron:
- Finally the worst of all the materials. Cast iron is brittle, weak and frankly an awful material to make an anvil from. These will dent and chip in use and should really only be considered if you honestly have no access to a large sledge hammer head or chunk of scrap steel. The money spent on a new cast iron anvil should easily cover the cost of a cheap hardware store sledge hammer which will serve you far better in the long run.
Cast iron anvils come in several shapes and forms. They are very easy to spot once you know what you're looking at. The proportions of the anvil will be wrong. The horn will likely be either very short and stubby or flat. Or both. The overall shape often looks wrong and they will typically be very small in size. Less than 20lbs in most cases. They often have no pritchel/ hardy hole or no hole at all. Sometimes the hardy hole is smaller than the pritchel hole. The cutting table will be very short if present. And they're almost always painted blue... Pictured are all cast iron junk anvils.
Last edited:


")
 . I'm the same as Nomad with the images, they're not coming through.