N
Nomad
Guest
I decided it was time I had an ancient artifact. Making this will take a while, so expect a series of posts over time showing the various steps. Readers are welcome to try and guess what it is as things proceed.
First, I got two bits of brass...

The big bit is 12" square and 1.2mm thick, and the other is 12x8" and 0.25mm thick.
The smaller bit is put aside for now, and the larger bit is fixed onto some sacrificial MDF...

For those that aren't aware, this is known as the superglue and masking tape trick, known to wizened old luthiers from the days when there wasn't even any masking tape, never mind superglue. You put some strips of tape onto the two things to be bonded, add a bead of medium viscosity superglue along the middle of each strip and then press them together, making sure things are aligned as desired (a particular corner to corner in this case). The result is a bond that is incredibly strong in shear, but is relatively easy to break in tension. That means it can't move sideways, but can be pulled apart when you're done. Using masking tape means no residue to clean off, which is what would happen with conventional double-sided tape.
The same trick is used to hold another bit of MDF on the table of the bandsaw...
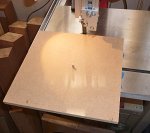
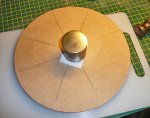
This bit, as you can see, has a dowel in the middle. There's a matching hole on the underside of the sacrificial piece holding the brass. When the latter is mounted onto the saw, the setup functions as a basic turntable. It looks like this...
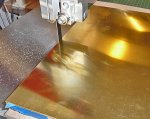
The setup is such that the corner of the brass at the bottom left is the reference that's measured from to determine the position of the hole that's over the dowel. The distances are such that, when the brass and MDF sandwich is rotated and cut, I'll get a 10" diameter circle while maximising the amount of brass I get as a single piece in the offcuts.
Part-way through...
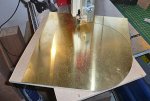
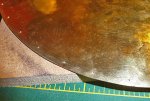
The blade in the saw is a fine-toothed one that's suitable for cutting non-ferrous metals as well as wood. Taking things slowly, it made a nice, clean cut...

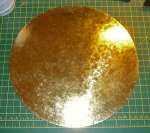
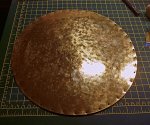
...to end up with the 10" diameter bit, a small offcut from the aforementioned reference corner, and one large offcut. I'll be using bits of offcut to do a couple of experiments to refine techniques before trying them on the main piece, and hopefully have enough left over to have some handy brass sheet for stock.
More anon.
First, I got two bits of brass...

The big bit is 12" square and 1.2mm thick, and the other is 12x8" and 0.25mm thick.
The smaller bit is put aside for now, and the larger bit is fixed onto some sacrificial MDF...

For those that aren't aware, this is known as the superglue and masking tape trick, known to wizened old luthiers from the days when there wasn't even any masking tape, never mind superglue. You put some strips of tape onto the two things to be bonded, add a bead of medium viscosity superglue along the middle of each strip and then press them together, making sure things are aligned as desired (a particular corner to corner in this case). The result is a bond that is incredibly strong in shear, but is relatively easy to break in tension. That means it can't move sideways, but can be pulled apart when you're done. Using masking tape means no residue to clean off, which is what would happen with conventional double-sided tape.
The same trick is used to hold another bit of MDF on the table of the bandsaw...

This bit, as you can see, has a dowel in the middle. There's a matching hole on the underside of the sacrificial piece holding the brass. When the latter is mounted onto the saw, the setup functions as a basic turntable. It looks like this...

The setup is such that the corner of the brass at the bottom left is the reference that's measured from to determine the position of the hole that's over the dowel. The distances are such that, when the brass and MDF sandwich is rotated and cut, I'll get a 10" diameter circle while maximising the amount of brass I get as a single piece in the offcuts.
Part-way through...

The blade in the saw is a fine-toothed one that's suitable for cutting non-ferrous metals as well as wood. Taking things slowly, it made a nice, clean cut...

...to end up with the 10" diameter bit, a small offcut from the aforementioned reference corner, and one large offcut. I'll be using bits of offcut to do a couple of experiments to refine techniques before trying them on the main piece, and hopefully have enough left over to have some handy brass sheet for stock.
More anon.

