Okay, following up on a recent post about emergency preparedness, picture this: your power has just gone out. It is the middle of winter, and the battery-powered radio reports that a major substation has suffered an outage due to iced-over power cables. You are told to expect that power will return in no less than 7 days. So you get out all the blankets in the house, and warm up the bed. You find your 72 hour kit, first aid kit, candles, flashlights, your food supplies (some freeze-dried entrees and cans of food), water, radio and more. After all that fussing around, you decide you want a nice cup of coffee and a hot meal. You have a camping stove that runs on naptha but you'd rather use that outside so the fuel doesn't smell so strongly. You need a quick stove for in the house. A good option for this is an alcohol stove.
I was at a dollar store the other day wandering around the aisles. Other than the things we were actually going there to get, I started browsing the shelves with an eye on camping and bushcrafty things - products I could use directly or indirectly to fuel the fire of my hobby.
I saw a pile of Fondu Fuel bottles containing denatured alcohol and had a little ponder. After a minute of semi-deep thought, I decided that finally it was time I made a Coke Can Stove.
Boiling water is obviously important when camping or hiking or during a power outage. With one you can make hot drinks, heat meals (boil in a bag, or heat straight from the can), cook rice or eggs, wash for regular hygiene or for first-aid reasons, sterilize gauze or needles or sutures, and much more.
Now this is a very simple little stove. All that is needed to build one is a pair of Coke Cans (specifically the bottom half of each can), a tuna can or some kind of base, something to cut the drink cans (knife or scissors) and something to poke holes in the drink cans (pin, or drill, or awl, or a nail). Into the stove you pour the denatured alcohol, light it and heat up your food or boil water for tea.
Anway, all I know is that it took me about 15 minutes to assemble a Coke Can Stove. Here is how you can do it too:
Acquire two cans of Coke and drink them quickly and grab a can of Tuna - consume tuna quickly. Rinse out the cans.
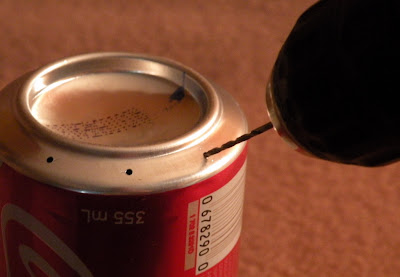
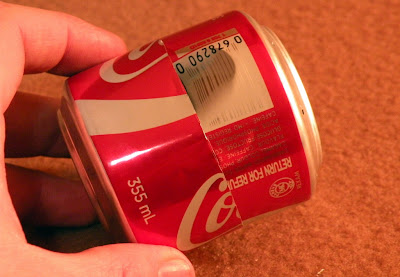
First of all drill roughly 8 to 14 1/16th holes into the rim of one can - you can also use the awl on a pocket knife or a pin mounted in an Exacto-Blade sheath. These holes are the gas jets. Also drill 3 1/16th holes into the center of the concave section. These will serve as gas jets also, but primarily as the fuel-filling holes.

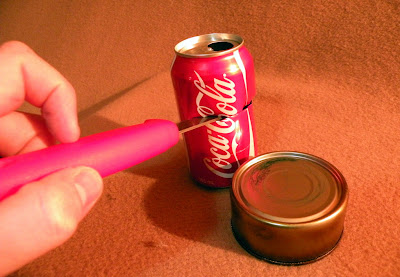
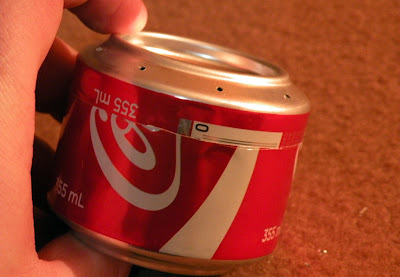
Carefully score each Coke can an inch from the bottom using the tip of your knife resting on a solid item about 1 1/2 inches high (I'm using the tuna can above). Rotate the can against it a few times. This will keept the score consistent and level.
Then remove the tops of each can by roughly cutting an inch above the score.
Dispose of the cut off tops (recycle them).
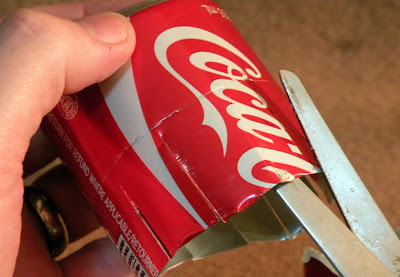
Slowly working your way around, cut tabs down to just above the score marks on each can using scissors.
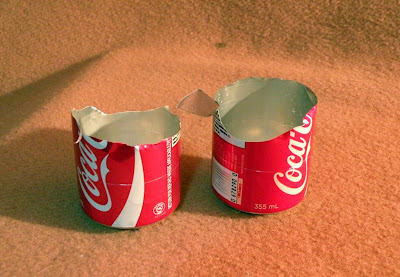
Bend them back and forth to get a neat break at the score line. This makes a very clean and straight edge.
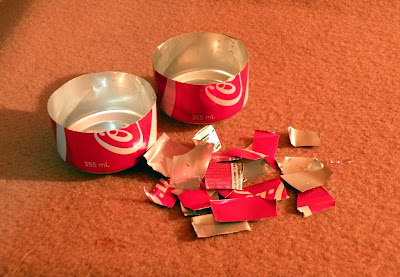
Dispose of the tabs (recycle them).
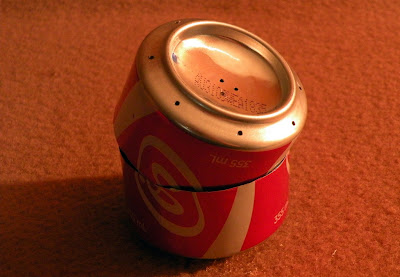
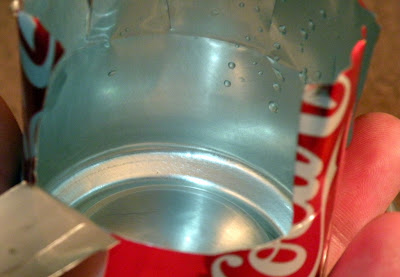
The next step is to nest the two halves together, top into the bottom.

You may find that bending little indentations in the top piece will help you slip it into the bottom piece.
Be patient, it seems tricky, but you'll get it.
Once it starts nesting, firmly and carefully tap the top section into place using a heavy object like a full can or a book.

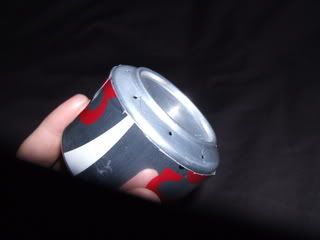
In the image above, you can see the fuel jets and the filling holes.

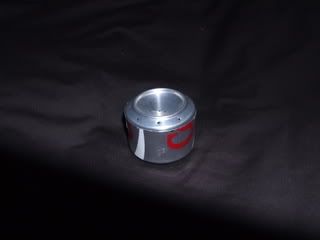
This is a lightweight stove, which is also pretty tough. You can carry one around in your jacket pocket. The fuel is stored separately.
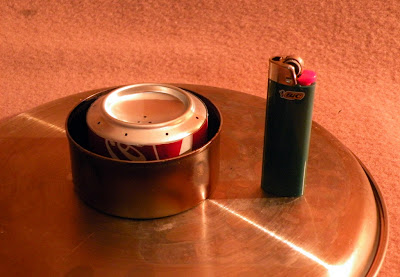
I'm using a metal tray for safety above. The Bic lighter will get the stove going.
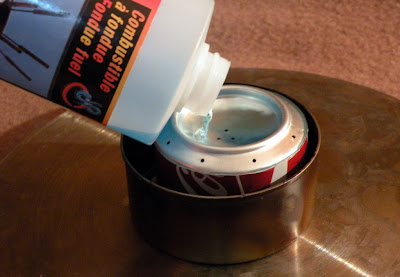
Fill the concave cavity about 3 times with fuel and allow it to drain into the stove.
Then pour about a teaspoon of fluid onto the priming section (in this case the tuna can). The fuel within the stove needs to be primed before it can ignite - i.e. it is heated by the external flame on the priming surface until alcohol fumes are pressurized and are emitted from the fuel jets.

Above you can see the priming flames begin to heat the stove and the fuel within.
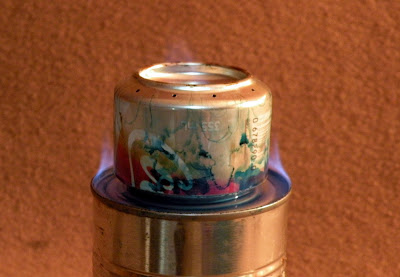
Here too - but I have used a regular empty tin can as the priming surface (better for the photograph). Soon the priming flames will exhaust themselves and burn out, hopefully not before doing their job.
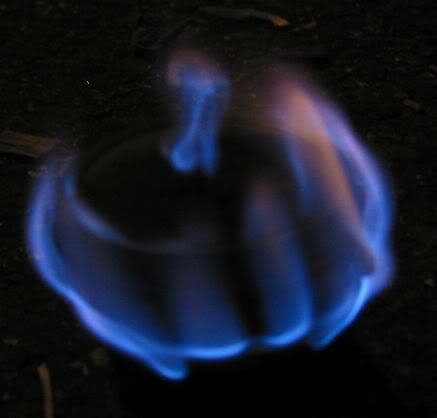
See the priming flames on the side of the stove in the image above, and the pressurized fuel jets beginning to ignite.
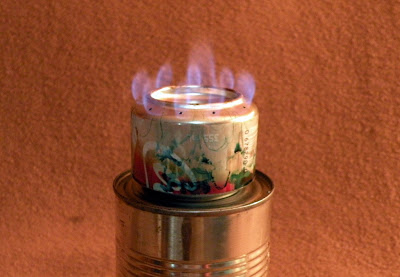
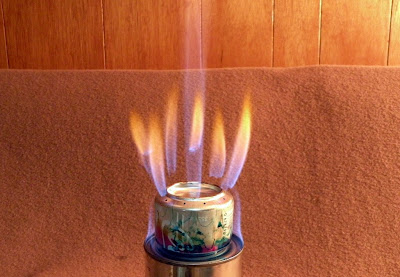
Here the initial burst of pressure has subsided, replaced with the regular fuel jets burning. They will increase in size in a minute or so, once the stove has warmed up.
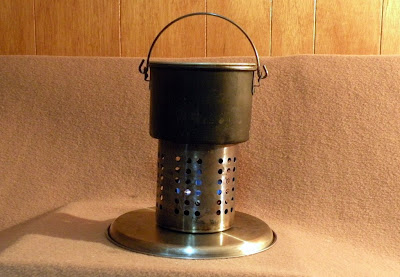
In the image above, I have placed the stove within an Ikea cutlery drainer which I have used as a wood stove. Above it I have placed a camping pot full of water. It took about 10 minutes for 1 1/2 liters of water to come to a boil, shortly before the stove ran out of alcohol fuel.
You can keep one of these stoves at home, one in the car and one in your jacket pocket for the moment that you need hot cocoa.
Let me know if you have any questions please about the construction of this stove.
Cheers,
Mungo
I was at a dollar store the other day wandering around the aisles. Other than the things we were actually going there to get, I started browsing the shelves with an eye on camping and bushcrafty things - products I could use directly or indirectly to fuel the fire of my hobby.
I saw a pile of Fondu Fuel bottles containing denatured alcohol and had a little ponder. After a minute of semi-deep thought, I decided that finally it was time I made a Coke Can Stove.
Boiling water is obviously important when camping or hiking or during a power outage. With one you can make hot drinks, heat meals (boil in a bag, or heat straight from the can), cook rice or eggs, wash for regular hygiene or for first-aid reasons, sterilize gauze or needles or sutures, and much more.
Now this is a very simple little stove. All that is needed to build one is a pair of Coke Cans (specifically the bottom half of each can), a tuna can or some kind of base, something to cut the drink cans (knife or scissors) and something to poke holes in the drink cans (pin, or drill, or awl, or a nail). Into the stove you pour the denatured alcohol, light it and heat up your food or boil water for tea.
Anway, all I know is that it took me about 15 minutes to assemble a Coke Can Stove. Here is how you can do it too:
Acquire two cans of Coke and drink them quickly and grab a can of Tuna - consume tuna quickly. Rinse out the cans.

First of all drill roughly 8 to 14 1/16th holes into the rim of one can - you can also use the awl on a pocket knife or a pin mounted in an Exacto-Blade sheath. These holes are the gas jets. Also drill 3 1/16th holes into the center of the concave section. These will serve as gas jets also, but primarily as the fuel-filling holes.

Carefully score each Coke can an inch from the bottom using the tip of your knife resting on a solid item about 1 1/2 inches high (I'm using the tuna can above). Rotate the can against it a few times. This will keept the score consistent and level.

Then remove the tops of each can by roughly cutting an inch above the score.

Dispose of the cut off tops (recycle them).

Slowly working your way around, cut tabs down to just above the score marks on each can using scissors.

Bend them back and forth to get a neat break at the score line. This makes a very clean and straight edge.

Dispose of the tabs (recycle them).

The next step is to nest the two halves together, top into the bottom.

You may find that bending little indentations in the top piece will help you slip it into the bottom piece.

Be patient, it seems tricky, but you'll get it.

Once it starts nesting, firmly and carefully tap the top section into place using a heavy object like a full can or a book.

In the image above, you can see the fuel jets and the filling holes.

This is a lightweight stove, which is also pretty tough. You can carry one around in your jacket pocket. The fuel is stored separately.

I'm using a metal tray for safety above. The Bic lighter will get the stove going.

Fill the concave cavity about 3 times with fuel and allow it to drain into the stove.
Then pour about a teaspoon of fluid onto the priming section (in this case the tuna can). The fuel within the stove needs to be primed before it can ignite - i.e. it is heated by the external flame on the priming surface until alcohol fumes are pressurized and are emitted from the fuel jets.

Above you can see the priming flames begin to heat the stove and the fuel within.

Here too - but I have used a regular empty tin can as the priming surface (better for the photograph). Soon the priming flames will exhaust themselves and burn out, hopefully not before doing their job.

See the priming flames on the side of the stove in the image above, and the pressurized fuel jets beginning to ignite.

Here the initial burst of pressure has subsided, replaced with the regular fuel jets burning. They will increase in size in a minute or so, once the stove has warmed up.

In the image above, I have placed the stove within an Ikea cutlery drainer which I have used as a wood stove. Above it I have placed a camping pot full of water. It took about 10 minutes for 1 1/2 liters of water to come to a boil, shortly before the stove ran out of alcohol fuel.
You can keep one of these stoves at home, one in the car and one in your jacket pocket for the moment that you need hot cocoa.
Let me know if you have any questions please about the construction of this stove.
Cheers,
Mungo
")