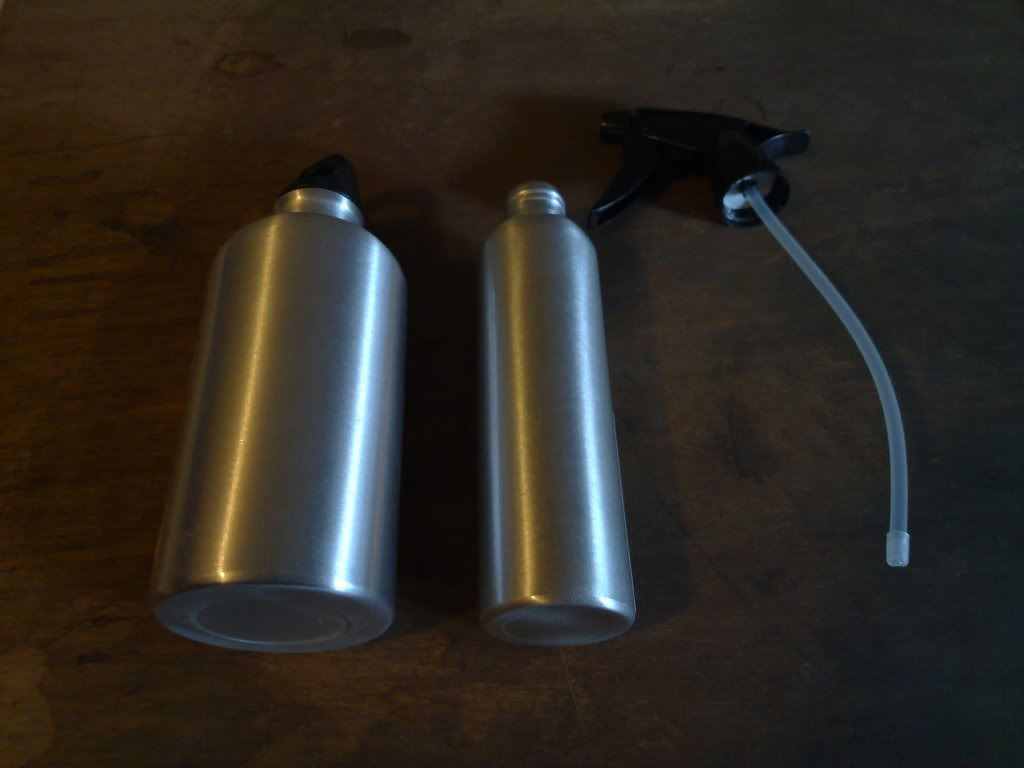
I noticed some aluminium bottled, pump spray applicators, in Poundland, so decided to make a miniature version of the good old aluminium bottle alcohol stove.
The bottles are pretty much the same design, but around half the diameter.
Here are the steps, for those no aware of the process.
1: Mark the bottle at the top and bottom, the same distance from each end.
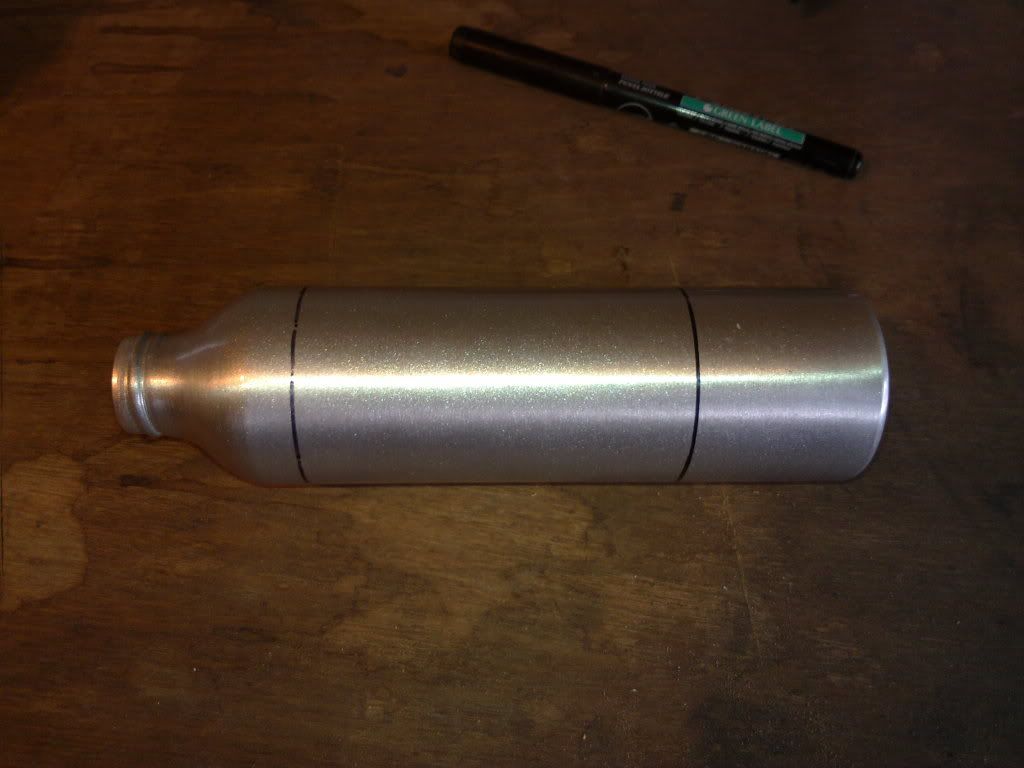
2: Cut the bottle into three pieces, along these two lines. It's easier if you use a mitre block, to help keep the cuts straight.

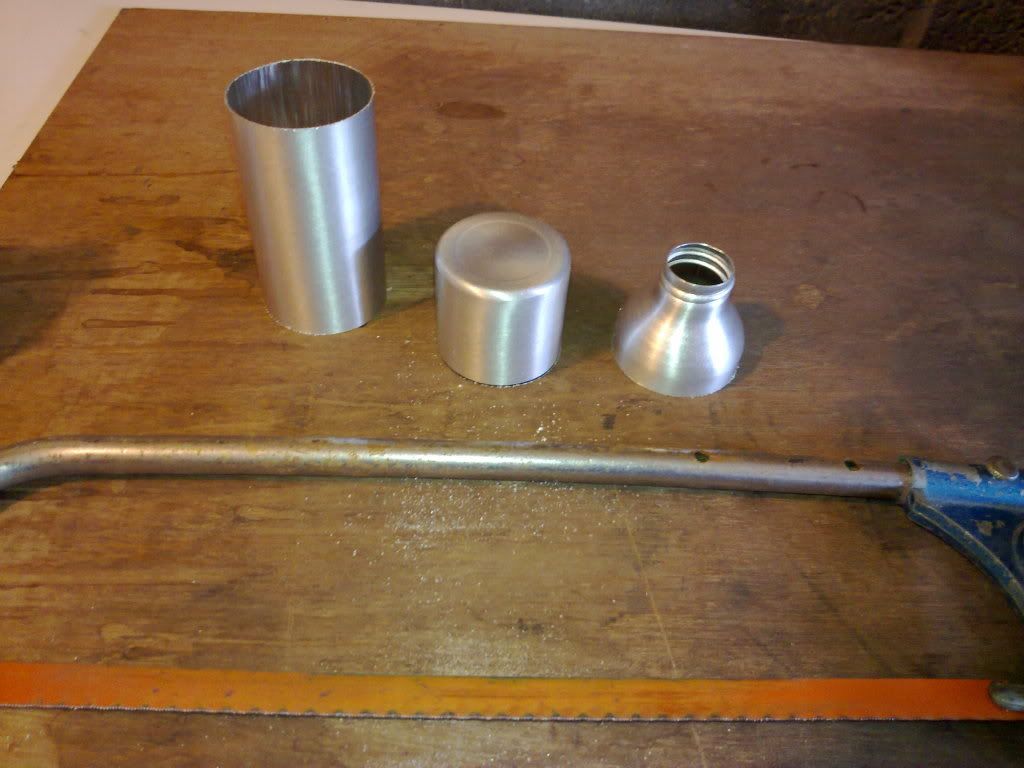
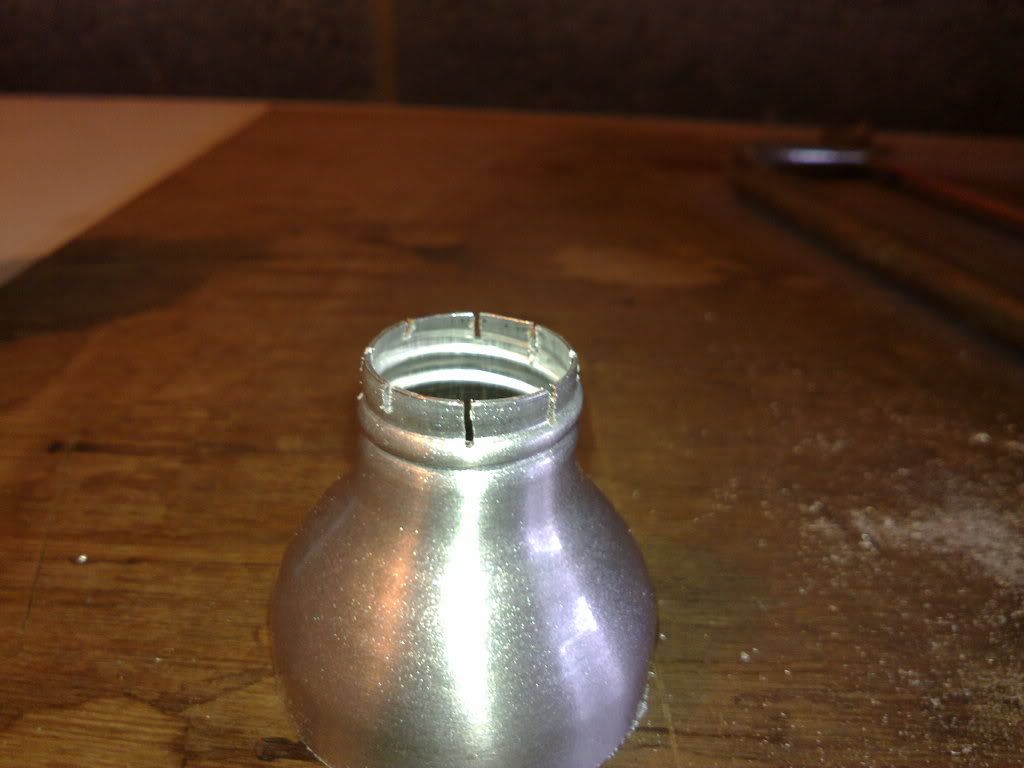
3: Make four cuts, across the mouth of what used to be the top, of the bottle. This creates 8 small notches, that allow the fuel to pass into the pressure chamber.
4: Turn the top section and insert the mouth of the bottle (the narrow end) into the bottom section, like so...

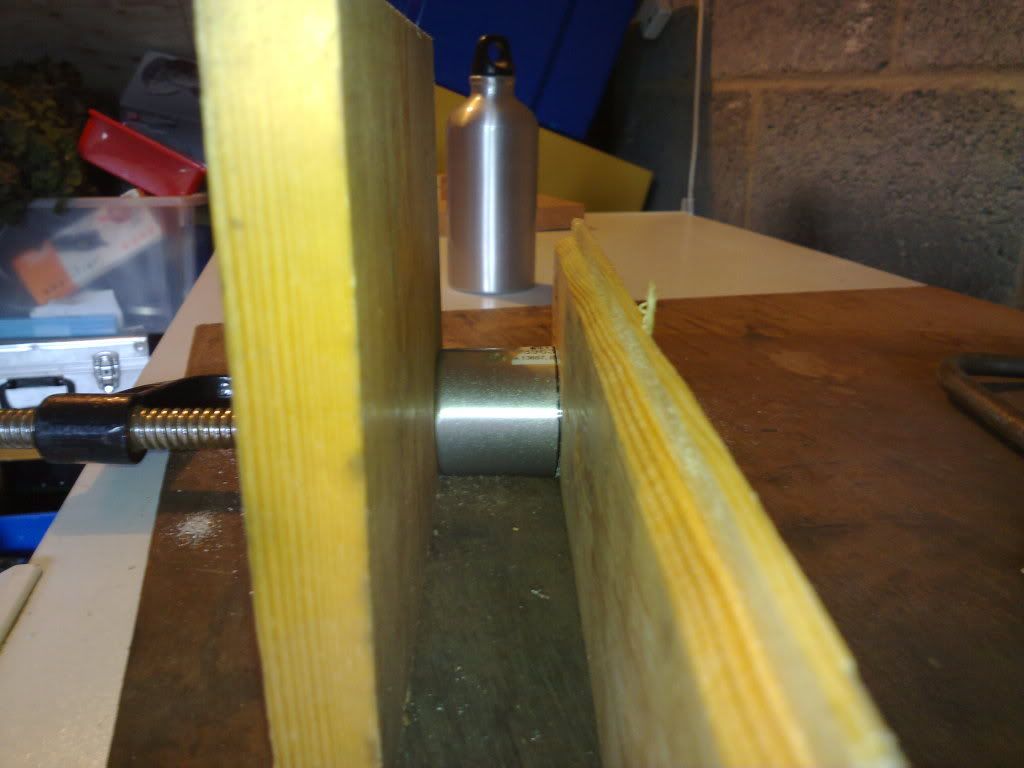
5: place these sections between two pieces of board, then between the jaws of a large clamp. Make sure the ends are as parallel as possible.
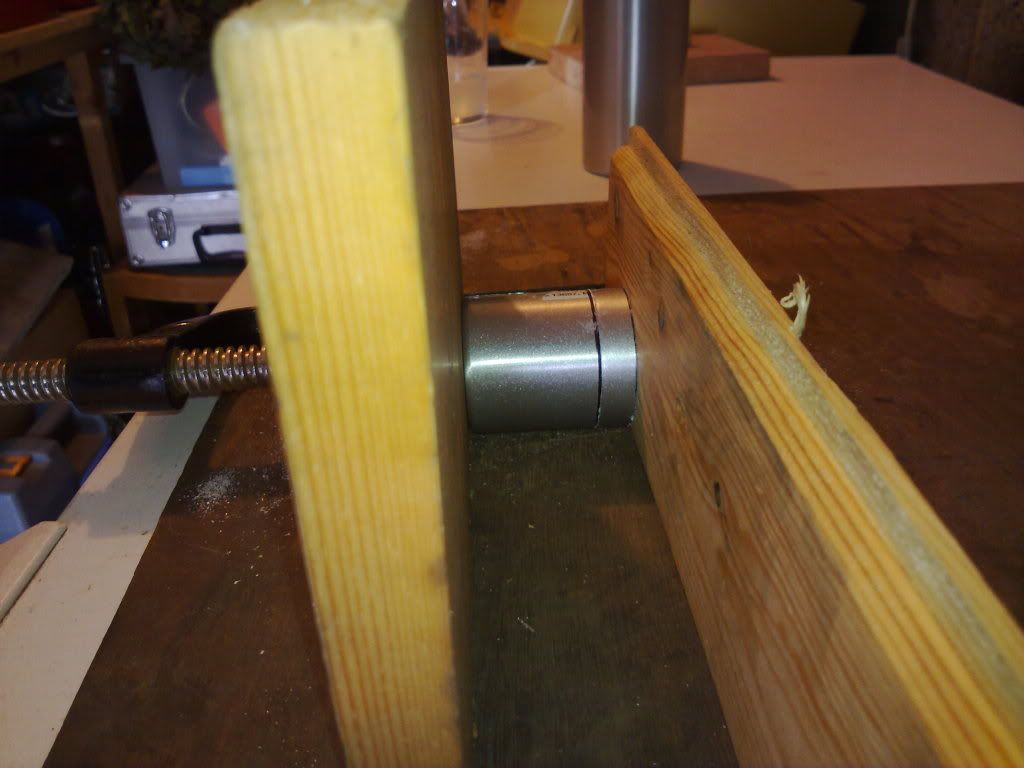
6: Tighten the clamp, to compress the top section into the bottom section, making sure the boards remain parallel, until the rims of both sections are level.
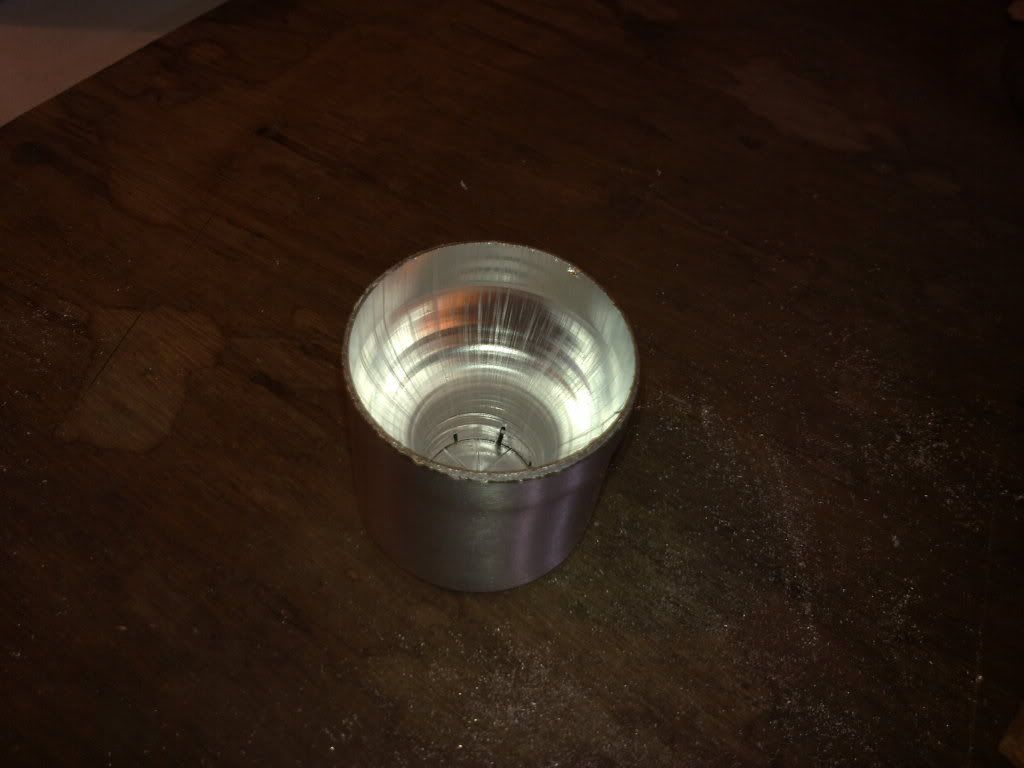
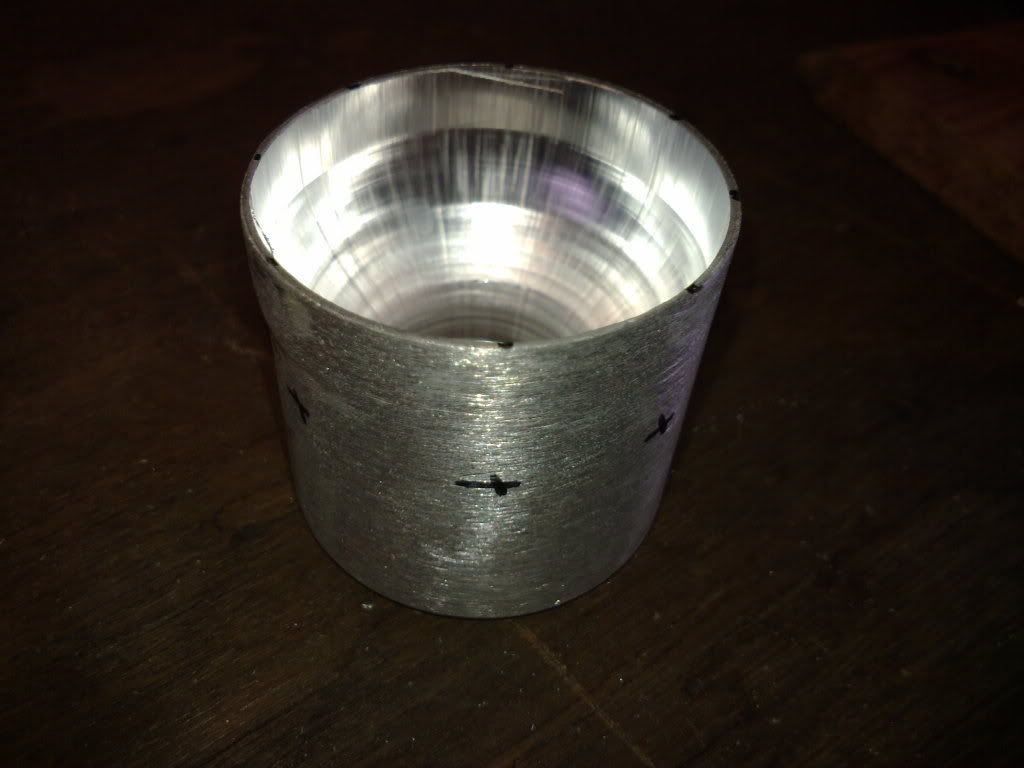
-When removed from the clamp, it should look like this...
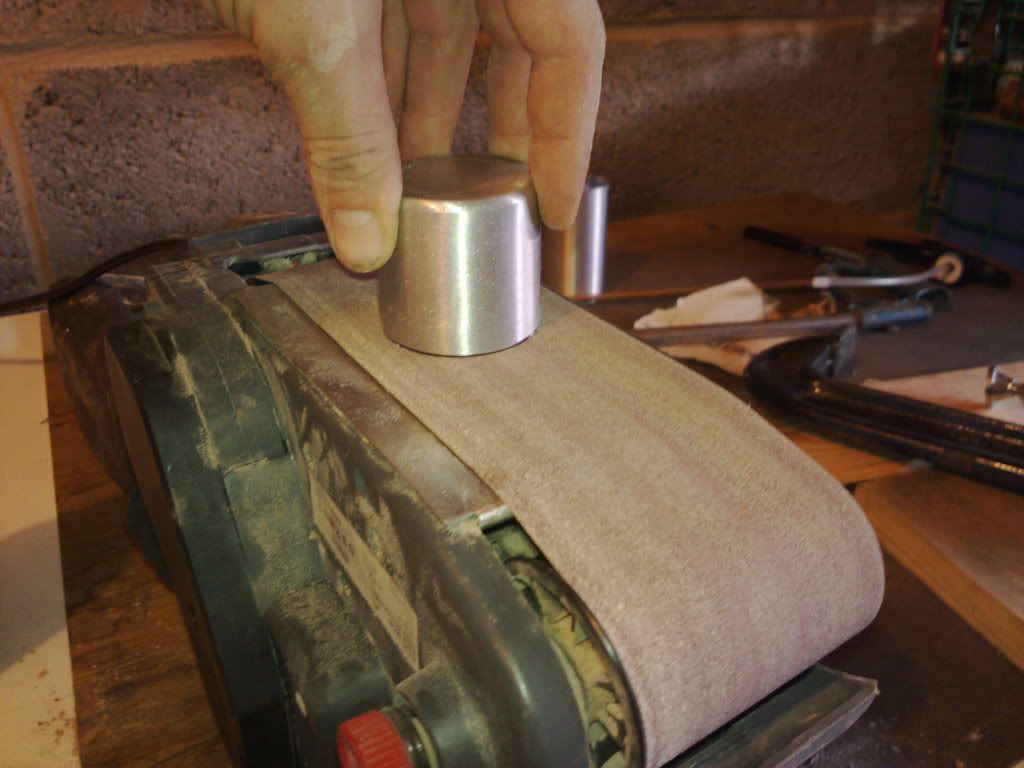
7: Using an upturned belt sander, smooth the cut edges, to level the (now) top of the stove.
8: Mark the 8 positions for the jets. Again it's easier if you mark them on the top edge first, then using a block to maintain high, mark around the stove in the corresponding places, then mark an X where the jets will be.
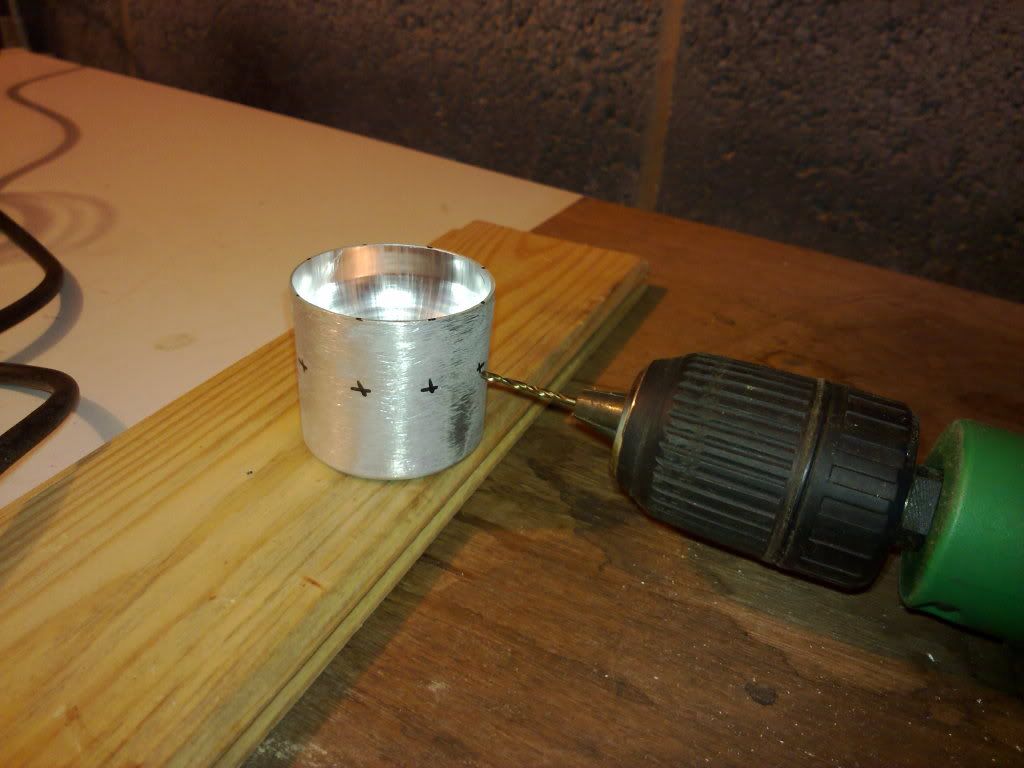
9: Drill a 2mm hole, at each of these Xs. I found it more controllable, if you lay the drill on it;s side, then "block up" the workpiece to get the correct high.
10: Once the holes have been drilled, use a panel pin to angle the jets upward.
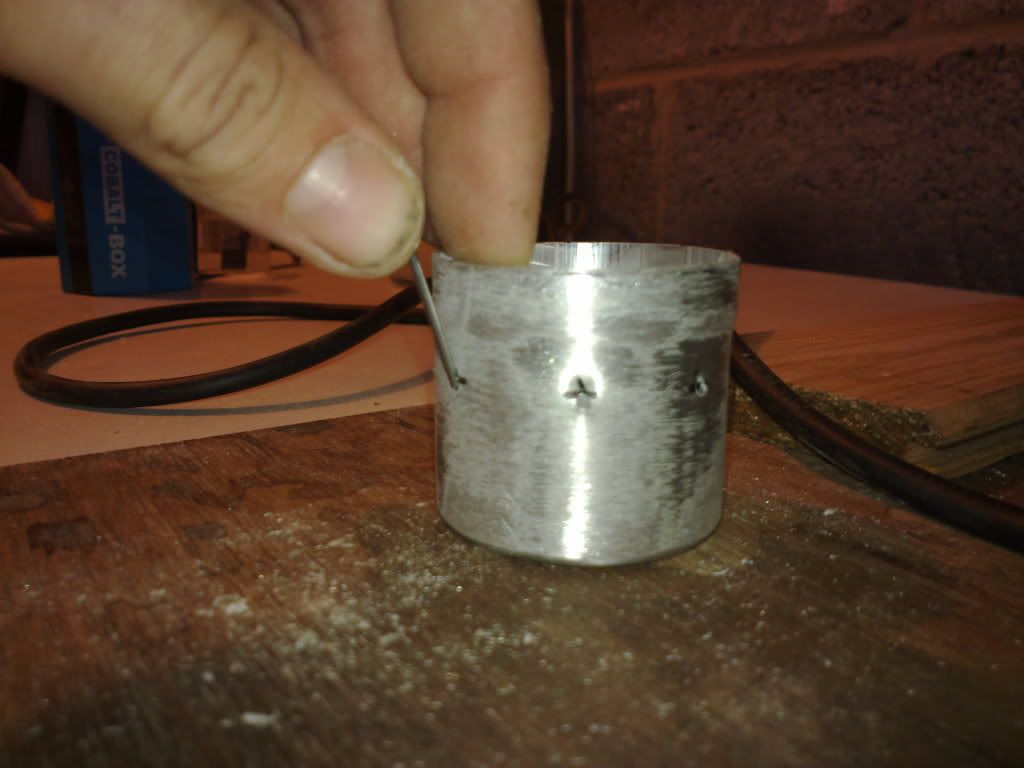
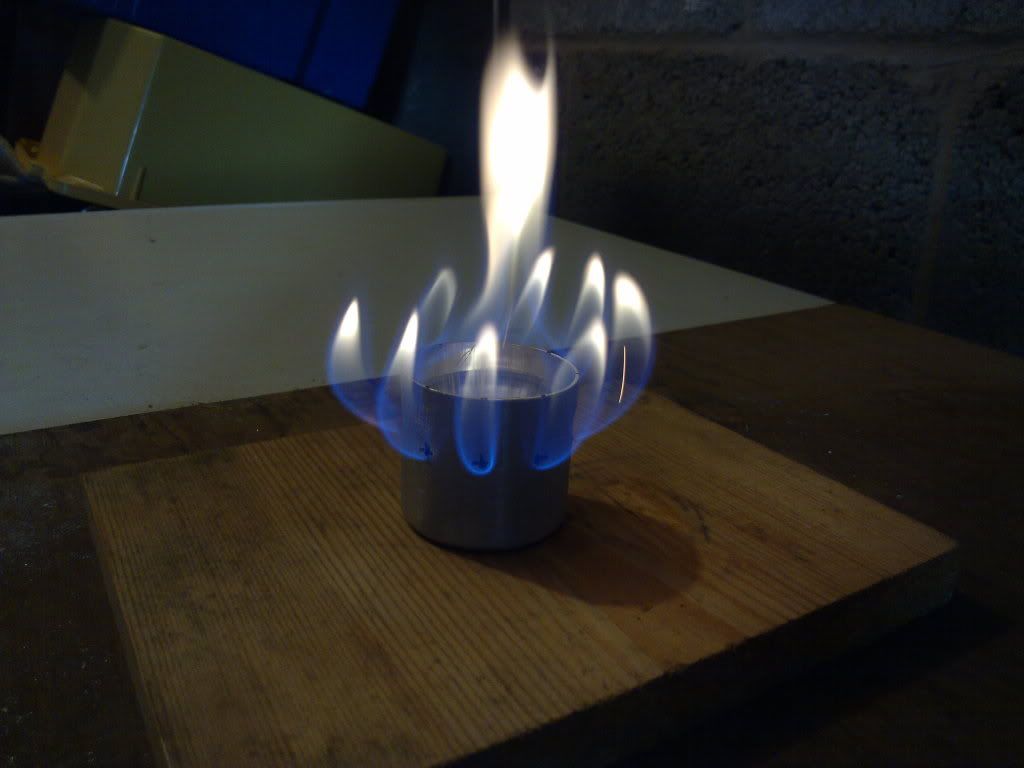
11: After a little sanding, to smooth any sharp protrusions, you're done. All ready to fill with fuel and get cooking.
The bottles are pretty much the same design, but around half the diameter.
Here are the steps, for those no aware of the process.
1: Mark the bottle at the top and bottom, the same distance from each end.
2: Cut the bottle into three pieces, along these two lines. It's easier if you use a mitre block, to help keep the cuts straight.
3: Make four cuts, across the mouth of what used to be the top, of the bottle. This creates 8 small notches, that allow the fuel to pass into the pressure chamber.
4: Turn the top section and insert the mouth of the bottle (the narrow end) into the bottom section, like so...
5: place these sections between two pieces of board, then between the jaws of a large clamp. Make sure the ends are as parallel as possible.
6: Tighten the clamp, to compress the top section into the bottom section, making sure the boards remain parallel, until the rims of both sections are level.
-When removed from the clamp, it should look like this...
7: Using an upturned belt sander, smooth the cut edges, to level the (now) top of the stove.
8: Mark the 8 positions for the jets. Again it's easier if you mark them on the top edge first, then using a block to maintain high, mark around the stove in the corresponding places, then mark an X where the jets will be.
9: Drill a 2mm hole, at each of these Xs. I found it more controllable, if you lay the drill on it;s side, then "block up" the workpiece to get the correct high.
10: Once the holes have been drilled, use a panel pin to angle the jets upward.
11: After a little sanding, to smooth any sharp protrusions, you're done. All ready to fill with fuel and get cooking.
")
")