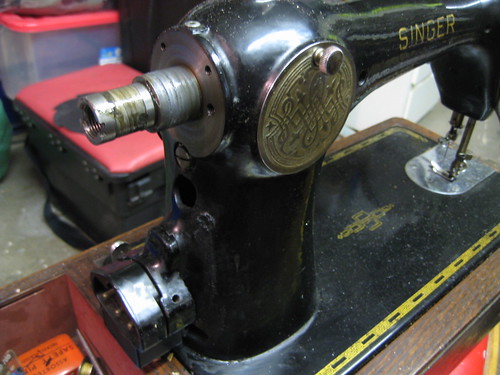
OK ta. How does the commutator come off? It's obviously attached to the wheel gearing but not sure how to get it out. Dunno what or where the feed tubes are either. This is all new to me. Is there an exploded view diagram to be downloaded somewhere that shows how it all goes together? Cheers
Old sewing machines (pic heavy)
- Thread starter Harvestman
- Start date
-
BushMoot: Come along to the amazing Summer Moot 31st July - 5th August (extended Moot : 27th July - 8th August), a festival of bushcrafting and camping in a beautiful woodland PLEASE CLICK HERE for more information.
You are using an out of date browser. It may not display this or other websites correctly.
You should upgrade or use an alternative browser.
You should upgrade or use an alternative browser.
The comm stays on the arbor, polish it like this http://vssmb.blogspot.co.uk/2011/12/how-to-re-wire-potted-motor-part-17.html
OK ta. How does the commutator come off? It's obviously attached to the wheel gearing but not sure how to get it out. Dunno what or where the feed tubes are either. This is all new to me. Is there an exploded view diagram to be downloaded somewhere that shows how it all goes together? Cheers
Have a look around on the site ozzy links to, there's a whole how - to there with all the pictures you need to do all of it very easily; it's actually very simple to do
")
Brilliant thanks, will have a good look at those vids before I go any further. One more question. Mains cable has been replaced at some time but it's only 2 core so there's no earth connection. Taking a guess I would have expected the middle pin on the machine to carry the earth to the body of it. A multimeter across the machine body and the three pins shows no continuity so the machine isn't earthed at the moment. Big lump of metal + mains electricity = shocking results. Surely it should be earthed?
Righto thanks. Just briefly looked through the blog for rewiring. Absolutely brilliant. Need to work my way through it now instead of just winging it 

Yes indeed. I feel a little guilty at getting into this. It's just not rock n roll and feels a bit geeky but the engineer in me can't help wanting to fettle it. So after reading the links I have now been able to remove the motor and dismantle it. It's surprising that it worked when I tried it as the insulation is totally shot. Everything is covered in oil and grease. The previous owner was apparently a mechanic - I would say more of a grease monkey judging by how much oil there is on everything. The resulting mess in the motor housing is a mixture of black graphite dust and oil and it's horrible. I have it ingrained into my nails and fingers now so now I look like a grease monkey too. Next job to clean it all up and rewire.
for anyone who wants to be totally blown away, check this out:
[video=youtube;wJBi1z_FohI]https://www.youtube.com/watch?v=wJBi1z_FohI[/video]
i'm embarrassed by my efforts so far and am going to be even more embarrassed by my finished result when its compared to his, but i had to share this with ya!
s
ps.....smojo...show us some pics please m8, would love to see your efforts!
Last edited:
dude i'm not even going to remotely try to do what hes done....not even try....i'd need professional spray guns, a sterile enmvironment, years of professional restoration experience and so on....judging by the fact this guy uses loads of car products i'd say hes into classic cars or something...this guys forgotten more than i'll ever know and has probably been doing this stuff as long as i've been alive.
mines simply getting resprayed with an aerosol of enamel then the same in lacquer....i'm not going to dare doing that back-polishing thing he does for fear of going through and sanding off the decals....i'll quit when i'm ahead....
just the first stuff he uses, the turtle wax, is 30 quid a bottle....and so on.....theres no way i'll know if my lacquer is thick enough to do what hes done.
no way, not a chance, over my dead body, not gonna even try it. maybe when i've done a few more but not yet.
no way. no. thats a no.
lololol s
I'm sure you'll do yours justice, matey, with your attention to detail and obvious love of the things; just do what he says about taking it in bite-sized chunks
ps.....smojo...show us some pics please m8, would love to see your efforts!
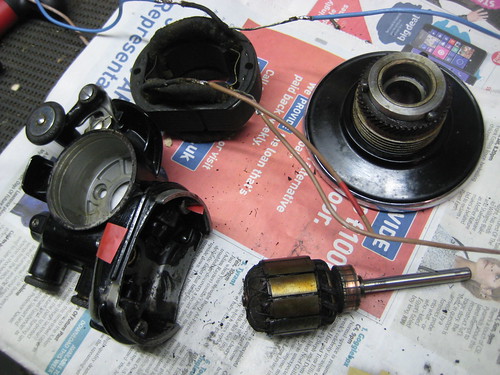
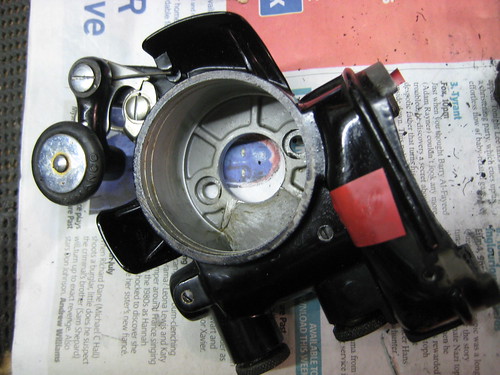
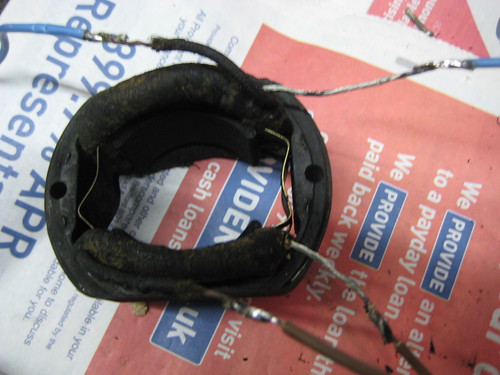
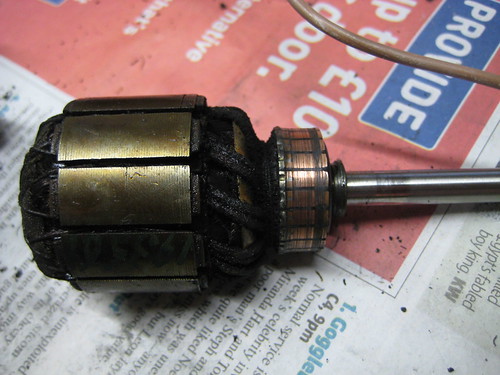
I'll see if I can get this to work. Hopefully here's some quite blurry photos of the 201 motor stripped and part way through rewire. The field coil is waiting for some heatshrink to arrive to finish it.
Last edited:
looking good so far dude....you gonna try sanding the copper bits like in the thread?
Yeah, it's been worn down quite a bit in the middle where the brushes touches so it won't be a straight process. Probably cut thinner strips of emery paper and let it ride over the bumps and dips till it's reasonably shiny.
Motor rewire finished and re-installed and running sweet as a nut. Tried a test sewing and it worked fine. Just cleaning up the bobbin area and needle mechanisms. Feeling dead chuffed with it. I was watching some Youtube stuff about the 201k2 and he reckoned Rolls Royce used them for stitching the interior materials back in the 50s. Cool or what?
I have had this Dürkopp (logo has worn off) for 20 years. It has spent way to much time tucked away, but after I put in in the living room it's back in business. The wood base shows that it has been used, but the mechanics are all good. Recently I gave it a good clean and proper oil, and it now sews like anything.

PS) Put some rubber feet underneath; no more ruining the nice table made by my girlfriends grandad.
PS) Put some rubber feet underneath; no more ruining the nice table made by my girlfriends grandad.
Last edited:
Similar threads
- Replies
- 2
- Views
- 414
- Replies
- 70
- Views
- 6K
- Replies
- 27
- Views
- 2K
- Replies
- 3
- Views
- 926