Making an adjustable pot hanger

Bushcraft basics
The adjustable pot hanger is excellent because it is simple and quick to put together. The pieces are easy to find and can easily be scaled up or down in size to accommodate different weights of pots or kettles.
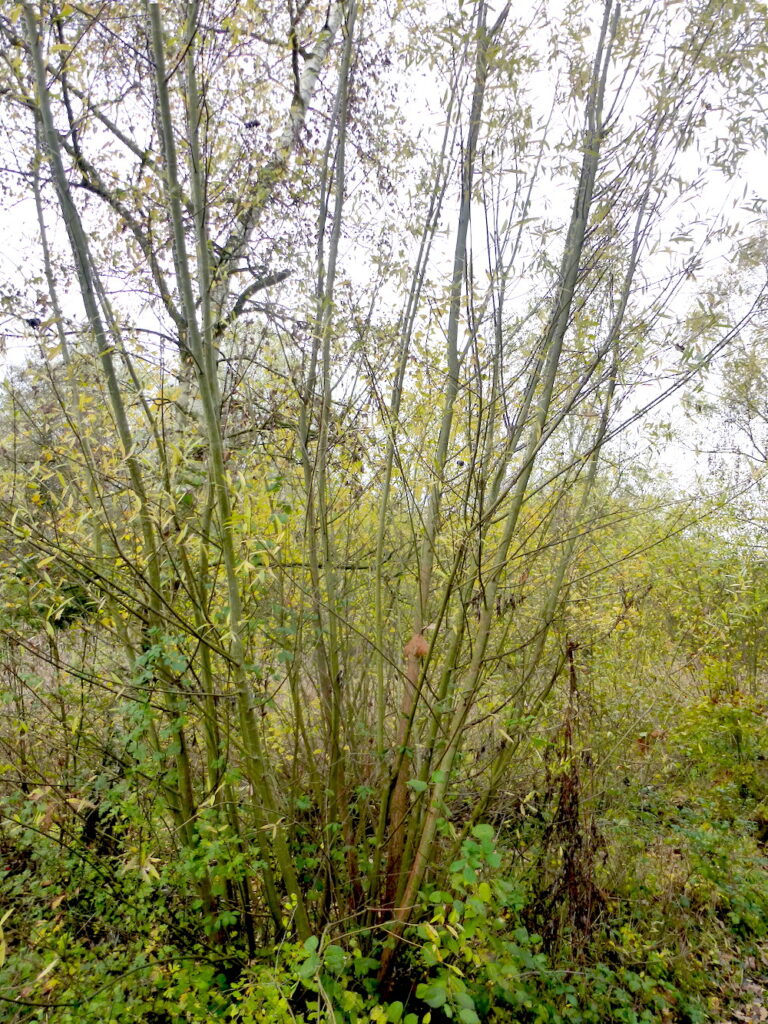
With only four components, it is possible to make it from just one stand of coppiced Hazel or Willow, which are great woods to use as they grow fast and straight.
This is a great project for beginners and seasoned bushcrafter alike; you get to practice knife skills and create something worthwhile.
Tools
Let’s take a moment to talk about the tools you will need for this project. When sourcing your materials, a folding saw is a very useful tool. A small hatchet can also be used but does leave the remaining coppice in a bit of a mess, which can lead to the tree becoming infected. So, a saw is preferable.
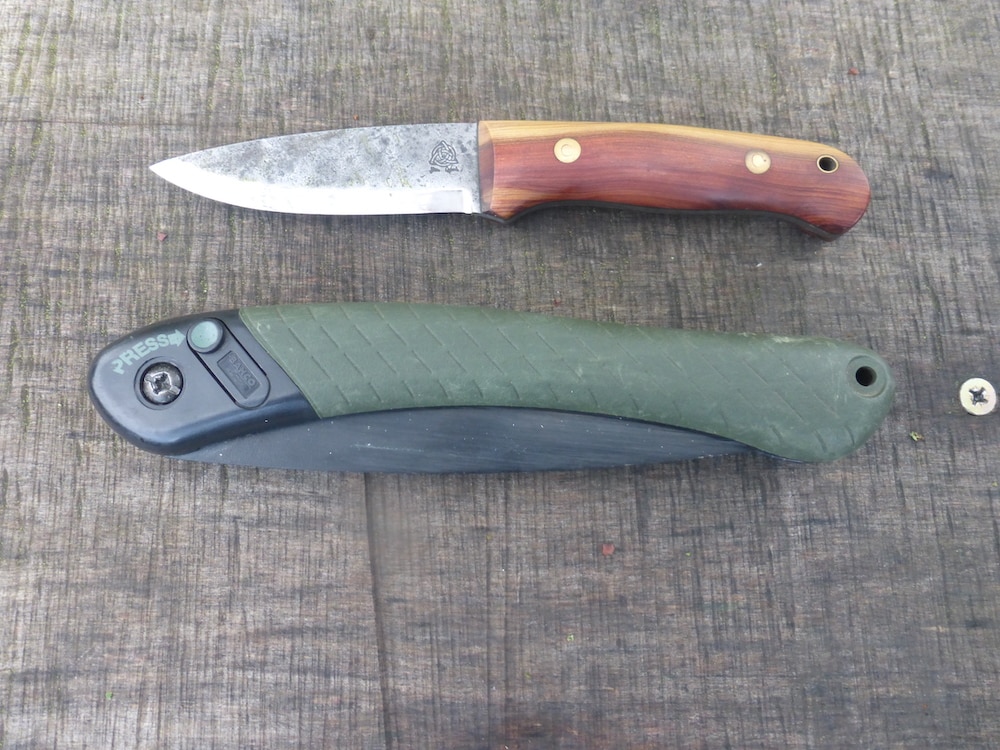
A sharp knife will make things much easier for the finer carving and cleaning up of the pieces. My preference is a knife with a Scandinavian grind as it’s designed for woodworking, but it can be done with just a pocket knife, such as a Swiss army knife which also has helpful tools such as an awl, a small saw and thinner smaller blades for reaching into tight spaces to make those fine adjustments.

Safety first
Please also remember that when using any bladed tools, always carry a first aid kit. Nothing fancy is required just a few adhesive bandages, antiseptic and some gauze or bandages. It’s also well worth doing a basic first aid course so you know how to deal with any minor injuries with yourself or others.
Cutting the parts
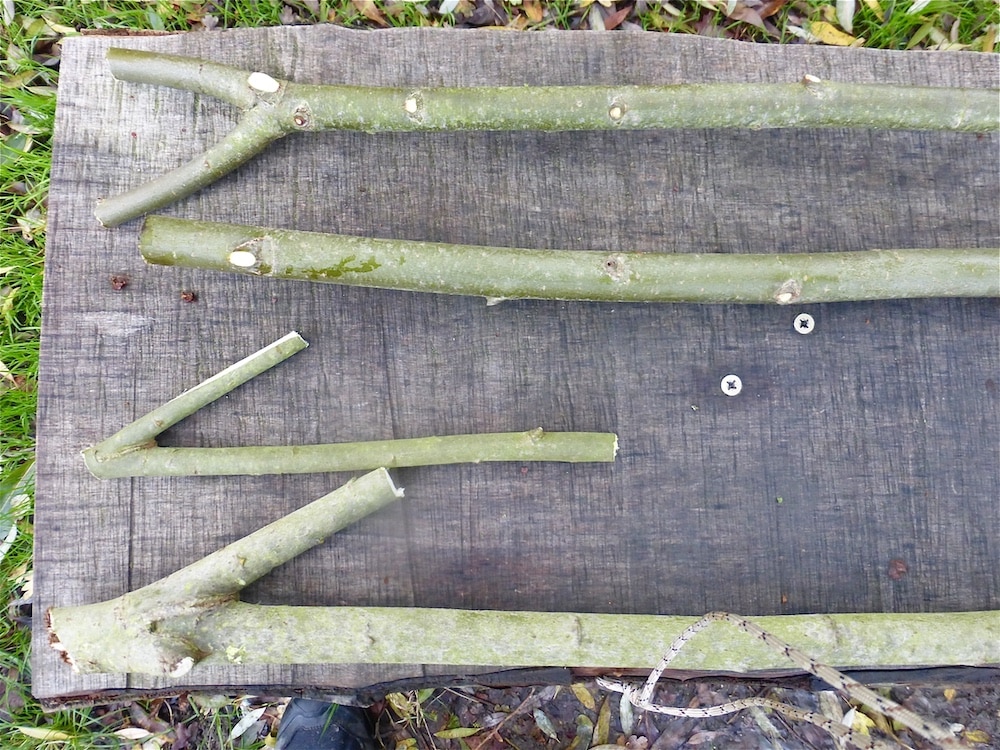
The four parts you will need to cut (from the top down) are: –
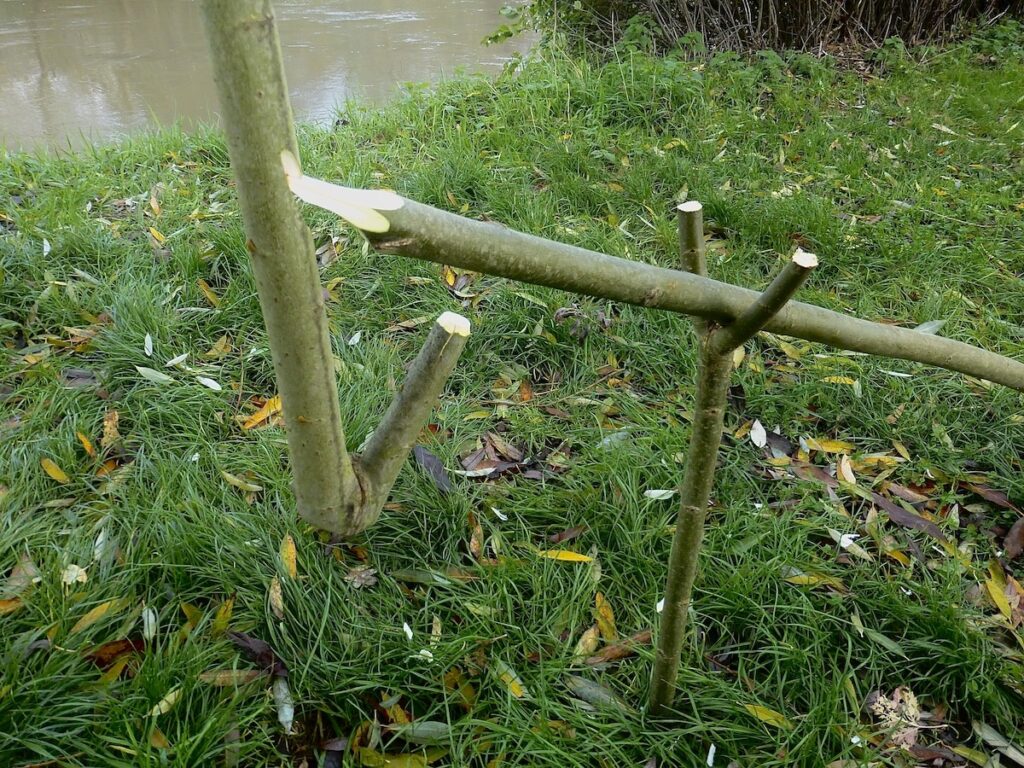
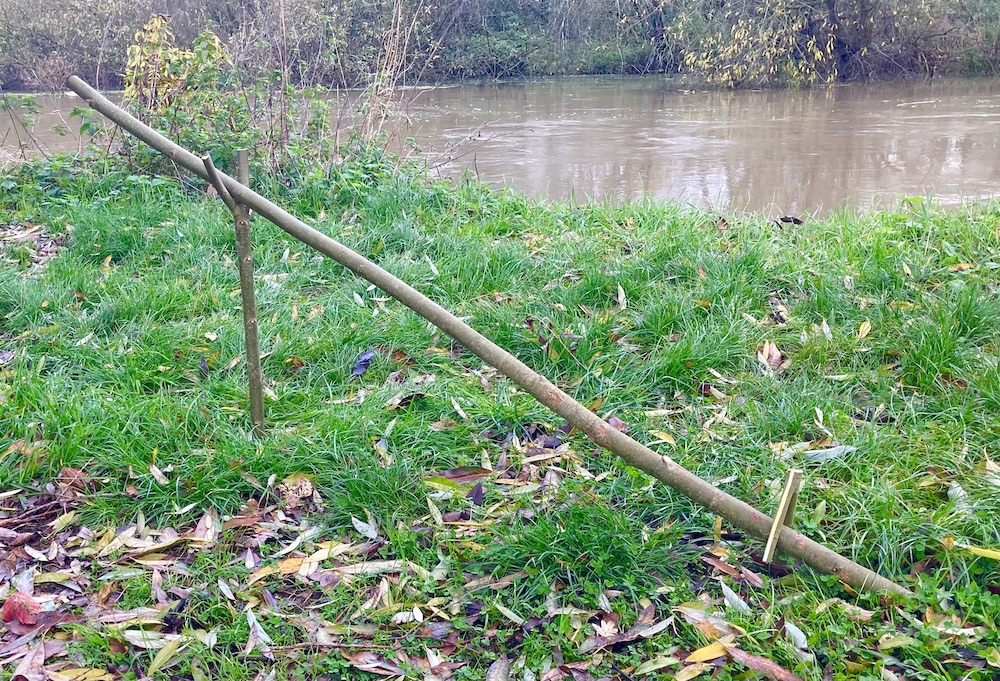
- A Y stick about two feet long (60cm) is the primary support for the stand. This needs to be sturdy as it will carry all the weight.
- A good stout, straight pole about six feet long (182cm) and about one and a half inches thick (3.8cm), this will be our crane arm.
- A hooked stake about a foot long (30cm) and an inch wide 2.5cm). This will hold down the crane arm and will be pushed firmly into the ground.
- The last piece to the puzzle is a hooked straight piece about two feet in length (60cm) and an inch wide (2.5cm). This will be our adjustable hook to hang our pot on.
The first setup
Now that we have the basic pieces cut, the first thing to do is push the Y stick into the ground, about 2 feet (60cm) from where you want the centre of your fire to be, you can put a point on the end if it makes it easier. Then lay the long crane arm in the Y and allow it to settle (roll) in position. This is important as you don’t want it to flip around when you put weight on it.
Adding the stake will keep everything locked into place.
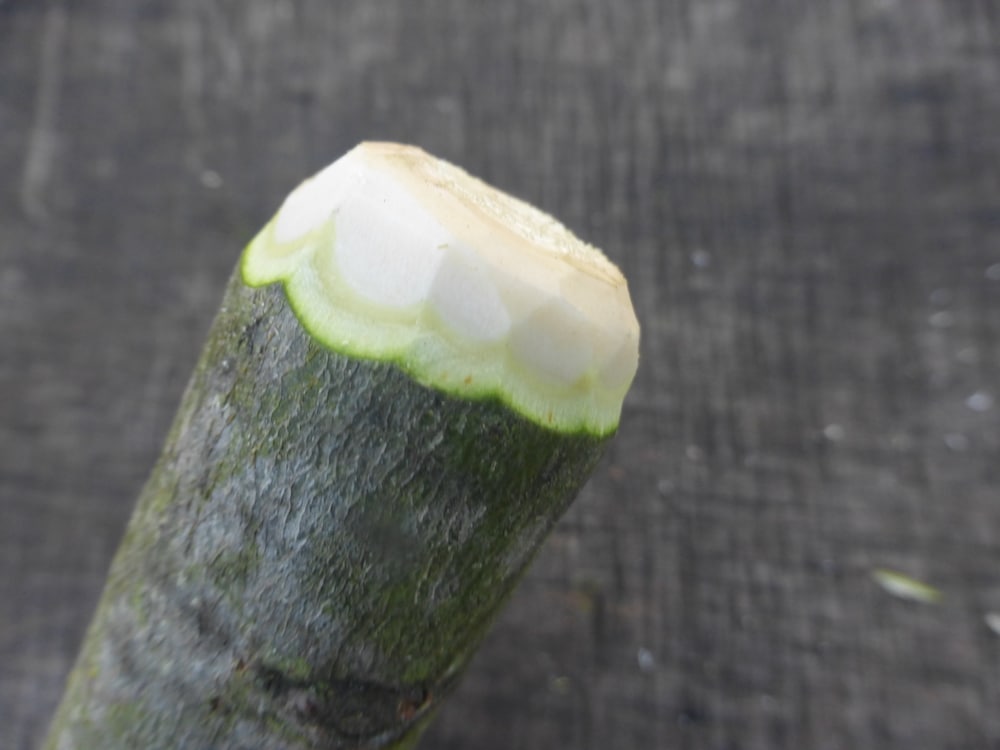
Keeping the crane stick in the ‘Y’, carve a flat surface on the top and bottom of the end that will be over the fire.
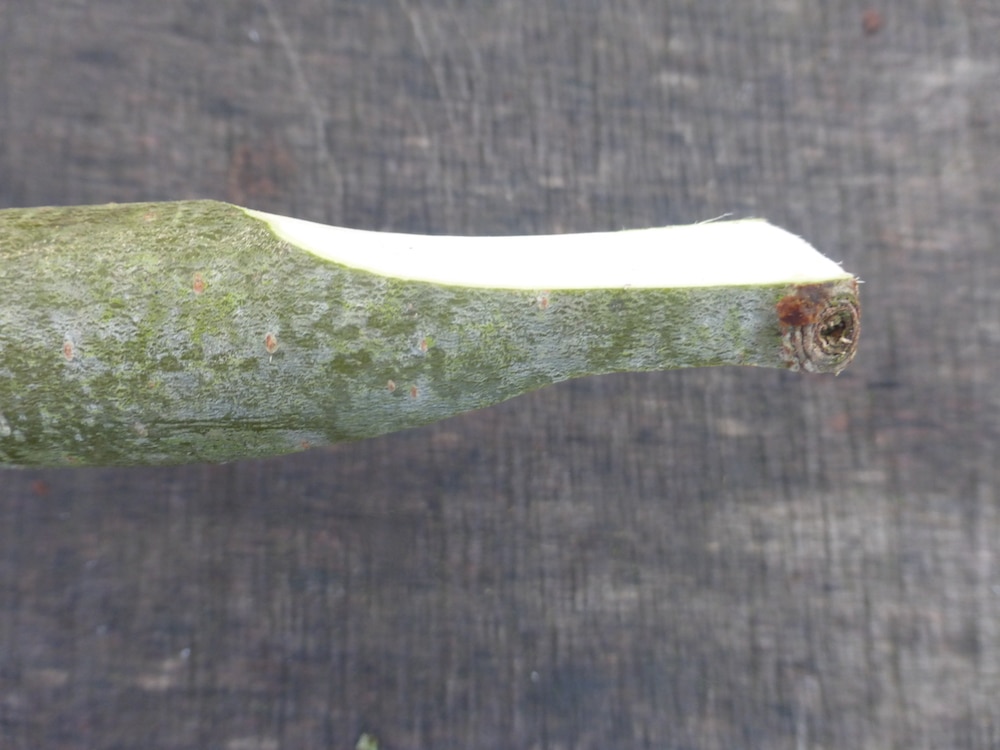
Cutting a slight chamfer on the underside will allow the pot hook to lock in place when we are all done.
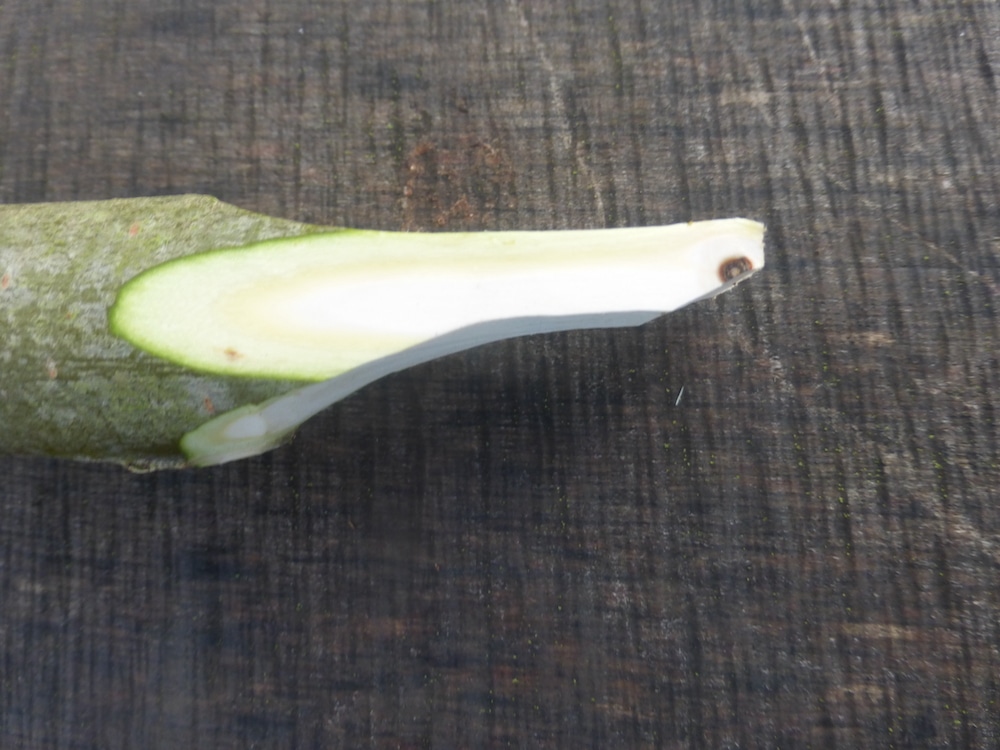
Gently use the point of your knife to push into the wood and turn it so that it drills a slight indentation in the top of the crane arm; this will help seat the pot hook. Be careful not to push too hard when drilling, as this can split your crane stick. You can also use the awl on your Swiss army knife if you have one.
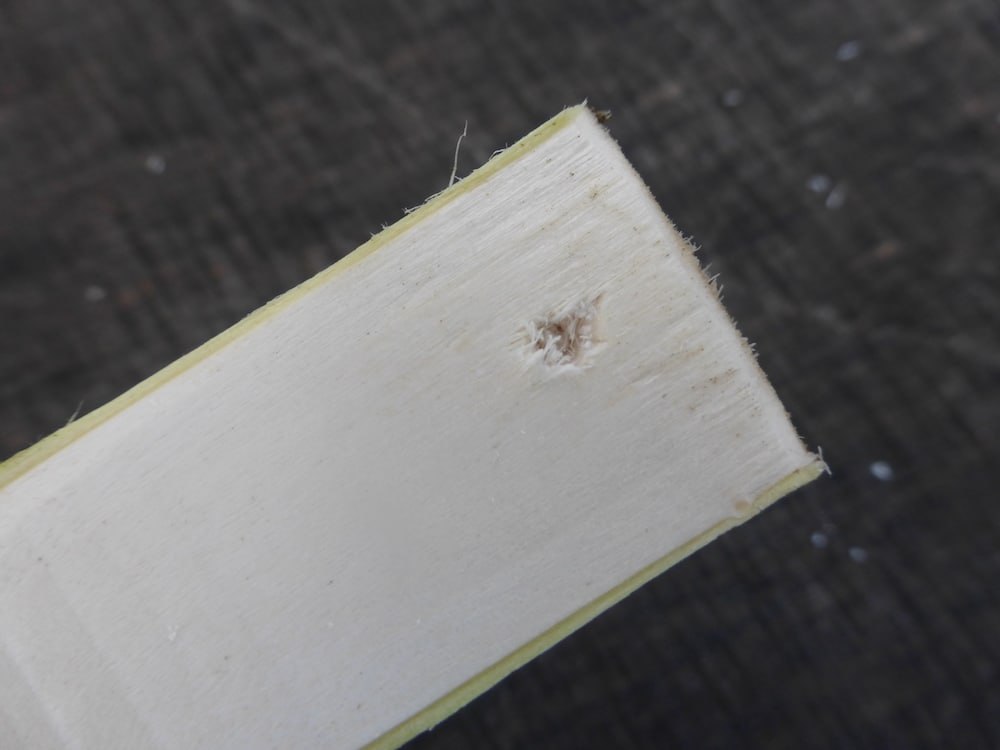
But what’s the point of this slight indentation?
It allows the tip of the beak you notched to sit in, stopping the pot hook from sliding off the crane stick. Losing your carefully prepared stew to the fire is always bad news!
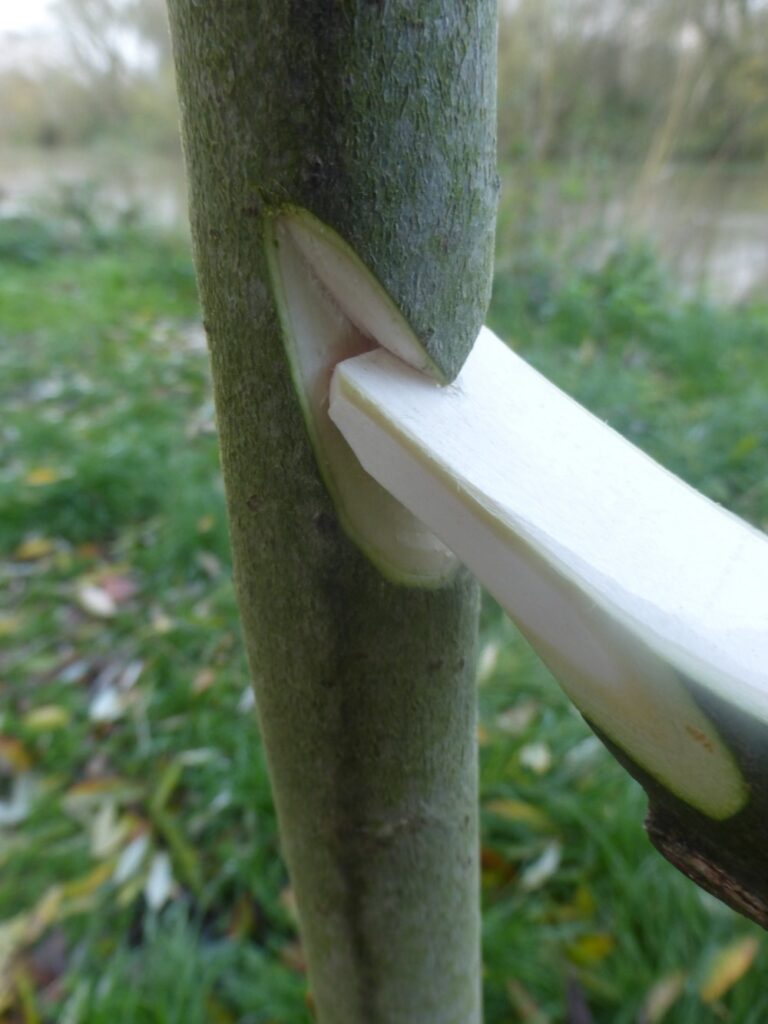
The beak notches
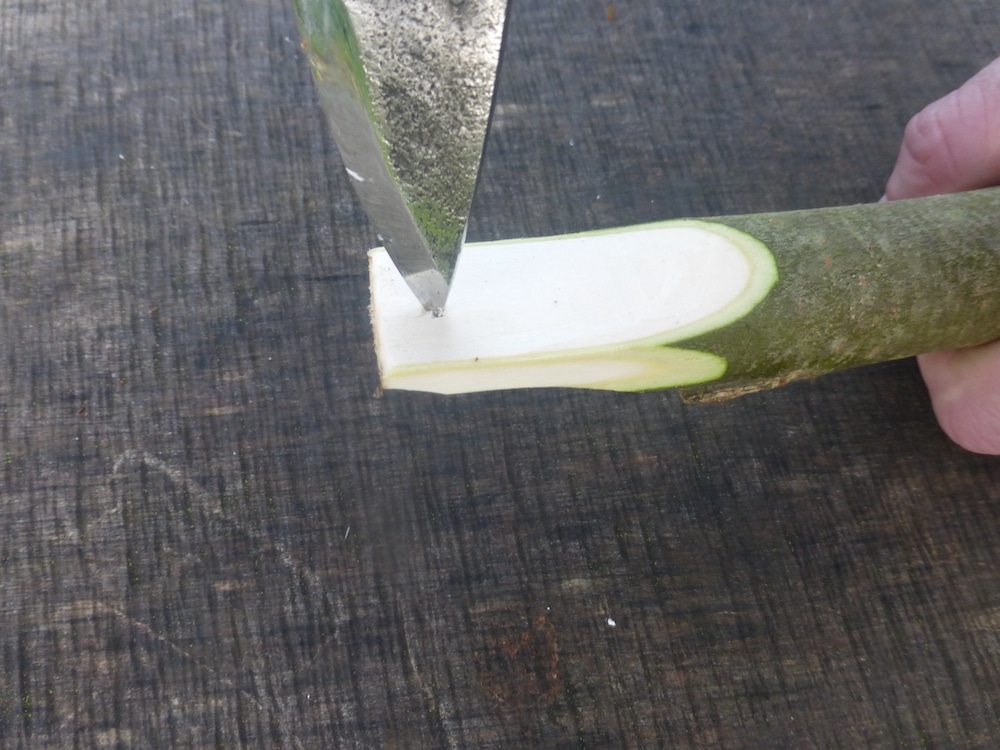
Now to carving the beak notches. It’s called a beak notch, as it resembles a bird’s beak. This will be the hook that keeps the pot hanger on the crane stick.
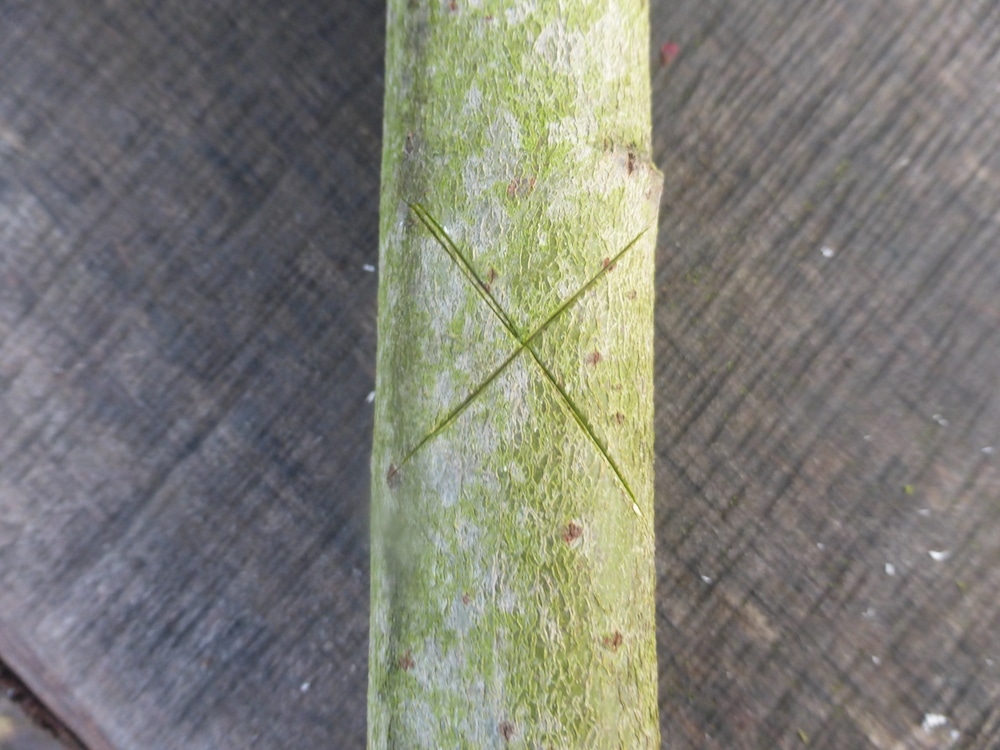
Start by cutting an X about six inches up from the hook and on the same side. You want to aim for about 5mm deep to begin with. Remember that you can always take wood away, but it’s impossible to add it back on. As my grandad used to say, “Measure twice, Cut once.”
Beginning from the bottom, cut upwards to the centre of the X by about an inch and a half. Then carefully Remove material from the sides up to the top two lines of your X cut. You should be left with something that resembles the picture below.
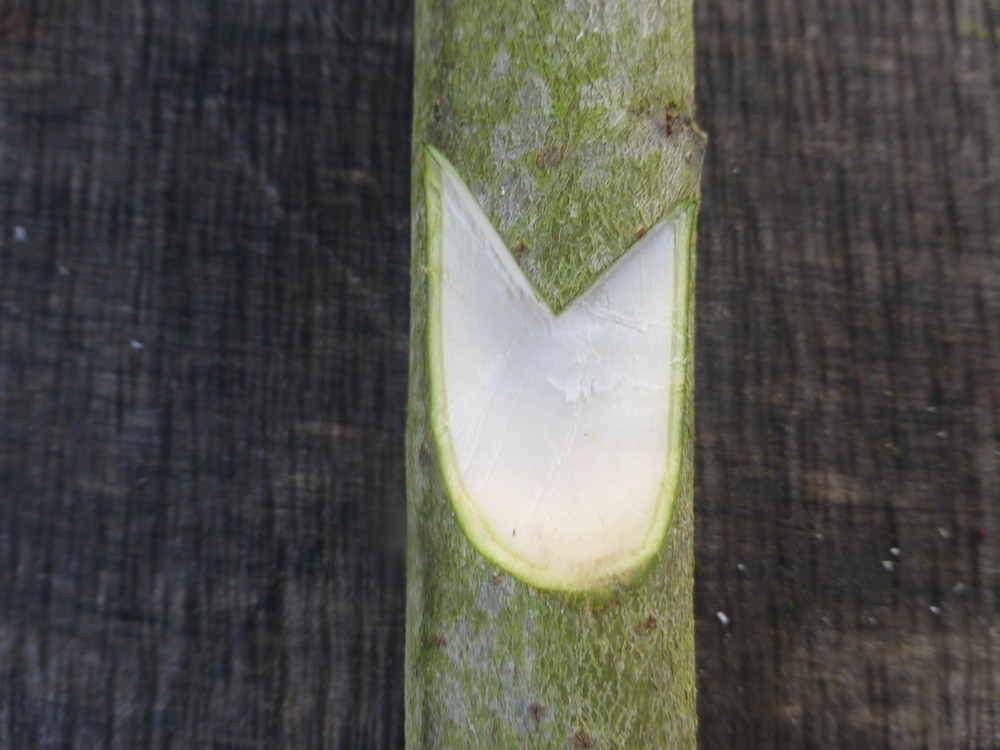
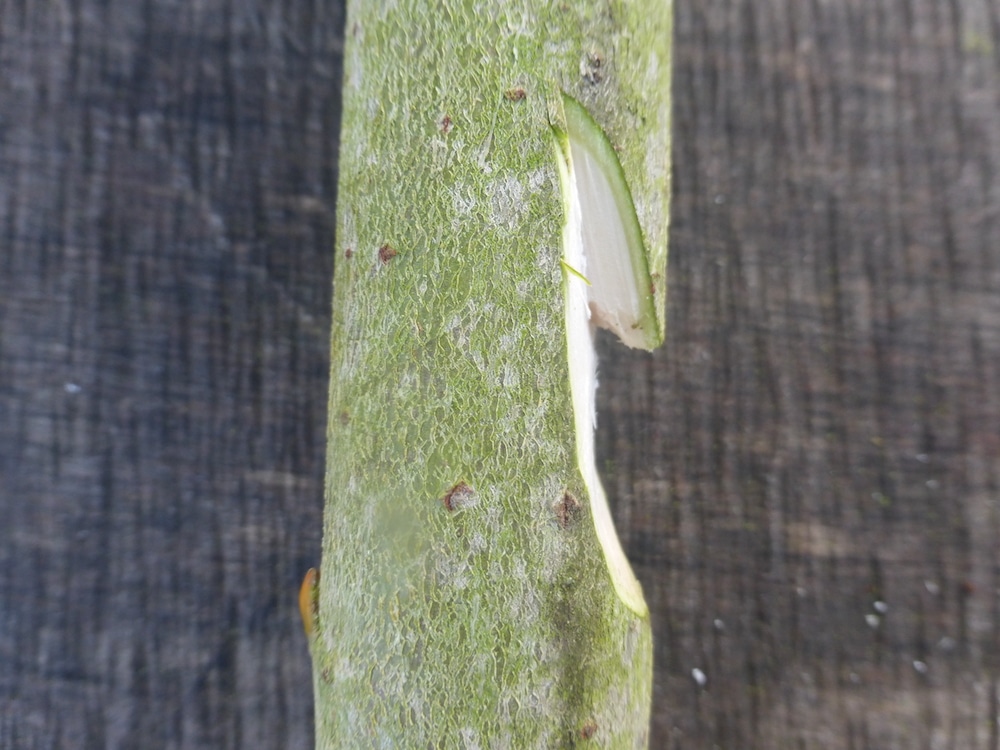
We then have to make an undercut to create the beak, removing wood from the underside of your notch so you get more of a hook, just like in the picture below. This might be a good job for a smaller blade, such as your Swiss army knife
Putting it all together
You need the beak to fit into the hole, deep enough to prevent the pot hanger from slipping off. If the tip of the beak doesn’t sit securely in the hole, carve down until you reach the desired depth.
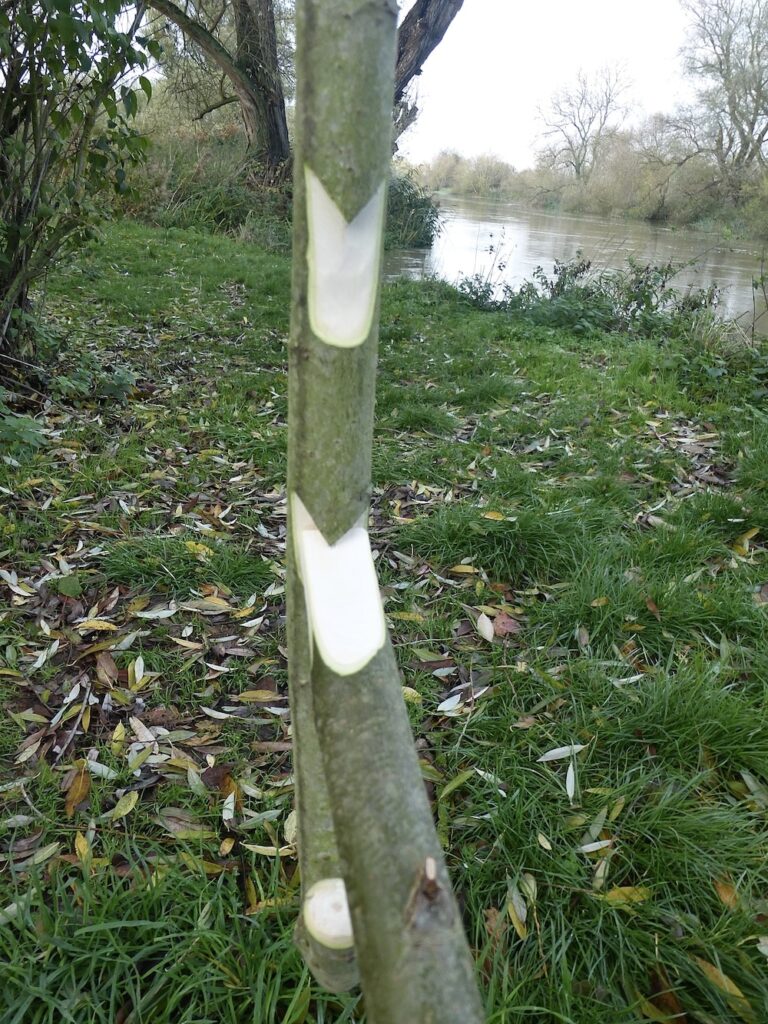
All we need to do now is repeat the process of carving some beak notches a few times, with about three inches in between each beak, and you are done!
You are now the proud owner of an adjustable pot hanger.
Feel free to clean your ends up a little bit, it will help them last longer and look neater.

BEN CLARKE
My formative years were spent reading the SAS survival handbook and watching Ray Mears on tracks on the telly. Learning a lot about the outdoors from my grandad who was a park ranger.
My first love of bushcraft will always be lighting fires, learning the techniques and history. When I was eight, I nearly burned the house down after hiding a lit candle from my parents under the bed. My sister luckily told on me. I can say that I’m a little safer with my pyromaniac tendencies now.
After being a scout and doing the duke of Edinburgh awards, I now practice my bushcraft skills with a great group of friends from all over the country.