Tine' Boxes

  • Hey Guest, Early bird pricing on the Summer Moot (29th July - 10th August) available until April 6th, we'd love you to come. PLEASE CLICK HERE to early bird price and get more information.

Harmony

Tenderfoot
May 15, 2008
79
0
87
Spokane, Washington USA
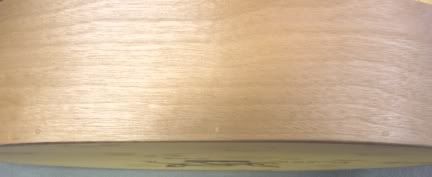
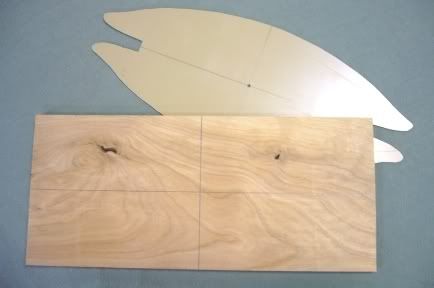
Selecting a type of wood to bend is a crap shoot. I have had good luck with maple, birch, oak, ash, pine and poplar. Straight grain bends best but is not as interesting to look at.

No mater how hard you try, you will break some side pieces.

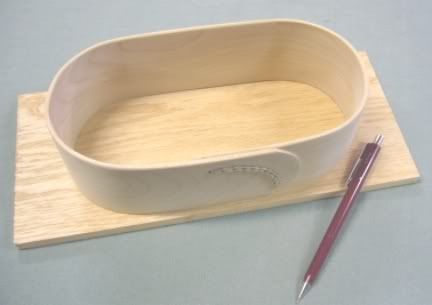
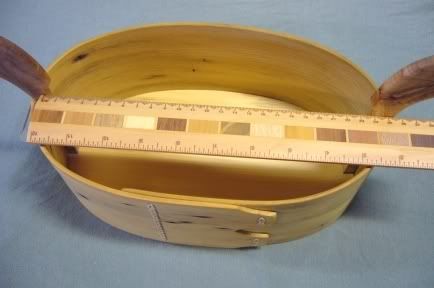
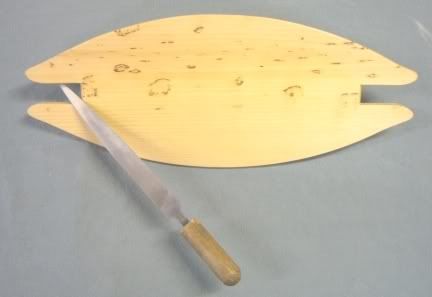
Measure the circumference of your form, allow for a 8 to 10cm overlap. This will be the length of your side.

The width should be the height of your form.

Thickens will be 3mm or a little less if you can do it. Thin wood bends easier.

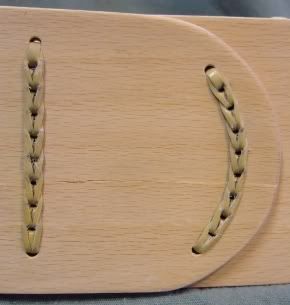
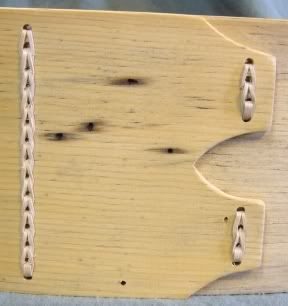
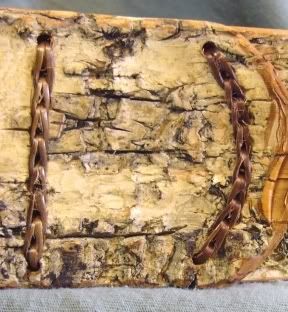
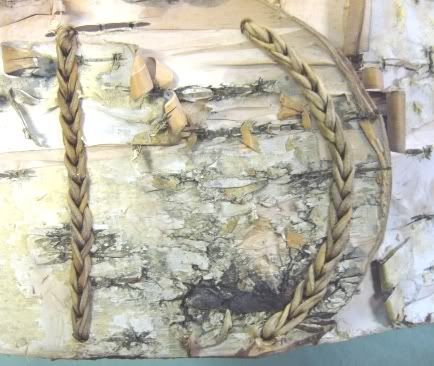
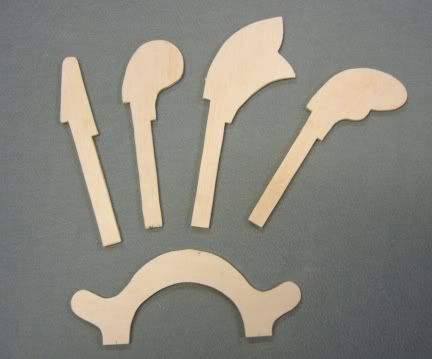
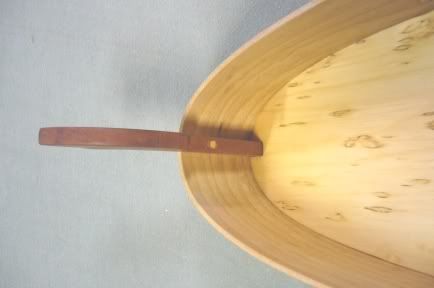
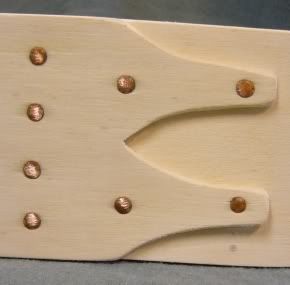
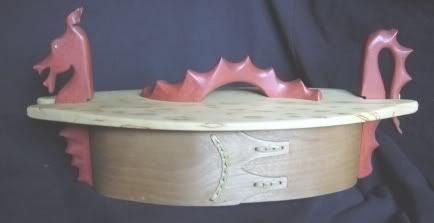
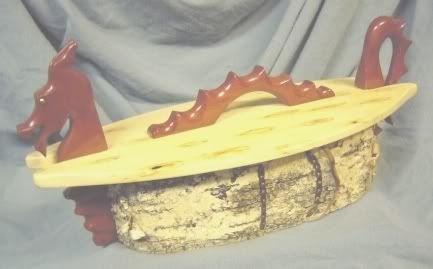
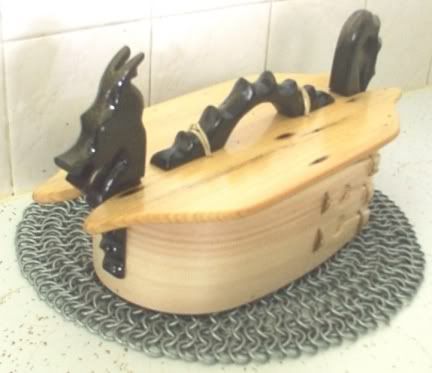
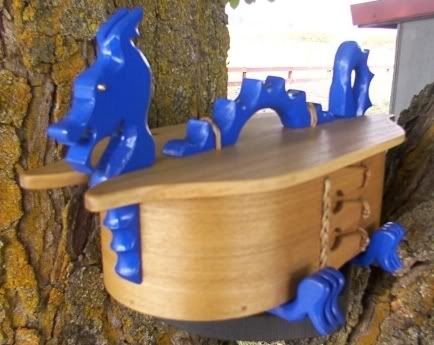
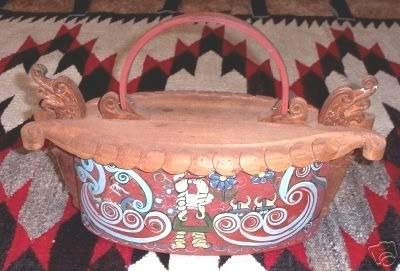
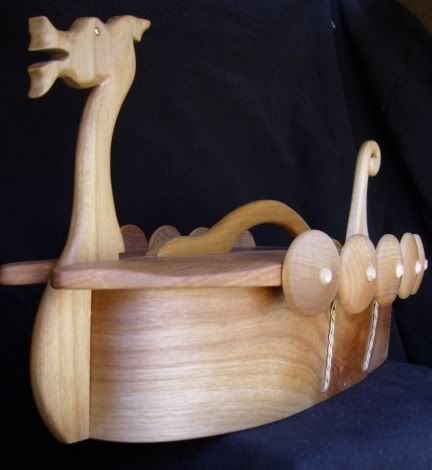
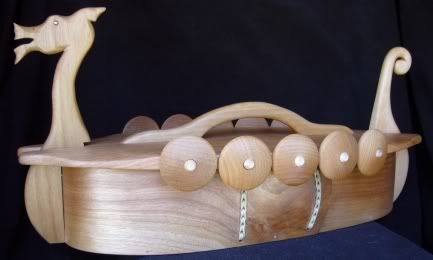
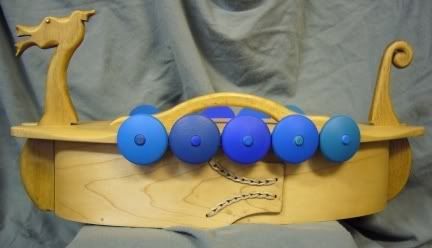
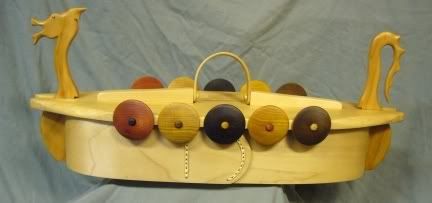
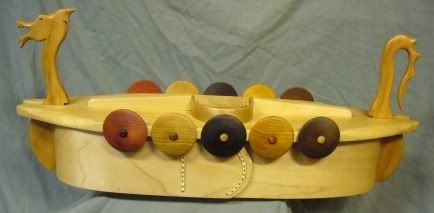
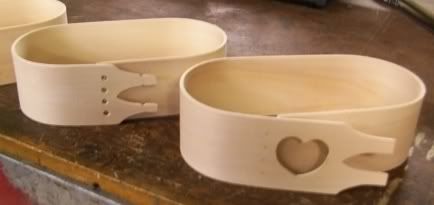
Come up with a design for the overlap end. Look at the pictures of some of my tiner or get creative.

Boil the side piece for 20 minutes or more.

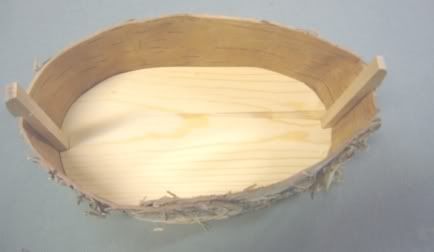
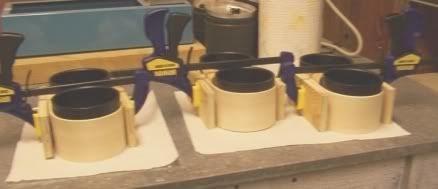
Have your form on the jig, strong backs close at hand and your clamp open a little wider than you will need.

Lift the side piece out of the pan with tongs. By the time you get to the jig it will be cool enough to handle.

Center the side on the back of the form. Pull forward and overlap the ends.

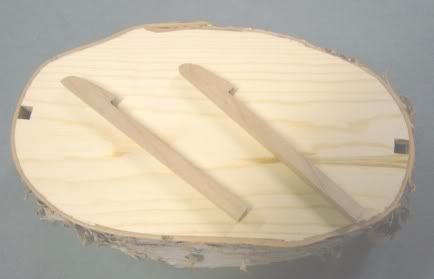
Place the strong backs front and back and apply the clamp loosely.

Grasp the side at the ends of the form and push in getting it as tight to the form as possible.

Tighten the clamp.

lift form and side off the jig and set aside to dry for two days.

BoxMakingsidesdrying.jpg


Remove the clamp and let dry another day.

BoxMakingsidesoffform.jpg


Next post I will cover lacing the side overlap.
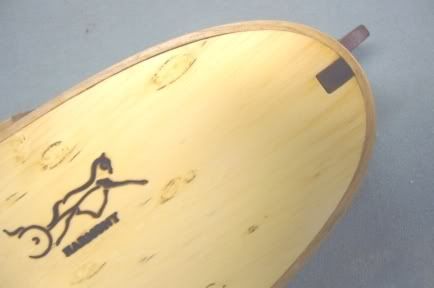
Harmony
 

Harmony

Tenderfoot
May 15, 2008
79
0
87
Spokane, Washington USA
I will cover lacing the side overlap in this post.

You will receive a lot of favorable comment on this part of your box. It is not only functional but very decorative.

The lacing technique you learn here will also work well when joining wood, bark or leather together for any project.

BoxMakinglacematerial.jpg


The materials I lace with are cane, root and rawhide.

BoxMakinglacestrcurv.jpg


BoxMakingLacefing.jpg


The cane I use is rattan chair cain. It comes in a hank of over 300m (a life time supply for a box maker). I use medium (3mm) size.

The cane has a smooth and a rough side. I prefer the rustic look of rough side out when I lace.

If you want the cane darker stain it. It is soaked in water before using, so I have a jar going with tea. A tip I picked up on this forum.

BoxMakingrootlacebirchbark.jpg


Spruce and birch root are the traditional lace materials for tiner.

Spruce root is very strong. Viking ships were lashed together with it, nails were to costly back then.

BoxMakinglacerawhidbark.jpg


I use deer rawhide. It stretches and contracts more than cow rawhide.

I get my rawhide here:

http://www.hideandfur.com/

This is a great site for a bushcrafter.

Cane and root is pierced with an awl wile lacing, I don't like to do this with rawhide. I made a makeshift needle with stainless wire and double the rawhide and pull two strands through.


Set the overlap on the side how you want it and clamp with a small clamp. You can glue the overlap if you are not staying traditional.

BoxMakinglaceing.jpg


Lacing Side Overlap


Start by laying out holes 6.25 mm apart.

Drill holes using a 3mm drill bit.


Use cane or root for the lacing (spruce root was the traditional material).

Soak the cane in water with a little glycerin over night.

Start by making a point on one end of the cane.

The unpointed end goes in from the front in the first hole a short way.

The pointed end goes into the second hole, then up through the first hole and down through the third hole. Draw the cane up tight.


Then using an awl, split the cane that is bridging the second hole.

The pointed end, which is on the inside of the box, goes through the second hole and through the split and is drawn up tight.

Then you continue doing the same thing all the way down until the end of the line of holes.

At the very end you take an extra stitch with out taking an extra hole. Slip the end underneath the previous loop on the inside, securing the cane.

Trim.

Set aside to dry.

BoxMakinglacehorzcirc.jpg


We will fit the bottom next post.

Harmony
 

Indoorsout

Settler
Apr 29, 2008
509
1
Brisbane, Australia
This looks fantastic! Thank you so much for sharing your skills with us. I hope this gets made into a permanent article.

Is there any difference when using leather for the sides? What type of leather would you use, for example veg-tan, rawhide commercial chrome tan?
 

Harmony

Tenderfoot
May 15, 2008
79
0
87
Spokane, Washington USA
The boxes I have made with leather I used 1cm thick veg-tan and some old harness leather I had on hand.

I also made a leather lid for a tine'. did not sell, ended up making a wooden lid.

People seem to like tiner that are rosemaled, pretty grained wood or rustic birch bark.

I think any thick bark you can get your hands on would make a great box. Give leather a try, if you like tine' making build a pan.

I bartered a box to a sheet metal worker for my pan.

Glad you are enjoying the "Making of a Tine'".

Harmony
 

Harmony

Tenderfoot
May 15, 2008
79
0
87
Spokane, Washington USA
Set the completed side on to the piece you have selected for a bottom, should be 1cm thick.

Hold the side secure and draw a line on the inside with a mechanical pencil.

P1000321.jpg


Cut to the pencil line, round the top edge a little and push into the side. You may have to sand or file a little,try to get a tight fit.

Decide on end post design and cut it out.

Here are some of my templates.

P1000326.jpg


The shorter notch is the height of the box, the longer notch includes the lid (1cm) and a little slack.

You can get end post and lid design ideas by searching on ebay for "tine box" or "tina box".

Center the end posts inside the box and draw around them on the bottom piece.

P1000323.jpg


End posts are backwards in this picture. I just need them as a pattern to draw around.

Press the bottom out and cut out for the end posts. Replace bottom.

P1000322.jpg


You are ready to pin in the bottom. I use 1/2 of a round tooth pick for a pin.

Select a drill bit a little smaller than the tooth pick and drill three holes, through the side and into the bottom, on each side.

P1000319.jpg


Drive the tooth picks in, cut and sand flush.

The end post is held in by the notch in the bottom and a pin through the side.

I use the mini hard wood axles used by wooden toy makers to hold the wheels on cars.

P1000325.jpg


P1000324.jpg


I brand my logo into the box bottom at this point. After it is finished, I will sign and date it here.

P1000327.jpg


Next post, cutting and fitting the lid. Will also cover finishing before ending the instructions.

Harmony
 

aarya

Member
Oct 5, 2006
32
0
42
Norway
This technique, which i`ve not seen named by it`s proper name, is called "sveiping" in Norwegian, and when you google the term, you come up with mostly Norwegian websites. Some of them have descriptions and pictures aswell though.
Harmony also seems to have it down to a tee. :You_Rock_
Just wanted to throw the proper name for the technique into the mix.
 

Harmony

Tenderfoot
May 15, 2008
79
0
87
Spokane, Washington USA
Thanks all for the kind words. And yes I am an "Old Shop Rat".

aarya,

It is very gratifying to get good feed back on a Norwegian craft from a Norwegian.

I am trying to use tine' and tiner properly. It is hard to use the proper words when the Norwegian pronunciation of tine' here in the US is a girls name.

Here boxes were built by the Shakers using the same wood bending techniques. They made round boxes that nested together and secured the side overlap with copper tacks.

BoxMakingtackfing.jpg


I make tiner like this for Rosemalers who don't want to paint over lacing.

Harmony
 

Harmony

Tenderfoot
May 15, 2008
79
0
87
Spokane, Washington USA
Take a measurement between the insides of the end posts.

P1000328.jpg


Select a piece of wood for a top. It should be at least 10cm longer and 2.5cm wider than the out side of your box.

Mark it in halve both for length and width.

Layout the shape lid you want and trace it onto the lid stock.

Take the measurement you have, for between posts, and center it along the center line. this will be the bottom of the slot on each end of the lid. Make the slot just a little wider than the thickness of the end post.

P1000329.jpg


Lay the lid stock on top of the box. Slide it to the notch in the end post. You should have a little clearance.

P1000331.jpg


If not, lay something on the lid stock and cut the notch a little higher with a thin bladed saw.

Cut out the lid.

Slide the lid down between the end posts. you will notice one end of the lid is being held up by the square bottom of the slot. Take a wood rasp and put an angle on the bottom of the slot to allow the lid to drop lower. Turn the lid around and file a angle on the other slot.

P1000330.jpg


If it dose not close with a little pressure, file off some of the slop on the end post. Do not deepen the slots in the lid.

Take your time fitting the lid. It should close with a snapping sound.


Design a handle and secure it to the top with 3mm dowels. You can also bend a handle, cut slots in the lid and secure it by pushing a 3mm dowel through holes in the handle on the bottom of the lid.

Now all you have to do is finish your box.

I use any number of oils and clear coatings, they all bring out the grain and make your box look better.

I hope you will make a tine' or two. If you do pleas post your pictures on this tread.

Use your imagination, I will post some of my tine designs.
You will see some stray from traditional.

Harmony
 

Harmony

Tenderfoot
May 15, 2008
79
0
87
Spokane, Washington USA
Norwegian House Dragons

We think of Western dragons as winged, fire-breathing monsters -- like those we find carved on the beams of buildings and Viking ships. Yet in Scandinavian folklore, the stories are filled with small, benevolent dragons.
The Norwegian countryside is where you’ll find tales of House Dragons. The earliest known references to them date from 1547, and they maintain their place in the beliefs of many today. Often described as little, serene dragons, they generally live behind the main stove or the hearth in a barn or cottage. Feeding on gifts from the homeowner of milk, flour, corn or hay -- in return, the dragons bring good luck and wealth to the household.
Once the dragon adopts (or is adopted by) a household, its primary goal in life is to increase the household’s wealth, enacting a sort of hoarding behavior by proxy. It will fetch milk, corn, or money for its master, though these are usually stolen from other households.
A dragon can move into a home by one of several means. Some are hatched from the seven-year-old eggs of cocks, or might be found and unwittingly brought home. Once a dragon takes up residence, however, it is nearly impossible to chase off.
If you have a house dragon in your home, treat it well. Surely it will bring you great fortune (though it may be at the expense of your neighbors)!

Dragons are known as protectors of treasure, so why not a tine' box to hold the treasure?

Dragon100.jpg


Dragonredbirch.jpg


Dragonblackrawhideonmaille.jpg


This one sets on a piece of chain maille I made,

DragonroseHallingdallace.jpg


This tine' is rosemaled in the Hallingdal style by Ginnylee Brown.

Dragonbluefeet.jpg


Birthday present for my daughter. She loved the blue dragon "Saphira" in the book Eragon.


Tine' can be fun.


Harmony
 

spamel

Banned
Feb 15, 2005
6,833
21
48
Silkstone, Blighty!
Fantastic boxes, pictures and instructions! The design of these seems to be so simple yet effective. I take it that the natural springiness of the wood is what makes the upright pegs snap into place when you secure the lid? Quite a brilliant way of securing the lid. Could one of these be made to a very small size? What is the smallest box you have made, as I was thinking of the box Old Ray uses to keep butter in in one of his Bushcraft episodes, made from birch bark I believe.
 

spamel

Banned
Feb 15, 2005
6,833
21
48
Silkstone, Blighty!
Nice one, I have a good piece of birch bark that is quite thick for UK birch bark. I still haven't found what to make with it, at least I hadn't until now! Gonna have to try and give it a go.
 

Harmony

Tenderfoot
May 15, 2008
79
0
87
Spokane, Washington USA
Spamel,

I use bark from Siberia, it is 3 mm.

The bark used in boxes from Norway is sometimes doubled to make the side wall thicker.

Post your butter box when it is finished.

Harmony
 

Harmony

Tenderfoot
May 15, 2008
79
0
87
Spokane, Washington USA
Most tiner are oval shaped. If you elongate the oval it is boat shaped.

I felt this suggested a Viking long ship.

I purchased a tine' that looked like the box maker was after a Viking look. The box is incomplete and over 50 years old.

The craftsman was a very good carver and put a folding handle on the box. You can see outlines in his painting that was never filled in.

DavesCarvedlidfoldinghandle.jpg


Here is my Viking tine', it is 35 cm long.

Vikingmedstainedshields2.jpg


The tine' is all birch. The end posts are carved to give shape to the dragon, his eyes are gold beads.

This tine is all ash.

Vikingmedbowshot94.jpg

Vikingmedallash94.jpg


This tine' I made for my new great grandson. His last name is Oscarson, I call him "Olaf, the littlest Viking". I didn't know what to think when I found out Olaf's mother was using his very Viking tine' to store his pacifiers. Blue shields for a boy.

Vikingmedblueshelds.jpg


I had a request to make a Viking tine' to hold human ashes. This requires a much bigger box. This tine' is 51 cm long. You will notice I made a folding handle, so the ship profile will show when it is setting on a shelf.

Vikinglarghandleup.jpg

Vikinglarghandledown.jpg


As you can see there is no end to the things you can do with the basic tine'.

Harmony
 

BCUK Shop

We have a a number of knives, T-Shirts and other items for sale.

SHOP HERE