The Pigging Canoes & Stupid Idea

No Idea

Bushcrafter (boy, I've got a lot to say!)
Sep 18, 2010
2,420
0
Dorset
Theres a bit of a problem with these canoes, especially theirs. They live on the 7th floor of a block of flats and will have to be able to get them in the lift.

I think getting a 14 ft canoe in the lift could be difficult.

So.....
 

No Idea

Bushcrafter (boy, I've got a lot to say!)
Sep 18, 2010
2,420
0
Dorset
We got the bits of their canoe out from under my bed and threw them out the bedroom window into the garden.

We spread them out over TANK, my biggests half finished creation....

b-dscf3257.jpg
 

No Idea

Bushcrafter (boy, I've got a lot to say!)
Sep 18, 2010
2,420
0
Dorset
Stepkid decided to look at the plans and instructions, thinking the next steps would be in there.

lol. He hadnt counted on me modifying things and not amending the drawings.

b-dscf3258.jpg


He did well, though. Normally, looking at the plans is a really good way to start.

Aha! Hes found the page where they join the parts of the sides and the parts of the bottom together.

b-dscf3259.jpg


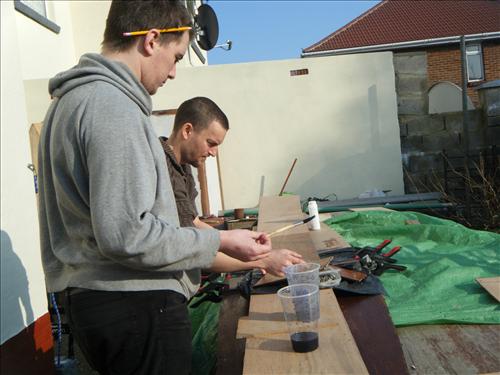
I gave the boyfriend the sizes I needed cut and he had a go at marking them out..

b-dscf3260.jpg


He needed several goes as the tape kept changing length. Not exactly sure how.

b-dscf3261.jpg


When using a square to draw the lines, its important to make sure you have it on a straight edge of the wood.

b-dscf3262.jpg


Oh dear.

He hasnt used the jigsaw before.

I made sure he didnt try using it on top of TANK, as I didnt want to have to explain how it lost bits...

b-dscf3263.jpg
 

No Idea

Bushcrafter (boy, I've got a lot to say!)
Sep 18, 2010
2,420
0
Dorset
I had a look at the pieces he cut with a tape measure that doesnt keep changing length and explained to him that the blade on the jigsaw is a few mm thick, so if you cut on the wrong side of the line, you end up with pieces that are a few mm smaller than they should be....

He decided he needed to cut some more.

b-dscf3264.jpg


He cut all the bits for one side, and Stepkid cut the bits for the other.
 

No Idea

Bushcrafter (boy, I've got a lot to say!)
Sep 18, 2010
2,420
0
Dorset
They were both really nervous about mixing and using fibreglass.

After nagging for a while, I agreed to show them what they needed to do with the bottom section and then they would do the sides.

So....

He is priming the first bits for the side with resin and the ends of the sides themselves. These are separated with a binliner to stop them sticking together....

b-dscf3266.jpg


He is mixing in microfibres...

b-dscf3267.jpg


OI ! Thats my screwdriver!

b-dscf3268.jpg


Pigging kid.

Its mixed...

b-dscf3270.jpg


something like as thick as peanut butter.

The boyfriend just made lunch...

b-dscf3271.jpg


Cant leave the resin at this stage as it will set in minutes. the noodles will just have to wait.

He has coated it with microfibres adn boyfriend got in the way as the pic was taken.

b-dscf3274.jpg
 

No Idea

Bushcrafter (boy, I've got a lot to say!)
Sep 18, 2010
2,420
0
Dorset
They have stuck the first male part of the join in place...

b-dscf3275.jpg


He is just about to flip the plastic across to the other side, and now hes stuck on the first of the female side of the joint.

b-dscf3277.jpg


He is building up microfibres on the back of the joint to stop it peeling off...

b-dscf3278.jpg


b-dscf3279.jpg


He is microfibring the female first piece...

b-dscf3288.jpg


He is now putting on the last piece of the female side. By this time, I had gone to collect the kids, so I didnt get to see this.

b-dscf3289.jpg
 

No Idea

Bushcrafter (boy, I've got a lot to say!)
Sep 18, 2010
2,420
0
Dorset
He is building up the fillet to stop it peeling...

b-dscf3291.jpg


He is sealing the top of the joint with resin...

b-dscf3292.jpg


He is clamping it so that it doesnt move while it sets...

b-dscf3293.jpg


He is trying to get some screws in to hold it secure....

b-dscf3294.jpg


Er....

He should touch his fingers together and put the screw in the V that forms between them, put the driver on top of the screw and lean it into the V.....

b-dscf3295.jpg


He is actually trying to grip the screws....

b-dscf3296.jpg


This makes that very obvious...

b-dscf3301.jpg


Need to teach him how to use this tool.
 

No Idea

Bushcrafter (boy, I've got a lot to say!)
Sep 18, 2010
2,420
0
Dorset
THe sky is looking a bit overcast. Time to call it a day. Well....3 hours.

b-dscf3303.jpg


Need to protect the fibreglass as it sets from damp - including dew. Thats why we did this on a plastic tarp...

b-dscf3304.jpg


I wrapped it up and weighted it to stop the wind pulling it off and took them home.

The wife had settled down to just a bit grumpy by then.
 

No Idea

Bushcrafter (boy, I've got a lot to say!)
Sep 18, 2010
2,420
0
Dorset
Taking the clamps off...

b-dscf3306.jpg


Writing numbers on them in circles so I can tell which bits belong together.

b-dscf3307.jpg


Going to crack them loose lengthways...

b-dscf3308.jpg


It came apart easily withoug any risk of loading the joint...

b-dscf3309.jpg


Its out...

b-dscf3310.jpg
 

No Idea

Bushcrafter (boy, I've got a lot to say!)
Sep 18, 2010
2,420
0
Dorset
The tongue is still wrapped in binliner...

b-dscf3311.jpg


Discovered the screws they used to tighten the joints went straight through and fixed the noggins to the back of the side.

b-dscf3312.jpg


They didnt scrape off excess resin with a plastic scraper. My fault for not telling them.

b-dscf3313.jpg


Must remember to take pics as they labour to get that off later lol

The tongue side

b-dscf3314.jpg
 

No Idea

Bushcrafter (boy, I've got a lot to say!)
Sep 18, 2010
2,420
0
Dorset
The second side. The bin liners stopped the noggins used to separate the sides from sticking. Fibreglass does not stick to pvc.

b-dscf3315.jpg


Unwrapped it...

b-dscf3316.jpg


Ready to part them..

b-dscf3317.jpg


Im stacking them up carefully, so there will be no weight put on the joins..

b-dscf3318.jpg


Now the bottom....

b-dscf3322.jpg


Unwrapped...

b-dscf3323.jpg


Er...

b-dscf3324.jpg


glad I didnt have an audience for that!


Its a bit wider, so Im carefully cracking it apart.

b-dscf3325.jpg


The tongue end stacked up..

b-dscf3326.jpg


This is the female end that the tongue will push into.

b-dscf3327.jpg
 

No Idea

Bushcrafter (boy, I've got a lot to say!)
Sep 18, 2010
2,420
0
Dorset
All carefully stacked...

b-dscf3329.jpg


Some lengths of reasonably straight wood on the table, out of the way of my hammock spot.

b-dscf3330.jpg


Ive lifted the parts on, but Im not happy....

b-dscf3331.jpg


Thats better. One end was overloaded.

b-dscf3332.jpg


All wrapped and off the ground so it will be fine until they next visit.

b-dscf3334.jpg


Im getting nearer to the kids going adventuring down the river.

Its going to take a while though.
 

pastymuncher

Nomad
Apr 21, 2010
331
0
The U.K Desert
Just caught this thread, cascamite/extramite is not the glue of choice for this application it's not very resistant or very durable.
Epoxy would be the best choice but you would still run in to problems with temperature, and cost.
Cascophen/Extraphen is another good choice, but again temperature plays its part.
For general use around boats Balcotan is probably the most user friendly (make sure you wear gloves), its a moisture curing polyurethane glue and cheap compared to epoxies. Whilst not a true gap filling adhesive it does foam up to fill voids, the foam is weak though.
It's very easy to clean up once hardened as well.
Great project for the kids BTW.
 

No Idea

Bushcrafter (boy, I've got a lot to say!)
Sep 18, 2010
2,420
0
Dorset
Hi Pastymuncher

Havent got any of that, or the funds for it, so they are using layup resin and microfibres.

Its not ideal, but Im pretty sure it should work.

Great Project for the kids...Many thanks
 

No Idea

Bushcrafter (boy, I've got a lot to say!)
Sep 18, 2010
2,420
0
Dorset
I think the pub finally ran out of booze.

The wifes boyfriend and her eldest son reapeared.

Just having a quick look for blue moons and checking to see if its christmas.

When they made the joints for the two ends of the canoe, they managed to get some lumps in the groove.

I think next time they may be more careful.

b-dscf3755.jpg


Step kid nearest is hacking out bits of fibreglass with a rotary file.

I am going to bash him if he breaks it as I cant find anyone who stocks them for the dremmel.
 

No Idea

Bushcrafter (boy, I've got a lot to say!)
Sep 18, 2010
2,420
0
Dorset
He is grinding off the high spots.

b-dscf3756.jpg


He poked the rule in the slot and checked how deep it was, then checked the length of the tongue and found it wouldnt all go in. He is marking off the excess to be removed.

b-dscf3758.jpg


and the other end.

I got the job of grinding it. Grinders arnt something I will trust to novices.

b-dscf3759.jpg


If he pokes a hole through the boat we are using as a workbench.....

This is where the bolts will go to hold the two halves together.

b-dscf3760.jpg
 

No Idea

Bushcrafter (boy, I've got a lot to say!)
Sep 18, 2010
2,420
0
Dorset
I found some stainless captive nuts and allen screws with penny washers to spread the load.

b-dscf3761.jpg


Bolting it up for the first time.

b-dscf3762.jpg


They are struggling a bit to get it together.

b-dscf3763.jpg


Missed a lump...

b-dscf3764.jpg


The boyfriend was doing the second joint, and step kid was struggling trying not to help....

So I gave him some tins and some new instructions....

b-dscf3765.jpg


Joint nearly clear...

b-dscf3766.jpg
 

No Idea

Bushcrafter (boy, I've got a lot to say!)
Sep 18, 2010
2,420
0
Dorset
Er....I think you should carefully pierce the holes - not stab it!

b-dscf3768.jpg


My penknife going through it again.

b-dscf3769.jpg


Time to try again...

b-dscf3771.jpg


Nearly...

b-dscf3772.jpg


but not quite.

b-dscf3773.jpg
 

No Idea

Bushcrafter (boy, I've got a lot to say!)
Sep 18, 2010
2,420
0
Dorset
He is tweaking the edge of his bottom can...

b-dscf3774.jpg


He has sort of got the first hole done...

b-dscf3775.jpg


Lol

Stepkid just worked out what he was making.

b-dscf3776.jpg


He may be a fully trained chef, but he hadnt ever had to make the stove before he could start cooking before.
 

BCUK Shop

We have a a number of knives, T-Shirts and other items for sale.

SHOP HERE