My Hammock Pod Project,
The Ogripod
So why a pod for my hammock, and not an under-quilt like loads of others folks have got?
Having recently been to the BCUK Christmas Moot, my buddy Queeg9000 (who did not have a quilt, but tried brazening the night out in a Nanok 0 bag and a foam pad) near froze to death. I spent the night in a tent using the excuse that I had my daughter with me, and I needed to know that shed keep as warm as me. In speaking to other BCUKers who had used quilts, they had been OK (they didnt use words like toasty, excellent, Ooh lovely etc) and some complained of cold spots and draughts through the night.
I want something that costs buttons to make, keeps out all manner of weather and that I can carry around in my shirt pocket. OK, so some of these wishes are going to be abandoned as unworkable real soon.
I had an idea, well, two actually but both using the same donor item a king-sized duvet. The Group-buy hammock measures 120 inches end to-end, minus hooks and ties etc material length is 104 inches. King size duvets are 80 x 86 ish inches giving a diagonal length of 120 inches Spooky or what?
Plan A is to fold the duvet along its diagonal, cut off some corner bits and sew it into a curved maggot shape so it completely encloses the whole hammock, put in a zip above where my head/face would be for ventilation and string the whole issue up with a ridge line to take the weight of the duvet Im a bit of a fat git and I dont fancy probing the ultimate tensile strength of a few yards of silk by adding to my already considerable mass!
Plan B is to cut a 10 inch strip of material off the long side of the duvet and move it to the end, creating a pad of 70 x 96 inches (remarkably close to the dimensions mentioned in Risks Travel-pod instructions). This then could be
A), attached to one side of the hammock a-la under-quilt, go underneath where it could be supported again like an under-quilt but then extend into a wrap-over that can be tucked into the first side of the hammock again, Trogs Taco!
Or B), make another tube and add some draw cords at each end to keep the wind out.
Either method sounds on paper, to be as snug as the proverbial carpet dwelling insect, though any method will blow the shirt-pocket-portable idea clean out of the water not to worry, I want warmth, on a budget.
Hand stitching for starters, shouldnt be too hard needle & some thread, poke it in and pull it through, then do it again and again until you reach the end. Oh man thats a long way to sew, my fingers were getting sore and Id only completed a few feet!
So here goes with the sewing machine boy aint there a bag full of gizmos on those things. I plugged it in and got the light on, & I could make things whiz around and Ive found where the bobbin lives but the handbook for it has long since been lost. So fearing some beginners lessons from the mother-in-law, I had a search on the Interweb, which got me enough information to wind the bobbin, thread the machine and get to a stage where you hit the pedal and go for it; it was time to build the confidence with the machine.
After a few days of cutting, sewing, unpicking, re-sewing, I managed by trial and error, to get to grips with the machine theyre not nearly as scary as I had thought, despite my childhood experience of running three or four stitches through my fingernail on my mums old treadle powered Singer!
I stitched both triangular off cuts to the head end of the pod (which has now been christened the Ogripod) so that it resembles an oversized, tapered-on-one-end sleeping bag.
First trial was with the duvet based pod, on its own it was pretty much clear, that things were heading in the right direction. The hammock was fully enclosed, which was good, though I could easily feel the cold wind blowing through the material not so good.
A weather proofing cover, was next up for brainstorming, and more research put me onto people such as- Jacks-R-Better, Ed Speer, Just Jeff and the likes, who are modern hammock pioneers in the States They have some great ideas and greater products on sale, but I wanted to keep the costs as low as I could whilst having a bit of fun experimenting. I wanted to copy the idea of a Hammock Sock, on
www.Tothewoods.net. And so to EBay, where I duly identified and secured a bargain piece of ripstop nylon, 6 meters posted for less than £7! This was sewn into an even bigger tube shape, to totally enclose the Ogripod, lending its windproof properties to the project.
There had also been another pondering going on, once I had got all of this insulation and weatherproofing hung on the ridgeline, how was I going to [1] get it to the other end of the hammock, [2] hold it there, and then be able to [3] close up the once open ends, so that I could stay inside being all warm.
This is where my scatterbrained ideas saved the day, with four different colour cords and a handful of accessory karabiners, threaded at different points at the head end of the hammock support straps, the open ends of both pod and sock and onto a hook within the hammock as a strongpoint for fastening it all to, I had a working pulley system
So heres the logistics;
I get into my hammock nothing startling there, but with the Pod and Sock down at the foot end, supported on a ridge line (read Ratchet Strap).
As I lie back, and with a bit of wriggling, the two new items can be pulled up to shoulder level.
The clever threading of the accessory karabiners around the hammock and the cords then allow me to:-
Pull both Pod and Sock to beyond the head end of the hammock.
Draw up the opening of the Ogripod to create a warm cocoon.
Lastly, close-up the opening of the Ripstop Nylon Sock as a windproof cover, keeping the whole thing warm as toast.
. All from within the pod itself by pulling and securing the different cords onto the ratchet strap that can further be used for raising or lowering the pod around the hammockee depending on the amount of sag and airspace you want!
I have thought long and hard about the sensibilities of tieing yourself so tightly into a web of string and have come to some conclusions if you should ever need to get out of the hammock in a big hurry, you should keep a small folding knife in the pocket of the hammock for cutting your way out though it is hard to envisage such an event baring fire in the hammock or forest fire close by. So theres No Smoking in the hammock and theres No Smoking outside the hammock either, proximity to campfire might also influence you proposed hammock site.
There is a definite order to the pulling and tying off of the various strings and to ignore the order can lead to a colossal tangle, hence it would also make big sense, to keep a torch inside the hammock to verify that things are happening in the correct sequence to enable a hassle free egress.
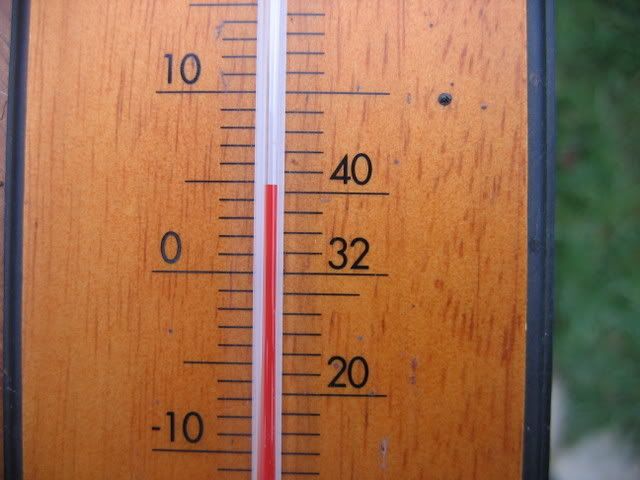
23rd December 2006, the weather was cold (4 degrees C) and foggy, no wind to speak of but chilly enough to test my ideas out. It took about three minutes to get everything slung up between two trees but then took a few more minutes whilst I got my head around some of the intricacies needed to set up the pulley system.
Once inside the enclosed cocoon, you can really feel things warming up; I kept my trousers and jumper on, but removed my thick padded shirt, and my boots. Taking a thermometer and camera, I settled down to see if things would steady to a given temperature, but once the meter got to 17 deg C, I thought that was sufficient for some reasonable sleep. There is still room inside, should it be needed, for a CCF pad and an over-quilt. I had the ventilation zips open a few inches and you can really feel the cold air dropping onto your face once the convection currents get going.
Happy after a two hour trial, I tore it all down for the final adjustments. Ive got a little more sewing to do then itll be back out for an overnighter!
December 27th was the overnighter, not as cold as the first trial but temperatures were low single figures just same (still working in degrees Celcius). Getting into the hammock in the dark seemed to go OK, I had my tarp pitched low and steep to keep the wind at bay it made a huge difference to the cold air convection draught as mentioned previously. Again I wore trousers and a light sweater, keeping my rolled-up shirt as a pillow. It soon warmed up and I drifted off to the land of nod. There were a few things that kept waking me however, A pump running on a near-by farm was noisy, and my dog made repeated visits through the night, sniffing around to check things out and wagging his tail against the tarp cords resulting in a bump bump bump sound. I woke at 04:30 on his latest visit to notice that my back was a little cold (the rest of my body was warm to the point of sweating) the pod had slipped and was open at the end letting cold air in. After a bit of shuffling around to sort the pulley cords it warmed up again but I knew that Id not get back to sleep, so called it quits and bailed for the house. The pod had performed well and I was pleased with what I have created. It felt as though I either needed fewer clothes on, or it needed to be colder and Id need to use a closed-cell foam pad
So what would I change if I was to make another one ?
1, sewing through a duvet, once it has been cut is a nightmare more practice on the sewing machine then Id sew two parallel lines to hold the insulation tight then cut through between the lines of stitches.
2, Id be tempted to try plan B, making a huge rectangle by sewing the edge onto an end of a duvet the resulting thing being tidier in the way of pre-sewn edges on the periphery for sewing zips and tabs etc.
3, Id like to improve the pulley system somehow to ease the cordage conjestion, making night-time egress without a torch easier for those all important Bio-breaks
So what of my wish list,
Cost
King size duvet 13.5 tog £9-99
EBay Ripstop material 6m £6-94
Ratchet straps £2-99
Zips £2-20 ea
Webbing for tabs and strengthening £1-00
Accessory karabiners x 3 £1-29 for two
Total = less than £30! Not buttons, but a darned site less than many other products on the market.
Weatherproofing
Initial trials have been promising though it feels too warm to be useful in autumn/spring I can feel another Ogripod on its way, using a lighter weight donor.
Portability
Nothing the size of a king size 13.5 tog duvet is going to fold up small, accept the fact that you are doing this on a tight budget and get used to bulky insulation.
Overall, I really enjoyed working this idea through; I might even say I could do it again if someone wanted to make it worth my while, as a saleable item.
Finally the pictures;
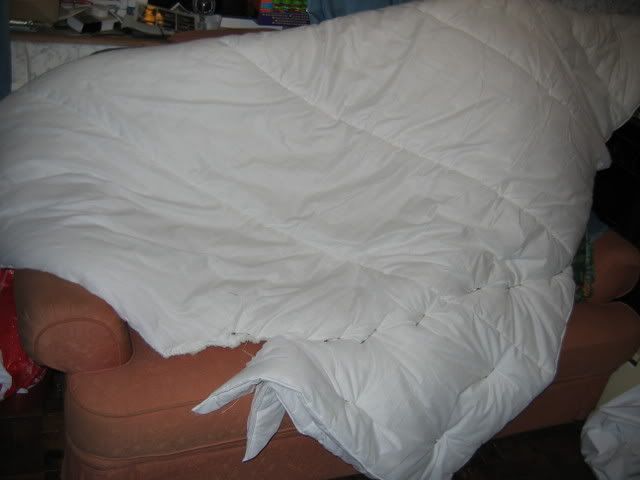
King Sized duvet folded corner-to-corner and the cut begun!
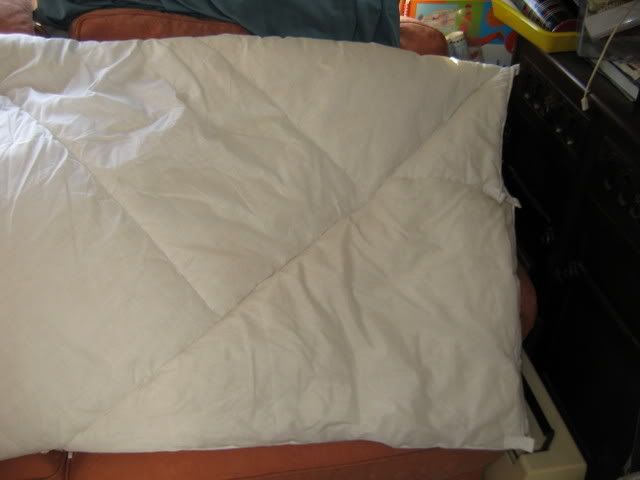
Cut off corners sewn onto the head end of the pod and some tabs sewn on the open end.
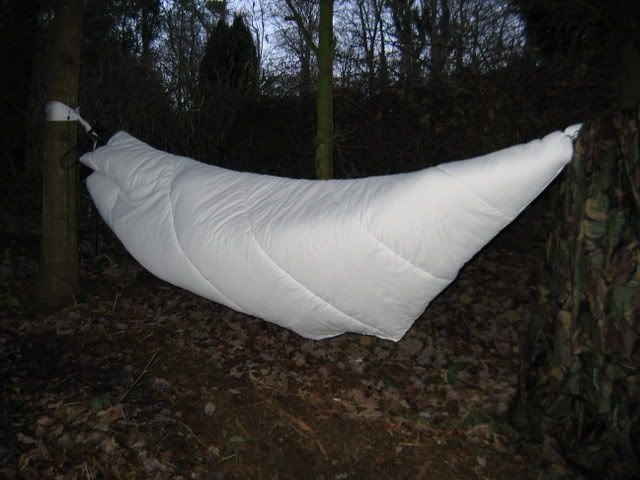
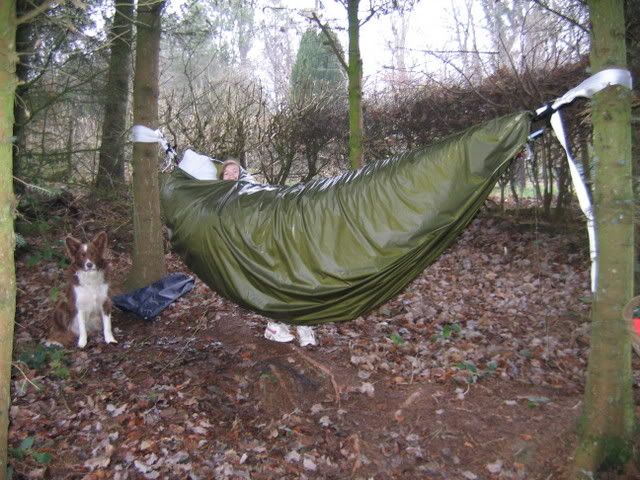
Ogripod, in situ, around an occupied hammock, cheers Queeg9000.
An early experimental pulley system and ridgeline. Showing how it all folds together to keep out the weather.
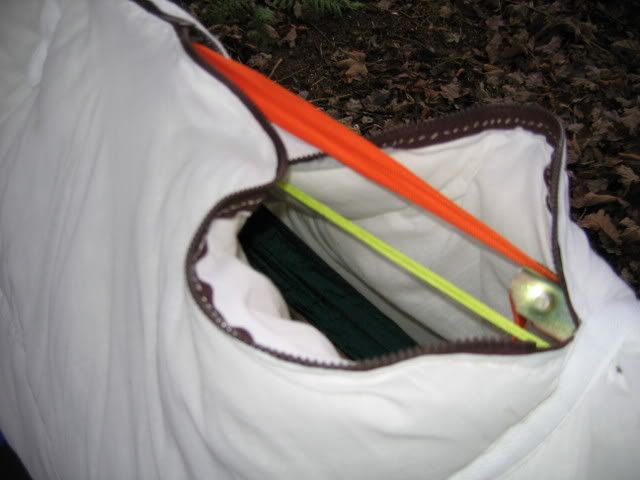
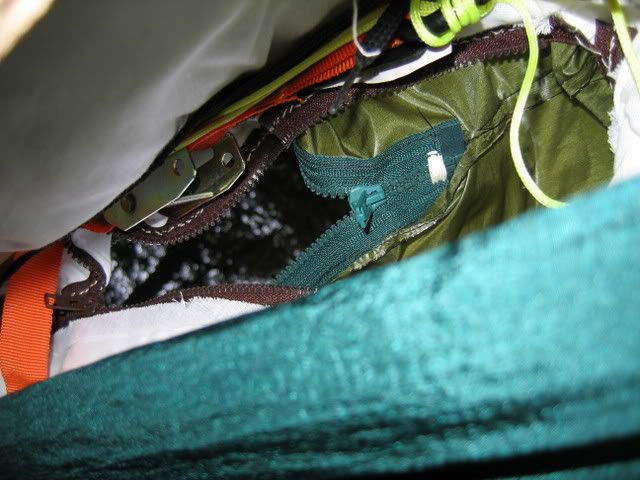
Crude but effective, zippered ventilation hole and a later version of the ridgeline adjustable from within.
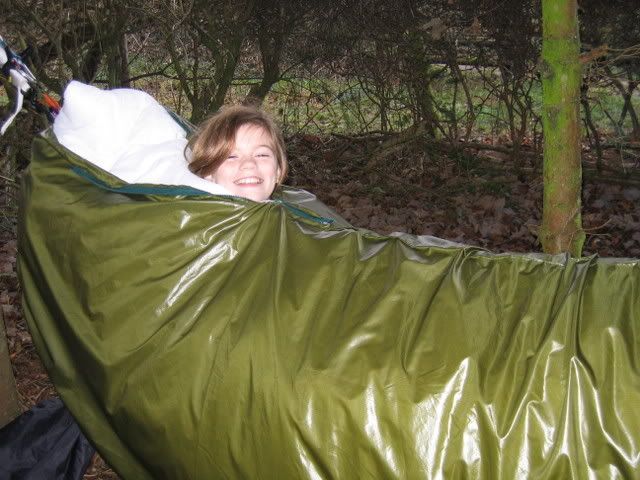
Complete with the Ripstop Hammock Sock.
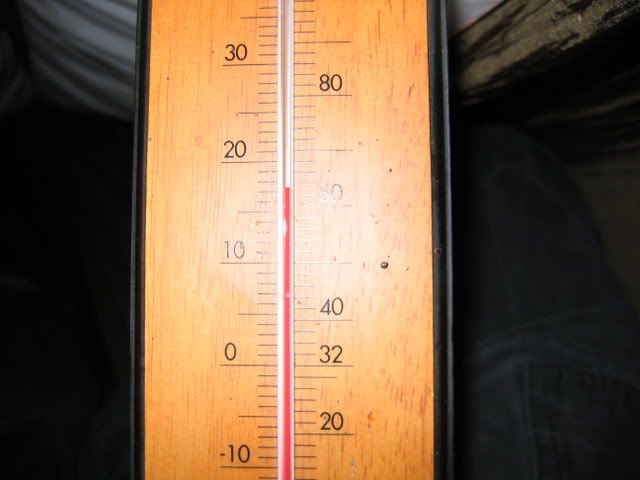
Outside air temperature.
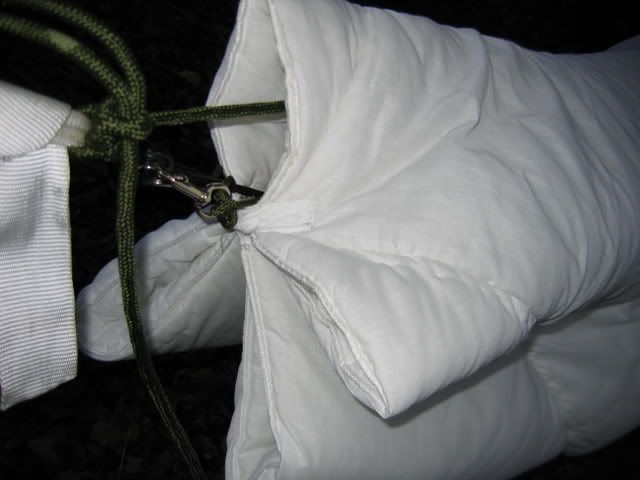
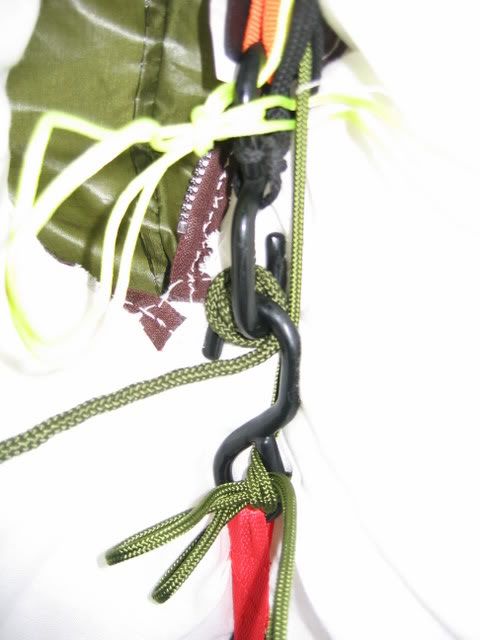
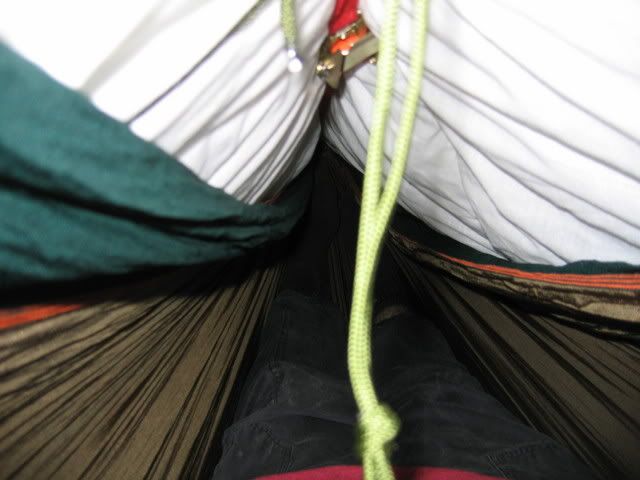
A view of the inside, showing the complexity of the pulley system.
The thick green Para cord runs to a karabiner on the supporting tree and back to the end of the pod, allowing the pod to be pulled beyond the head end of the hammock.
Yellow cord closes up the Ogripod and thinner green cord closes the Sock opening in a similar fashion.
Ratchet strap adjusters (just out of frame, both ends), allow adjustment of dead space beneath the user and counters any difference in sag once the hammock is occupied.
Note the quality of the sewing on the zip!
Its quite roomy inside! Plenty spare for quilts and pads if needed.
Both vents open to the trees above. The stitching on the green zip is better, having got to grips with the sewing machine by this time.
Inside temperature after and hour or so!
My daughter helping (spelt H-i-n-d-e-r-i-n-g) and having fun. Final modifications will be to sew the top end of the sock together to keep the cover over the pod.
Thanks for reading everyone, any questions, pleased ask.
Cheers
Ogri the trog