I had been using a Maxpedition Manta for a while for all my day to day stuff (wallet, camera, USB key, note pad, pen, flashlight, etc.). It was fine, save for that it wasnt much good for carrying books - something I tend to do a lot of.
Ive been using a crappy attache case/messenger bag for a while. Cheap material, poor construction, so it was falling apart. But it had been given to me, so made use of it sometimes. During my recent stint at school, it served as the carrier for all my books. Okay for that purpose, but not much good for anything else, and the quality of it was abysmal.
So I ended up carrying two bags.
Decided to build myself a messenger bag, that not only allowed me to lug books, etc., but also organize all my gizmos and gadgets. All the features I wanted, none of the ones I didnt. Engaged the brain, did some measuring and drawing and came up with the Messengemups.
And as you look at these photos, keep in mind the whole thing was sewn by hand. Needle, thread, two fingers. Okay, and some needle nose pliers in the really built up areas.
(And I apologize for the fact that it is in hard to photograph black. But I think you can discern what is going on. For prototypes I prefer to use light colours (mainly because they do photograph better), but I made this one black, what with being a ninja and all.)
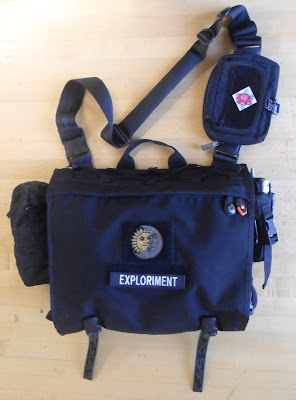
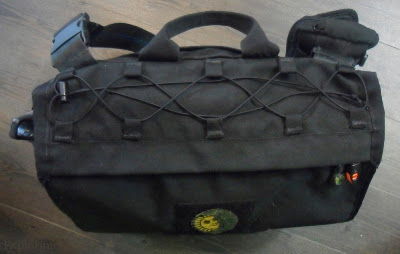
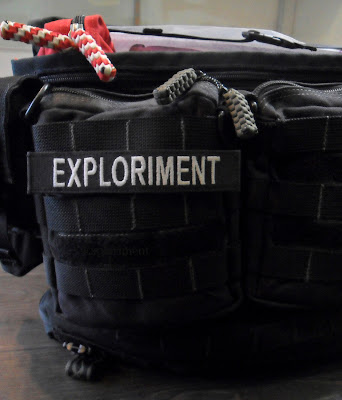
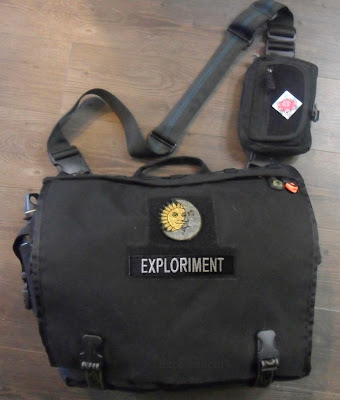
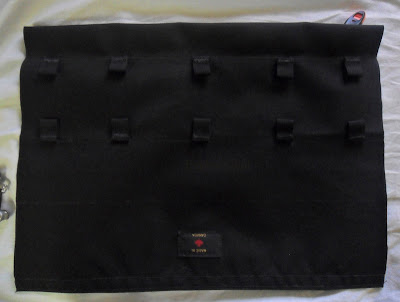
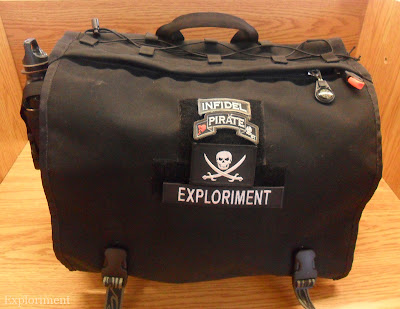 Front. Showing the bags most important and valuable feature, Velcro for cool guy patches.
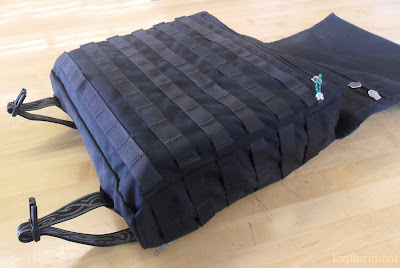
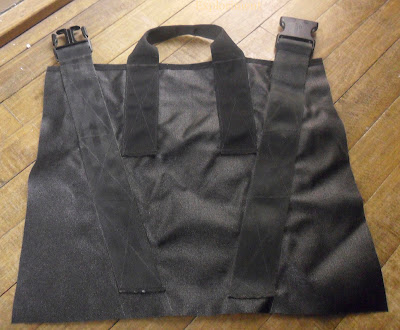
 Back. Carry handle along the top. I have to say, the straps for the shoulder strap, angled a bit and along the back, rather than along the sides like most bags like this, works very well. There is very little sway when I hustle.
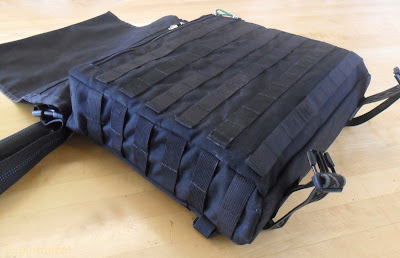
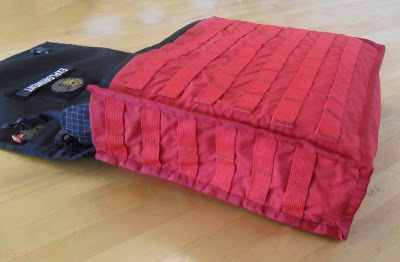
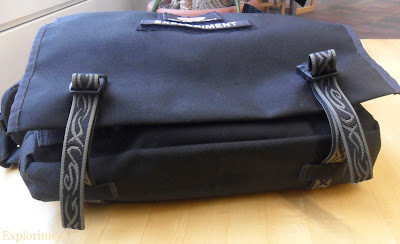 Bottom. Used up some of the webbing I had left over that Leo Zulueta designed for Teva. Nice contrast to the black.
 Top. Bunjee to stash a jacket, umbrella, shillelagh, baguette, foot long submarine sandwich....
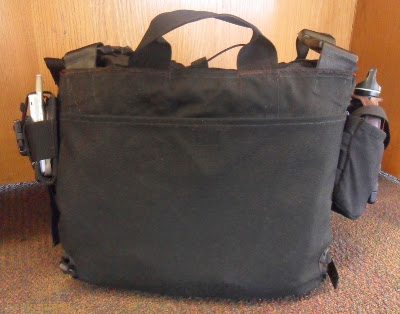
 Sides have PALS webbing...
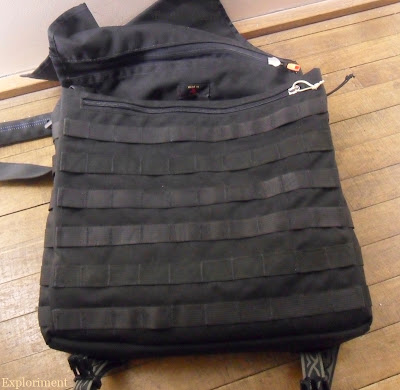 .....as does the front when the flap is lifted. There is also a zippered compartment at the top.
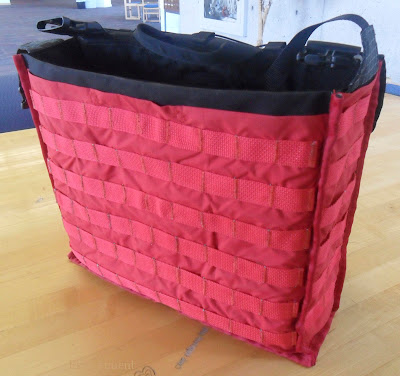
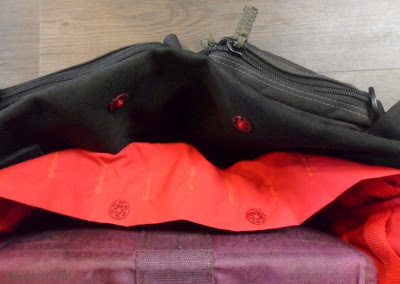
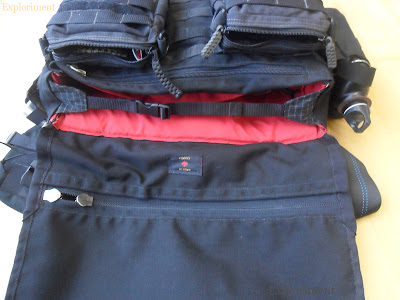
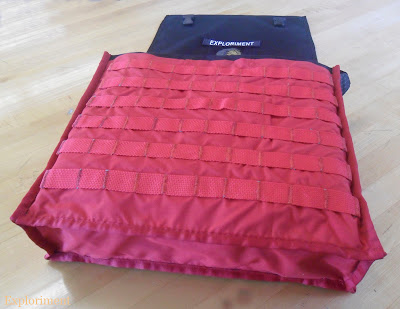 I lined the inside with red rip-stop to avoid that cavernous black hole effect. Tried to find bright yellow or orange, but all I could get was this red, and I ended up really liking the way it looks. This is the other side of the front of the bag, ie the side that would be away from my body. At the top is another slot as well. PALS to allow me to add organizational pouches if I choose.
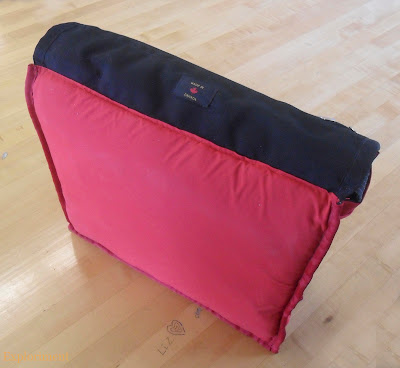 This is the side of the bag that would be against my body. Padded with ¼" foam to protect my delicate derriere. And my laptop. One other thing I am about to tackle is either a padded divider or a sleeve to further protect the laptop.
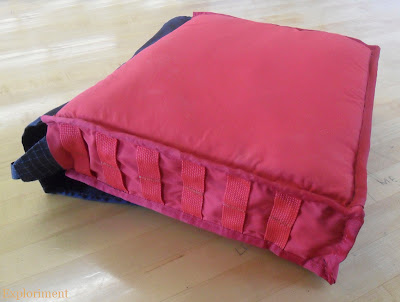
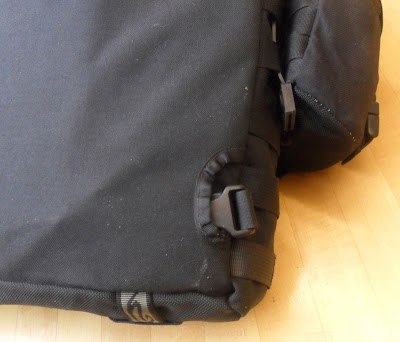
 The sides also features PALS to allow me to add organizational pouches if I choose.
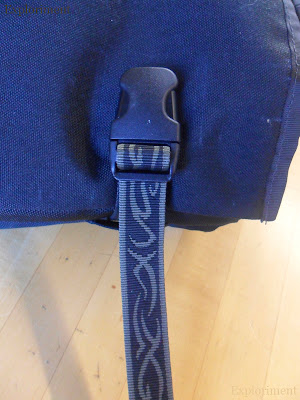
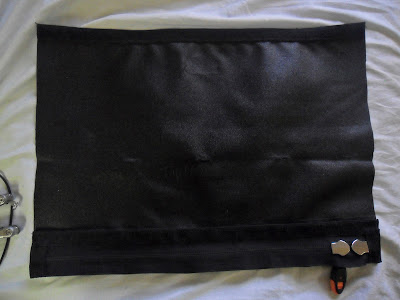
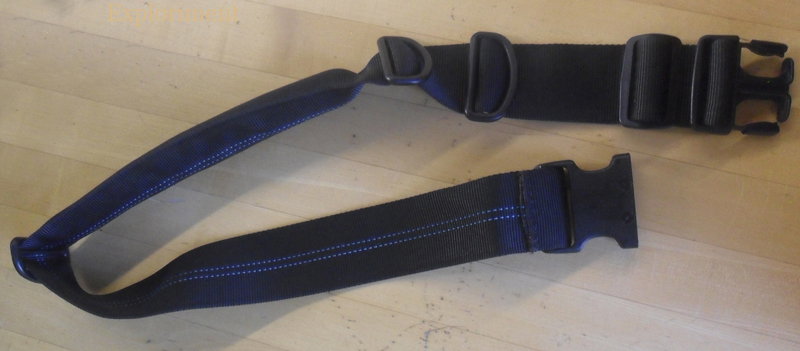
 Along the back I also have a waist belt that can either be hidden away or removed altogether.
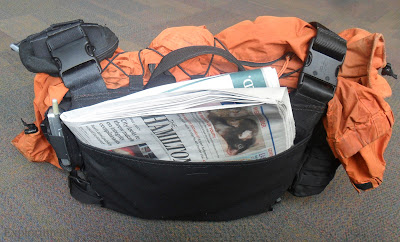 The pocket that can store the waist belt can also be used to stash a newspaper, magazine, etc.
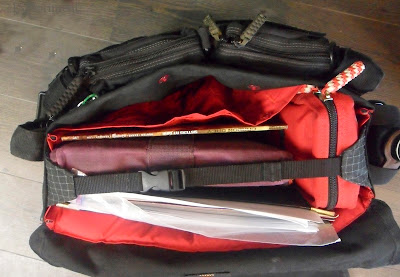
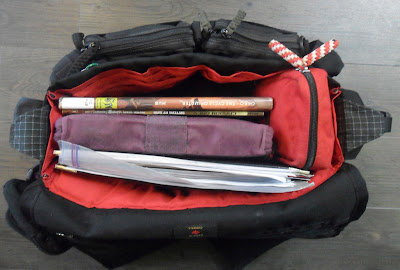
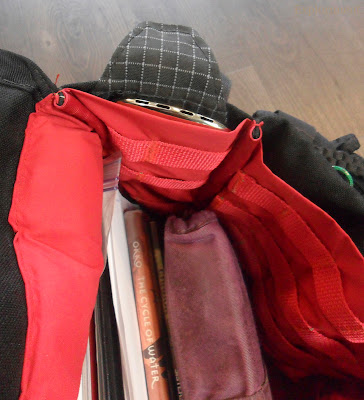
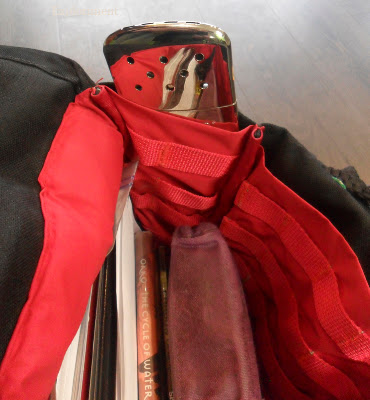
 Looking down into the bag, and also into the zippered compartment that runs along the front.
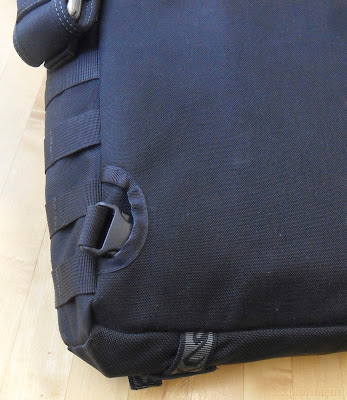
 Here you can make out the slot pocket along the front. I added a buckled strap to counter the sides flaring out. Its been a flaw on other bags and pouches Ive done, so I added this to deal with that. If I find that it isnt necessary (and so far that seems to be the case), I can easily remove them. But adding them wasnt a big deal, and I would rather have them to prevent having rain water run into the bag. (I made the flap a bit wider at the top than the main compartment as well.)
 The dimensions of the main compartment are 40.6 cm (16") wide, 35.5 cm (14") high, 10.1 cm (4") deep. I did some fancy mathematical computations and calculated it to have a volume of a little over 29 liters or just shy of 1800 cubic inches. Big enough to make it a heavy beast when filled with big hardcover books.
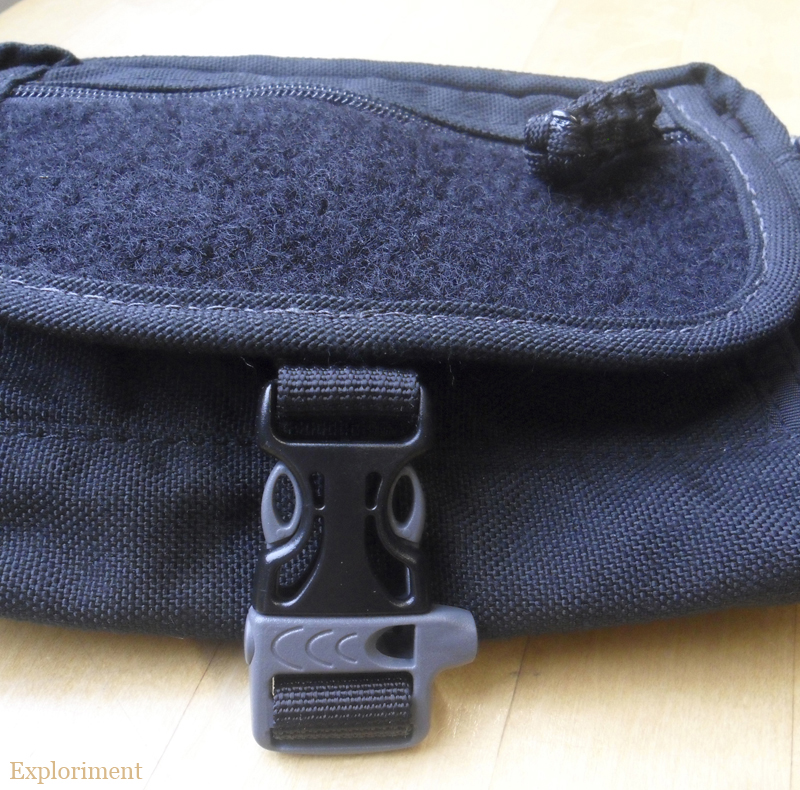
 I installed some snaps to keep the slot pocket closed.
 I also retained slot pockets along the sides. But I couldnt think of much that I could keep in there that was long and thin. So I sewed them shut at a certain height (different on each side) so I could keep small things in there, and not have to try and then retrieve them from the bottom of a 4"x14" pocket. Here I have a Zippo Hand Warmer.
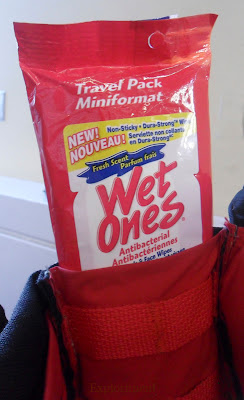 Here I have some wet wipes. Not definitively what I will keep in there, but it gives you an idea.
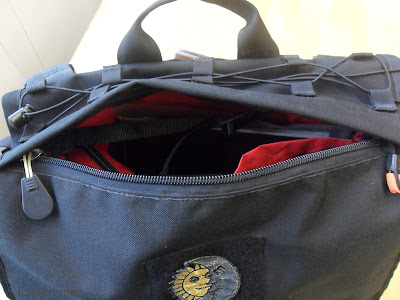
 On the flap I have a zipper, so that I can access the main compartment or pouches along the front without having to lift the whole flap.

 Makes getting at my wallet much easier.
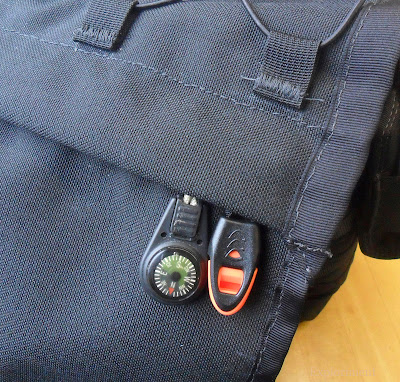 And the pulls I have on the flap zipper. Whistle and a compass. Not only useful, but the tactile aspect makes it easy to tell which one to tug on to open the zipper.
 On the flap I opted to use some surface mounted buckles. They are about the only part of the whole project that I am having some misgivings about.
 Lift up the flap and everything looks normal.....
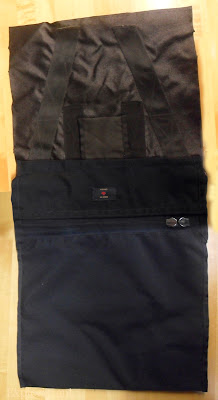
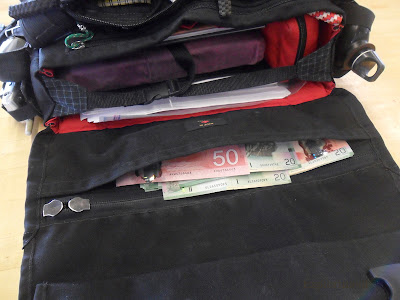 ....but there is a hidden pocket that runs all along the top of the flap to stash vast fortunes, fake IDs, banned political tracts, Penthouse centrefolds, etc.
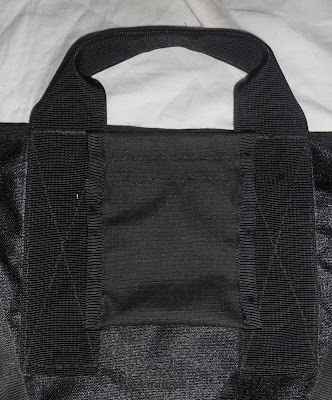
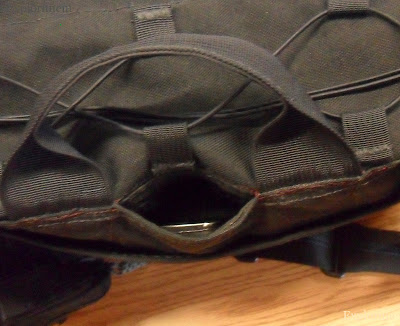 Along the back between the carry handle is another hidden pocket.
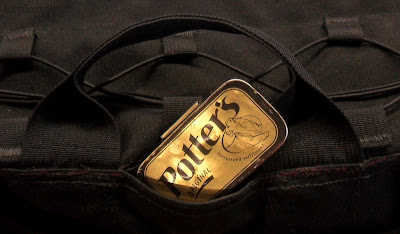 Perfectly sized for a tin of surprisingly refreshingPotters.
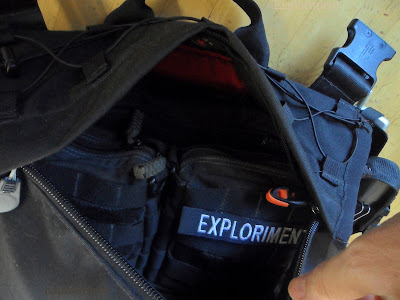
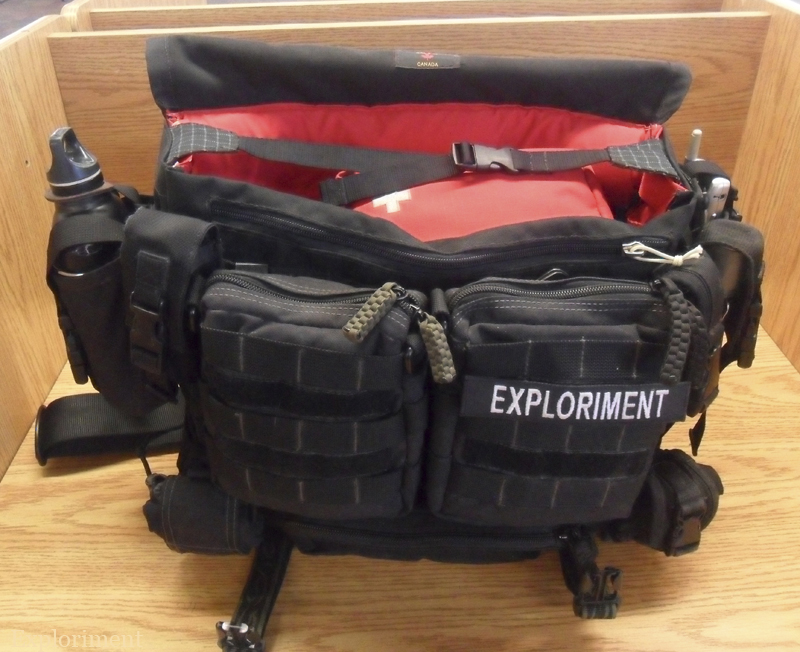
 Front with the flap up, showing some of the pouches I have mounted.
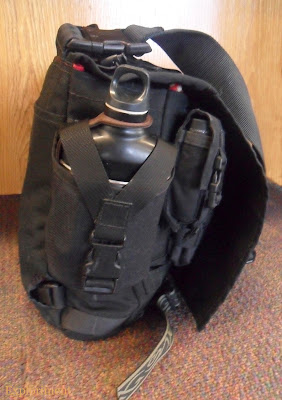 On the back I have the Siggmups.
 Which can be interchanged with the HSGI Nalgene pouch.

 Next to that a Tactical Tailor multi-tool pouch with a monocular.
 In this photo I have a Maxpedition Rolly-Polly, but Im not stuck on it being in that particular spot. Beside it I have a Tactical Tailor 1H pouch. Another one that is there because I was fiddling around with pouch arrangements.
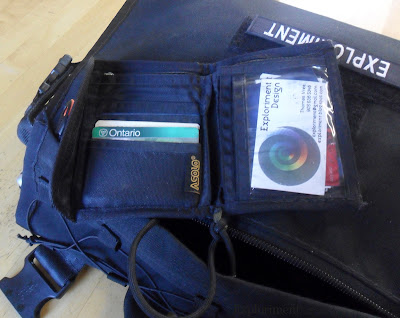
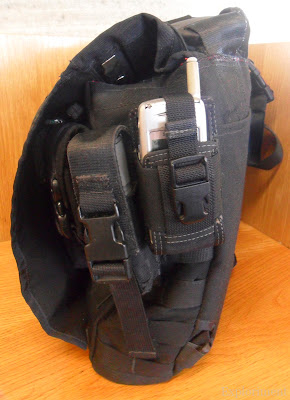
 Two Maxpedition TacTile pockets. The one at the back usually contains my camera, a variety of USB drives, etc. The one at the front has my wallet, business card holder, pen, marker, note pad, etc.

 Behind the front TacTile I have my A.G. Russell WoodsWalker. I didnt put it back there for any nefarious, concealed, stabby stabby purposes. Just a convenient, safe place to put a knife that gets used for such sexy things as fruit and vegetable peeling, cheese slicing, package opening, etc.

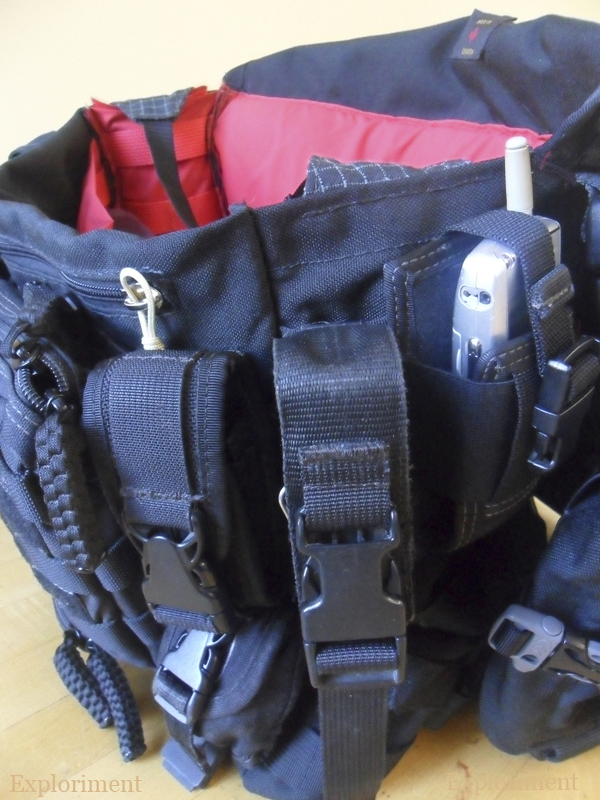
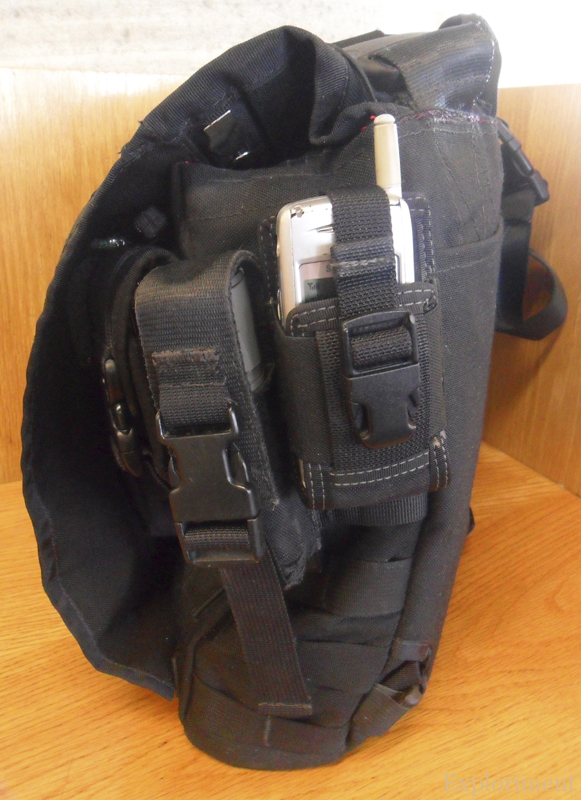
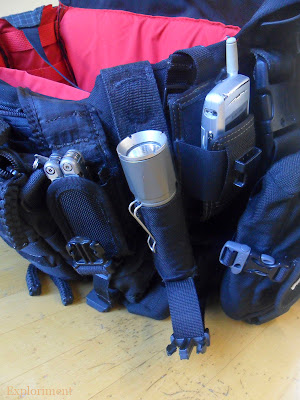 Beside the front TacTile I have a modified Leatherman pouch with my Wave. Beside that is amodified Fenix T1 pouch. Beside that I have my modern high tech telecommunications device in aMaxpedition Phone Holder.
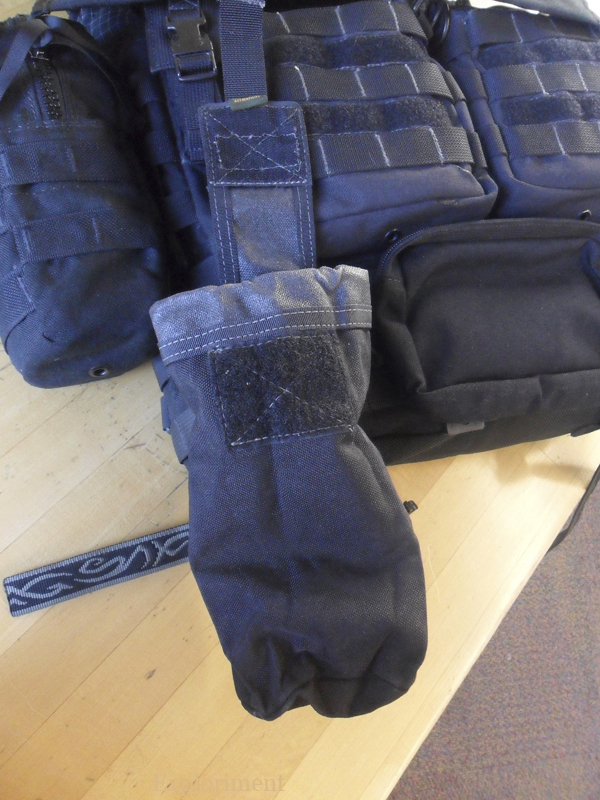
 In this photo I have a modified Petzl pouch with my Tikka. Another instance of fiddling around with pouch placement. Might stay there, might not.
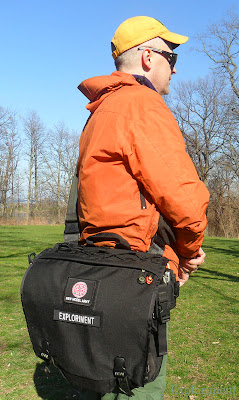
 Better view of the front.
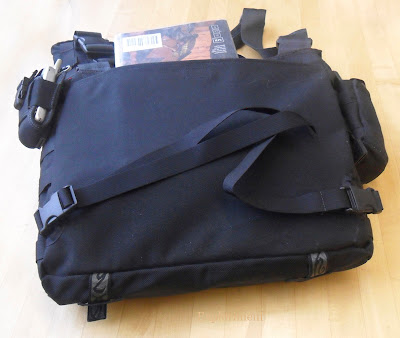
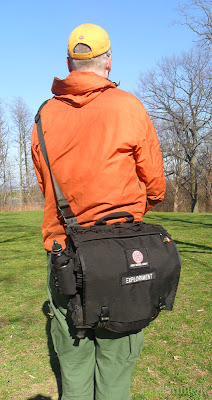
 The strap is a length of tubular webbing. In the center I have a rolled up contractor grade garbage bag. Works very well. Makes it round, thus very comfortable to wear, and its one of those things that in a pinch can serve a myriad of purposes. I may work out a more elaborate strap yet, but this has served very well so far.
Maxpedition has a cool little pouch that you can use with their shoulder bags, the Janus. Useful not only for the fact that it allows access to all those oft used items, but also because it serves to extend the strap. I had a pouch kicking around that I figured I would do something similar with. No idea who made it. I had modified it previously by adding PALS webbing to the back and some Velcro to the front flap.

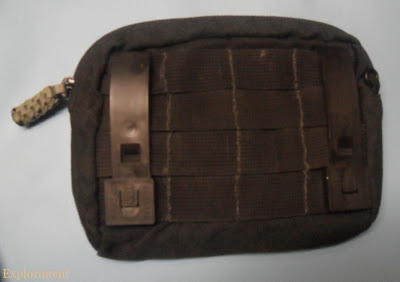
 I debated for a minute whether to remove the PALS off the back, but figured that since I had gone to the trouble to add, why remove it. But I didnt dig the flimsy velcro closure, so opted to change that.


 Added a side release buckle for a closure and the buckles necessary to snap it into the strap. Not sure Im super keen on it. It works, but I may make something that fulfills a similar purpose but isbetter suited to my needs.
 Ive been using it for 4 weeks now, and so far it is everything I wanted it to be. Like anything else I may well realize some shortcomings after using it for a long period of time, think of something I wish I had included, or a point where I should have used a different construction technique. But so far, everything is to my liking. I mentioned the surface mount buckles being a point that I have some doubts about, but other than that, very pleased with it.
 Its a big bag, and filled up with a bunch of hard cover art books it weighs a hefty amount. But part of testing it all out is to subject it to some strain to see if it holds up. Ive been checking the seams and they are doing fine. Kind of knew they would though.
 All the features I wanted, none of the ones I didnt.
Oh and...sewn by hand. My finger tips wonder what they did to deserve such abuse, but until I get a SailRite or a Juki, it works. Not as fast (took me about 5 weeks, an hour here, 4 hours there, 2 hours here, a half hour there, start to finish) doesnt look as sharp, but I am very confident in the strength and durability of it.
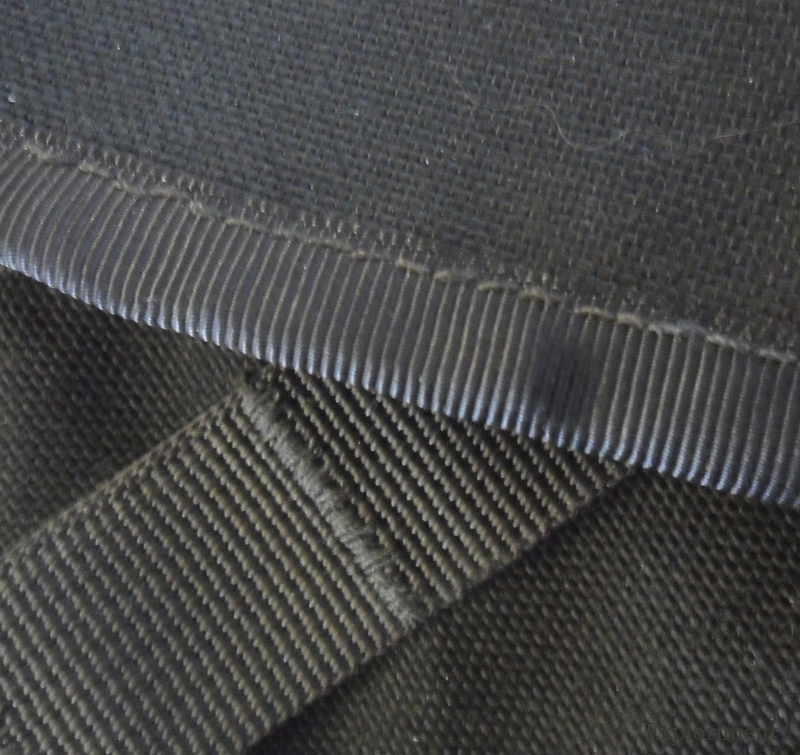
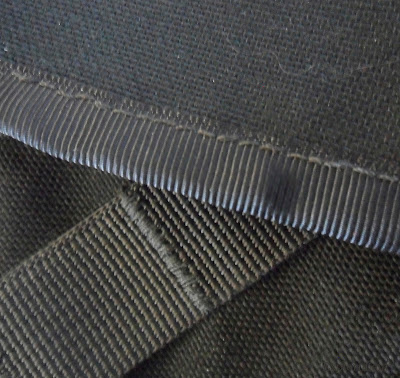 An example of my hand stitching. Not as sharp, but not that shabby either. And it all looks that good. ;-)
 Just had to add that.
Oh, and a note on DIY....If youre thinking of tackling a DIY project like this because it will save you money, youll be disappointed. Im sure there are some DIY pastimes where you can indeed save money, but this was one instance where buying it would have been cheaper. Some of the stuff I already had - all the black webbing, hardware - and some I had to buy - the black Cordura, red rip-stop, red webbing, red seam tape, some incidental stuff like the red thread and another spool of black upholstery thread, a white pencil. If I had to add it all up, I would guesstimate, somewhere between $75 and a $100. Lets not get into the time I spent. DIY is fun, gives you exactly what you want, but if saving money had been my aim, MEC sells a messenger bag/attache case type of thing for $30. (Made in the Peoples Repressive Communist Regime of Vietnam of course.) If saving money is your aim, this approach is not for you.
And for anyone interested, some pics snapped during the construction. Again I apologize for the photos taken under less than optimal light conditions, with a less than optimal camera of a less than optimal colour. But hopefully you can get a sense of what I did.
 The back. As mentioned, angling the shoulder strap connections and having them along the back, totally the way to go. Lots of reinforcement and bartacking here due to the strain this area would be subjected to.
 The slot pocket that sits along the back, with the cutouts for the concealable waist belt.
 The concealed pocket.
 The top of the flap, to be folded to form the hidden pocket.


 The rest of the flap, front, back and opened to show the back of the surface mount buckle. I dabbed white paint on the prongs, pressed them on the fabric to leave a mark to know exactly where to cut. Surface mount buckles are tricky to install.
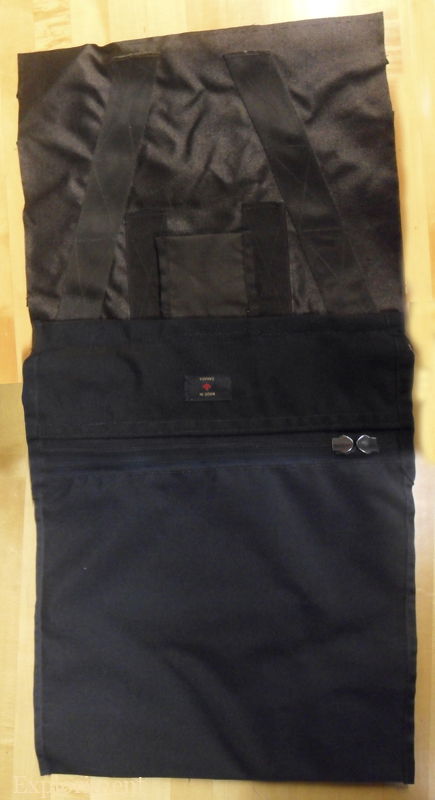
 These three sections were then joined together.

 Which was then mated with the front section.
Ive been using a crappy attache case/messenger bag for a while. Cheap material, poor construction, so it was falling apart. But it had been given to me, so made use of it sometimes. During my recent stint at school, it served as the carrier for all my books. Okay for that purpose, but not much good for anything else, and the quality of it was abysmal.
So I ended up carrying two bags.
Decided to build myself a messenger bag, that not only allowed me to lug books, etc., but also organize all my gizmos and gadgets. All the features I wanted, none of the ones I didnt. Engaged the brain, did some measuring and drawing and came up with the Messengemups.
And as you look at these photos, keep in mind the whole thing was sewn by hand. Needle, thread, two fingers. Okay, and some needle nose pliers in the really built up areas.
(And I apologize for the fact that it is in hard to photograph black. But I think you can discern what is going on. For prototypes I prefer to use light colours (mainly because they do photograph better), but I made this one black, what with being a ninja and all.)


Maxpedition has a cool little pouch that you can use with their shoulder bags, the Janus. Useful not only for the fact that it allows access to all those oft used items, but also because it serves to extend the strap. I had a pouch kicking around that I figured I would do something similar with. No idea who made it. I had modified it previously by adding PALS webbing to the back and some Velcro to the front flap.


Oh and...sewn by hand. My finger tips wonder what they did to deserve such abuse, but until I get a SailRite or a Juki, it works. Not as fast (took me about 5 weeks, an hour here, 4 hours there, 2 hours here, a half hour there, start to finish) doesnt look as sharp, but I am very confident in the strength and durability of it.

Oh, and a note on DIY....If youre thinking of tackling a DIY project like this because it will save you money, youll be disappointed. Im sure there are some DIY pastimes where you can indeed save money, but this was one instance where buying it would have been cheaper. Some of the stuff I already had - all the black webbing, hardware - and some I had to buy - the black Cordura, red rip-stop, red webbing, red seam tape, some incidental stuff like the red thread and another spool of black upholstery thread, a white pencil. If I had to add it all up, I would guesstimate, somewhere between $75 and a $100. Lets not get into the time I spent. DIY is fun, gives you exactly what you want, but if saving money had been my aim, MEC sells a messenger bag/attache case type of thing for $30. (Made in the Peoples Repressive Communist Regime of Vietnam of course.) If saving money is your aim, this approach is not for you.
And for anyone interested, some pics snapped during the construction. Again I apologize for the photos taken under less than optimal light conditions, with a less than optimal camera of a less than optimal colour. But hopefully you can get a sense of what I did.


")

 Yeah the bag with nothing in it weighs a bit already. Webbing, foam, doubed layers of material, etc., etc. starts to add up. I tend to schlep a lot of books home from the library, and while it is close to home, doing that for long periods of time I could see causing some shoulder, back, neck strain. But I don't keep all that much in it most of the time. I keep it largely empty so I have room to carry home some groceries from the market, books when I pick them up from the library, etc. One thing I intend to still make for this are some back pack type shoulder straps, but I need to get an other 2" Warrior buckle. Those at the top, then hooked into the 1" buckles at the bottom where the waist strap is.