As the title says, "I finally made that handle!"
Some of you may have read a post I did recently asking whats the best option to fix a handle on a knife I was given 25 years ago.
After reading a link I was provided, I thought i'd give it ago some time.
This is not intended as a tutorial, just a break down of what I did after reading the link I was provided. All pic's were taken from my mobile which isnt in the best condition.
Well yesterday at work I got some 45mm x 20mm Maple and cut it in half down the lenth, leaving me with 2 pieces approx 45mm x 8mm. I sanded them flat for a couple of minutes on sandpaper stuck to the bench, to remove any un evenness left from the table saw. I got some thick brown paper which is more like card and used pva glue on the newly sanded faces then stuck them to the paper making it one piece again.
I also got a 45mm x 3mm strip of oak then cut that to approx 150mm as an estimate. thinned that down to approx 2mm on the sand paper, fired the parts in my bag so once I was at home I could begin my project.
I decided I was going to do this with the most basic tools possible as most people who give tutorials tend to have tools avaliable others dont, (I know I cut the wood at work, but my thinking from that point on was, you could buy thin strips and just cut them to length by hand).
The tools I used were:-
Swiss Arm Knife
Half round file
Chisel (but I could have used the Swiss army knife)
JB Weld 2 part epoxy (the quick dry version)
roll of sticky tape
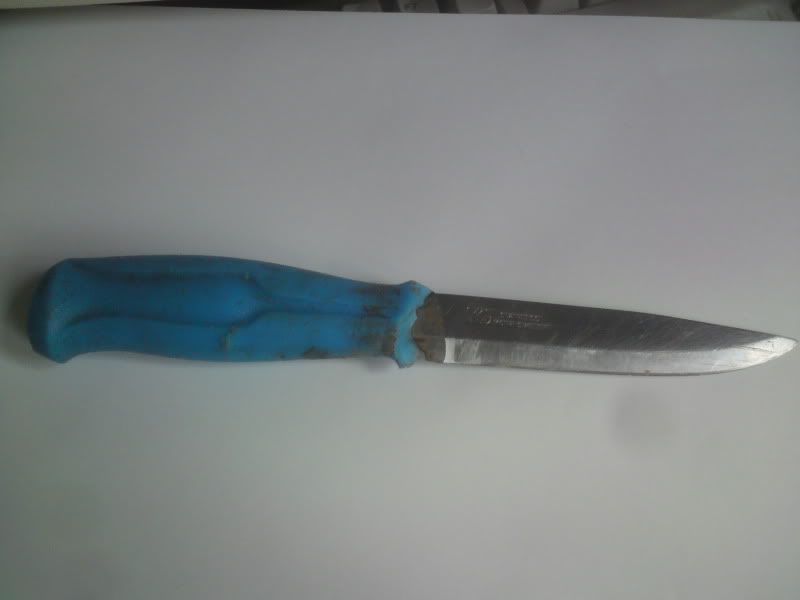
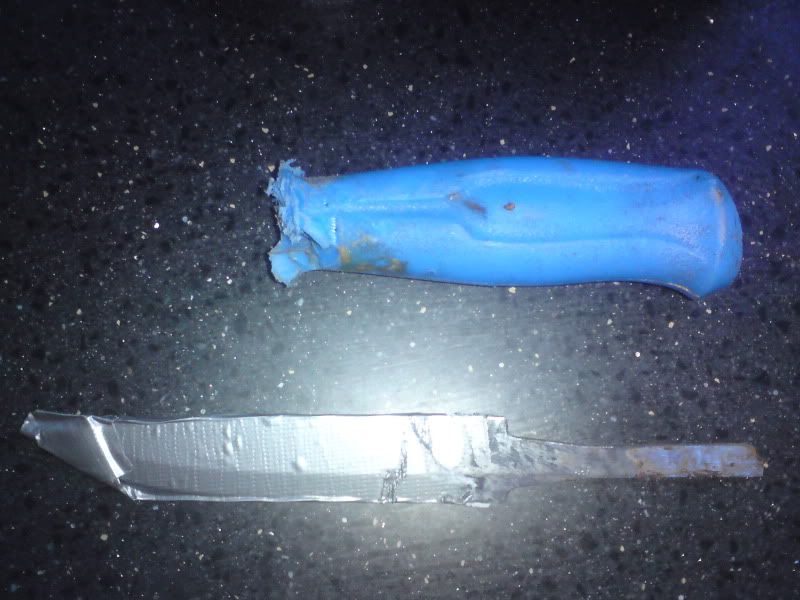
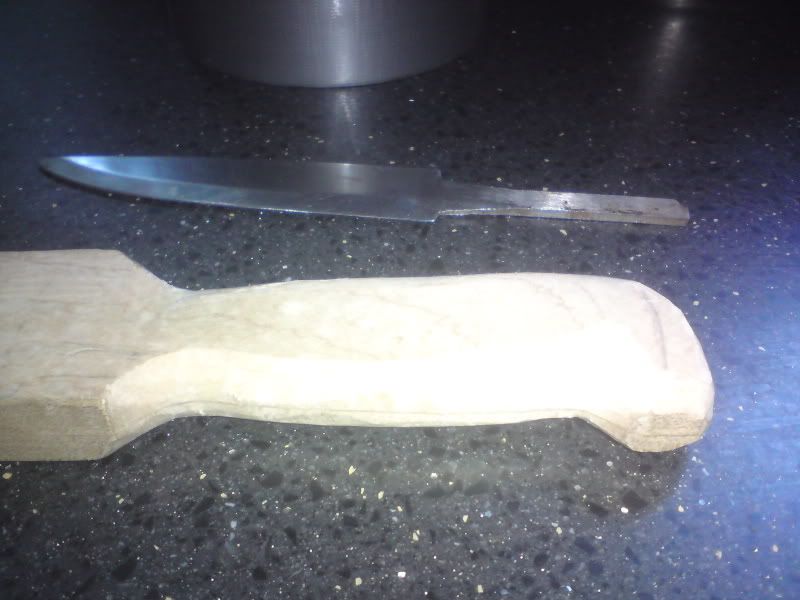
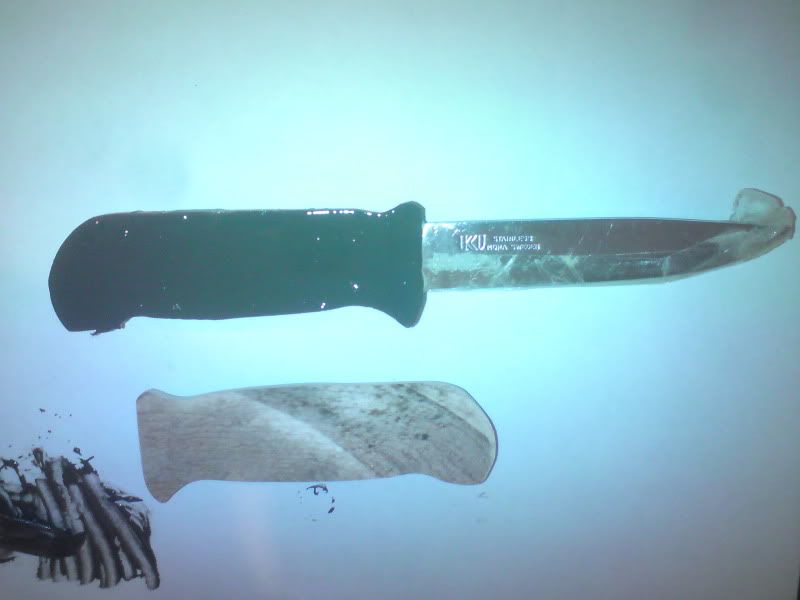
I removed the original handle from the knife by holfing the blade (covered in duct tape) and hitting the handle in the opposie direction with the file (blumin cowboy) it came off eventually.
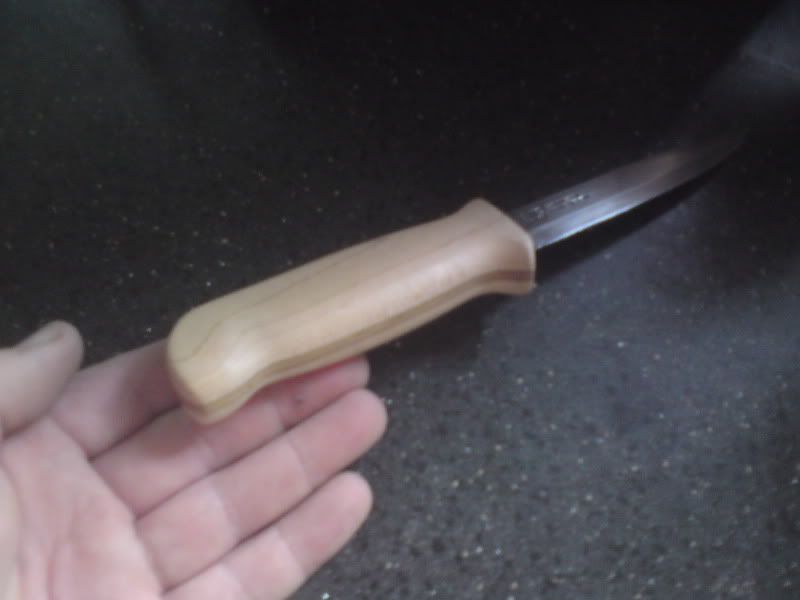
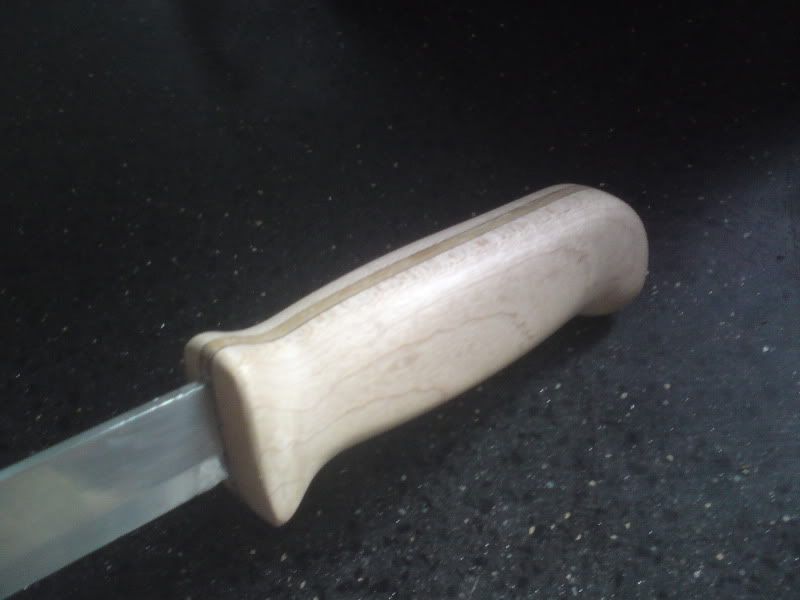
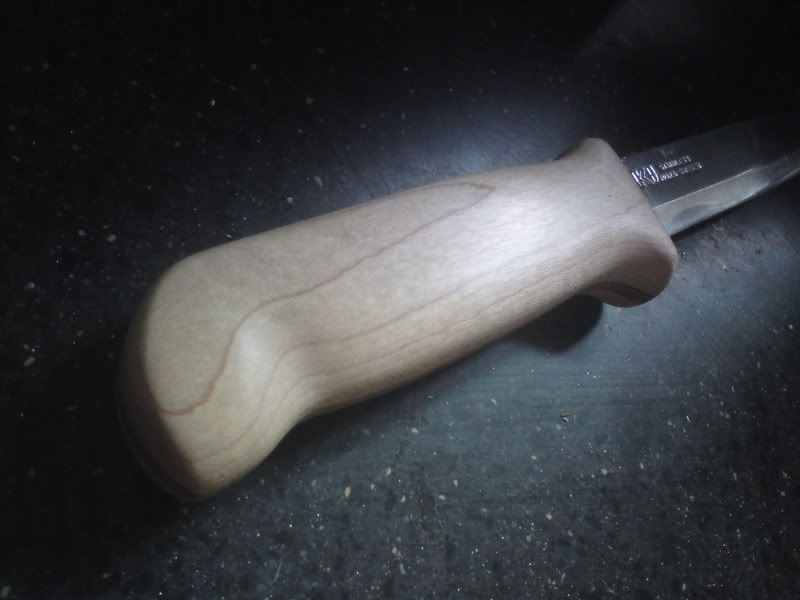
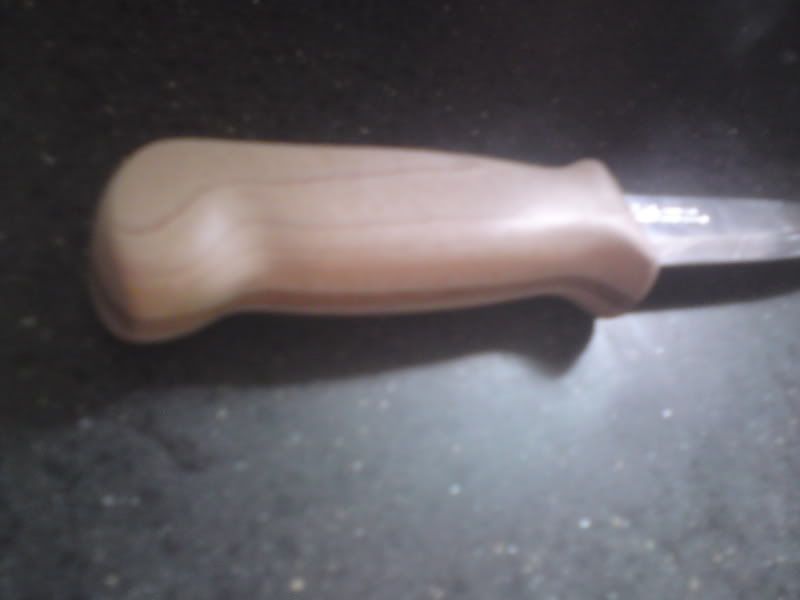
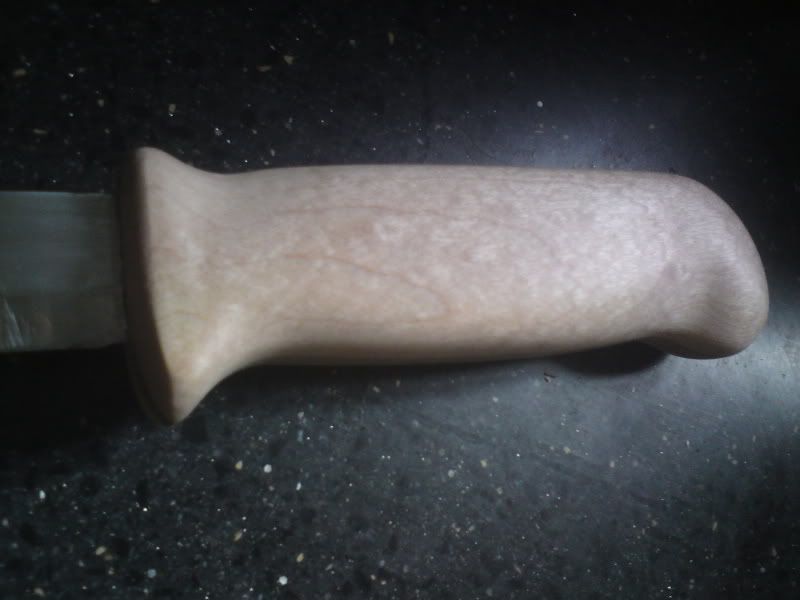
I used the original handle as a guide for size, I transfered the profile to my Maple, I was not going to replicate the handle just to give me approximate size to start with. Whittle'd my handle to shape, this Maple is not easy to whittle and it took some time.
(my hands ache today)
you can see the paper in the middle.
Once I was happy with the size, shape and fit in my hand I scrape'd the Swiss army kinife blade along my newly shaped handle to give it a smoother finish.
next I used the chisel to seperate the 2 halves by inserting it into the paper and tapped with the palm of my hand until it split apart.
(didnt take any effort)
 I also used the chisel to scrape the remaining paper off.
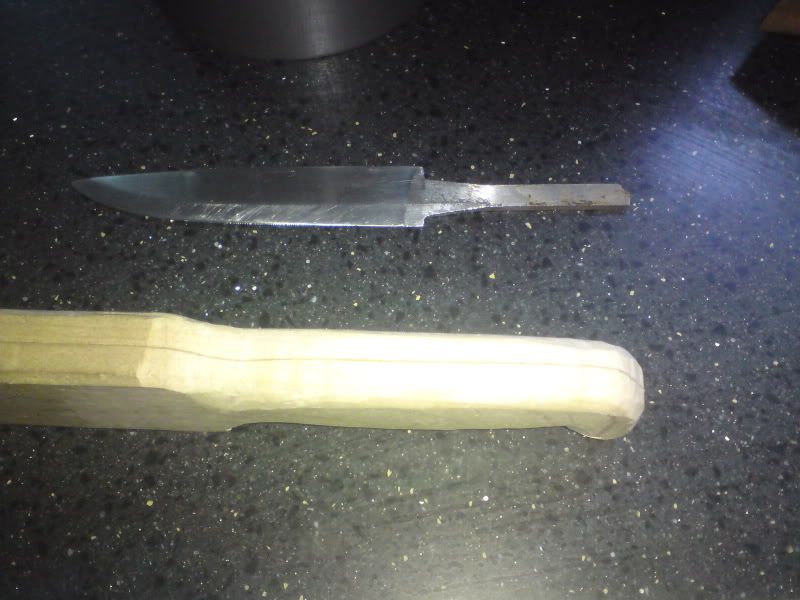
I cut the handle sides to length using the swiss army knife (2nd pic I forgt to take)
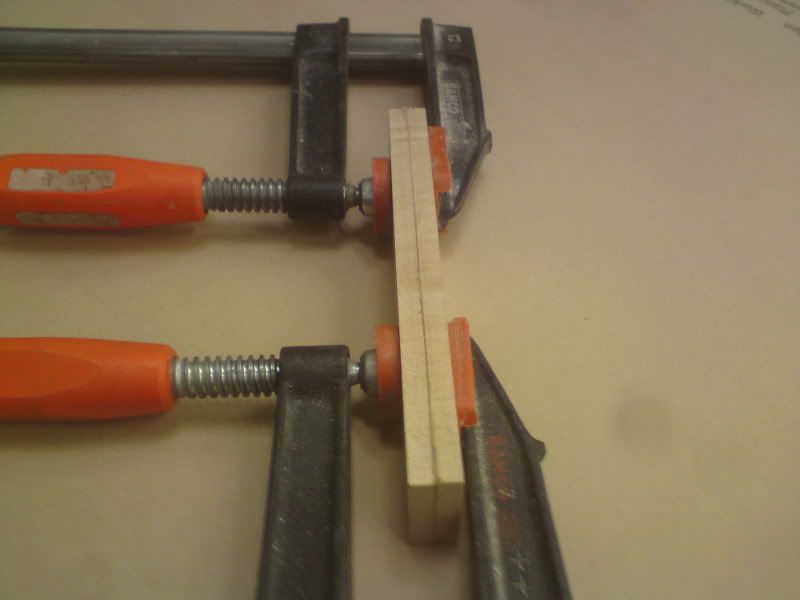
Next I took the Oak strip, traced around the tang of the blade I needed to fit, and cut it out with the saw on the Swiss army knife.
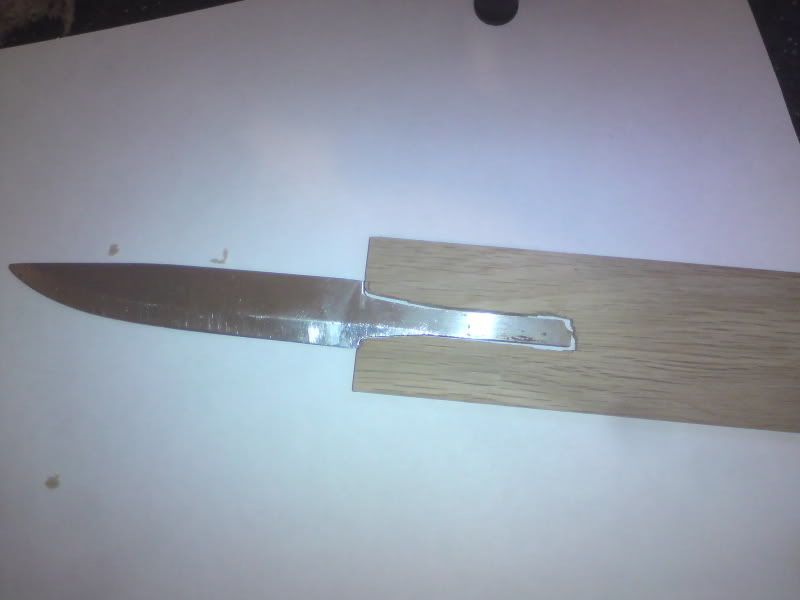
Made sure the shoulders of the blade fitted the ends of the Oak then mixed up some JB weld placed the parts on a sheet of paper and just filled it with the JB Weld. scrape'd away the excess.
Once dry I peel'd it free from the paper below sanded it both sides, so the sides could sit flat against the Oak. The Oak and blade are not quite the same thickness but its close enough for my first go. (thats a the Ist pic forgot to take)
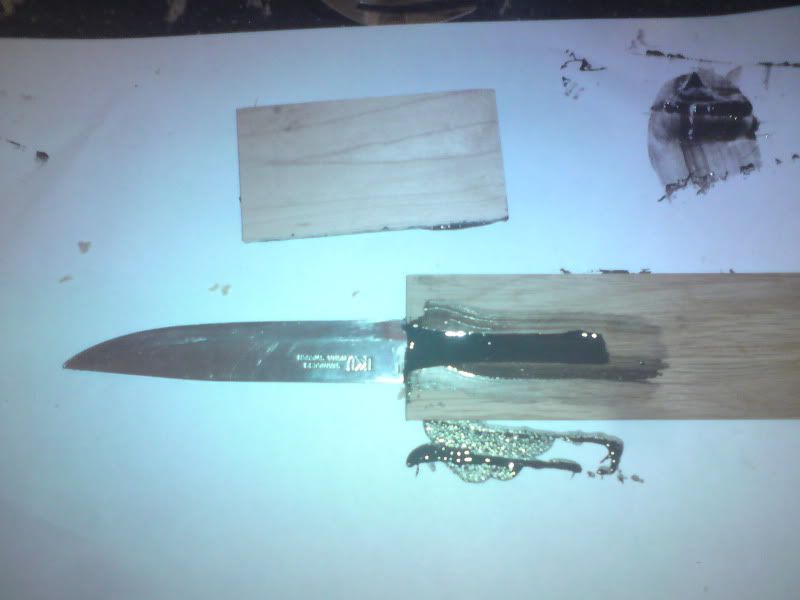
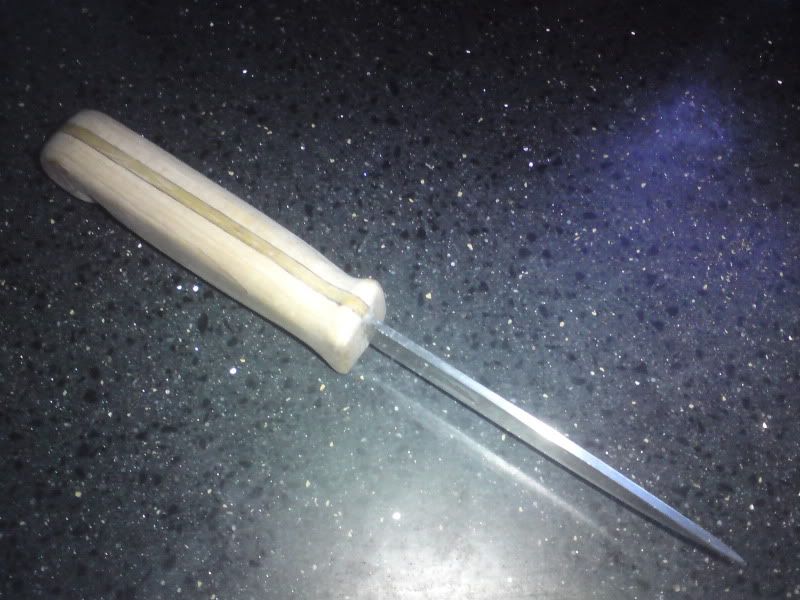
Next I placed the new side on the oak (traced around the side to check positioning, so the tang was central. Mixed up more JB Weld and stuck it in place.
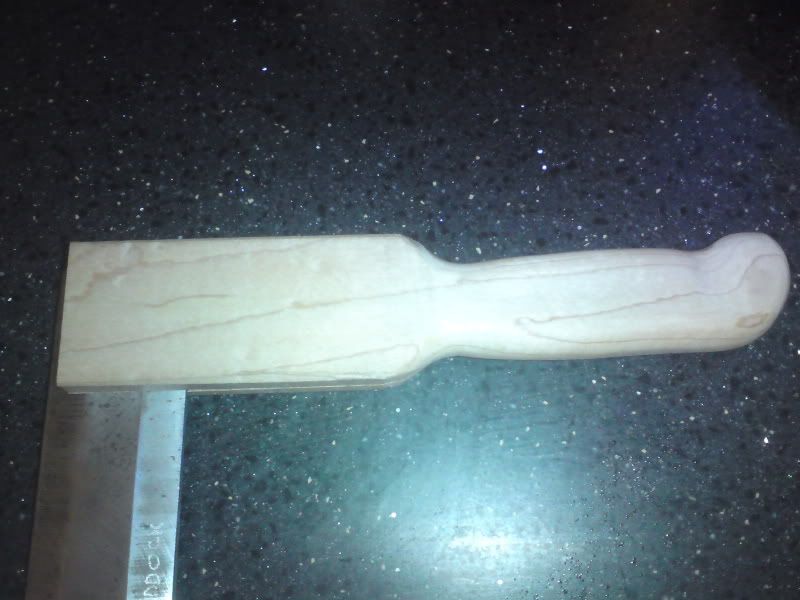
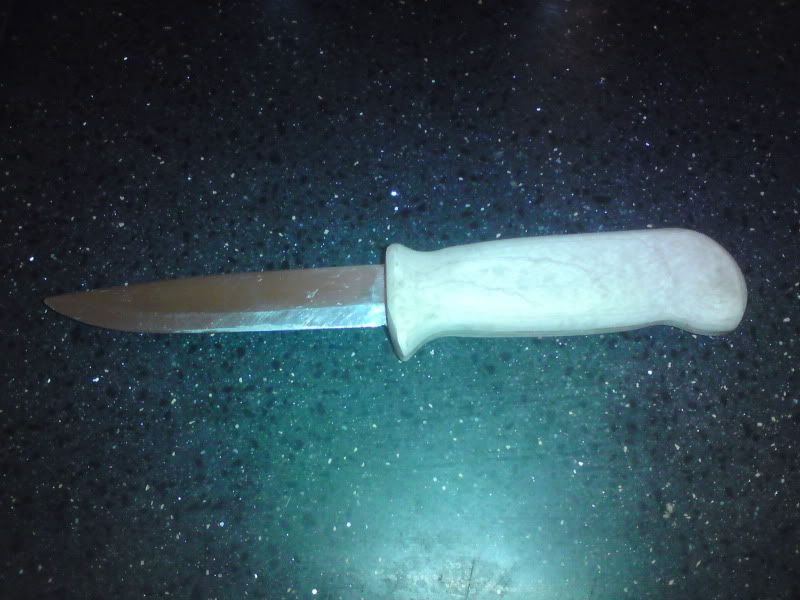
Once dry I used the saw fon the Swiss army knife fo cut the Oak level with the end of the new Maple side then whittle'd the Oak to the same profile as the Maple, I coated the remaining side of Oak with JB Weld and fixed the remaining Maple side with tape to keep it in place.
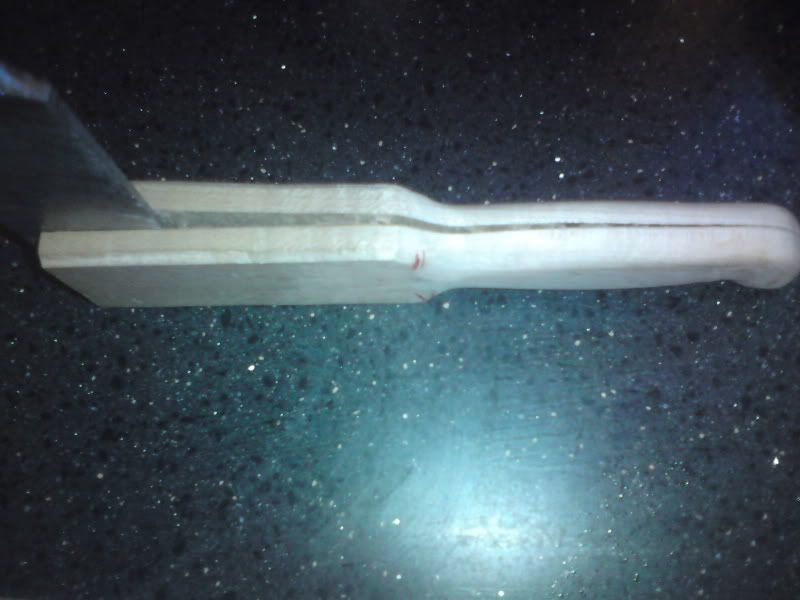
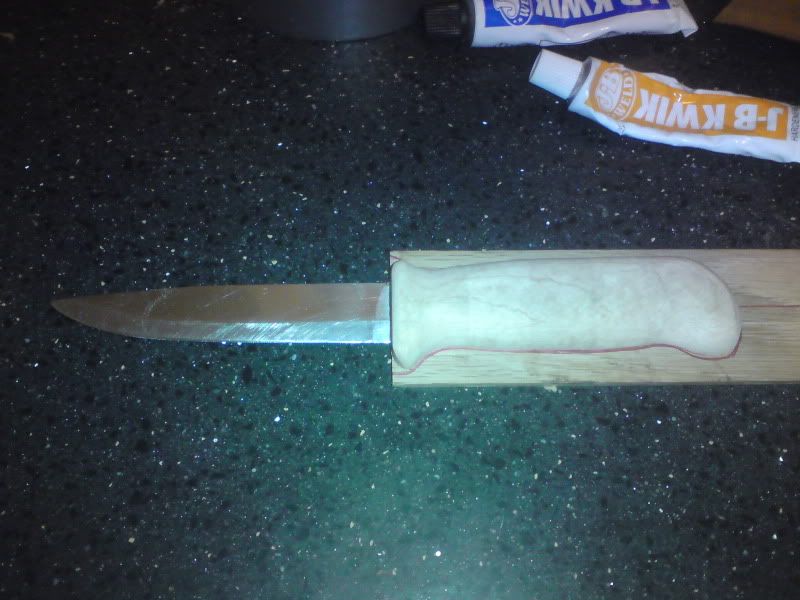
I continued to whittle the handle for a more comfortable fit in my hand and once again I scrape'd the handle for a smoothe finish.
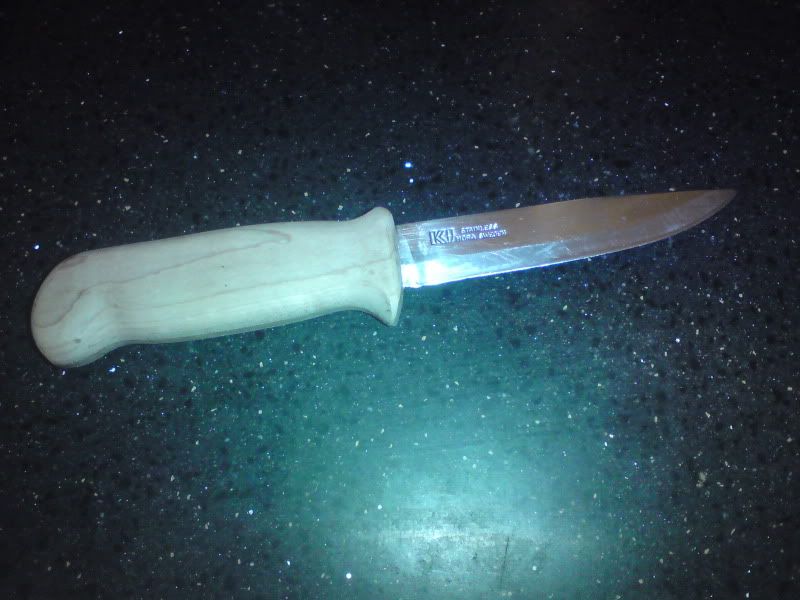
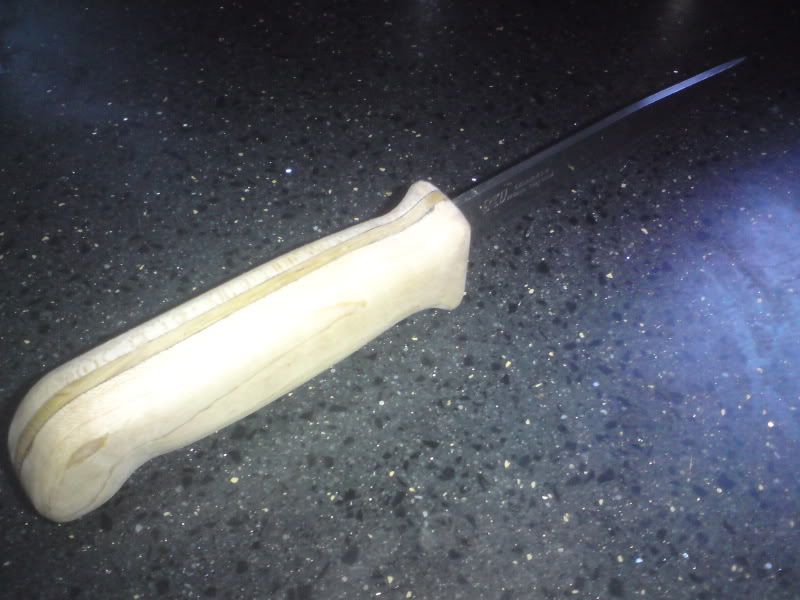
My handle still needs sanding to get rid of the score marks remaining in it, the next thing I need is information, could anyone tell me the best finish to apply to protect the handle from the effects of water?
Im guessing oil of some kind in preference over a wax or varnish.
A future project will have to be a sheath as it's never had one.
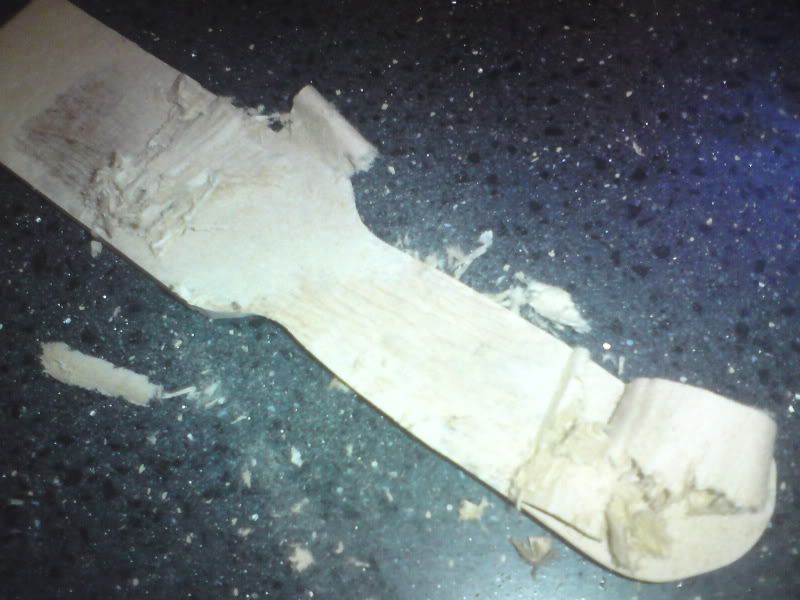
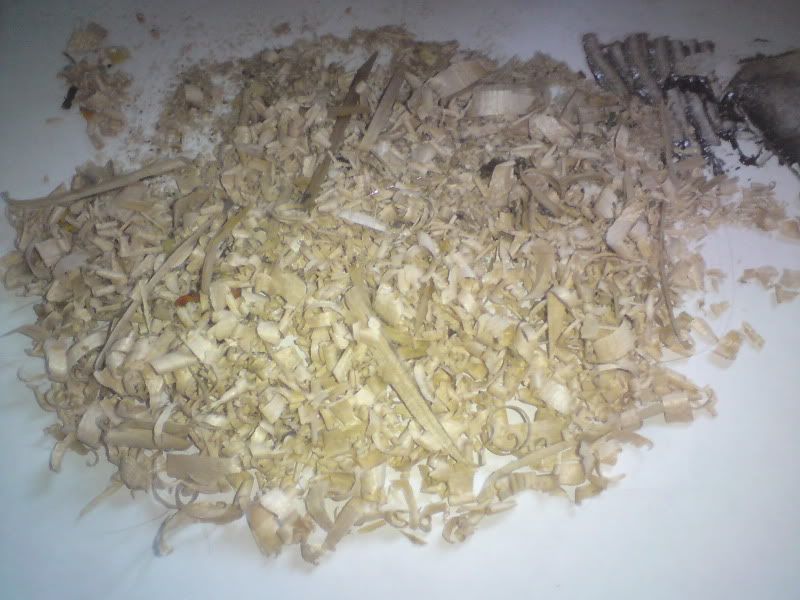
oh heres the pile of shavings I ended up with.
Some of you may have read a post I did recently asking whats the best option to fix a handle on a knife I was given 25 years ago.
After reading a link I was provided, I thought i'd give it ago some time.
This is not intended as a tutorial, just a break down of what I did after reading the link I was provided. All pic's were taken from my mobile which isnt in the best condition.
Well yesterday at work I got some 45mm x 20mm Maple and cut it in half down the lenth, leaving me with 2 pieces approx 45mm x 8mm. I sanded them flat for a couple of minutes on sandpaper stuck to the bench, to remove any un evenness left from the table saw. I got some thick brown paper which is more like card and used pva glue on the newly sanded faces then stuck them to the paper making it one piece again.
I also got a 45mm x 3mm strip of oak then cut that to approx 150mm as an estimate. thinned that down to approx 2mm on the sand paper, fired the parts in my bag so once I was at home I could begin my project.
I decided I was going to do this with the most basic tools possible as most people who give tutorials tend to have tools avaliable others dont, (I know I cut the wood at work, but my thinking from that point on was, you could buy thin strips and just cut them to length by hand).
The tools I used were:-
Swiss Arm Knife
Half round file
Chisel (but I could have used the Swiss army knife)
JB Weld 2 part epoxy (the quick dry version)
roll of sticky tape
I removed the original handle from the knife by holfing the blade (covered in duct tape) and hitting the handle in the opposie direction with the file (blumin cowboy) it came off eventually.
I used the original handle as a guide for size, I transfered the profile to my Maple, I was not going to replicate the handle just to give me approximate size to start with. Whittle'd my handle to shape, this Maple is not easy to whittle and it took some time.
(my hands ache today)
you can see the paper in the middle.
Once I was happy with the size, shape and fit in my hand I scrape'd the Swiss army kinife blade along my newly shaped handle to give it a smoother finish.
next I used the chisel to seperate the 2 halves by inserting it into the paper and tapped with the palm of my hand until it split apart.
(didnt take any effort)
I cut the handle sides to length using the swiss army knife (2nd pic I forgt to take)
Next I took the Oak strip, traced around the tang of the blade I needed to fit, and cut it out with the saw on the Swiss army knife.
Made sure the shoulders of the blade fitted the ends of the Oak then mixed up some JB weld placed the parts on a sheet of paper and just filled it with the JB Weld. scrape'd away the excess.
Once dry I peel'd it free from the paper below sanded it both sides, so the sides could sit flat against the Oak. The Oak and blade are not quite the same thickness but its close enough for my first go. (thats a the Ist pic forgot to take)
Next I placed the new side on the oak (traced around the side to check positioning, so the tang was central. Mixed up more JB Weld and stuck it in place.
Once dry I used the saw fon the Swiss army knife fo cut the Oak level with the end of the new Maple side then whittle'd the Oak to the same profile as the Maple, I coated the remaining side of Oak with JB Weld and fixed the remaining Maple side with tape to keep it in place.
I continued to whittle the handle for a more comfortable fit in my hand and once again I scrape'd the handle for a smoothe finish.
My handle still needs sanding to get rid of the score marks remaining in it, the next thing I need is information, could anyone tell me the best finish to apply to protect the handle from the effects of water?
Im guessing oil of some kind in preference over a wax or varnish.
A future project will have to be a sheath as it's never had one.
oh heres the pile of shavings I ended up with.
Last edited:
") like the result.
like the result.