I agree with Chris.

My own preference for both drill and hearth is seasoned Hazel, with the "burning " end of the drill very much flatter and fatter than the bearing block end (max friction on the board min friction on the bearing block) and I line my bearing block with a limpet shell as a "friction free" bearing....
The stuff below is an article I wrote many years ago for a magazine...
Fire by friction, also known as bow drill technique, “Indian fire fiddle” etc is a prehistoric fire-lighting method and can be performed with nothing more than materials found out in the woods, !
As with all fire-lighting, preparation is key to success and before you even think of making your ember you need to have your fire laid and ready with at least twice the amount of tinder you would imagine needed, with kindling, small wood and fuel to hand. To make fire you are going to need to produce heat, so protect your equipment from the cold and damp, insulated from ground which is nearly always colder and damper than you want to work on.
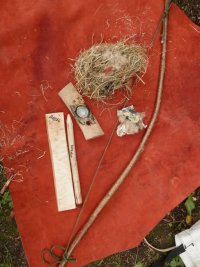
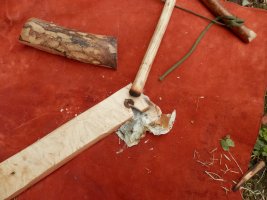
The main pieces of equipment needed for fire by friction using a bowdrill set are the “bow” a “base-” or “hearth-board”, a“spindle” and a bearing block. A dried leaf, sliver of wood or piece of bark is useful as an “ember catcher” and a good dry tinder bundle is essential.
The bow needs to be about as long as your arm from armpit to middle fingertip, rigid or semi-rigid and with a curve to allow the spindle free play. The bow cord can be made of any tough cord. I have used nettle cordage, plaited leather and other natural cordage, but paracord and other synthetics tend to wear better.
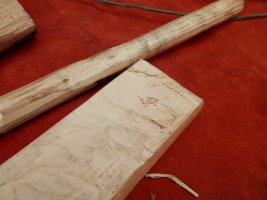
For the base board and spindle most people find using the same kind of wood works best and hazel on hazel is one of my favourites. The idea is that the spindle will spin on the base plate creating heat by friction and the two pieces will wear each other down creating “char”dust which will collect and eventually ignite. Using woods of different hardnesses means that one will wear the other away faster.
The bearing block needs to be of a hard wood with a recess cut in its underside to take and support the top of the spindle and have the topside shaped to fit comfortably in the hand. I have seen people use a stack of limpet shells as a bearing block and I will, if possible,set a limpet shell into my bearing block as a “frictionless bearing”. If you do not have limpets you can lubricate the bearing by inserting green leaves – holly is very good – to reduce friction. The bearing block is not where you want the heat!
The base or hearth board needs to be between 1.5 to 3cm thick and long enough for one end to be trapped under your foot while you work. As long as the base board is wider than the spindle, width is not too important, but it does need to be worked reasonably flat.
The spindle needs to be very straight, around 20-30cm long and about as thick as your thumb with one end domed and the other brought to a strong point.
Both base board and spindle need to be thoroughly dry and seasoned for best results.
The cord on the bow needs to be tied so that when you twist the spindle in the cord grips, it is tight enough to get the spindle turning, but not so tight that it is hard to turn it at all! Tension can be adjusted by gripping the cord as well as the bow with as many fingers as it takes to get the tension right.
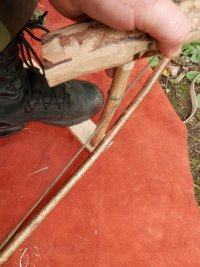
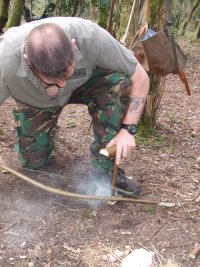
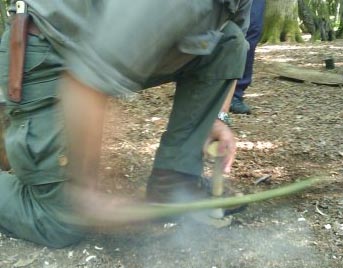
To start getting fire by friction, dig a small indent into the top of your base board using the tip of your knife. Trap the base board under your left foot (I am describing the set-up for right handers; left handed folk will have to make their own adjustments – sorry!)and kneel left knee up, right knee on the ground. Twist the spindle into the bow cord and put the domed end into the indent of the base board.
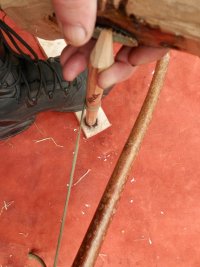
Place the bearing block onto the pointed end of the spindle and position yourself so that you can lock your left arm around your left knee and press vertically down on the spindle. This prevents the spindle from wobbling or flying out of the base board as you “saw” the bow back and forth.
As you push the bow back and forth keep the string parallel with the ground or it will climb up and down the spindle and may fly away! If you press down too hard, the spindle will not spin; if you do not press hard enough the spindle can jump off the base board. However you should soon see smoke and “char” developing as the spindle wears in.
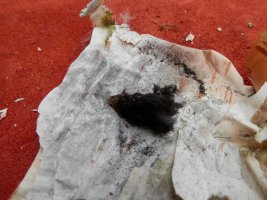
Once this occurs you need to cut out a “pie slice” notch from the base board, reaching from the centre of your newly made depression to the edge of the board. The slice needs to be around 1/8th of the circle of the depression. This is to catch the char and start your ember.
Place your ember catcher under the pie slice and start bowing again. Start slow and steady, increasing pressure and speed until you have great clouds of smoke developing. You cannot have too much smoke!
You will know you have succeeded when, if you stop bowing and remove the spindle, the char that has collected in the pie slice keeps smoking and you see a pinpoint of red glowing coal in there. No smoke or glow to be seen? Get back to bowing!
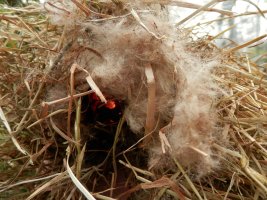
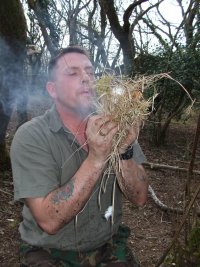
Once the ember is forming you need to let air to it so it can develop. Gently tap the base board to free the ember and lift the board free then, gently blowing on the ember if it needs it, use the ember catcher to tip the ember into the tinder bundle.
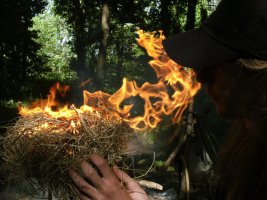
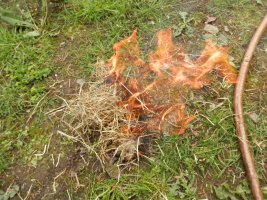
All that now remains is to blow the ember up to flame as with most“primitive” fire lighting techniques. Sometimes during the bowing you get excessive squeaking – try altering your downward pressure to avoid this, and sometimes the wood “glazes”,polishing not charring. If glazing occurs rough up the spindle and base depression with your knife and go again.
If at first you do not succeed, try, try, try again! Bow drill friction fire becomes easier the more you do it and get the feel for it. Initially it is hot, hard work (my first ever ember was immediately dowsed when a drop of sweat dripped off my nose right onto the coal as I tried to blow the ember brighter) but with practice it becomes fast and easy. Trust me on that!
View attachment 92482View attachment 92483View attachment 92484View attachment 92485View attachment 92486View attachment 92487View attachment 92488View attachment 92489View attachment 92490View attachment 92491View attachment 92492View attachment 92493
This is just what works for me ( other people may give different advice

)and it has worked well for a lot of my students as well

Keep trying - the first fire you make will feel fantastic

The photos feature Greg Hardman of Wilderness Emergency Survival Training - not me!

