Back in 2012 I posted a few videos showing a DIY clip on modified Bic/Spark-lite firestarter that not only is waterproof but can clip on a pack. Some people noticed this gear item asking about it. I intended to post some more on the DIY fire kit but always had something else to do. Dirt time is a commodity after all. Here is that video.
[video=youtube;aHDbCtAtQy0]https://www.youtube.com/watch?v=aHDbCtAtQy0[/video]
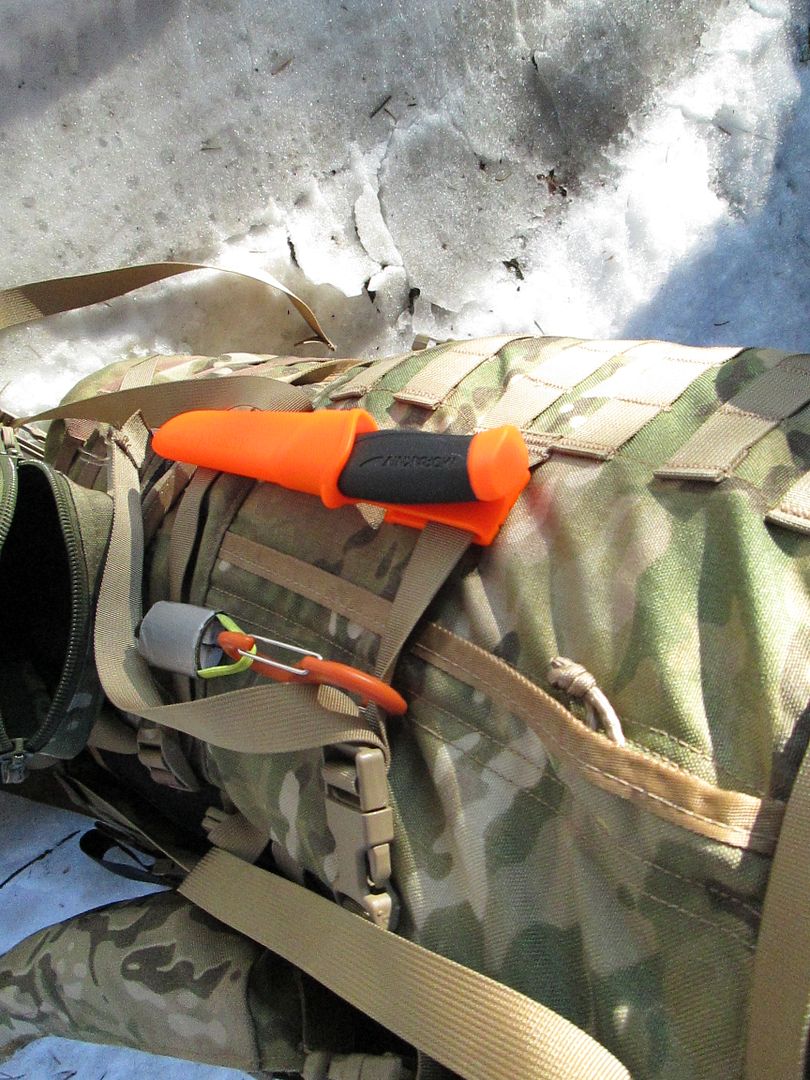
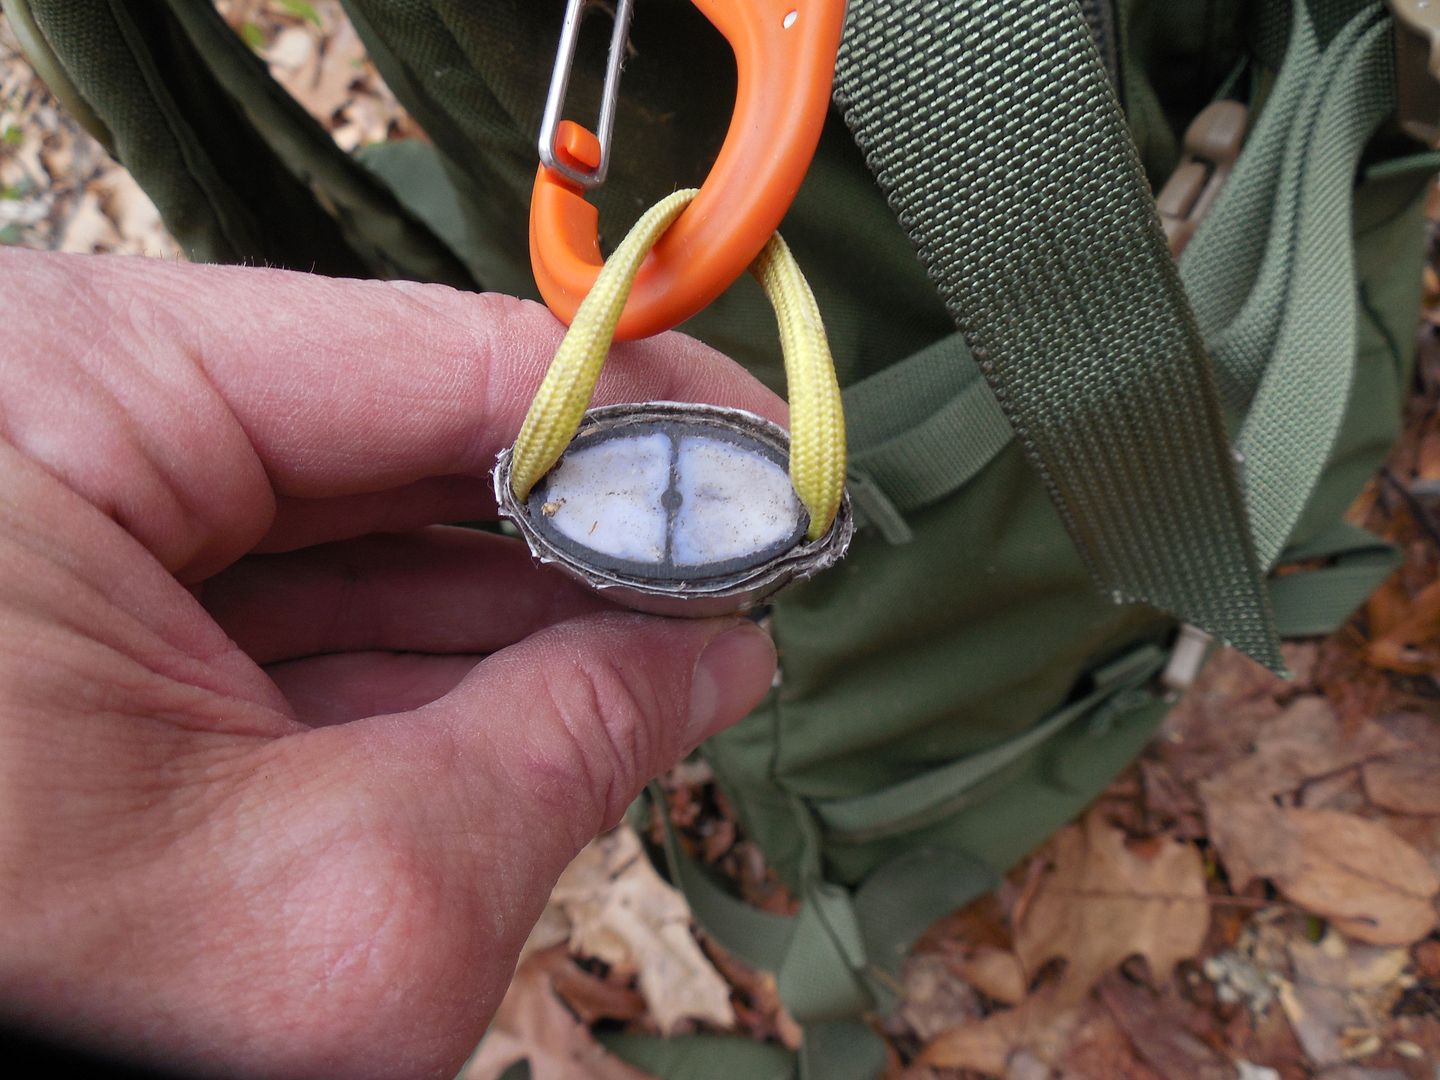
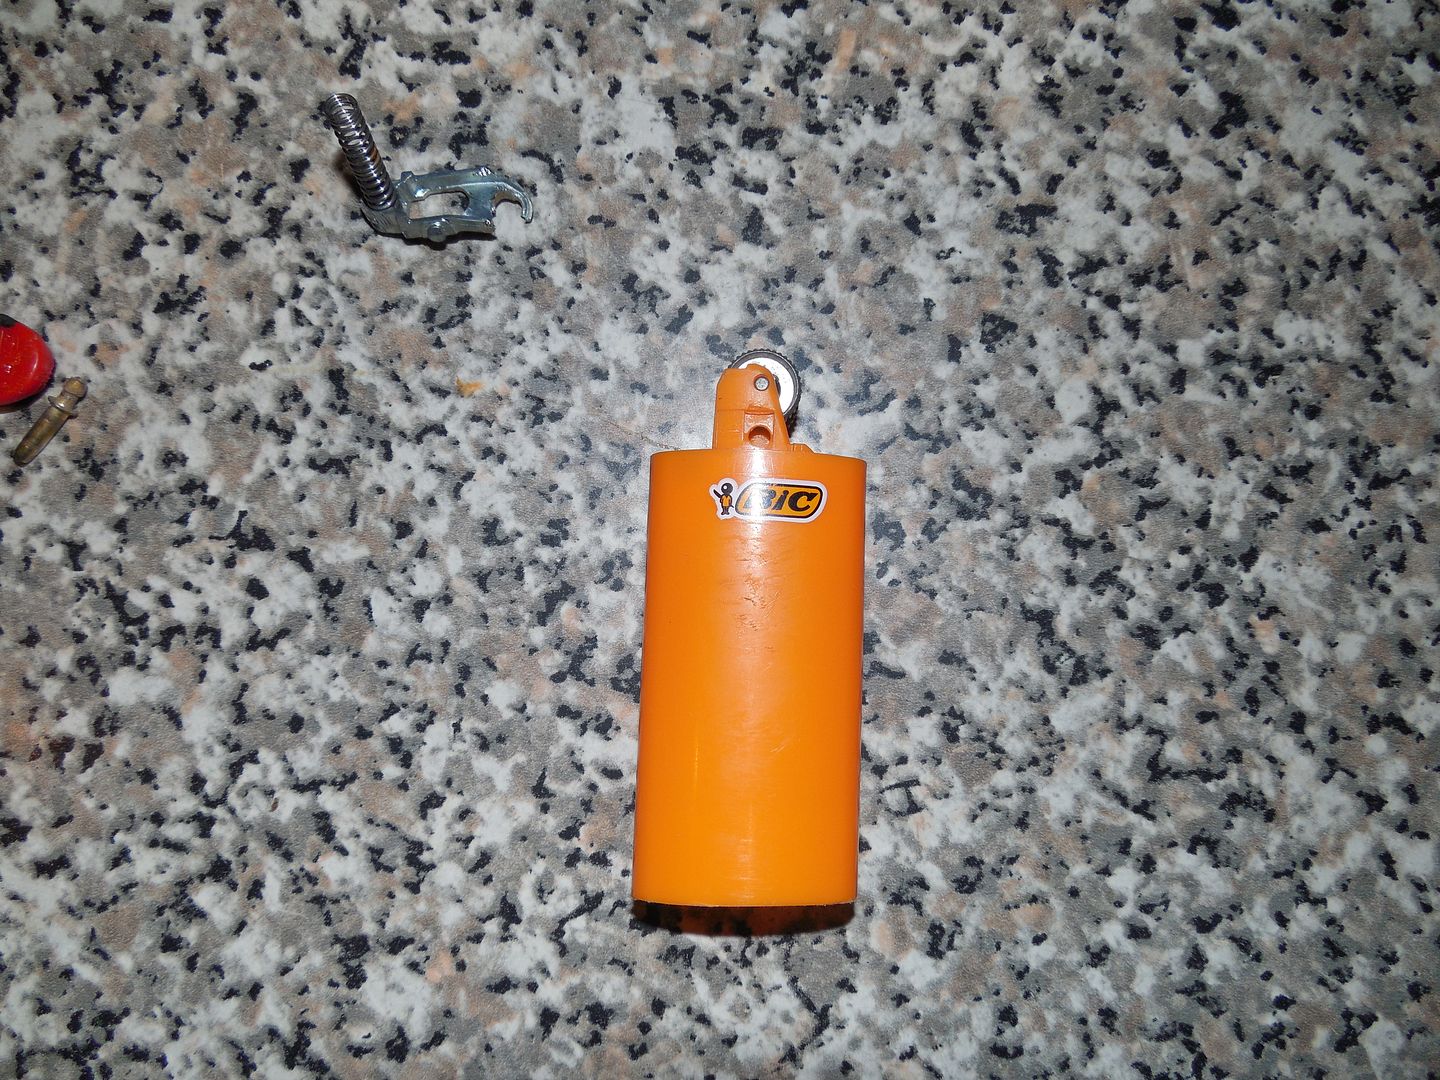
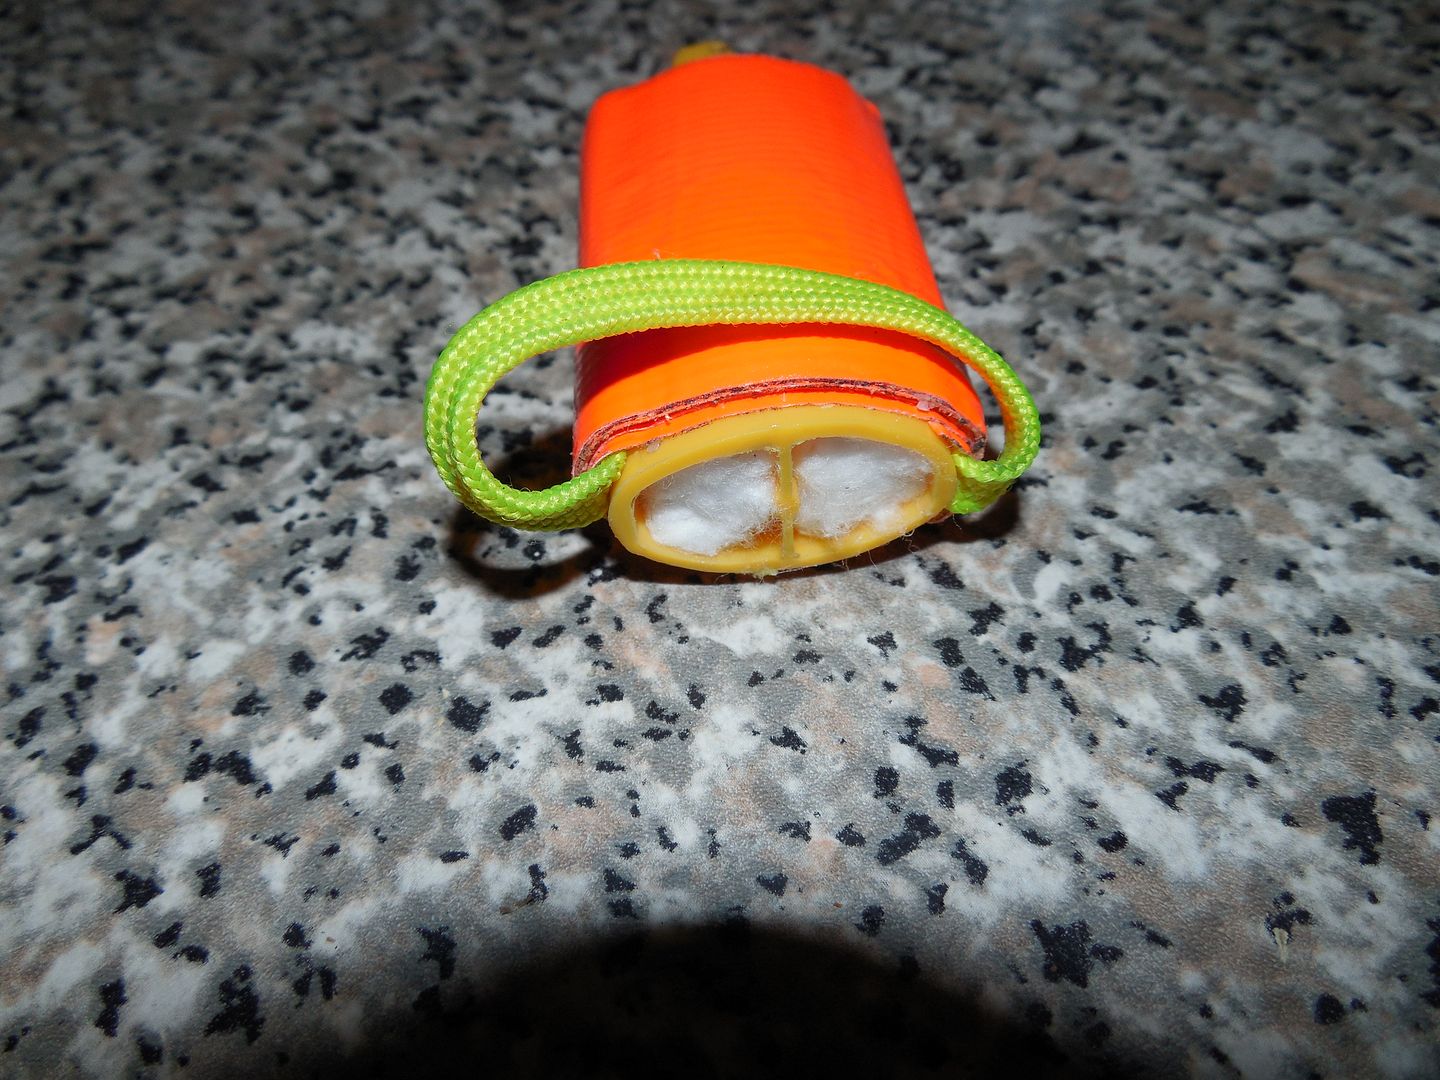
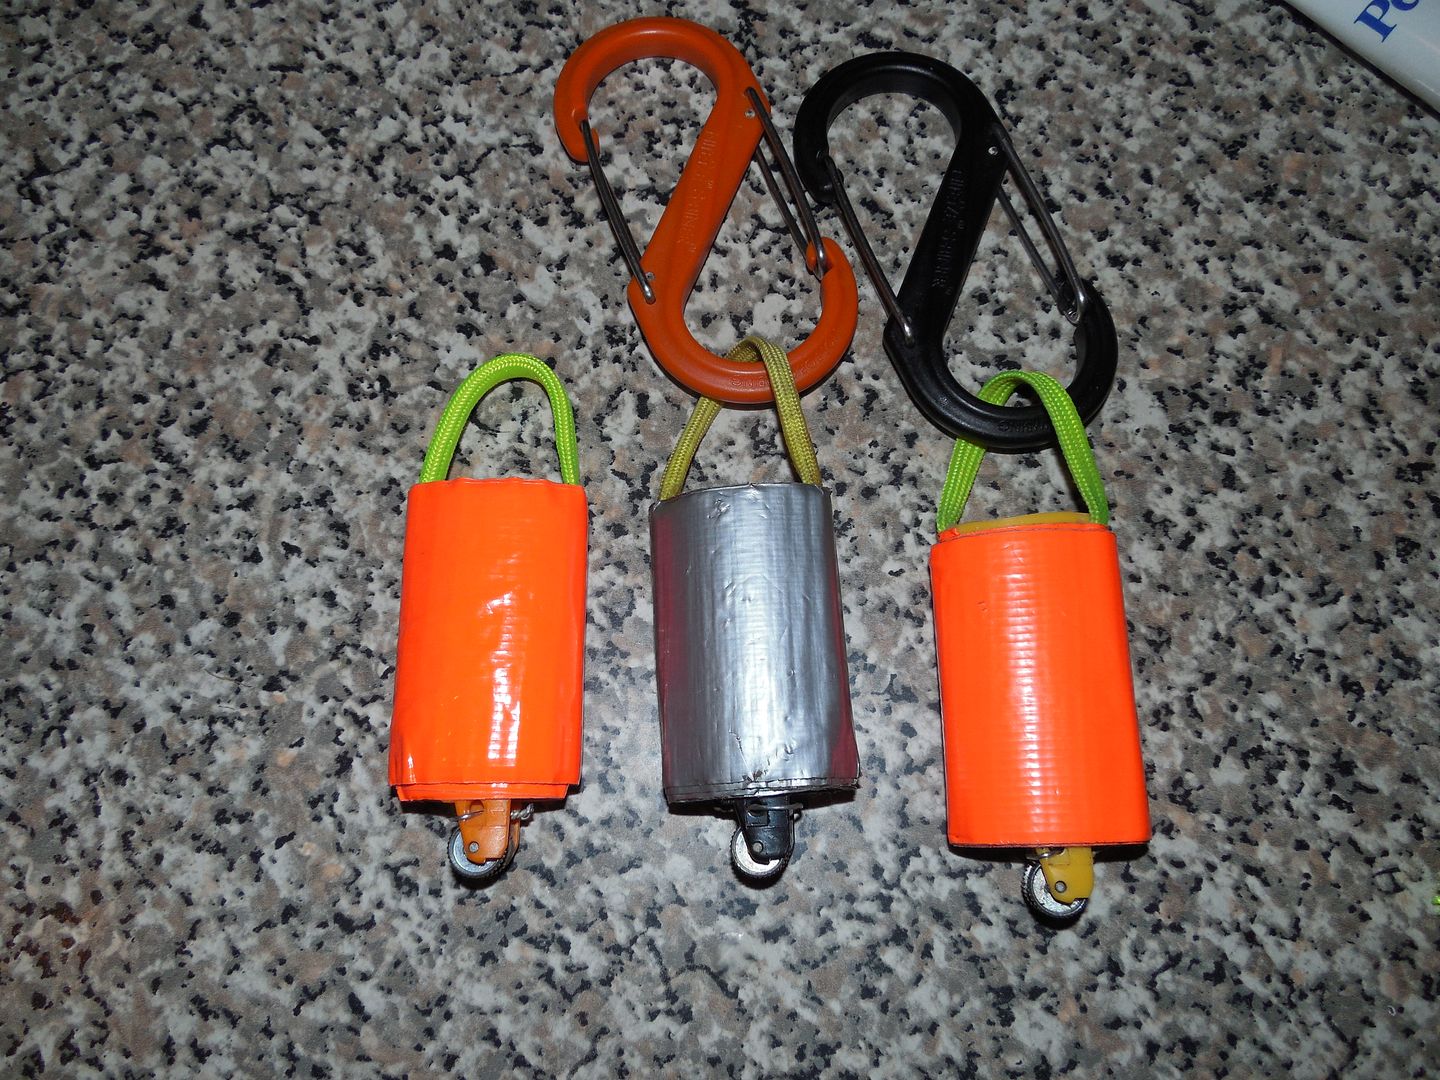
Photos from 4 years ago.
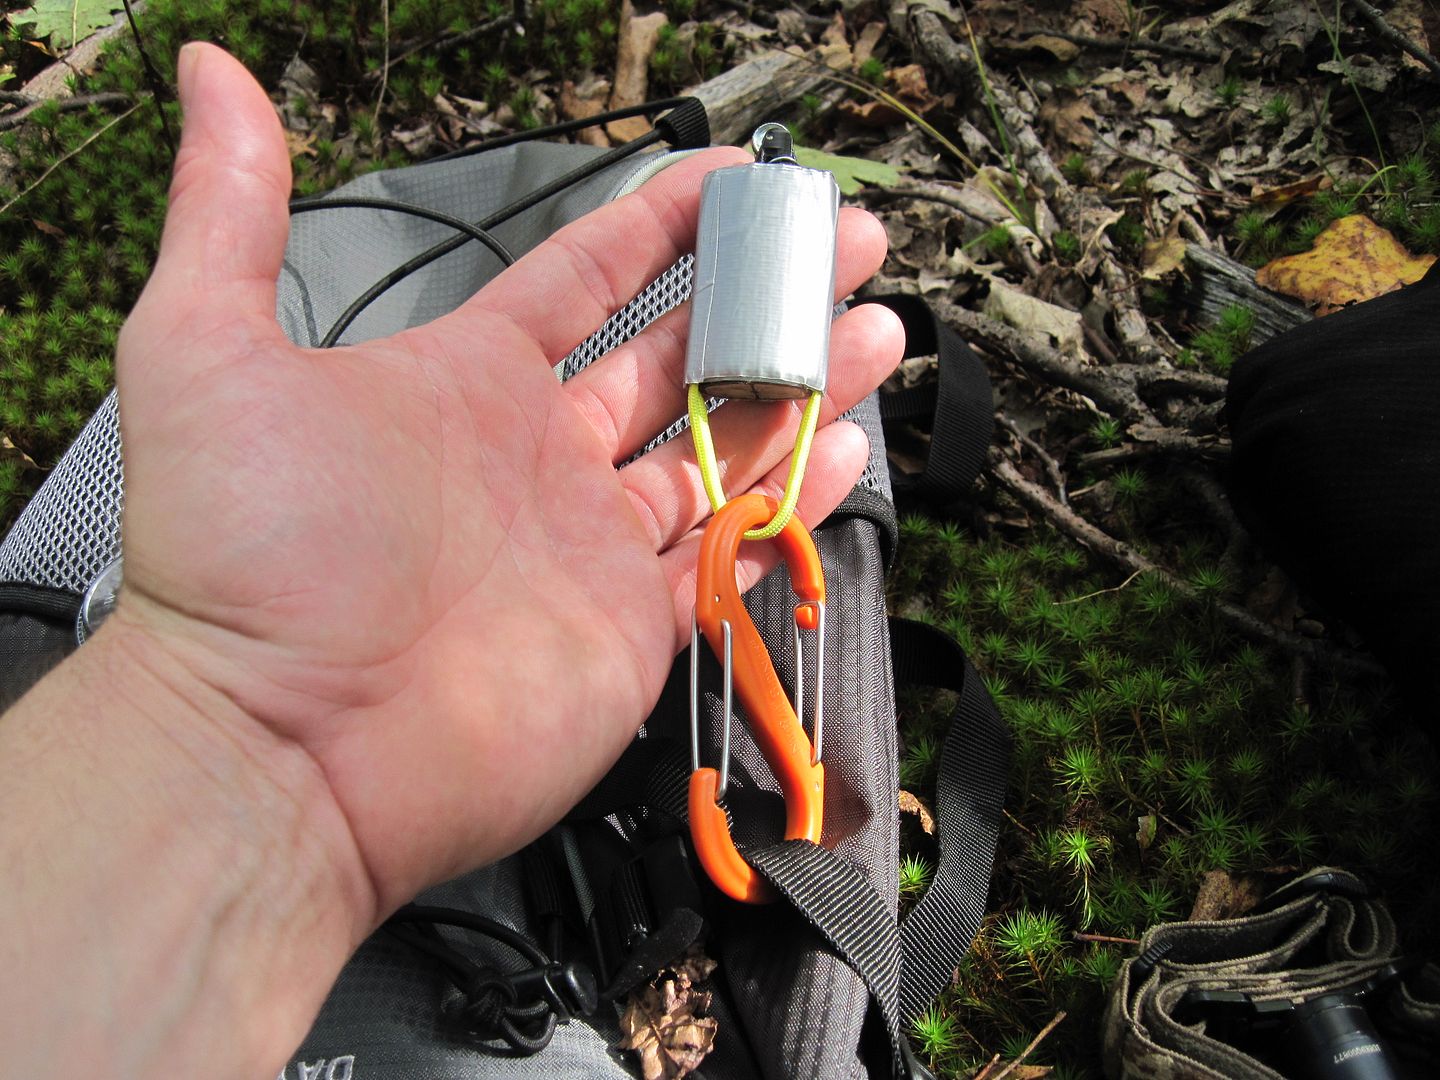
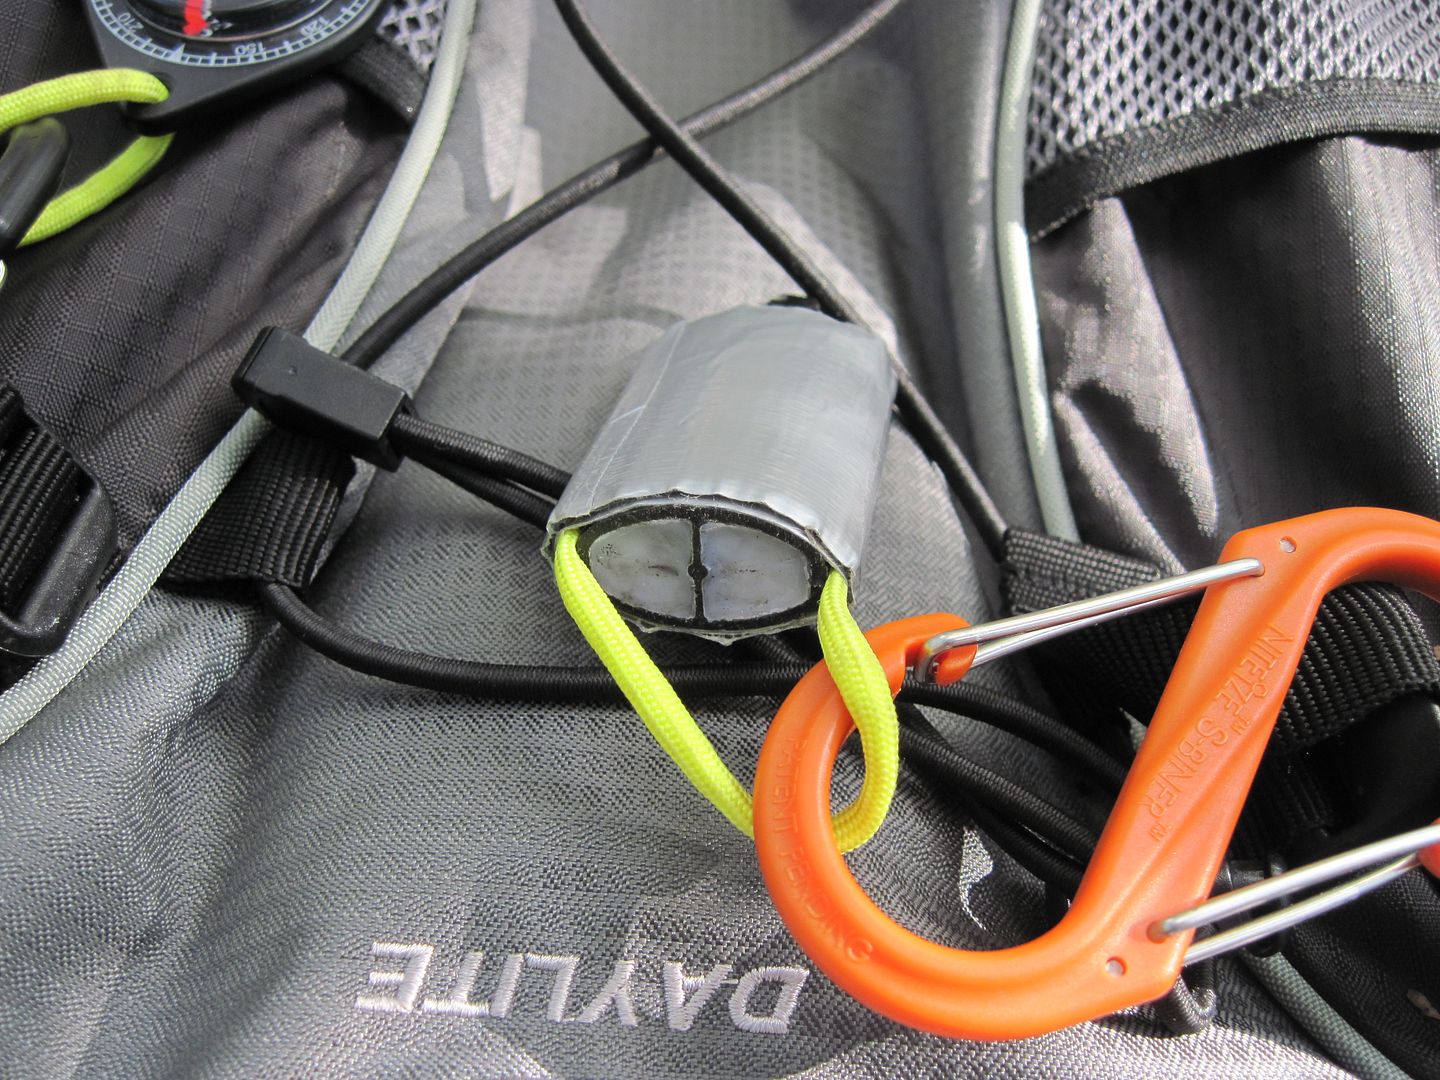
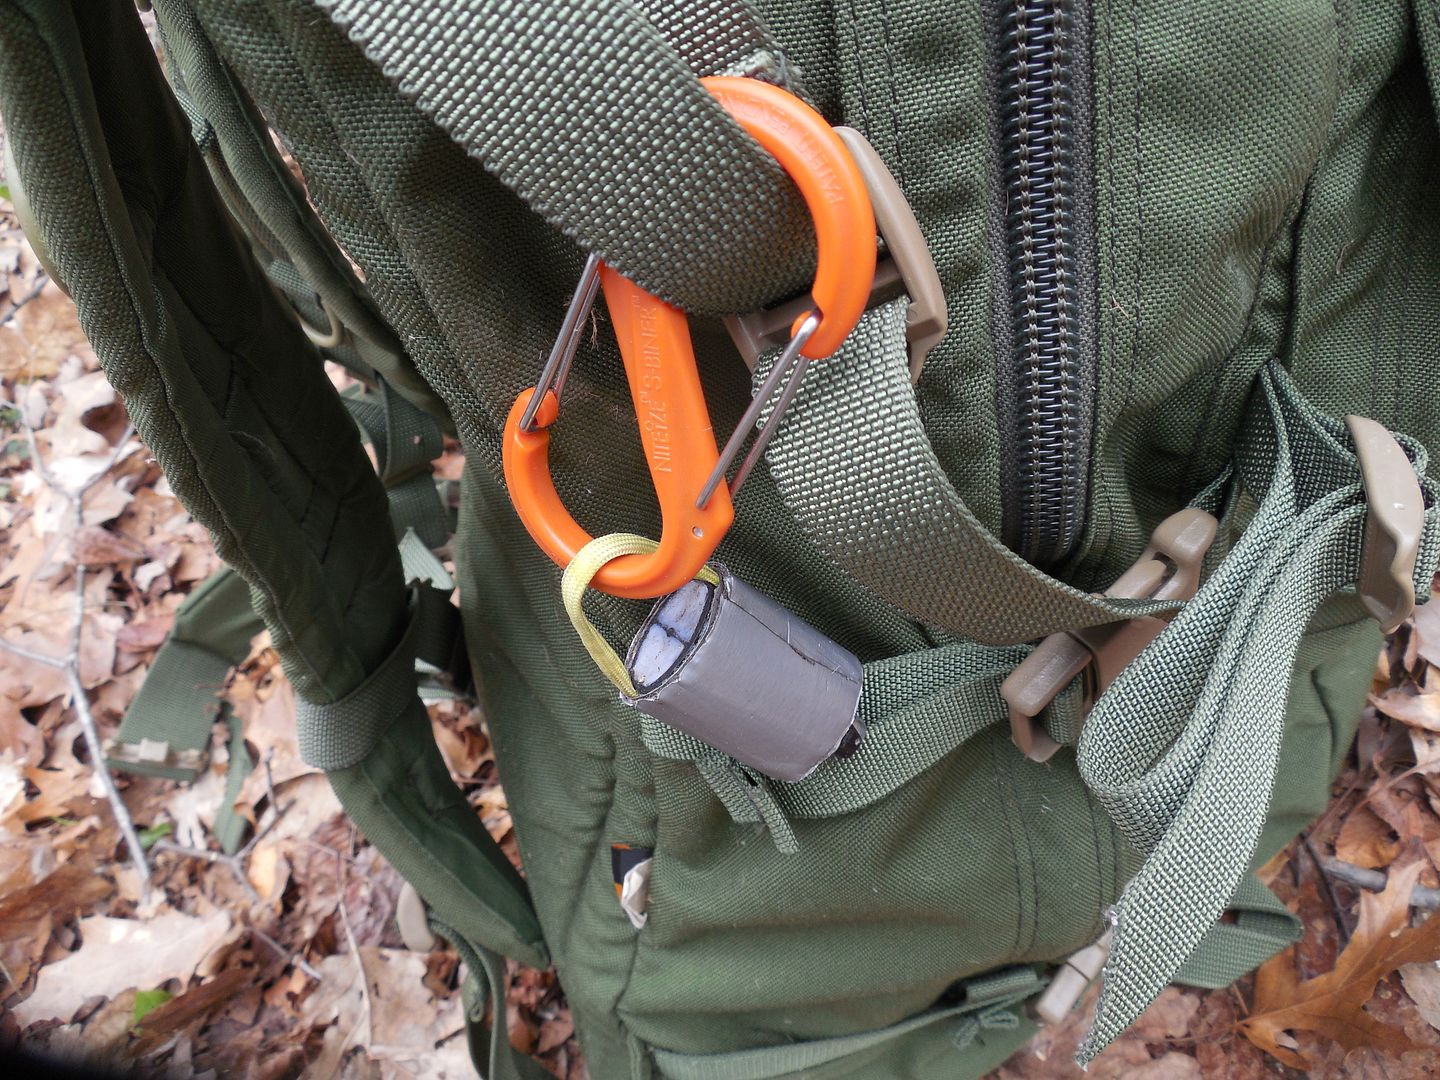
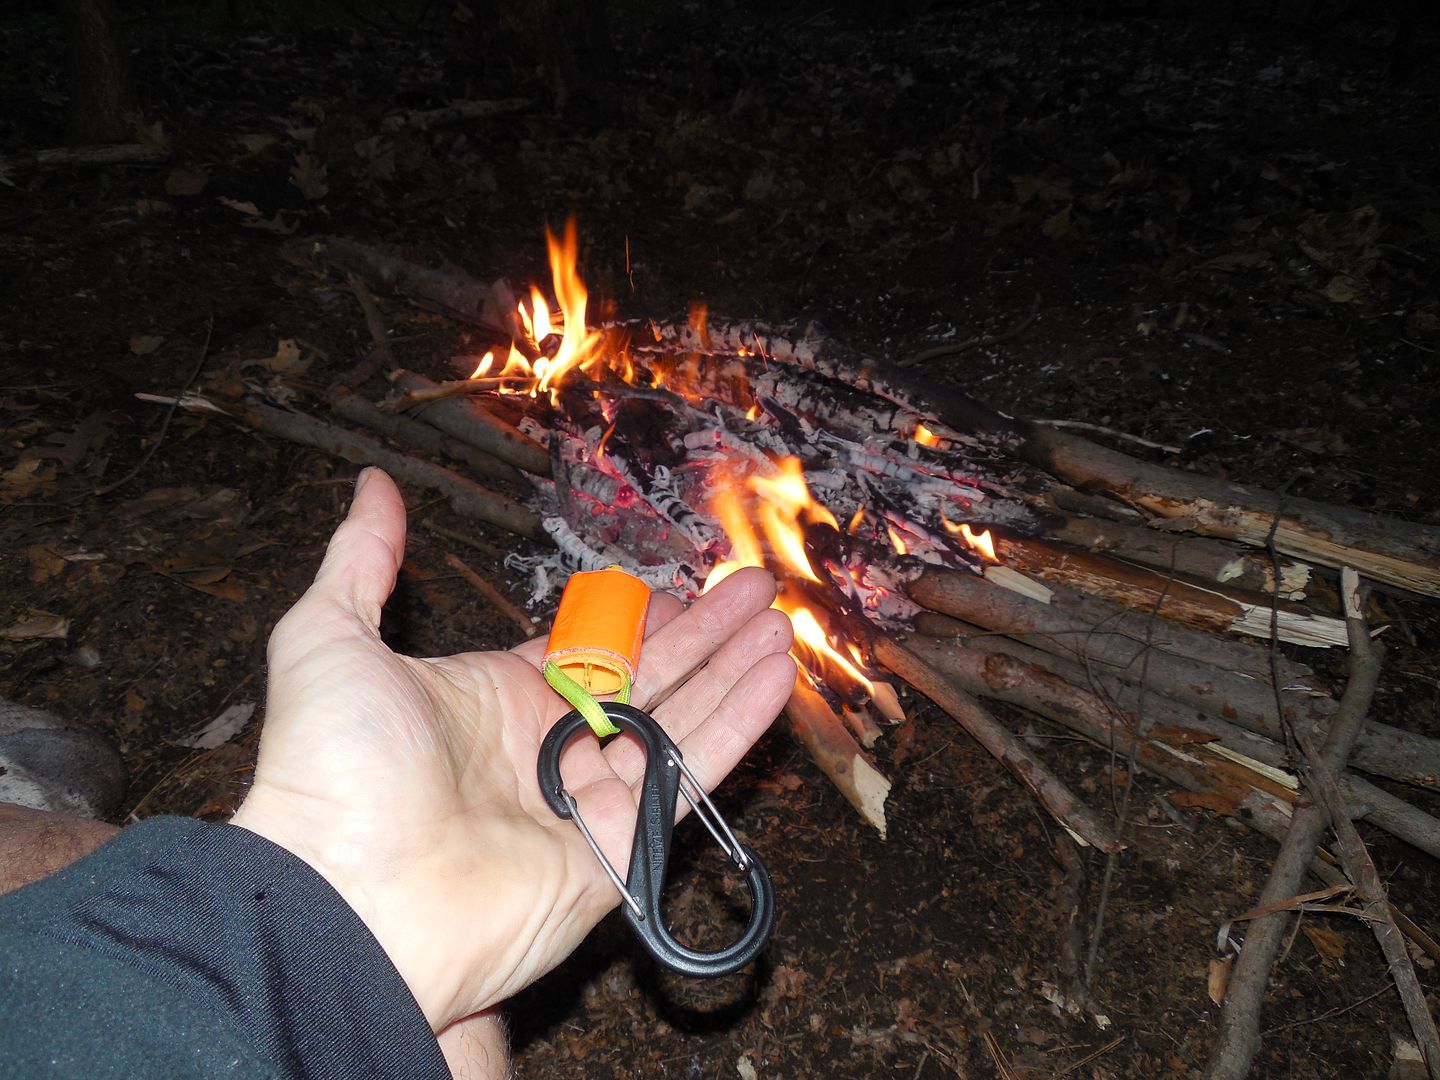
Clips on via S biner and is waterproof because of a wax seal.
This DIY gear item has been attached to various packs doing multiple fun things over the past 4 years. Despite swinging from my pack for maybe 1000's of miles it still remained attached not harmed by the weather or brush. In fact odds are if you look at some of my back posts you will see it clipped on to something.

Modified empty Bics are nothing new however I never seen those posting videos on how to make Bic mods actually test one out in field conditions. These are often created on kitchen table tops for the primary benefit of YouTube and message boards. Having a solid loop, extra duct tape and being waterproof isn't needed unless there was a survival situation in the living room. Also properly testing implies actually going outside in less than ideal conditions. That could be a problem for the modern kitchen table top survival methodology? The ability to solidly clip something means, at least for me it can be accessed outside of the pack and easily moved. Attached and forgotten about until needed separate from the rest of my fire kit. The clip on feature allows for potential use of 2-3 feet of duct tape which as we all know is a useful gear item. Probably this has been done before like everything however has it been tested the hard way? I don't know but today we are doing just that.
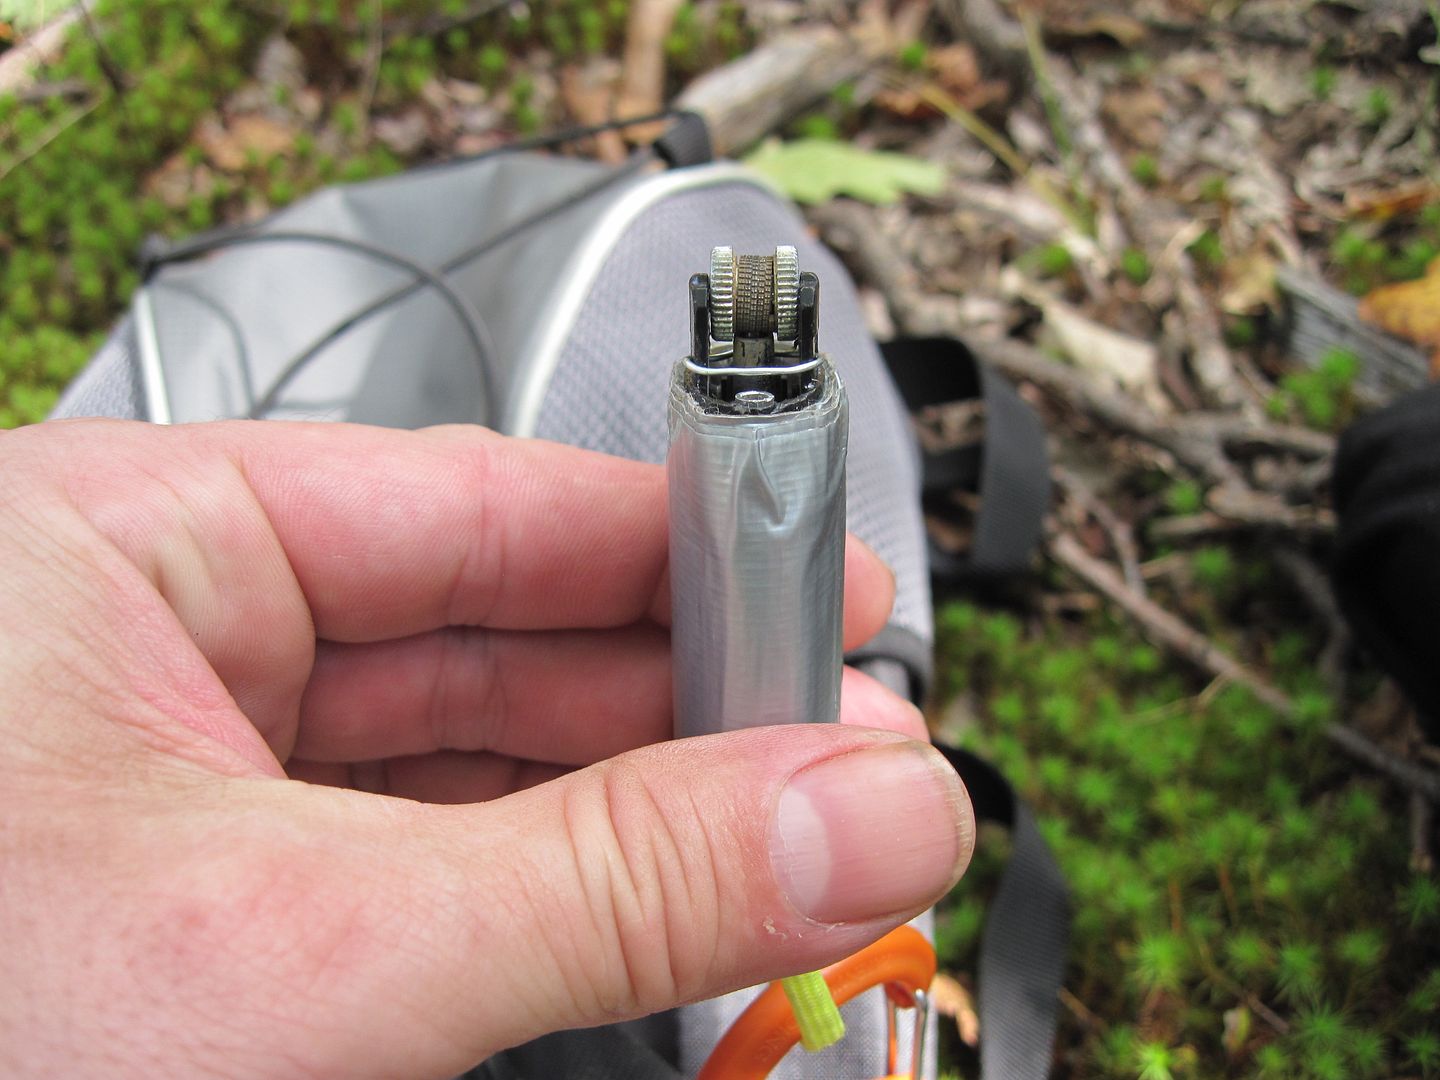
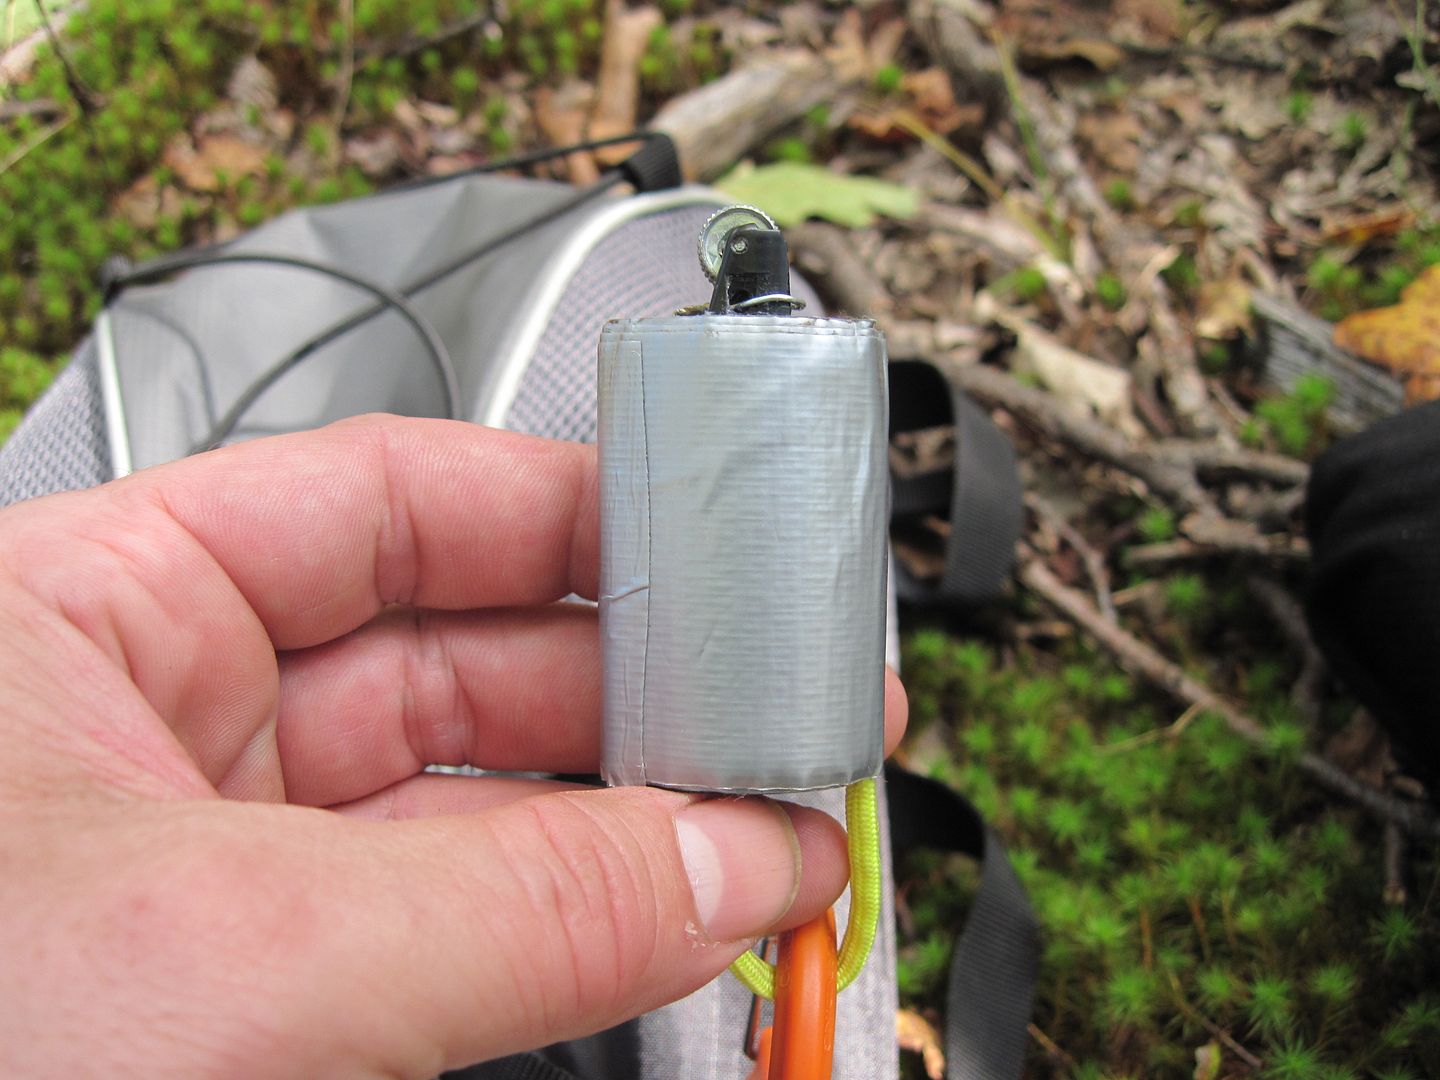
It looks nearly the same after being fielded for many outings. Photos taken during the field test.
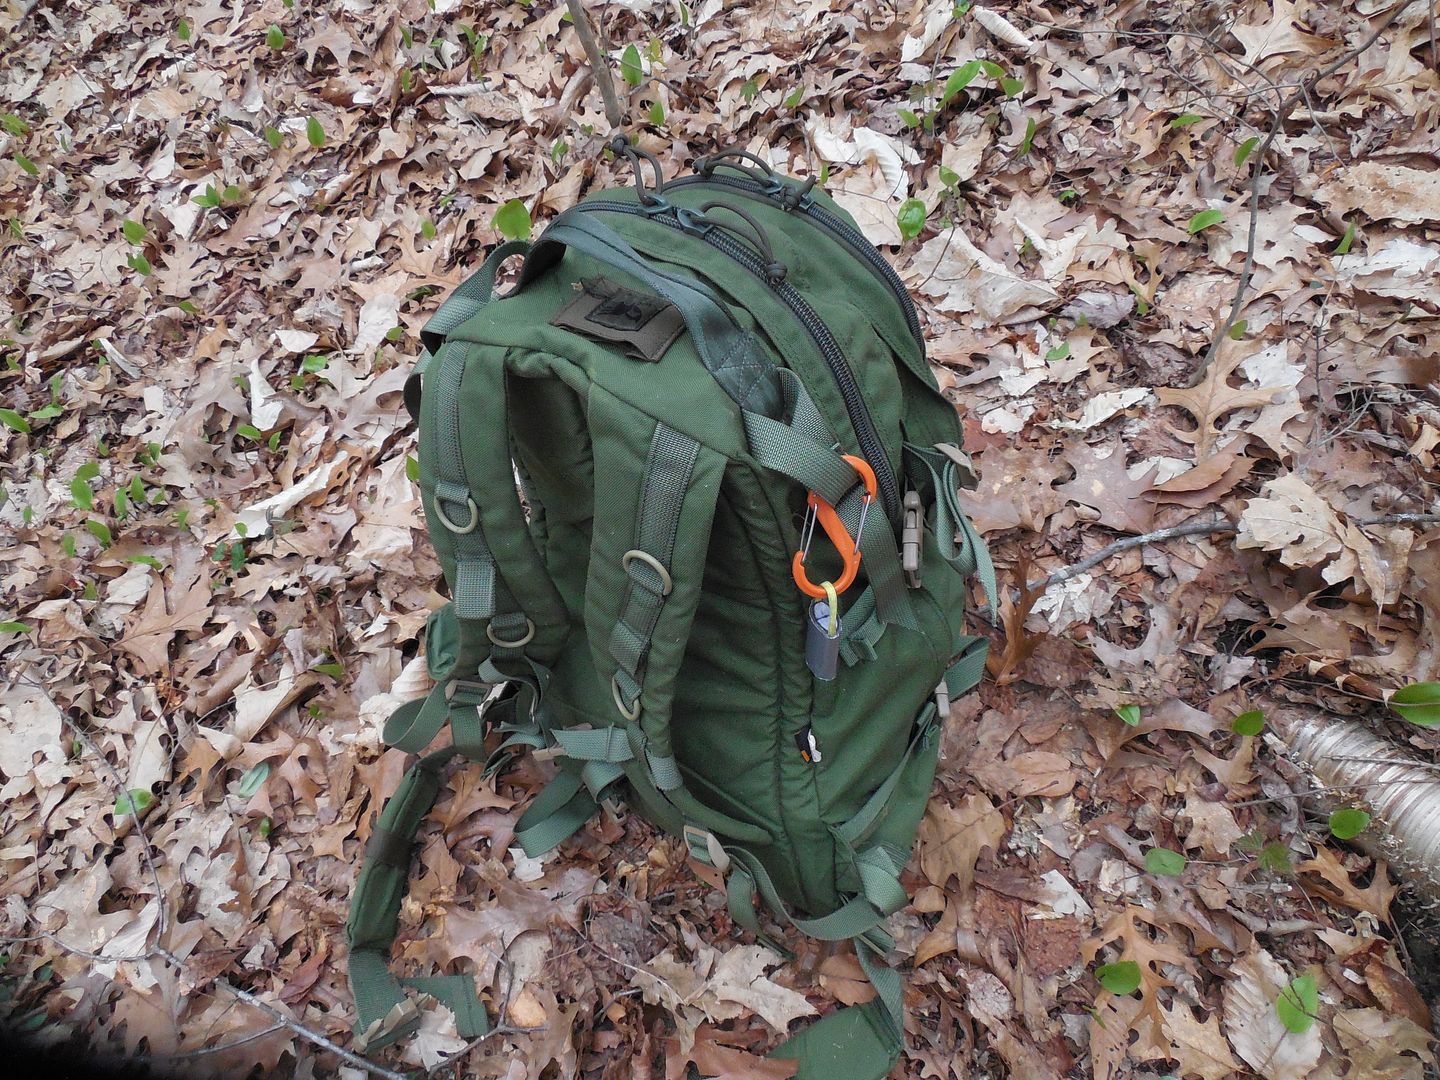
The wax and S biner, duct tape and gutted paracord loop all survived the test of time.
Construction and testing in the woods of the DIY Clip On Waterproof Bic Fire Starter Kit. Extra Duct Tape Kit. GO!
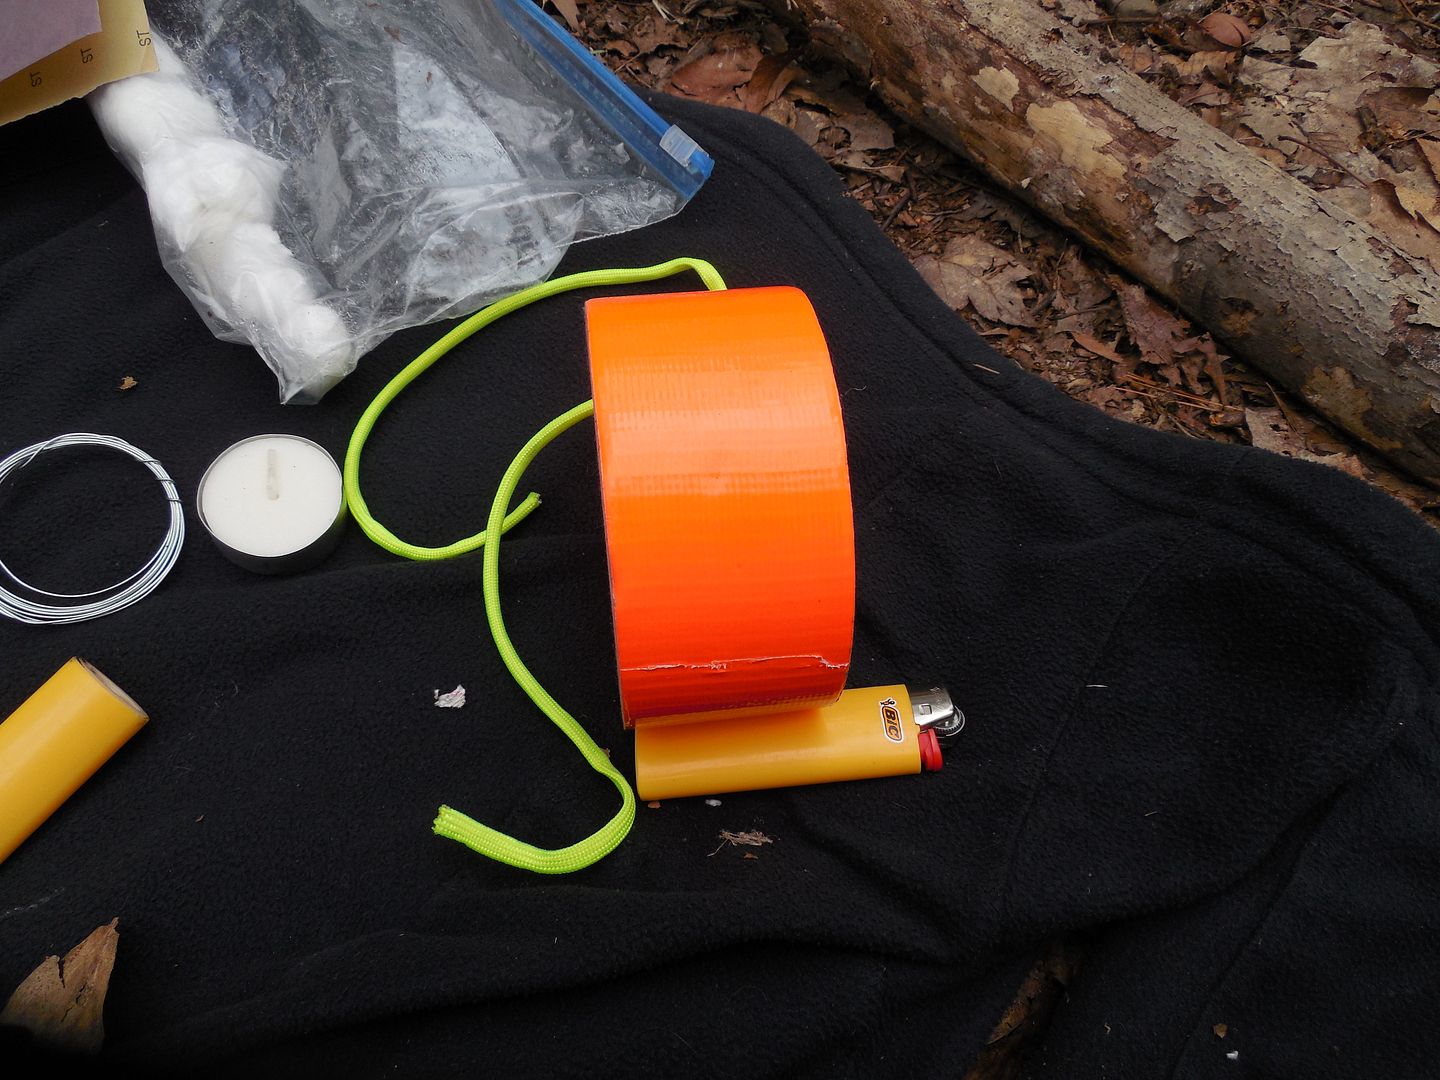
What we are going to need.

1. Both a full and empty Bic lighter.
2. Duct tape. The more obnoxious the better. This time I took reflective silver and crazy orange.
3. Wire.
4. Tools. A Leatherman is good, wire clippers and fine saw if you have them.
5. Sandpaper. Optional.
6. S bine or something similar.
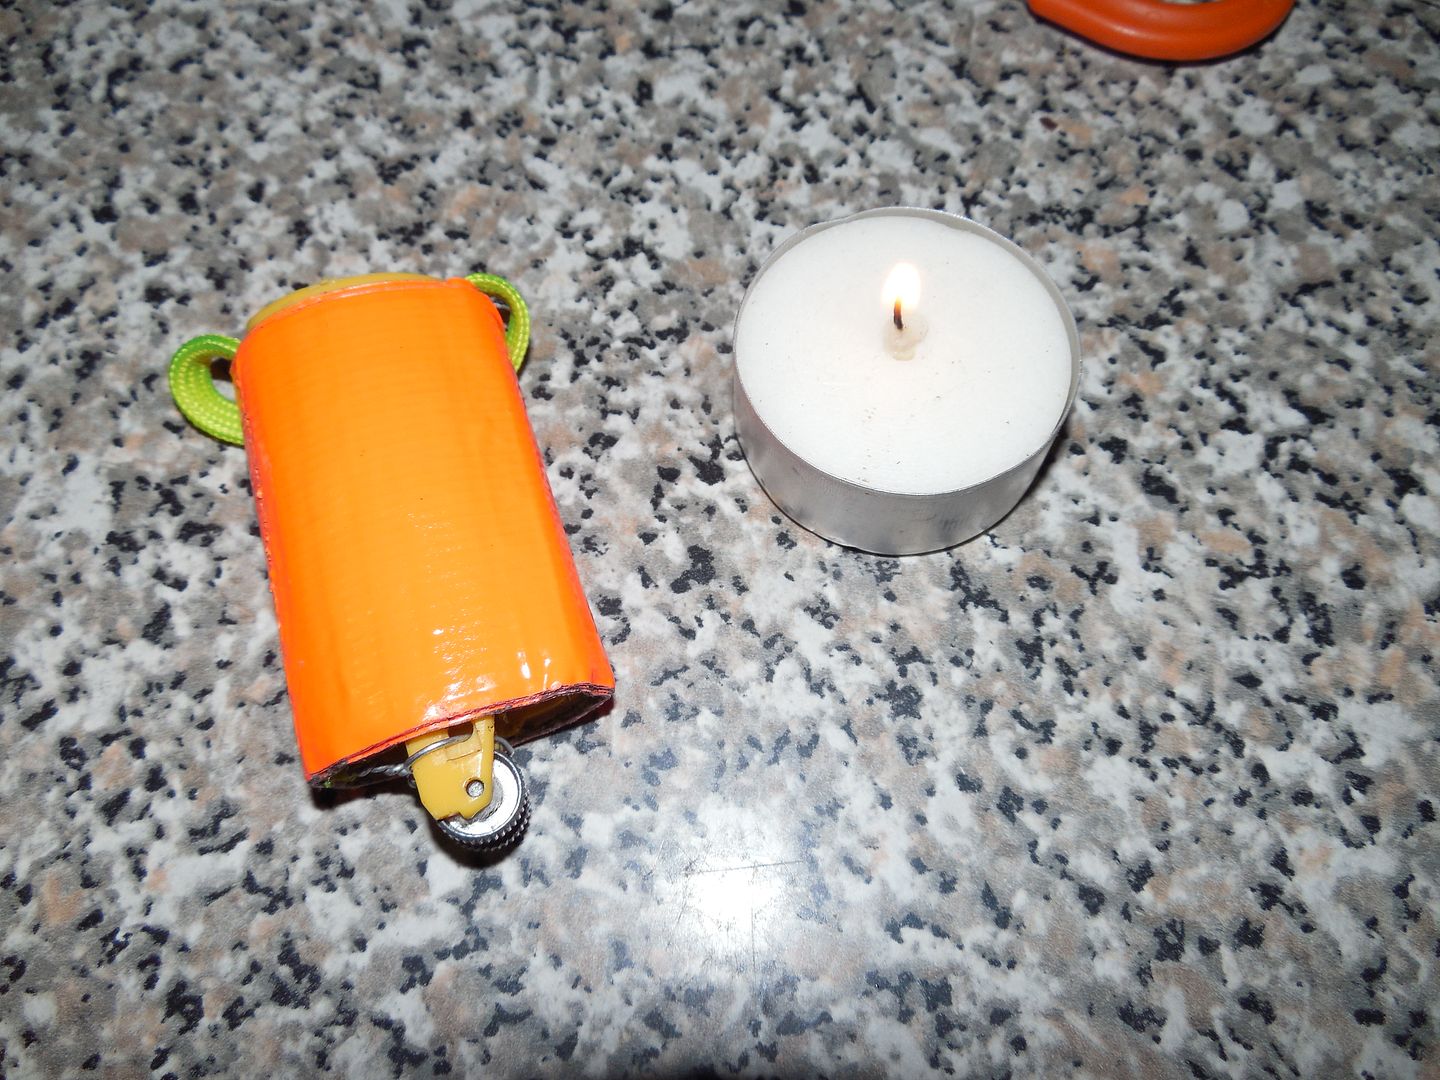
7. Candle.
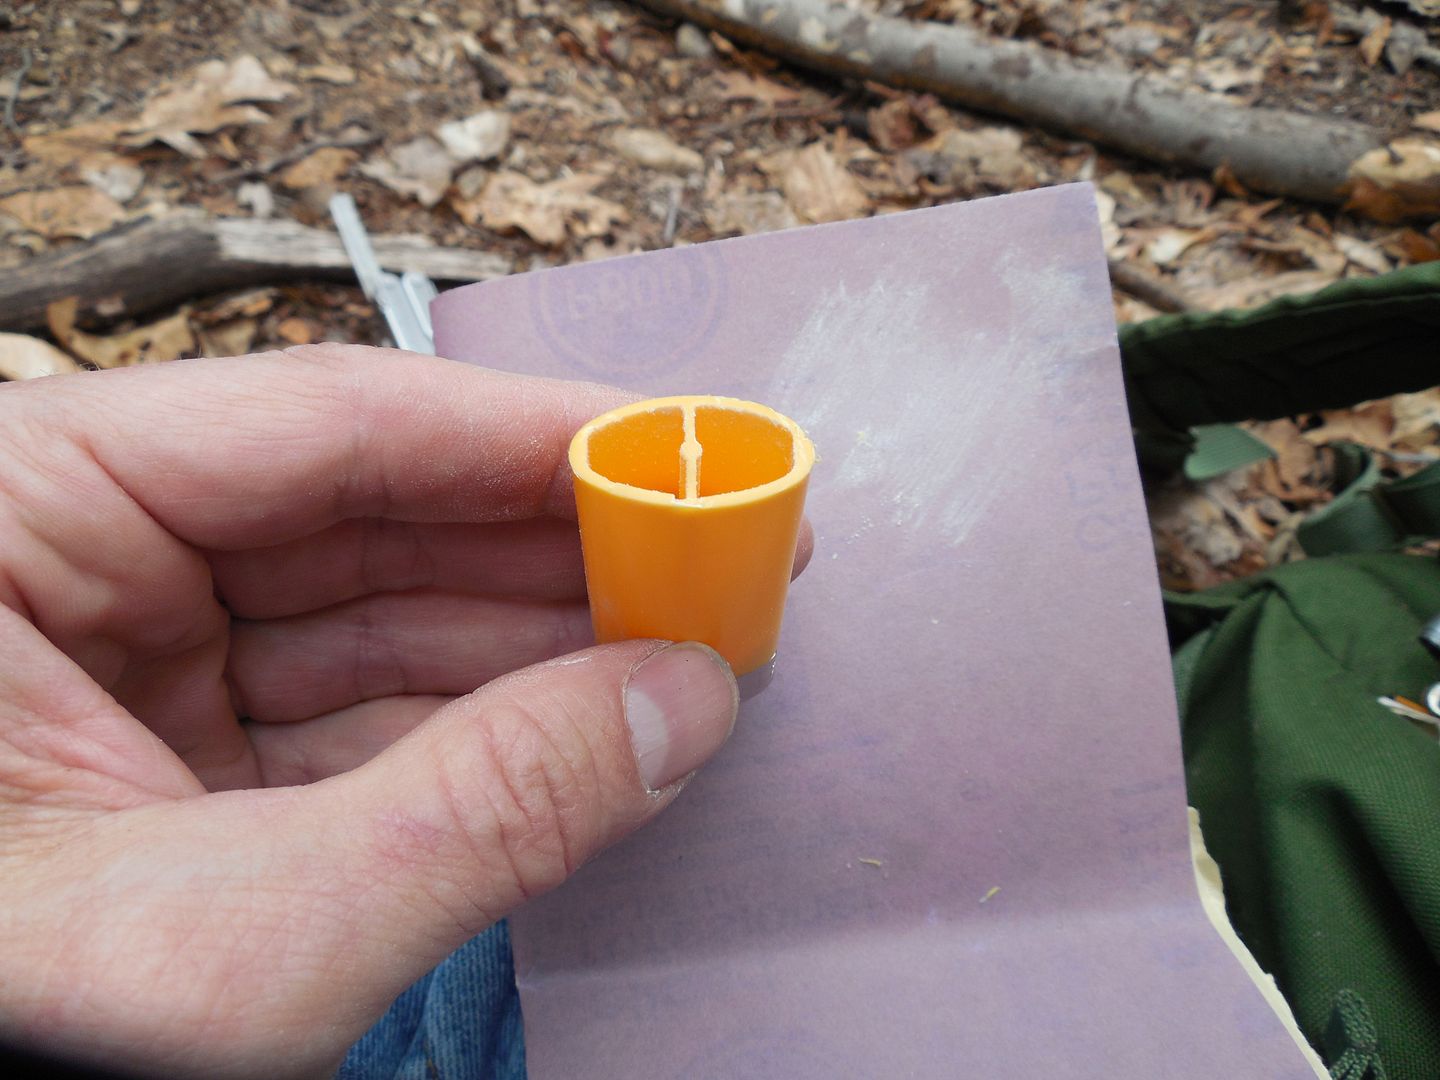
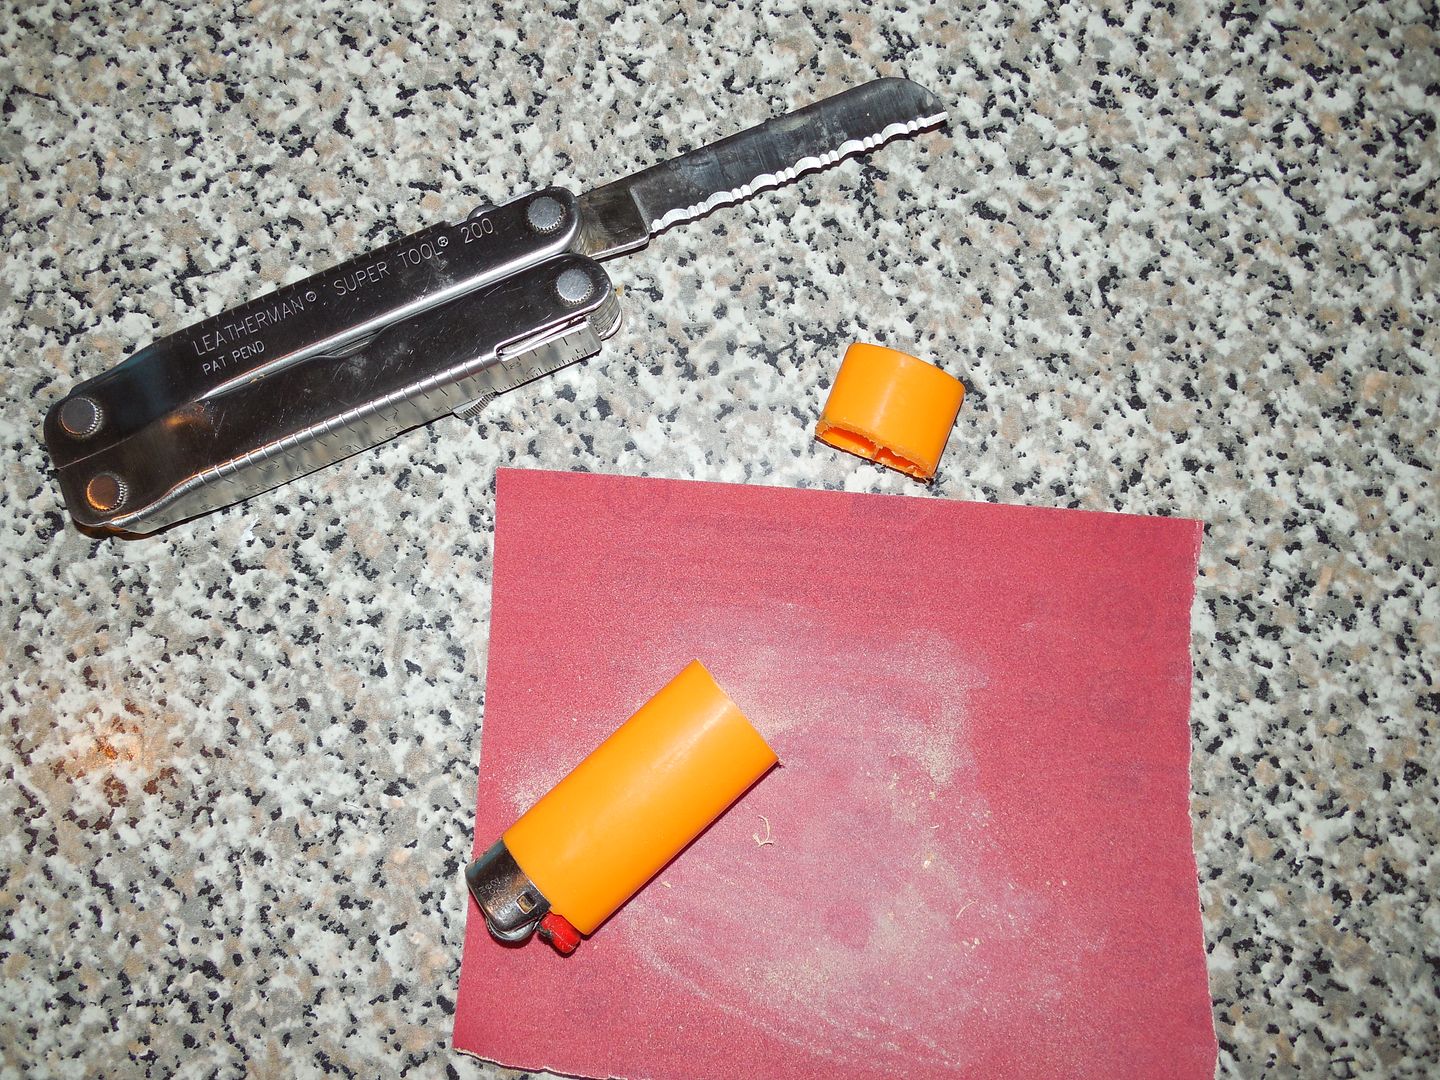
Clearly there isn't much to this. The Bic will need to be cut so the insides can be accessed for water tight tinder storage. A spent lighter is ideal. This project is a recycling enterprise which works because the ferro rods (aka flint) Bic uses are much longer than actually needed for the life of the fuel. My sparker is still sparking fine 4 years later. I really used the heck out of it igniting natural tinder, stoves, charred materials, etc etc etc. The after life of a Bic can be longer than it's first. I cut the lighter about the same width as the duct tape. A Bic is tougher than many might expect so it could take a minute or so to cut through if using small hand tools.
Once cut a file or sandpaper can be used to even and smooth things out but this is cosmetic.
The rest of the construction is on video as couldn't both take photos and video at the same time building this thing in the woods. Adding to the fun it started to sprinkle and the rain would be getting worse. I needed to make another one inside to show the construction.
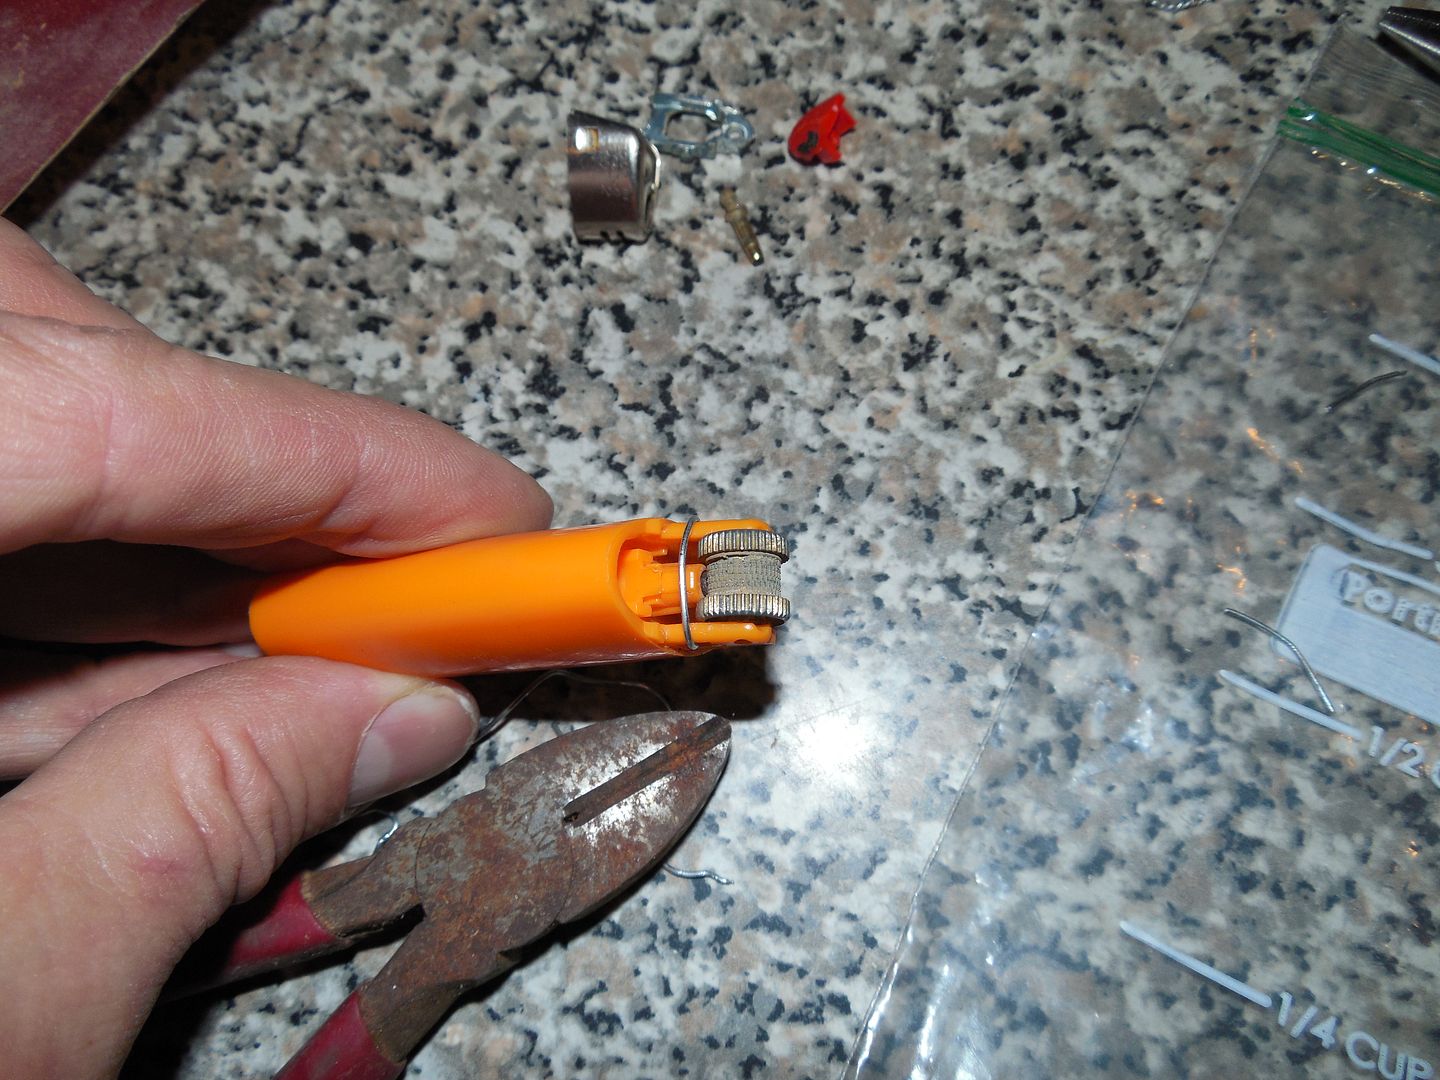
1. Cut and sand Bic.
2. Remove all the top parts including the wheel taking care not let the flint fly out because it's under spring tension.
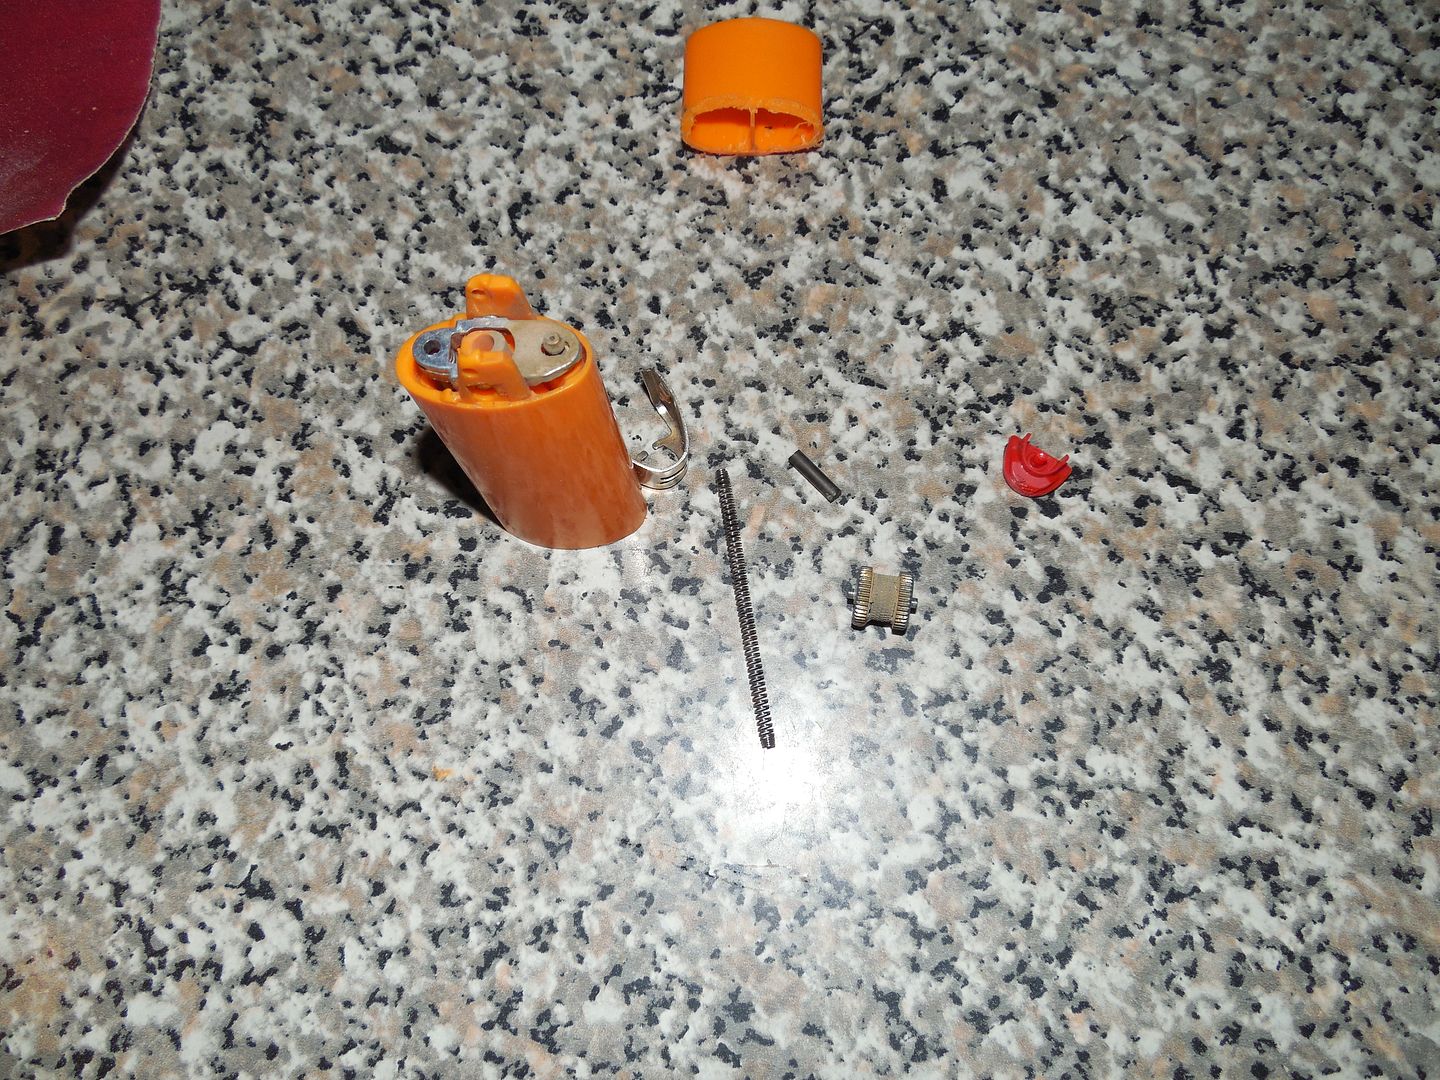
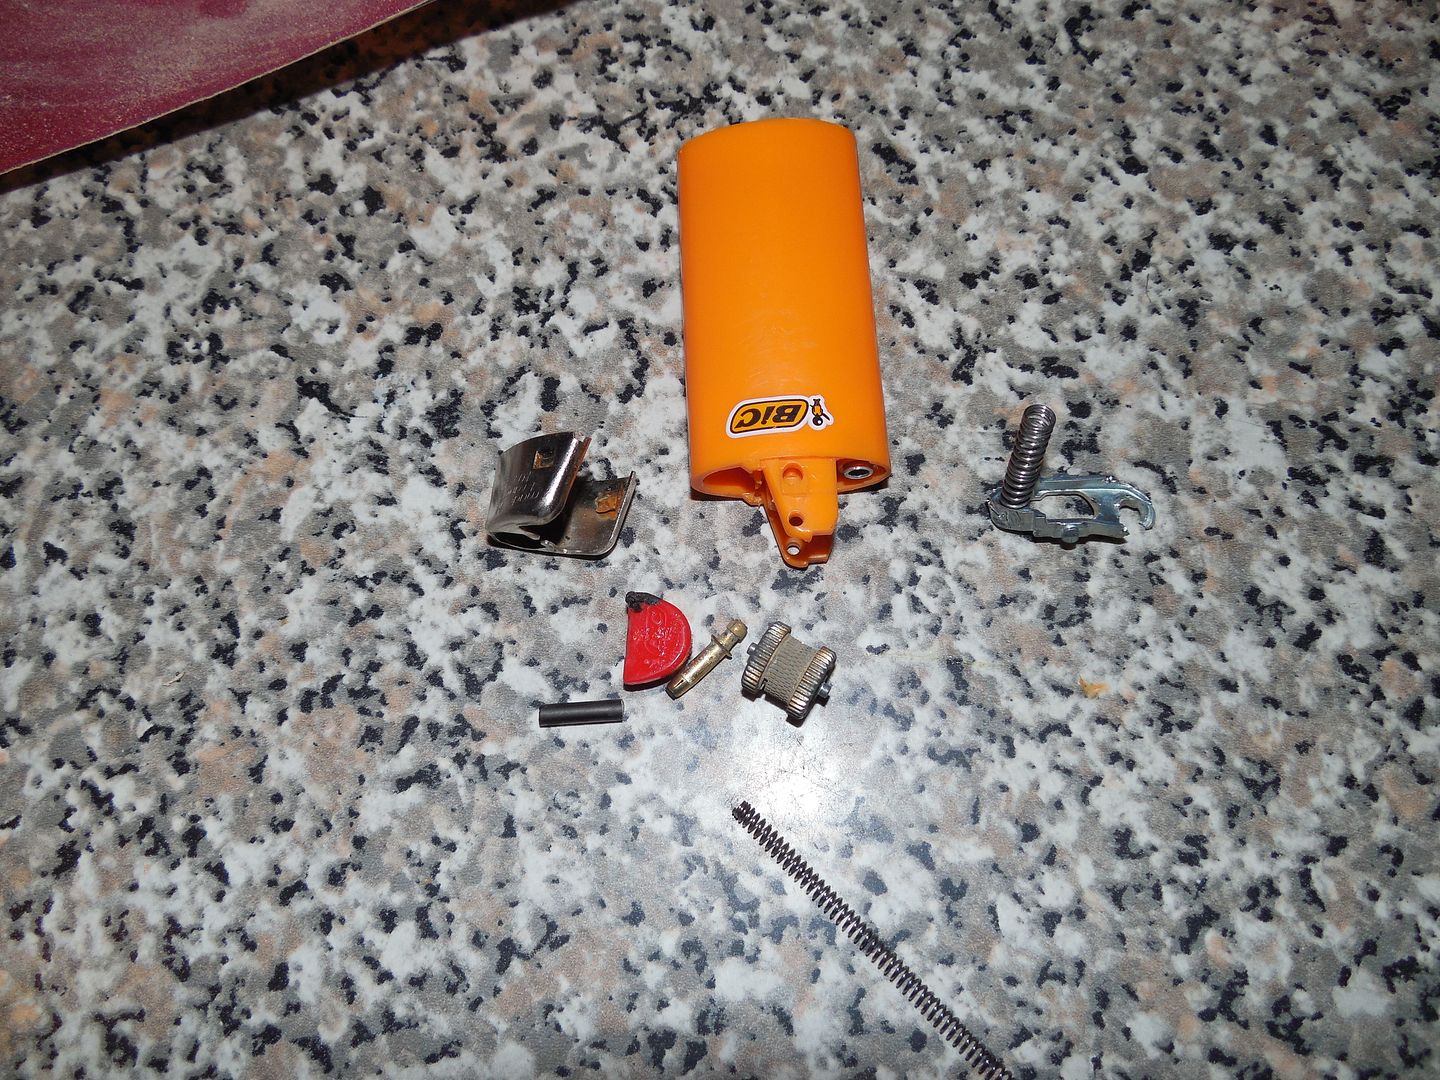
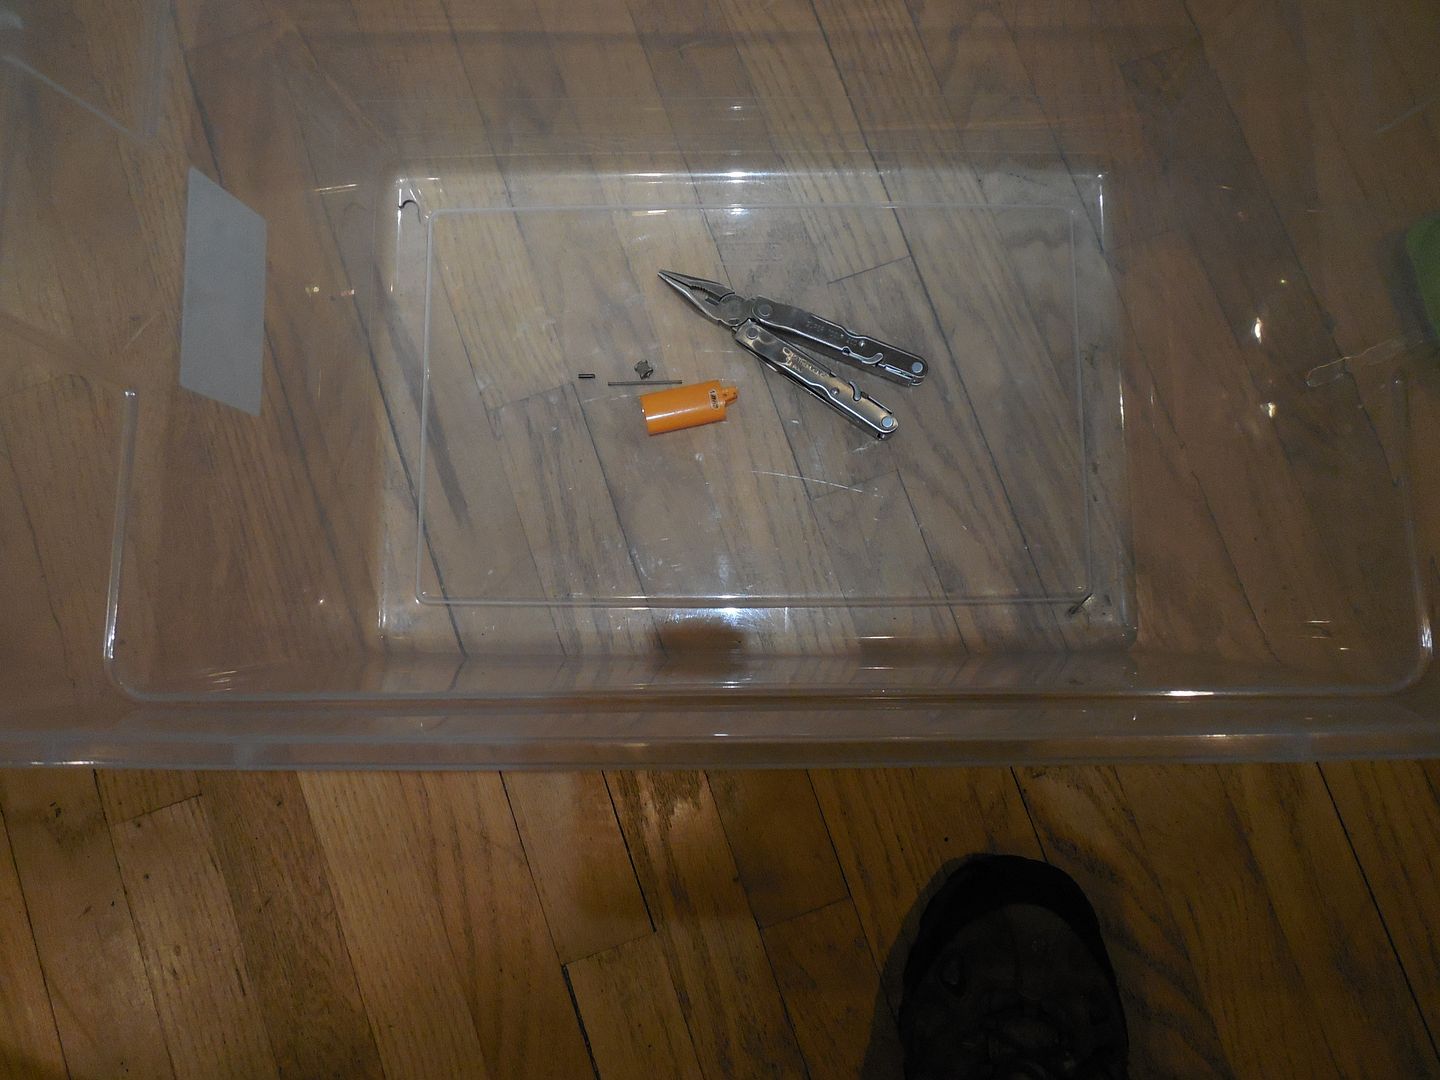
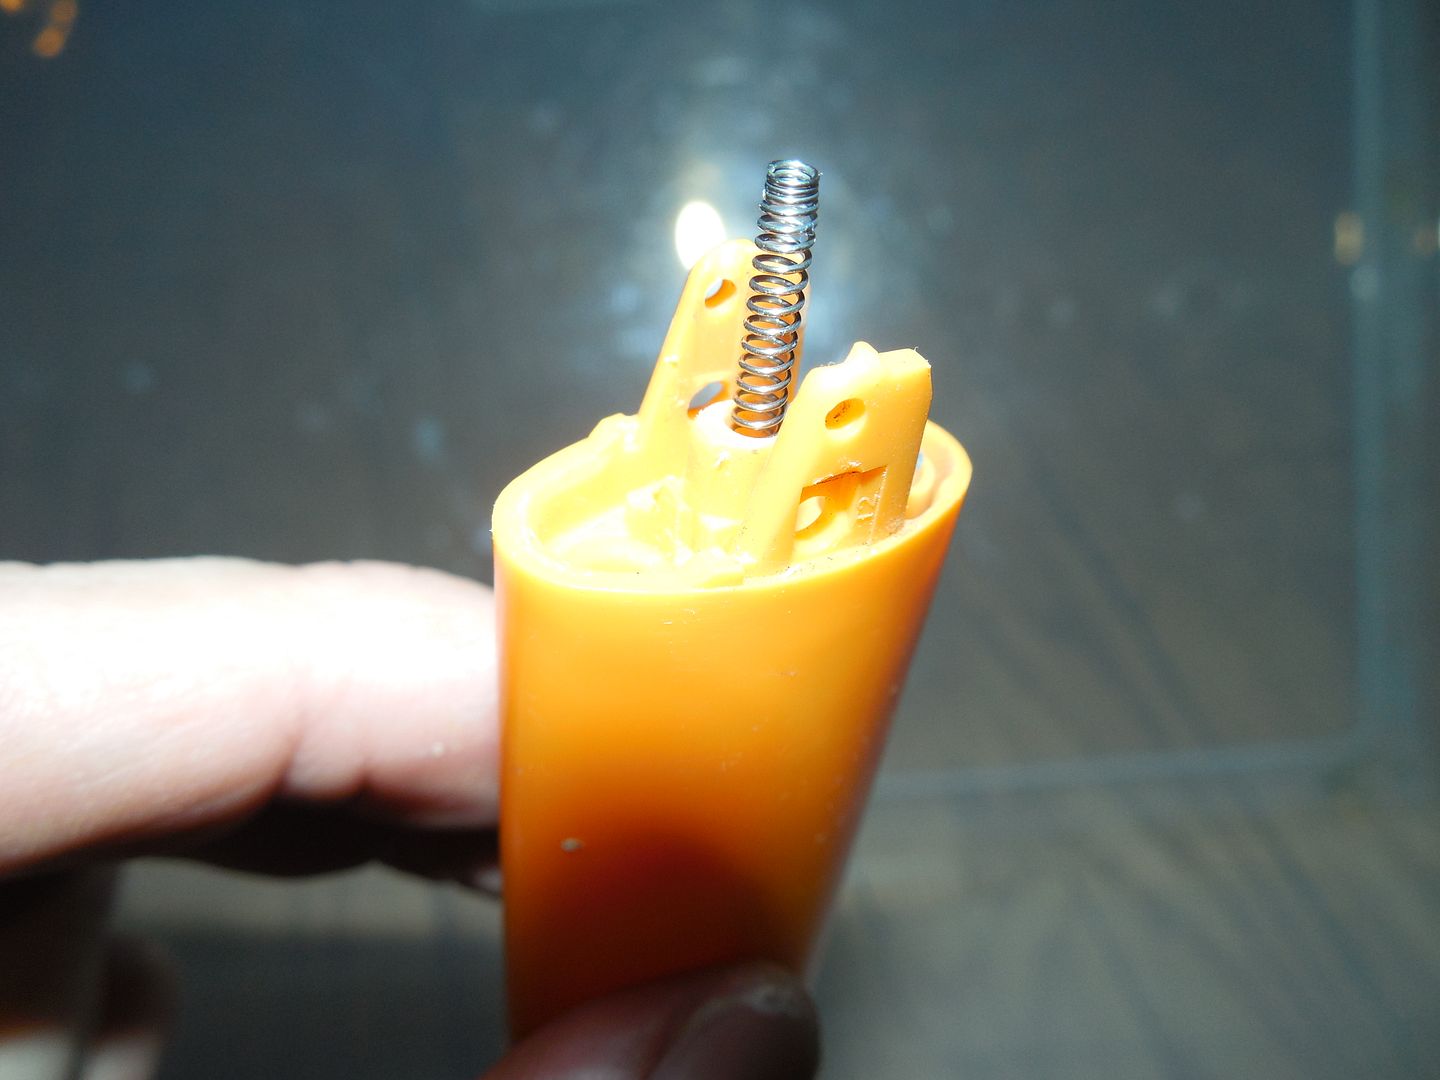
The flint/ferro rod loves to fly away. The removal of the wheel/flint and their replacement is easier if done inside a container as the little rod will fly away a few times. It's nearly impossible to find once out of sight.
See the problem. The rod needs to be pushed back in then wheel replaced. It's doable but is the hardest part of this easy project IMO.
Spring, flint and wheel replaced.
The wheel seems solid however I add some wire to keep it in place. The side which is flicked should have the loop. The spark side should have the twisted and cut end. This way it won't jab your finger when flicking.
Time to fill it. We are going to move over to the one used in the field test to show they're refillable. The one made in the woods needs a recharge so lets show that.
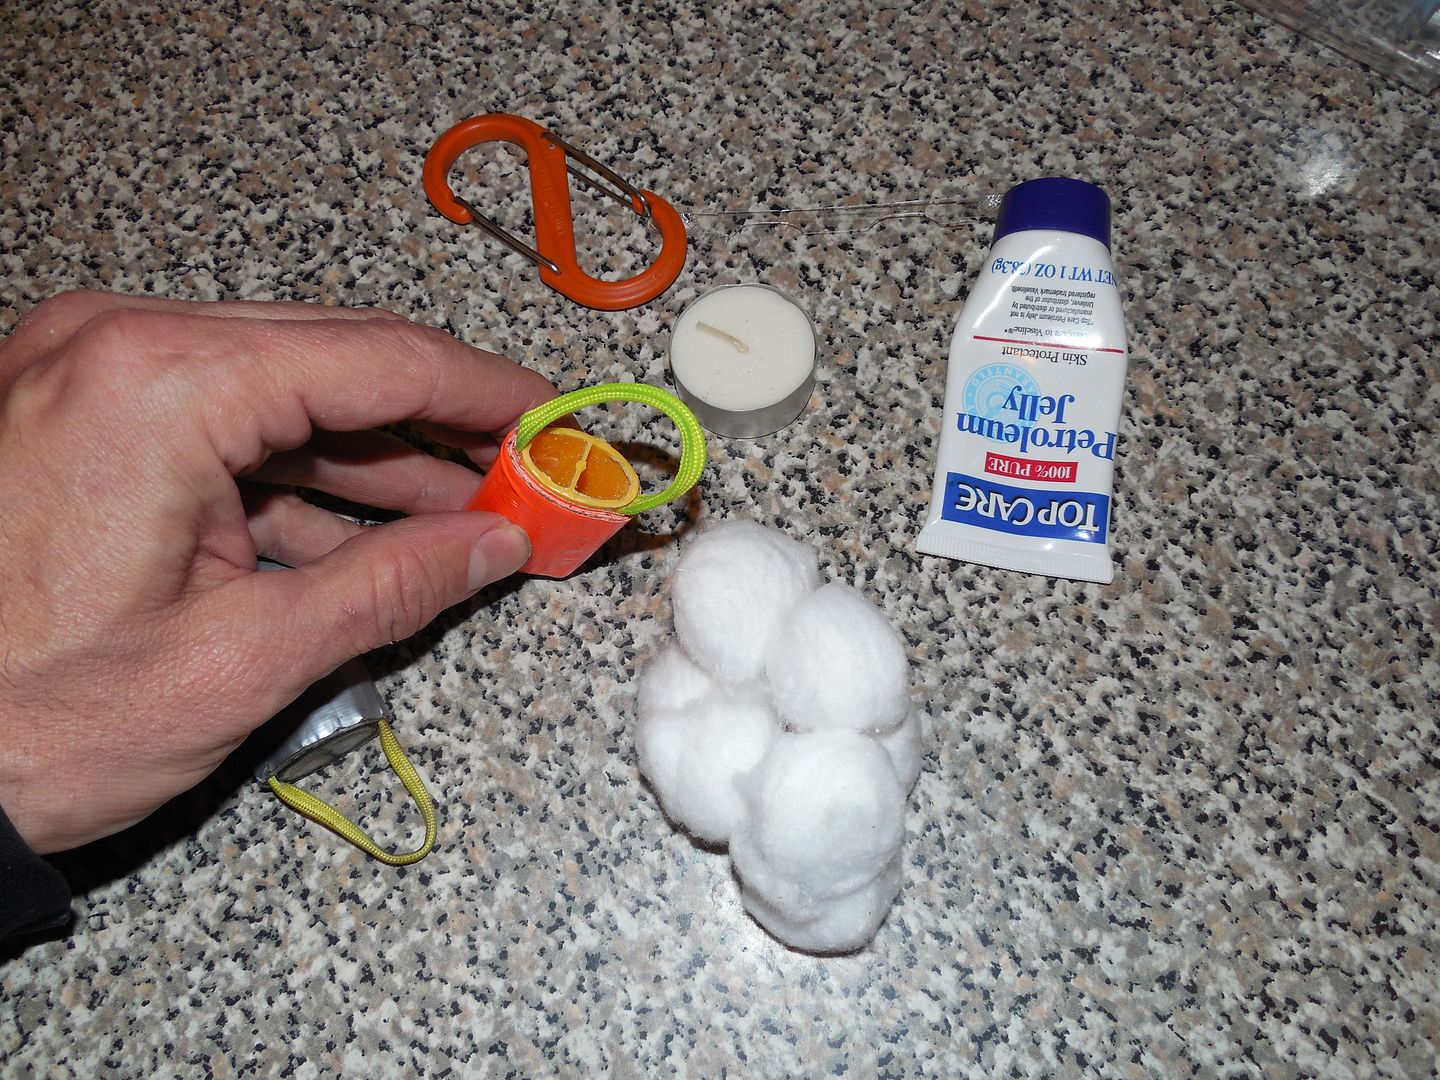
Just a little dab of Vaseline. Don't overdo it.

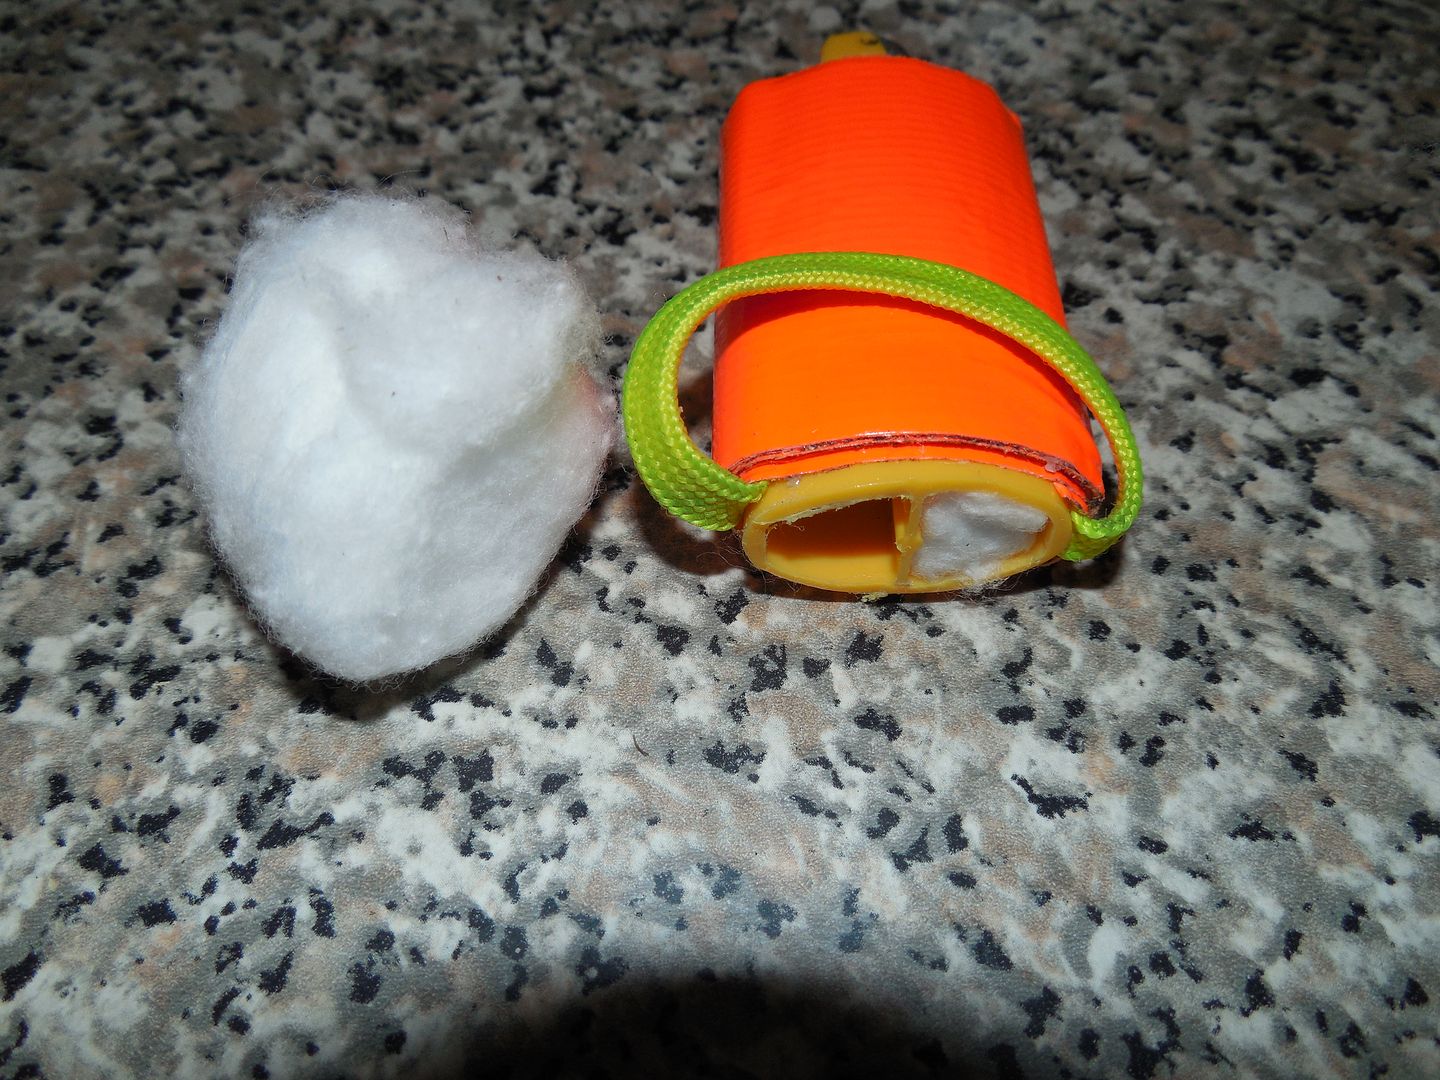
One large cotton ball per side fits just fine.
Now the wax.
The one on the left sealed 4 years ago. On the right 4 minutes ago.

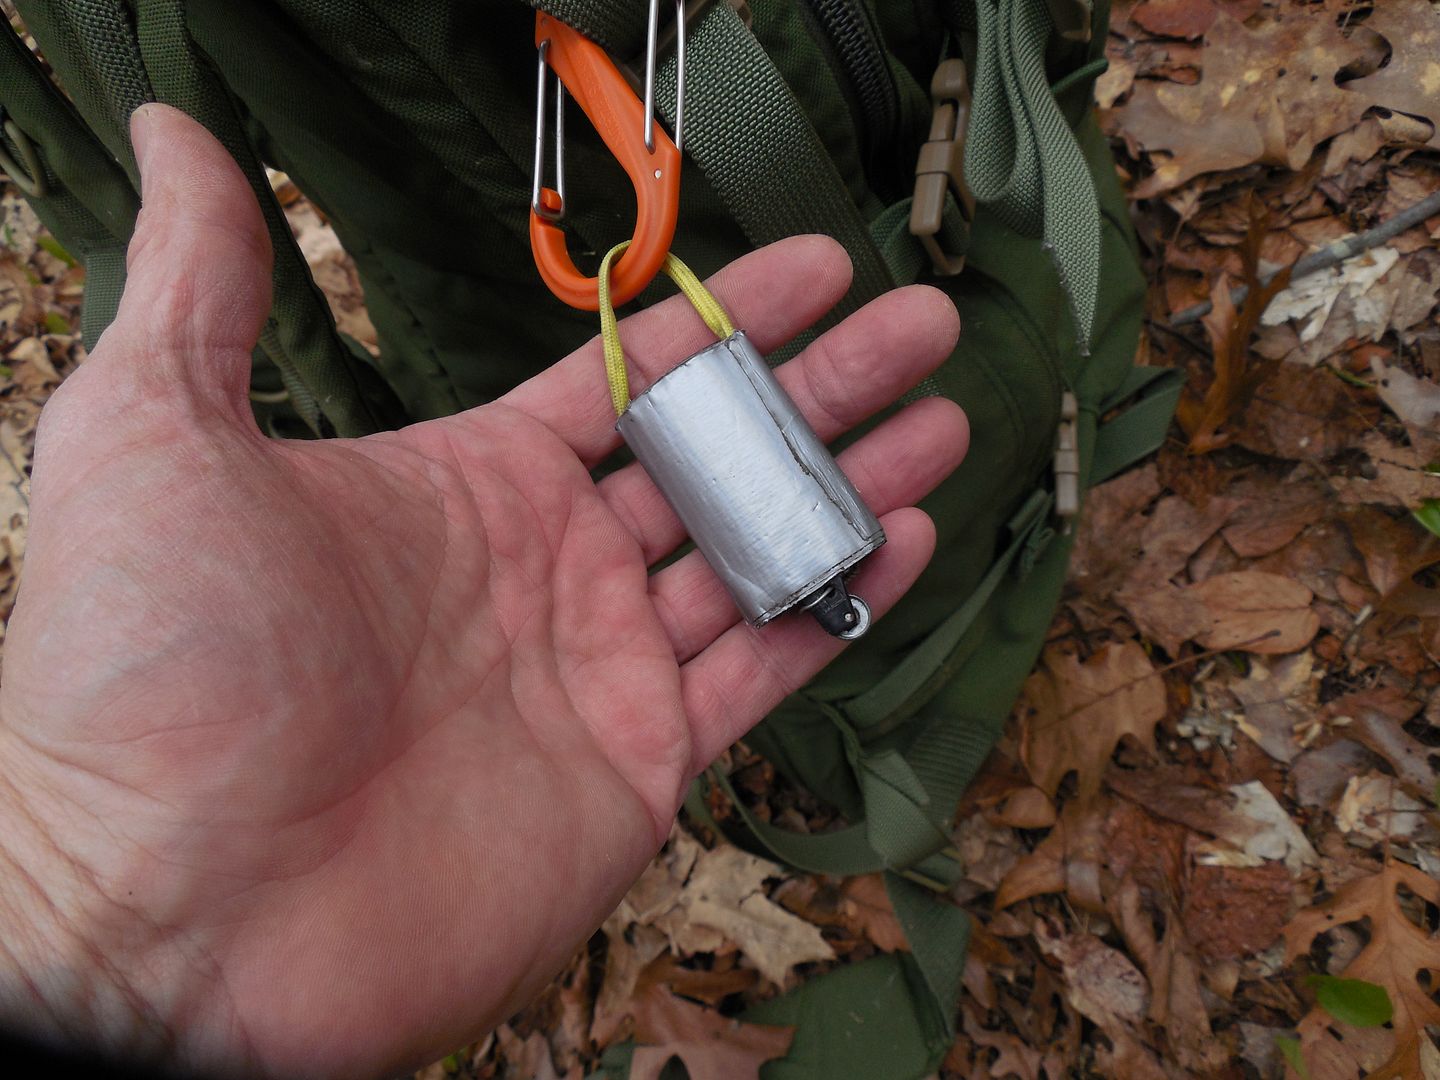
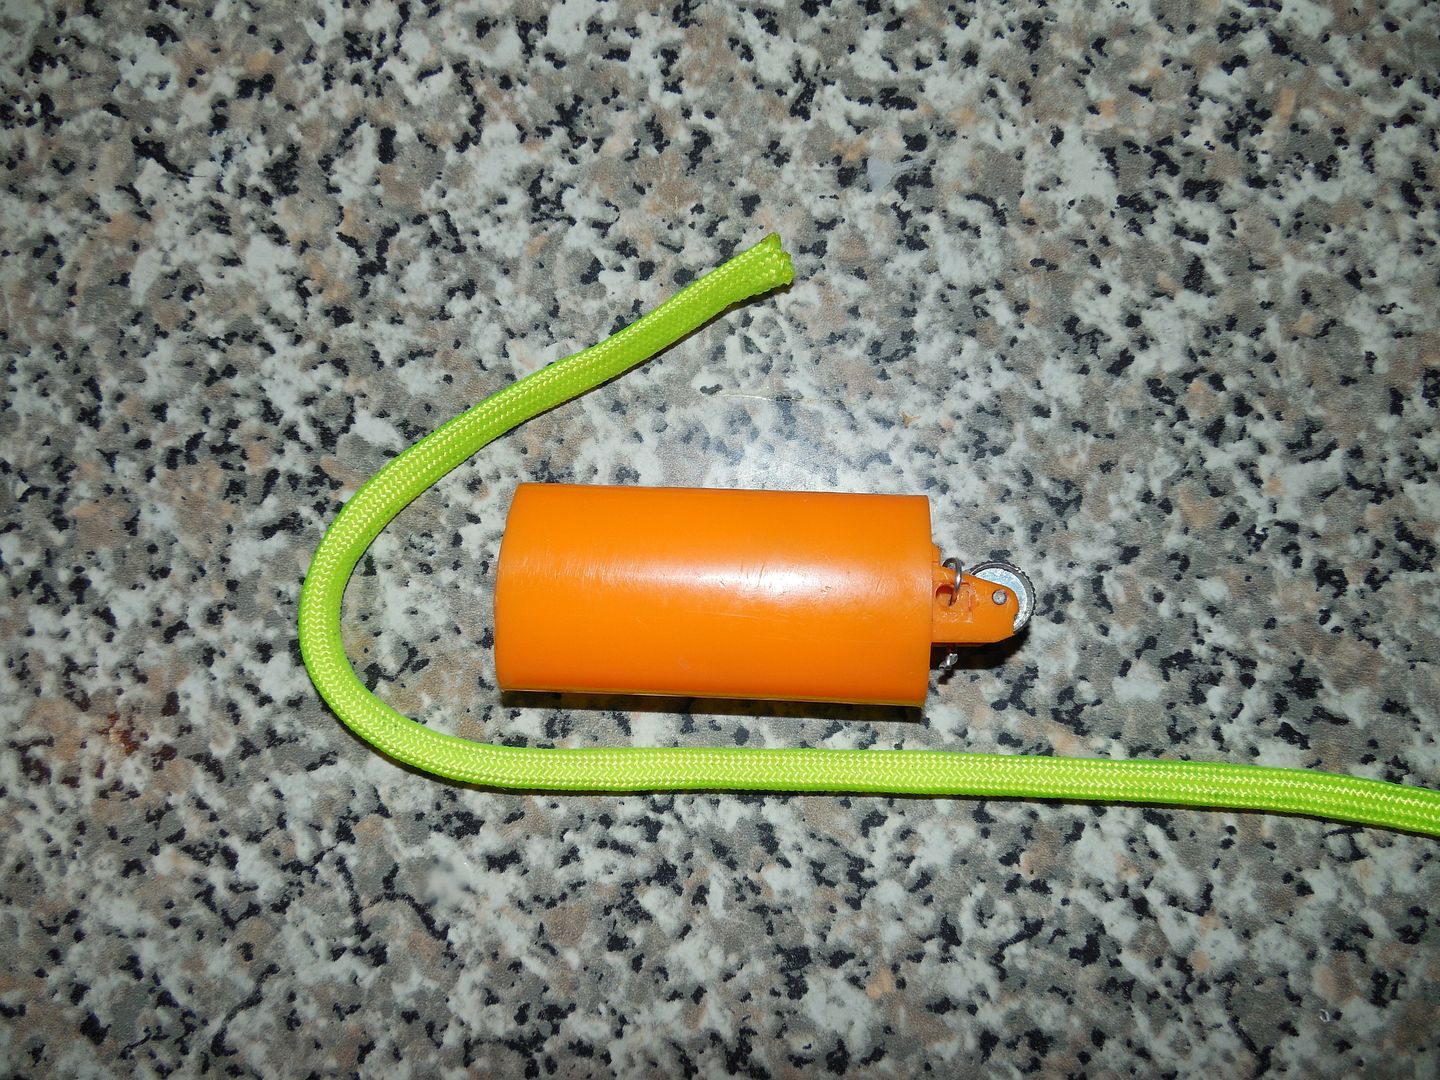
Showing how the loop is made. I gut the paracord as it lays flatter to the lighter.
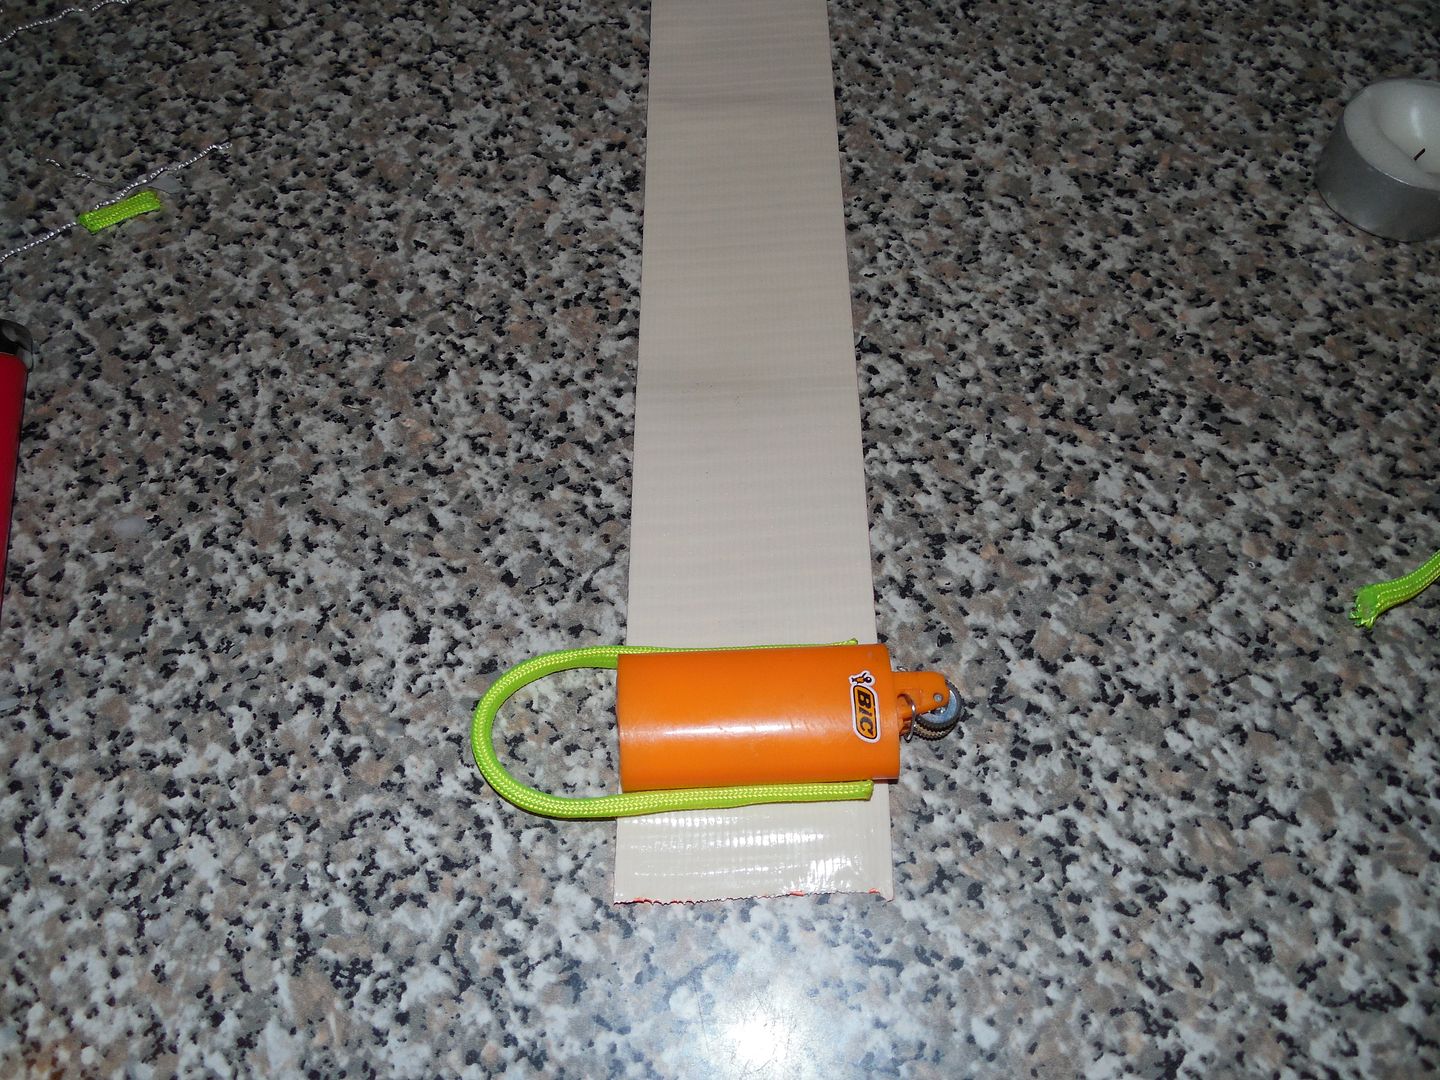
Two to three feet of duct tape. Why so much? Do we really need to ask? Having extra duct tape offers more options and we all love duct tape! It's a bit tricky to roll back on but doable.
Now I have 3!
Going to retire the old one until I find another spent Bic for parts to replace the flint/ferro rod and wheel. It still sparks good but at this point must be nearly done. The others have tons of life left in them. Recycled gear.

The field test.
So does it actually work in field conditions? Some time ago I tested another type of DIY fire starting kit in extreme conditions. It worked so added that to my gear however things tend to be different when under stress than when seen in controlled situations. I bet few if any of these kit items we see on the internet are tested hard. Not saying it doesn't happen however rarely see it. So let's GO!
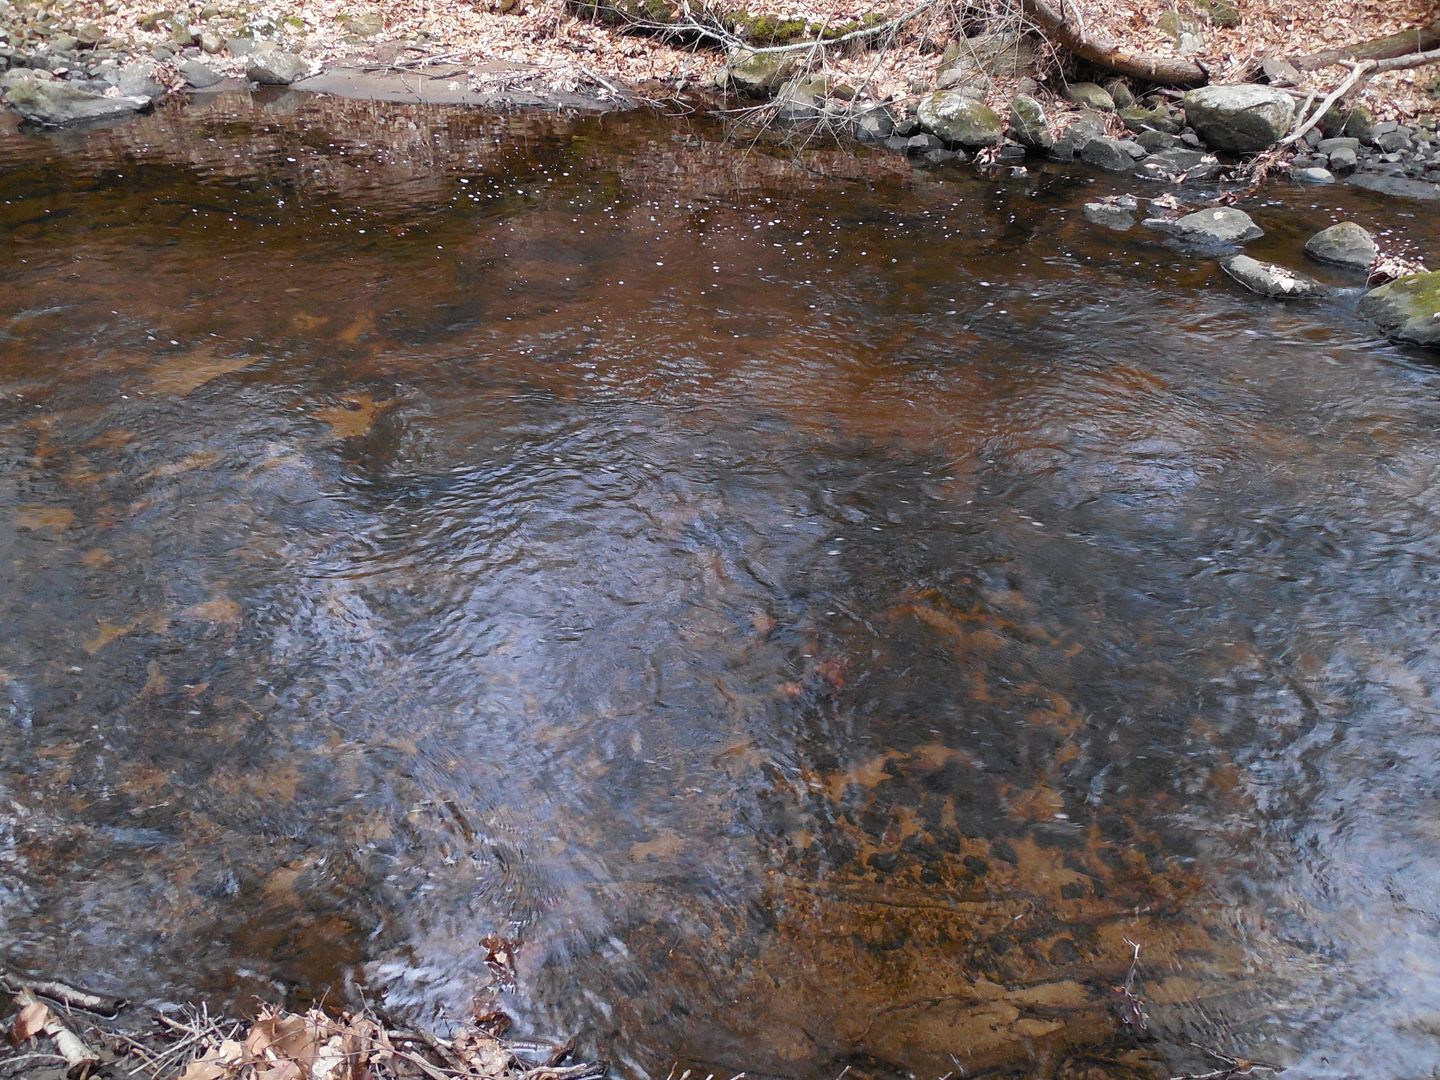
The setup. When making the kit the temp was 48. It's now around 46 with spotty sprinkles which are going to increase. The temperature will bottom out at 38ish with constant rain later. This is an ideal setup for trouble. A trout fisherman working a stream takes a "man in the creek" dunk miles from a road in unsettled cold weather. Actually that's exactly what's going to happen. This spot looks good.
So how did it work out? Well it's on video so you're welcome to see for yourself. Dang cold and as part of the test I did zero fire prep before keeping within the roll of an accident. I also intentionally wore mostly cotton clothing. The DIY fire starter was clipped to my belt and dunked multiple times as I flailed about intentionally hamming it up for the camera. It was a good time.
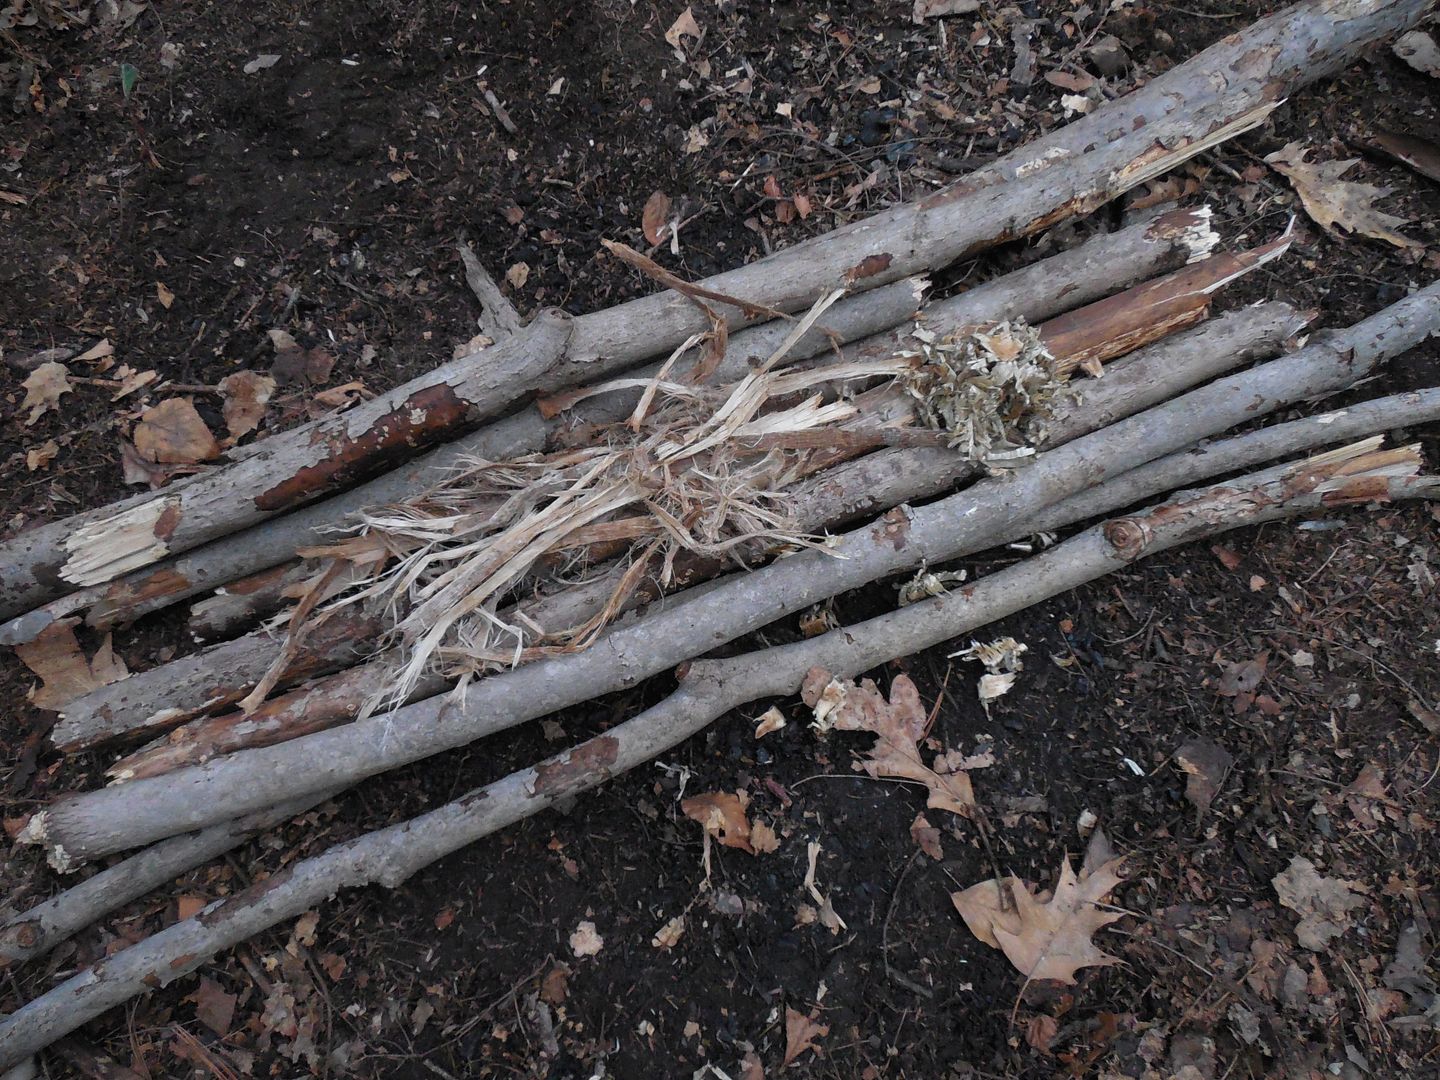
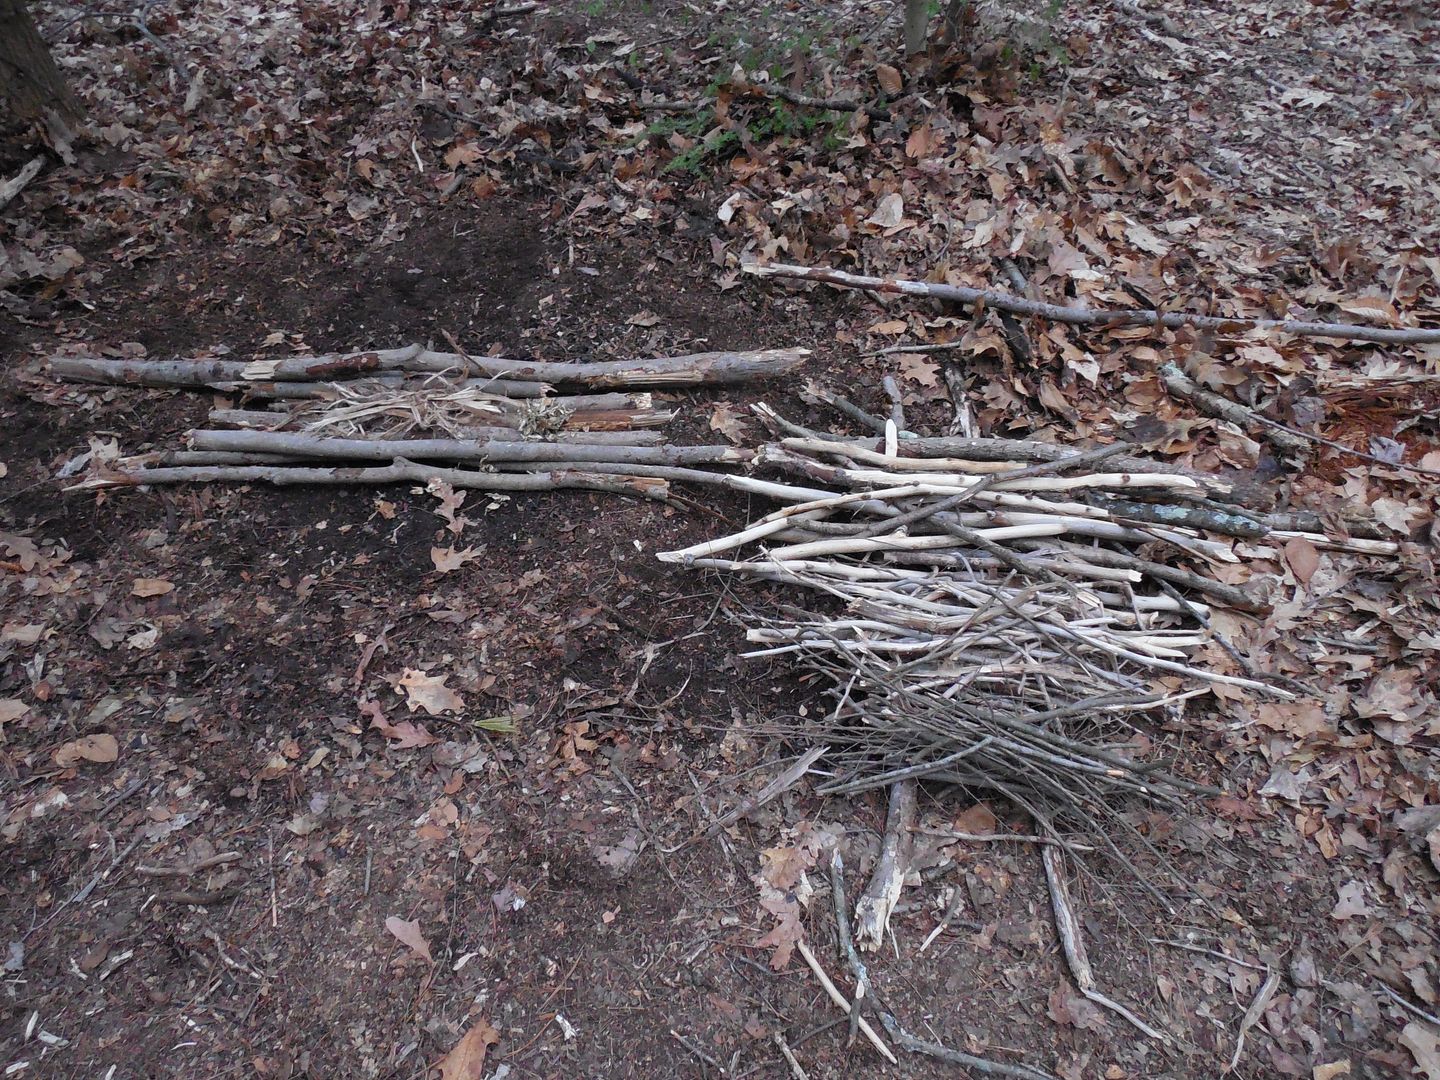
Immediately I hiked away from the stream picking up firewood and tinder. This yellow birch bark will help out greatly.

I am going to do a twig fire and as luck would have it in the rain. I might only have one shot at this so took the time to do it right despite wanting fire sooner rather than later. Success isn't determined by simply getting flames as they must also be sustained.

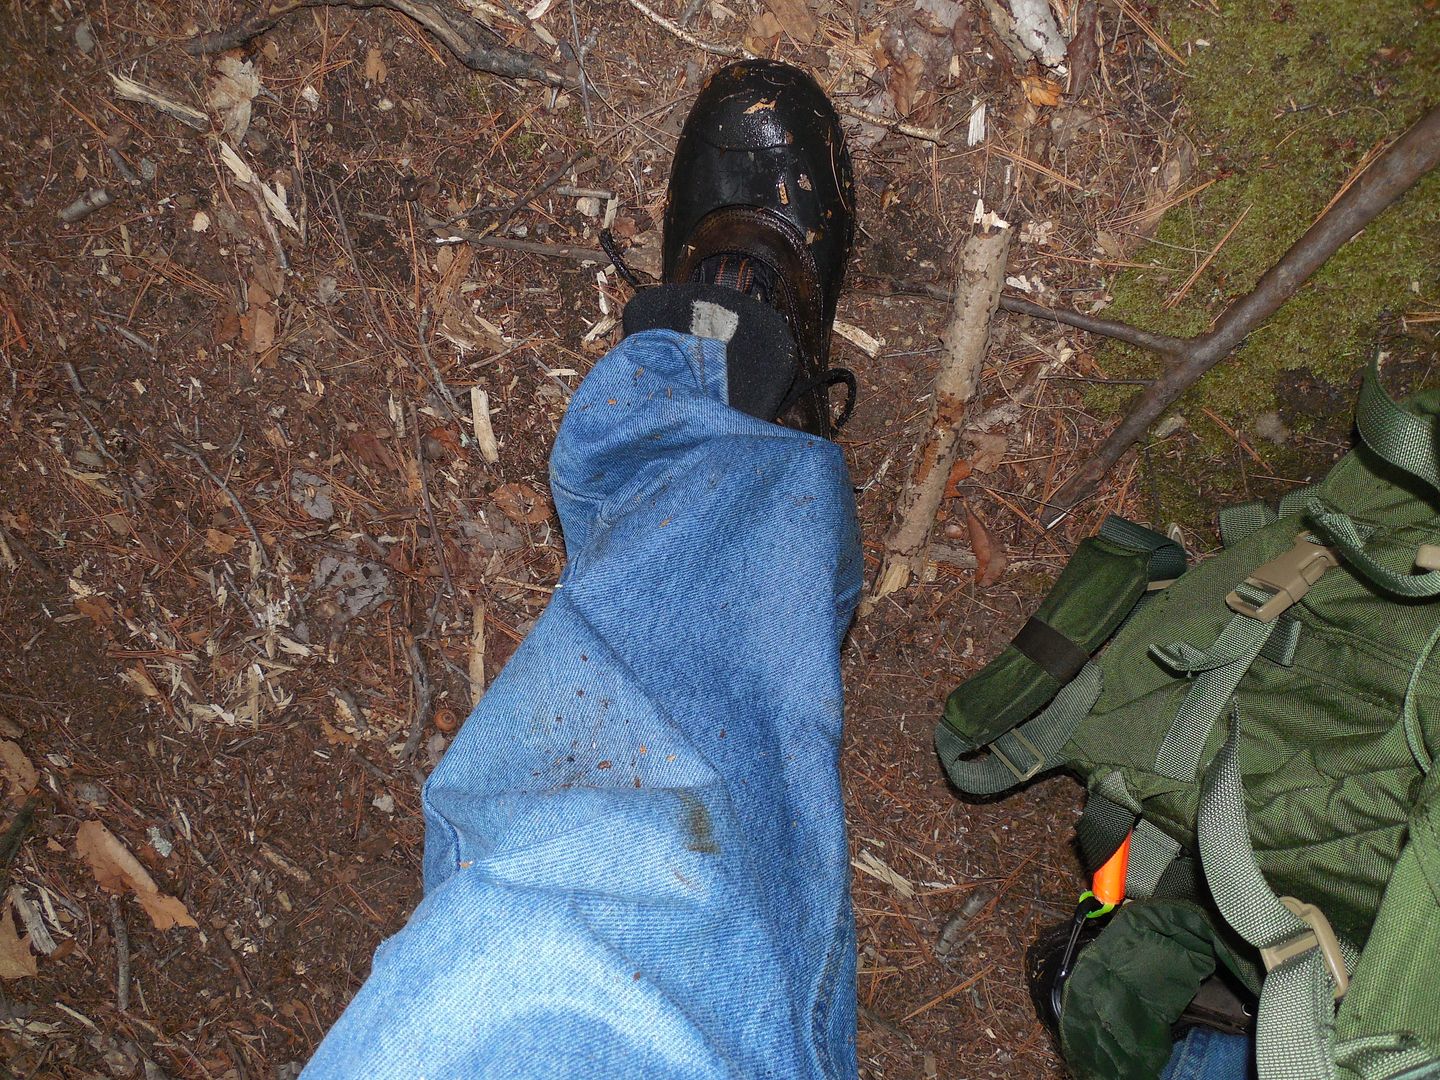
It worked though did have one unexpected problem. I used too much wax this time and it acted as a durable plug which was great to keep my tinder dry but required just the right stick to dig out. It took 3-4 minutes that seemed like forever. The wax pushed down into the Bic compressing the tinder. It needed to be scrapped out with a strong but thin enough stick. Oddly a rare commodity right then. Go figure! I kept the firecraft in it's raw state much like was done during a similar test with IA Woodsman's DIY ER firekit which also worked. However this makes for a longer video but it's important to show that fire under stress isn't always instant. Stuff happens. In any case it actually worked. One thing learned from multiple cold and wet encounters is often I was better off removing wet cotton clothing rather than keeping it on. The wet cotton never dries especially in damp wet weather. It just sucks the life out of you. However the jeans did make for a nice ground pad.

The fire turned everything around though did have to hike out wearing my underwear in the 40 degree rain. Still a fire really takes the edge off. I used the same cottonball/Vaseline mixture from my camping gear which has more Vaseline than I would have preferred for something like this. It made the initial fire take more strikes than normal. Used less Vaseline for the refill and a bit less wax in the hopes it won't cause issues next time however 3-4 minuet delay didn't really effect the outcome in the slightest. Still that's why I like to field test stuff.
Here is a video of the build and field test all of which occurred in the woods.
[video=youtube;wG0Rki8s-B4]https://www.youtube.com/watch?v=wG0Rki8s-B4[/video]
Thanks for watching.
[video=youtube;aHDbCtAtQy0]https://www.youtube.com/watch?v=aHDbCtAtQy0[/video]
Photos from 4 years ago.


Clips on via S biner and is waterproof because of a wax seal.

This DIY gear item has been attached to various packs doing multiple fun things over the past 4 years. Despite swinging from my pack for maybe 1000's of miles it still remained attached not harmed by the weather or brush. In fact odds are if you look at some of my back posts you will see it clipped on to something.


Modified empty Bics are nothing new however I never seen those posting videos on how to make Bic mods actually test one out in field conditions. These are often created on kitchen table tops for the primary benefit of YouTube and message boards. Having a solid loop, extra duct tape and being waterproof isn't needed unless there was a survival situation in the living room. Also properly testing implies actually going outside in less than ideal conditions. That could be a problem for the modern kitchen table top survival methodology? The ability to solidly clip something means, at least for me it can be accessed outside of the pack and easily moved. Attached and forgotten about until needed separate from the rest of my fire kit. The clip on feature allows for potential use of 2-3 feet of duct tape which as we all know is a useful gear item. Probably this has been done before like everything however has it been tested the hard way? I don't know but today we are doing just that.
It looks nearly the same after being fielded for many outings. Photos taken during the field test.


The wax and S biner, duct tape and gutted paracord loop all survived the test of time.

Construction and testing in the woods of the DIY Clip On Waterproof Bic Fire Starter Kit. Extra Duct Tape Kit. GO!
What we are going to need.

1. Both a full and empty Bic lighter.
2. Duct tape. The more obnoxious the better. This time I took reflective silver and crazy orange.
3. Wire.
4. Tools. A Leatherman is good, wire clippers and fine saw if you have them.
5. Sandpaper. Optional.
6. S bine or something similar.
7. Candle.
Clearly there isn't much to this. The Bic will need to be cut so the insides can be accessed for water tight tinder storage. A spent lighter is ideal. This project is a recycling enterprise which works because the ferro rods (aka flint) Bic uses are much longer than actually needed for the life of the fuel. My sparker is still sparking fine 4 years later. I really used the heck out of it igniting natural tinder, stoves, charred materials, etc etc etc. The after life of a Bic can be longer than it's first. I cut the lighter about the same width as the duct tape. A Bic is tougher than many might expect so it could take a minute or so to cut through if using small hand tools.

Once cut a file or sandpaper can be used to even and smooth things out but this is cosmetic.

The rest of the construction is on video as couldn't both take photos and video at the same time building this thing in the woods. Adding to the fun it started to sprinkle and the rain would be getting worse. I needed to make another one inside to show the construction.
1. Cut and sand Bic.

2. Remove all the top parts including the wheel taking care not let the flint fly out because it's under spring tension.


The flint/ferro rod loves to fly away. The removal of the wheel/flint and their replacement is easier if done inside a container as the little rod will fly away a few times. It's nearly impossible to find once out of sight.

See the problem. The rod needs to be pushed back in then wheel replaced. It's doable but is the hardest part of this easy project IMO.

Spring, flint and wheel replaced.

The wheel seems solid however I add some wire to keep it in place. The side which is flicked should have the loop. The spark side should have the twisted and cut end. This way it won't jab your finger when flicking.

Time to fill it. We are going to move over to the one used in the field test to show they're refillable. The one made in the woods needs a recharge so lets show that.

Just a little dab of Vaseline. Don't overdo it.

One large cotton ball per side fits just fine.


Now the wax.

The one on the left sealed 4 years ago. On the right 4 minutes ago.

Showing how the loop is made. I gut the paracord as it lays flatter to the lighter.

Two to three feet of duct tape. Why so much? Do we really need to ask? Having extra duct tape offers more options and we all love duct tape! It's a bit tricky to roll back on but doable.

Now I have 3!

Going to retire the old one until I find another spent Bic for parts to replace the flint/ferro rod and wheel. It still sparks good but at this point must be nearly done. The others have tons of life left in them. Recycled gear.

The field test.
So does it actually work in field conditions? Some time ago I tested another type of DIY fire starting kit in extreme conditions. It worked so added that to my gear however things tend to be different when under stress than when seen in controlled situations. I bet few if any of these kit items we see on the internet are tested hard. Not saying it doesn't happen however rarely see it. So let's GO!
The setup. When making the kit the temp was 48. It's now around 46 with spotty sprinkles which are going to increase. The temperature will bottom out at 38ish with constant rain later. This is an ideal setup for trouble. A trout fisherman working a stream takes a "man in the creek" dunk miles from a road in unsettled cold weather. Actually that's exactly what's going to happen. This spot looks good.

So how did it work out? Well it's on video so you're welcome to see for yourself. Dang cold and as part of the test I did zero fire prep before keeping within the roll of an accident. I also intentionally wore mostly cotton clothing. The DIY fire starter was clipped to my belt and dunked multiple times as I flailed about intentionally hamming it up for the camera. It was a good time.

Immediately I hiked away from the stream picking up firewood and tinder. This yellow birch bark will help out greatly.

I am going to do a twig fire and as luck would have it in the rain. I might only have one shot at this so took the time to do it right despite wanting fire sooner rather than later. Success isn't determined by simply getting flames as they must also be sustained.


It worked though did have one unexpected problem. I used too much wax this time and it acted as a durable plug which was great to keep my tinder dry but required just the right stick to dig out. It took 3-4 minutes that seemed like forever. The wax pushed down into the Bic compressing the tinder. It needed to be scrapped out with a strong but thin enough stick. Oddly a rare commodity right then. Go figure! I kept the firecraft in it's raw state much like was done during a similar test with IA Woodsman's DIY ER firekit which also worked. However this makes for a longer video but it's important to show that fire under stress isn't always instant. Stuff happens. In any case it actually worked. One thing learned from multiple cold and wet encounters is often I was better off removing wet cotton clothing rather than keeping it on. The wet cotton never dries especially in damp wet weather. It just sucks the life out of you. However the jeans did make for a nice ground pad.

The fire turned everything around though did have to hike out wearing my underwear in the 40 degree rain. Still a fire really takes the edge off. I used the same cottonball/Vaseline mixture from my camping gear which has more Vaseline than I would have preferred for something like this. It made the initial fire take more strikes than normal. Used less Vaseline for the refill and a bit less wax in the hopes it won't cause issues next time however 3-4 minuet delay didn't really effect the outcome in the slightest. Still that's why I like to field test stuff.

Here is a video of the build and field test all of which occurred in the woods.
[video=youtube;wG0Rki8s-B4]https://www.youtube.com/watch?v=wG0Rki8s-B4[/video]
Thanks for watching.