For many years now, I've been threatening to learn how to make a knife. Finally moving back to South Wales in May, into a house with a basement -soon to be workshop - the time was nigh. It was either now or never.
So permission was granted by Household Government sometime back in June ("Why do you want to do a knife making course?") and off I went. Leaving South Wales on Thursday at 6am, arriving at Cheriton Bishop at 8.30am to begin my two-day knife making course with Dave Budd. Easily found the parking spot (test it on Google Street View first), and there he was, bang on time, waiting for me.
A five minute stroll into Dave's woodland, set in beautiful rolling countryside just to the north east of Dartmoor, we arrived in Dave's masterpiece of an off-grid workshop. I was anticipating something slightly more rustic. But Dave's built up an impressive arsenal of tools and machinery, from ancient to super-modern. His cabin is a man cave dedicated to all thing metal, wooden and leather.
Our needs were simple, however. Belt grinder, angle grinder, drill, kiln, and a selection of abrasives.
After niceties, and a bit of gossip, I knew it was the moment to start. Something I was nervous about. Those machines looked menacing. And Dave's hands looked a lot tougher than mine. "Right then," he says, pointing at the chalk-board. "Draw your knife."
S***.
I tried my best to make it look like I hadn't come more or less straight from a nightshift, and had given it some though. I drew this

His response was charitable.
"I want a full tang," I said. "And either a full flat or a convex grind." This was the moment Dave and I first bonded over knife talk, over our mutual bewilderment at the omnipresent "scandi" grind. While he wasn't all that keen on the full tang idea: "it's really not needed for strength," I told him I liked it aesthetically and he relented.
So we got to it. Drawing out the rough on a piece of tool steel and angle grinding it, and roughing it on the belt.

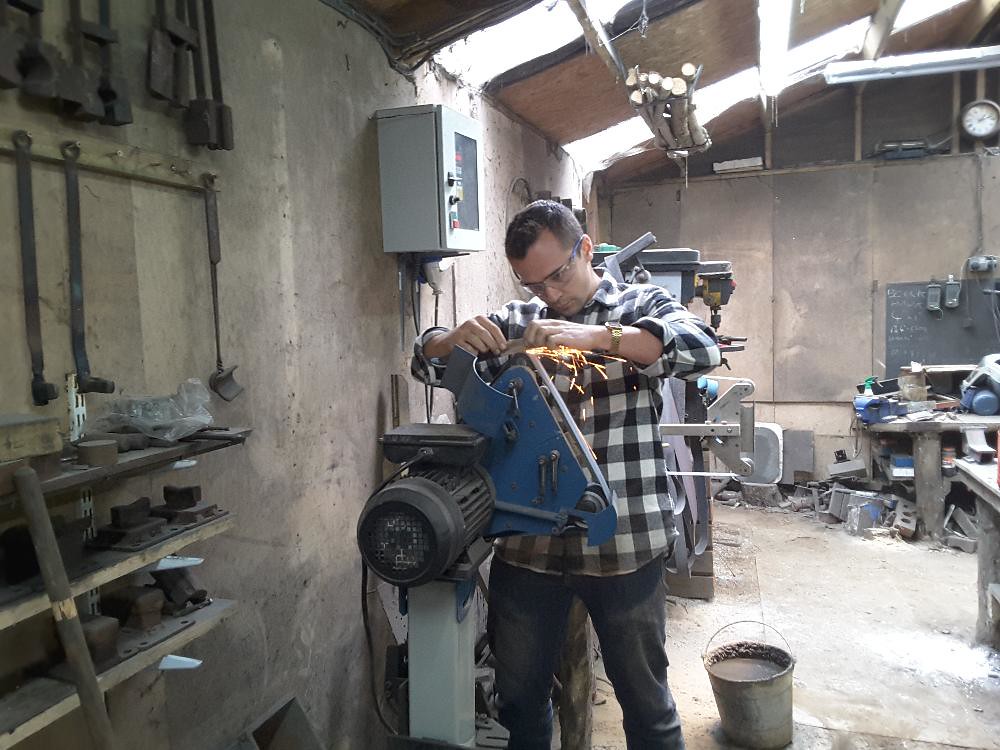
Then came roughing out the edge. Dave explained the concept, in detail, gave a tutorial, and then told me to go ahead. "Looks easy enough," I thought. Confident in my ability to impress him. Not to be. It's then that I got an understanding for his mastery on the belt grinder, even though "it's not something I like doing. Much prefer forging," he said. He churned out a precisely ground knife blank, insisting that we don't use a jig so that we develop the skill of doing it by hand and using one's eye. His looked like a masterpiece, mine looked like it had been run over by truck.
I got there, more or less. The unrelenting, unforgiving belt grinder giving me a run for my money. But with some patient step-by-step guidance from Dave and constant questions from me, in the end I was very happy with the result.
That's where the photos dry up a bit. I got too excited and forgot. Missing out on the extensive heat treat process, including Dave expertly crafting me a two-brick forge to take home with me.
The process was clearly explained, including the science, and we went through the three normalising processes, hardening and tempering, leaving us with two heat-treated knives. Both in his kiln and two testers in my two-brick with a plumber's torch.
Out came the knives, and on with the grinding. "You want to get as much done prior to heat treat, but not too much so that you risk warping in heat treat." It all made sense.

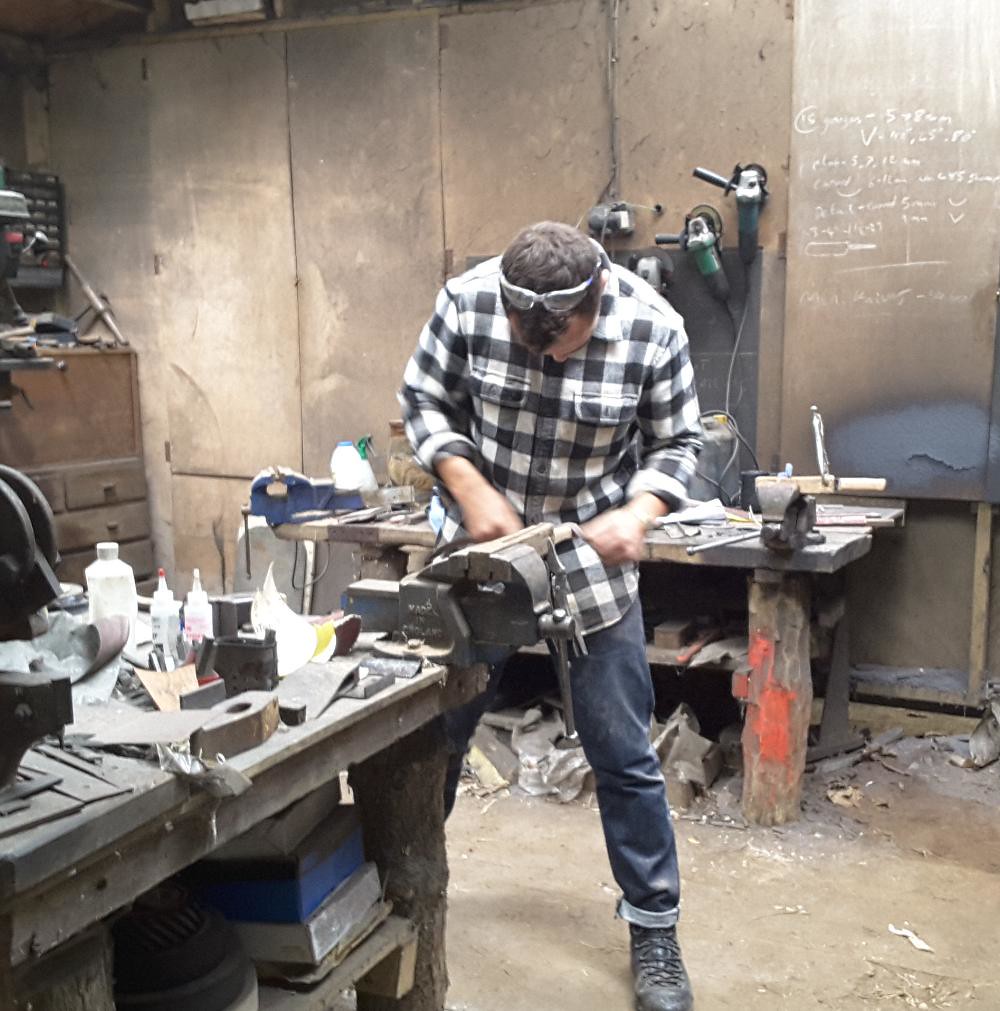
Next angle grinding the tang to lose some weight. The only process I simply couldn't get to grips with. That's Dave carrying it off like a surgeon.
Now onto the handle fitting. Again, lack of photos here, but the process was made clear, with an emphasis on using your eye, not a jig, and the importance of proper sanding (to get a completely smooth finish - Dave doesn't do machining marks- that was made clear). Doing bulk on belt grinder, and finishing by hand.


At each step of the way, just when I thought I could get away with what I'd done, Dave would step in and insist on perfection. Clearly, there were some mistakes that couldn't be rectified: "you're just going to have to live with that," namely a very deep sweep beyond the ricasso which nearly cost me the entire project, plus a couple of other moments. But I was brought back round, and the end product was far better than I had hoped at the beginning. With nice additions like the turquoise quartz.
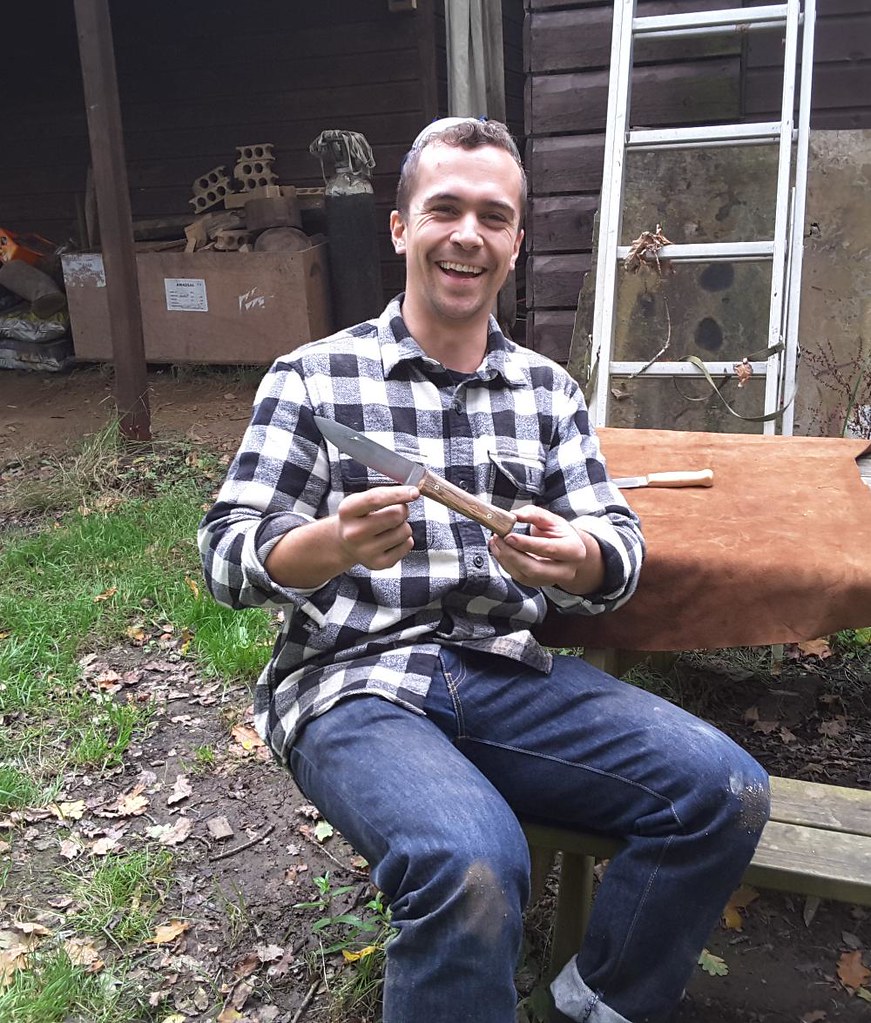
The joy is, I did it myself. And I've never used power tools. There were small moments of assistance, but the entire project was done with my two hands with Dave guiding each step, as is his teaching style. The result is a great knife, and imparted knowledge which would have taken me years to discover on my own.
And the end product? See below. Mine's the bottom one: flat ground O1, spalted Hawthorn scales with brass pins and turquoise quartz filler.
Two days in the woods making knives interspersed with tea from the Kelly kettle. What a way to spend time. If you're toying with the idea of doing such a course, do it. Dave Budd comes highly recommended.

Enviado desde mi iPhone utilizando Tapatalk
So permission was granted by Household Government sometime back in June ("Why do you want to do a knife making course?") and off I went. Leaving South Wales on Thursday at 6am, arriving at Cheriton Bishop at 8.30am to begin my two-day knife making course with Dave Budd. Easily found the parking spot (test it on Google Street View first), and there he was, bang on time, waiting for me.
A five minute stroll into Dave's woodland, set in beautiful rolling countryside just to the north east of Dartmoor, we arrived in Dave's masterpiece of an off-grid workshop. I was anticipating something slightly more rustic. But Dave's built up an impressive arsenal of tools and machinery, from ancient to super-modern. His cabin is a man cave dedicated to all thing metal, wooden and leather.
Our needs were simple, however. Belt grinder, angle grinder, drill, kiln, and a selection of abrasives.
After niceties, and a bit of gossip, I knew it was the moment to start. Something I was nervous about. Those machines looked menacing. And Dave's hands looked a lot tougher than mine. "Right then," he says, pointing at the chalk-board. "Draw your knife."
S***.
I tried my best to make it look like I hadn't come more or less straight from a nightshift, and had given it some though. I drew this

His response was charitable.
"I want a full tang," I said. "And either a full flat or a convex grind." This was the moment Dave and I first bonded over knife talk, over our mutual bewilderment at the omnipresent "scandi" grind. While he wasn't all that keen on the full tang idea: "it's really not needed for strength," I told him I liked it aesthetically and he relented.
So we got to it. Drawing out the rough on a piece of tool steel and angle grinding it, and roughing it on the belt.

Then came roughing out the edge. Dave explained the concept, in detail, gave a tutorial, and then told me to go ahead. "Looks easy enough," I thought. Confident in my ability to impress him. Not to be. It's then that I got an understanding for his mastery on the belt grinder, even though "it's not something I like doing. Much prefer forging," he said. He churned out a precisely ground knife blank, insisting that we don't use a jig so that we develop the skill of doing it by hand and using one's eye. His looked like a masterpiece, mine looked like it had been run over by truck.
I got there, more or less. The unrelenting, unforgiving belt grinder giving me a run for my money. But with some patient step-by-step guidance from Dave and constant questions from me, in the end I was very happy with the result.
That's where the photos dry up a bit. I got too excited and forgot. Missing out on the extensive heat treat process, including Dave expertly crafting me a two-brick forge to take home with me.
The process was clearly explained, including the science, and we went through the three normalising processes, hardening and tempering, leaving us with two heat-treated knives. Both in his kiln and two testers in my two-brick with a plumber's torch.
Out came the knives, and on with the grinding. "You want to get as much done prior to heat treat, but not too much so that you risk warping in heat treat." It all made sense.

Next angle grinding the tang to lose some weight. The only process I simply couldn't get to grips with. That's Dave carrying it off like a surgeon.
Now onto the handle fitting. Again, lack of photos here, but the process was made clear, with an emphasis on using your eye, not a jig, and the importance of proper sanding (to get a completely smooth finish - Dave doesn't do machining marks- that was made clear). Doing bulk on belt grinder, and finishing by hand.


At each step of the way, just when I thought I could get away with what I'd done, Dave would step in and insist on perfection. Clearly, there were some mistakes that couldn't be rectified: "you're just going to have to live with that," namely a very deep sweep beyond the ricasso which nearly cost me the entire project, plus a couple of other moments. But I was brought back round, and the end product was far better than I had hoped at the beginning. With nice additions like the turquoise quartz.
The joy is, I did it myself. And I've never used power tools. There were small moments of assistance, but the entire project was done with my two hands with Dave guiding each step, as is his teaching style. The result is a great knife, and imparted knowledge which would have taken me years to discover on my own.
And the end product? See below. Mine's the bottom one: flat ground O1, spalted Hawthorn scales with brass pins and turquoise quartz filler.
Two days in the woods making knives interspersed with tea from the Kelly kettle. What a way to spend time. If you're toying with the idea of doing such a course, do it. Dave Budd comes highly recommended.

Enviado desde mi iPhone utilizando Tapatalk
 and the knife is a success
") Wonderful setting where he works. Enjoyed your review, thanks. making a knife is on my (long) list.
Wonderful setting where he works. Enjoyed your review, thanks. making a knife is on my (long) list.


")