Cold Steel Norse hawk, Tomahawk - WIP!* Finished!!*

  • Hey Guest, Early bird pricing on the Summer Moot (29th July - 10th August) available until April 6th, we'd love you to come. PLEASE CLICK HERE to early bird price and get more information.

Samon

Bushcrafter (boy, I've got a lot to say!)
Mar 24, 2011
3,970
44
Britannia!
Evening all, after the pleasant success of this previous project - http://www.bushcraftuk.com/forum/showthread.php?t=122698&highlight= I decided I wanted to try another!

So, with a special birthday of someone this month approaching soon I ordered another model and a package arrived in the post today, something that I've been excited to do for some time, I might add!

This bad boy, a Cold Steel Norse hawk!


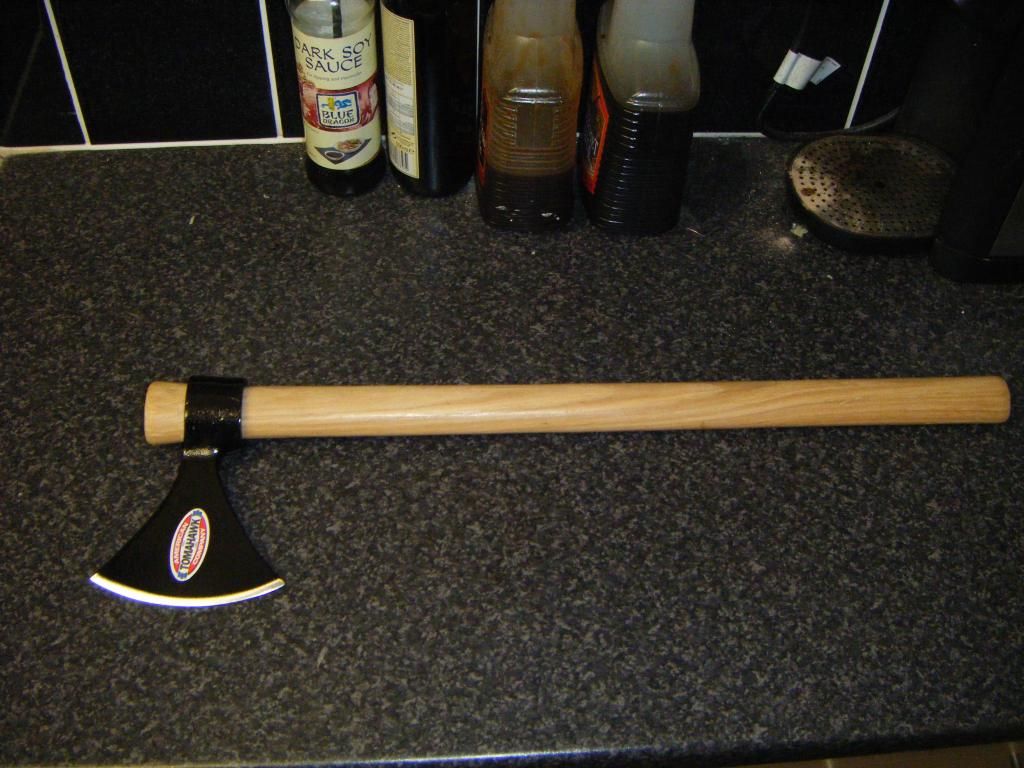
Cold Steel make a variety of hawk models and this will be the third different one I've held/owned.

As with my others I intend on tarting this one up, and even trying my hand at engraving in some Norse runes into the handle. I'll strip the paint, remove the forging marks, clean the lines and square them up. Polish the head so it's shiny, reprofile and sharpen the edge properly, trim the handle, blacken the handle, add a lanyard tube, some leather lace and maybe a pommel spike.. maybe. I'll have a fiddle with some steel wire wrapping too, but that's just an idea.


Any luck and I can get started soon, just need to be up in the light and have the time and/or motivation to crack on. I have two weeks.. well less actually.

I'll do my best to photograph each step and give a little write up as and when I get bits done!

Any questions just ask. So stay tuned!

Cheers

Samon
 
Last edited:

Samon

Bushcrafter (boy, I've got a lot to say!)
Mar 24, 2011
3,970
44
Britannia!
I have time today, but I can only make use of it if the weather is stable. I have no shed, garage or even shelter in my footpath of a garden, and sadly that is all I have to work my tools in. But I will do my best with the time I have, so stay tuned!
 

Samon

Bushcrafter (boy, I've got a lot to say!)
Mar 24, 2011
3,970
44
Britannia!
As promised, I made use of the weather, my time and my fast hands! ;)

First thing I do, and what most others do with these hawks is to clean up the inside of the eye of the head. The factory finish is rough, burred and will snag up your handle like a bored dog. You can use a file, sand paper etc, but the fastest and best way in my opinion is with a hobby tool. (mine as £15 from Lidl, as I killed my £45 dremel..)

Make sure to feel with your fingers for any toothy edges and because I didn't bother with paint stripper I gave the inside a little more work than is needed. All done in about 2 minutes with one of the little stone attachments.

Like so..


I will finish the inside of the eye with sand paper, but I will wait to do this in the coming days as I've retired for the day.

Next, remove that ghastly paint!

Like I said, I didn't bother with paint stripper for this, like I did with my previous two hawks. I just whacked on a fresh sanding disc and it flew off in seconds. You don't need to push hard to remove the paint, but you will need to apply pressure to remove forging marks. Something I have gone and done. Atleast most of the marks anyway. I didn't need to cool the head once during this, as a fresh disc made short work of it all. It barely even got warmer than my hands.

A little before, during and after shot for my friends.


With the head now stripped naked.. :rolleyes: I can crack on with the handle. First I ran the sanding disc on my angle grinder over the wood to clean up the snagged head end and to lightly sand off the glossy paint stuff. My poor camera skills don't show any difference in the before and after shots.. but I did do it. And then assembled it for a quick eye over.


Not bad so far 'ey?

Always room for improvement though, and next job for the handle was to trim the top a little. It looks kind of odd to have so much handle up top. Nothing difficult here, just a little sawing motion with a £2 hacksaw.


Now, I did actually drill the bottom of the handle for a lanyard tube, but I had to fight with my dying hand cranked drill.. and the little bugger pretty much won. needless to say, the hole was on the wee and too wide due to my lack of bits. The lanyard tube was made from a broken crossbow bolt. I'm such a good shot I'm like the modern Robin hood.. only I don't split my bolts down the middle I just shoot through the sides of them.. lol.

Yeah.. well I'll use the aluminium tube for knives, as I don't think it will suit this axe like it did my other. For those of you curious, a little picture..


So, with both ends chopped.. not perfectly I might add it was time to flatten them on my grinder. A gift from my wife, and a very handy tool to have for a tinkering wombler like myself. This bit is easy and was finished in a few minutes. Got them flat and gave the edges of the cuts a very slight bevel.


Now the colour of the handle. White? pfft. Nope. Black! or blackened atleast. Not fully either, ever so slightly patchy, to give a more rustic appearance. I do this with a £5 blow torch, a squirt of raw linseed oil on some tissue and about 5 minutes of my time!

I pre oil the tissue as I like to apply it to the still scorching wood asap. I find it draws the oil in better, particularly helpful hen using raw linseed oil, as it contains no toxic chemicals they aid in the absorption!


Then to finish it off I rub the oily tissue up and down in a very familiar fashion until the heat goes away. I pay close attention to the ends, as they tend to shrink and crack fast! I will add more coats over the next few days, along with a little more heat to allow for better absorption again.

And lastly, a shot of the new handle proudly crowned with a pretty new head.


In the next few days I will finish the head, as it is NOT finished. It needs hand sanding and polishing to removing orbital scratches. My camera cannot pick up on them so well but they are there and as much as I detest hand sanding for ages I would like to remove as much as possible with my patience, then buff on my grinding wheel and maybe even patinate the head..

So, It is not finished, but it is nearly finished. There should be one final update coming soon, so again my dear aduience, stay tuned, the show is not over, until this fat man sings! :D
 

2trapper

Forager
Apr 11, 2011
211
1
Italy
Amazing work. I'm truly imrpressed. I avoided this hawk because it seems too modern but after this tutorial I'll rethink about buying it
 

John Fenna

Lifetime Member & Maker
Oct 7, 2006
23,129
2,870
66
Pembrokeshire
I like it - well all except the black handle... I prefer raw wood myself...
I am tempted to get one of these axes now :)
 

Samon

Bushcrafter (boy, I've got a lot to say!)
Mar 24, 2011
3,970
44
Britannia!
Amazing work. I'm truly imrpressed. I avoided this hawk because it seems too modern but after this tutorial I'll rethink about buying it

I also thought it was less attractive than the others. But, in the hand and in person even before a clean up it feels and looks pretty good. Better than the trail and spike hawk in their factory form.

I like it - well all except the black handle... I prefer raw wood myself...
I am tempted to get one of these axes now :)

I'd say go for it, they are fun projects and the steel is actually rather good. I'd rather the handle was a natural colour too but this isn't for me and I know the person who ill receive will prefer the scorched handle.

With my first one I wanted a natural looking waxed handle like my granny b. It was easy, just a quick sand, oil and copious bees wax warmed in with candle heat and hand rubbed with a rag after. Like so..


Samon

Bushcrafter (boy, I've got a lot to say!)
Mar 24, 2011
3,970
44
Britannia!
The finishing touches! Firstly, the head needed more sanding, orbital lines and streaks from the sanding discs were present and although my camera doesn't show them due to it being crap and my skills equally crap, they are there!

I did a little shop at Lidl yesterday, to get wine and stuff I saw they had some diy styff left over from the past weeks. I purchased a sanding wheel for drills and angle grinders etc. It had a velcro face and I also bought a box of sand paper pads. Not bad for £7!

So, I got started this morning as it ill be presented later today. I found the orange discs were way too course and added more scratches etc to the steel, but the wet n dry discs were just right. I will need more of these as they only provide one of each grit in their multipack, but loads of the others. I quick during and after shot, finished in 320 grit.


Nice? I like it, there are still minor surface flaws etc but I don't think they really matter..

I like the handle, but it's not very grippy! So, a generous coating of hard bees wax all over, into the grains and in any tiny cracks. Then a twice over with the blow torch to get it to melt into the grain and not leave any lumps or blobs. After that gentle flaming, I give it a rub down to ensure the softened wax gets in and the excess gets off.


After that, it's time to sharpen the blade. What's a true Norseman's hawk worth if it's blunt?


I use cheap diamond plates and a flattened DC4 ceramic. Then I strop! and it certainly makes hairs pop. ;)

And finally, it is done!


I really need to learn how to take decent pictures and maybe invest in a better camera..

But Atleast the axe is done, looks good and is wrapped up and ready for a mans 30th birthday!

I hope you guys liked the wip and if you have any questions, just ask.

Thanks for reading and watching.

Samon
 

Samon

Bushcrafter (boy, I've got a lot to say!)
Mar 24, 2011
3,970
44
Britannia!
Thank you gents.

I have an idea for the next one now, and this one was well received today!

Glad you enjoyed the wip, and feel free to suggest the next model for the chopping board.

I'm going to go for a natural coloured and waxed handle and something special with the steel, forging marks and patina! Should look nice, but I won't go into any details as of yet.
 

BCUK Shop

We have a a number of knives, T-Shirts and other items for sale.

SHOP HERE