For the second year at the Bushmoot we ran the Starter course. This course is designed for anyone who wants to spend time in a comfortable environment practicing some of the key skills that many bushcrafters take for granted. This is a course that is open to anyone no matter their age as I believe we are all kids at heart.
Last year the idea came up (either at a Mods meeting or the main meeting) that a starter course would be a good thing to have at the Moot. Experienced bushcrafters come to the Moot to try out new skills and practice existing ones, however many bring their families with them and also new bushcrafters come along every year. This course is designed to show these budding bushcrafters some of the key skills many of us take for granted.

The skills we agreed we could cover were:
1) Safe sawing
2) Safe knife use
3) Knots
4) Setting up a tarp and hammock
5) Collecting firewood
6) Lighting a fire with a firesteel
7) Looking at simple pot hangers
8) Putting a fire out correctly
Last year we had a lot of takers for the course so this year I asked around to get some more volunteers on standby. I have used pictures from last years course as well as this years course plus a couple from elsewhere. I am writing the post though because of one of the members - Pawprints (James) came on the course with his family this year and worked with me through the day. We had a great time and a couple of days ago asked if I would post up a thread on it. I am also using some of Pawprints pictures as well.
There were many instructors on the day and we all broke off after the intro into groups of about 15 students. Each instructor covered the same subjects but in their own style. This thread covers what my group did but it should give you a feel for what everyone else did.
The team were Sargey, Pete, Wayne and Paul

Also Richard, Mark and myself - I am sorry if I have missed anyone else out who came to help on the day.
To begin with we got everyone sat down and asked them to just watch what we did. Quickly we put up a tarp and hammock, split wood down for pegs, laid a fire, lit it and got the kettle on. We then had a quick Q & A with the students to ask them what they had just witnessed. This formed the overview and objectives for the course.
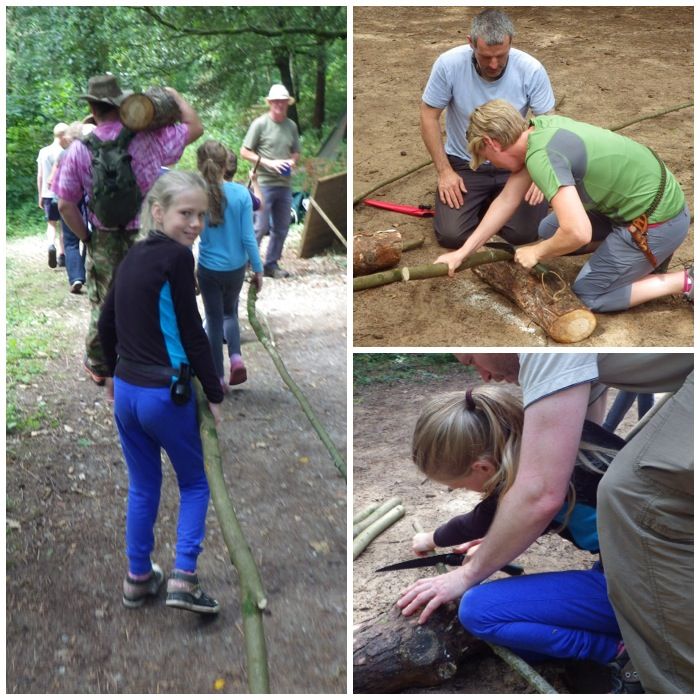
I learnt from last year we would need a lot of green and seasoned wood for the course. I had spent the previous day cutting down some sycamore, collecting rounds for working on and making sure we had some seasoned wood. We split everyone into their groups and headed off to collect all that wood and kit.
First up was to practice safe saw work. As most people were carrying Laplander type saws I focused on them. My style of sawing here when using a log as a rest is to get low down, brace the work piece with a knee and cross my arms as you see in the pictures. This is to help minimise the chance of the teeth connecting with my fingers.
Everyone had a demonstration first thing that morning on safe knife use but now they got a chance to practice for themselves. Everyone found themselves a clear area and parents helped out where needed. We covered a range of knife cuts to produce a small wedge in the end for battoning.
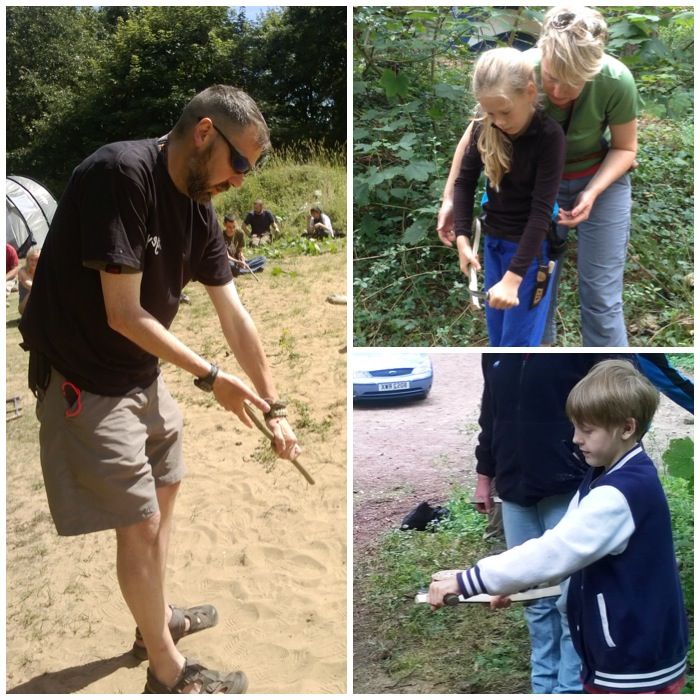
Once the wedges were made everyone learnt to batton with their knives in a safe manner. We ended up making some large tent pegs in the end which I used for putting up tarps later. Last year the students as you can see on the right made some campfire tongs.

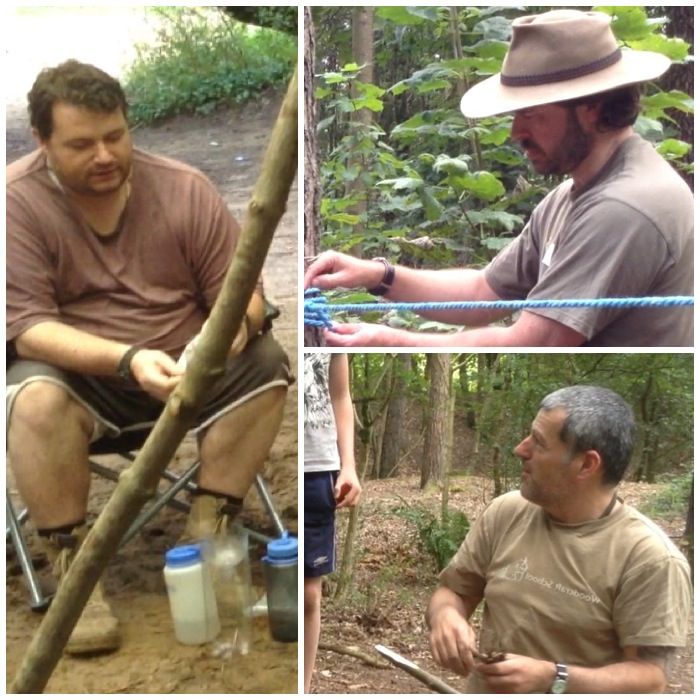
We covered a few quick release knots starting with demonstrations using large rope.
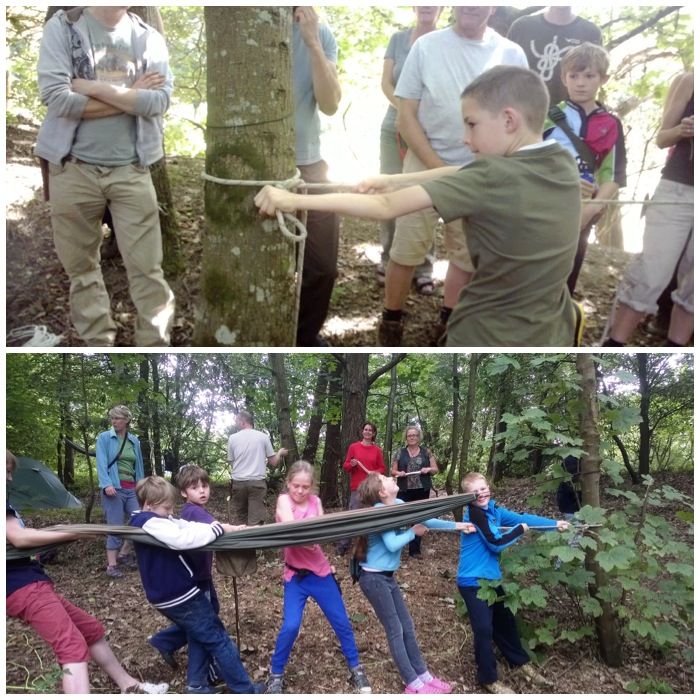
The knots we tried out were the clove hitch (on a closed and also on an open spar), the evenk, the taut tarp, the timber hitch and also the guyline hitch.
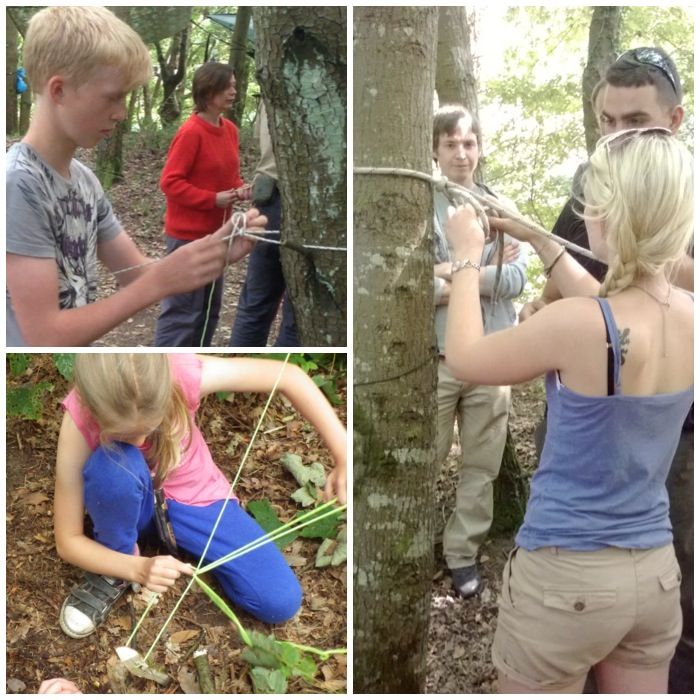
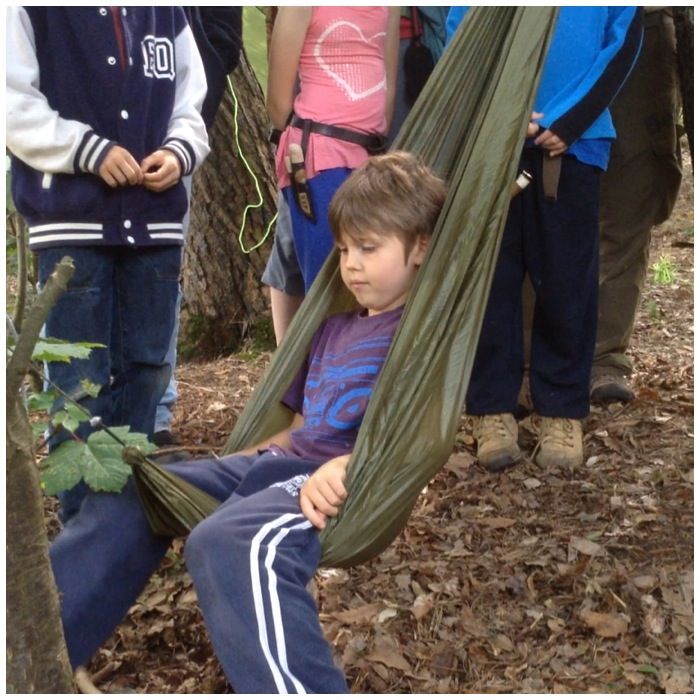
We put up a tarp and as you can see in one of the previous pictures a hammock as well. I also had along my little EDC hammock seat in my bag. The students put this up using an evenk and taut tarp knot. Everyone had a go and it stayed occupied for most of the morning.
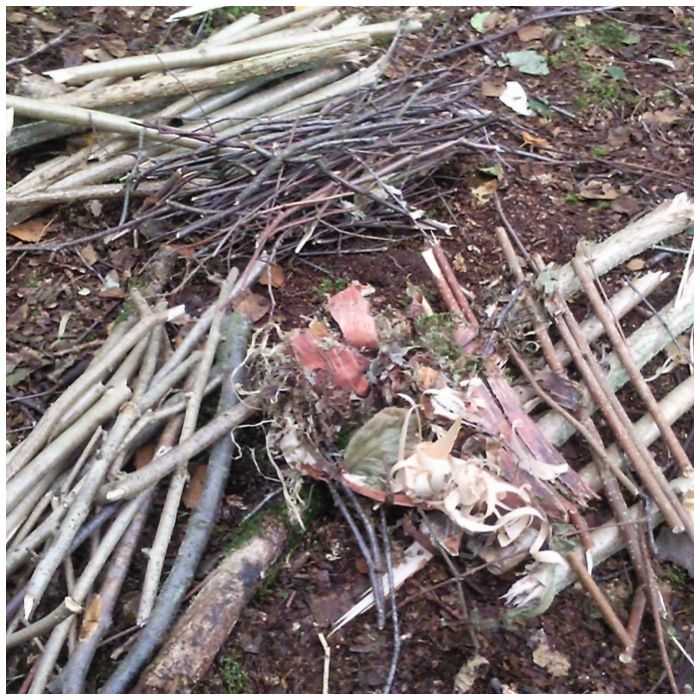
We spent a good amount of time discussing collecting timber in a safe and sustainable way. After enough wood had been collected an area was cleared and some straight sticks laid for a base.
Everyone got a chance to try out a firesteel. I showed them how to use one without knocking the tinder away by locking the arm holding the striker and drawing the steel backwards. Also how to slowly push down on the steel with the striker. Some of the younger ones found this difficult so they rested the steel against the tip of their boot and slowly pushed down on the steel. I got everyone to practice on pampas grass at first before moving onto char cloth.

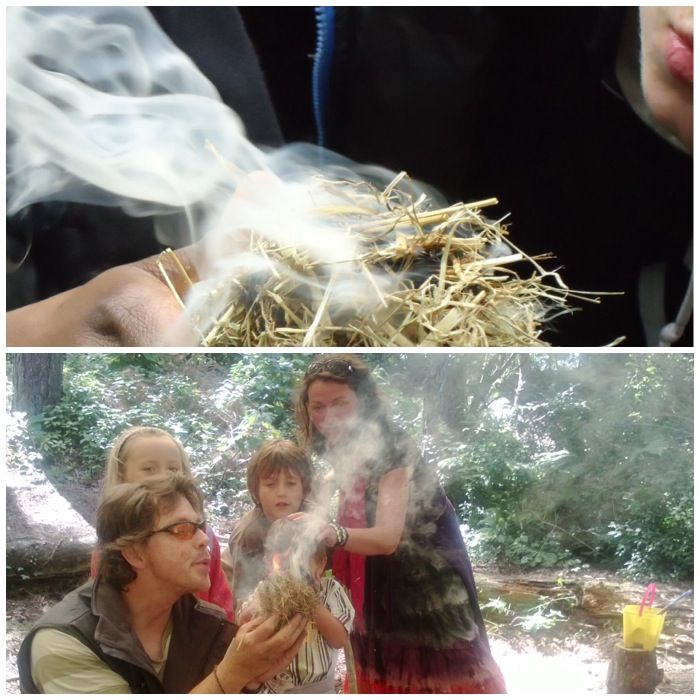
It did not take long before everyone had lit a piece of char cloth. This was then popped into a bundle of hay.
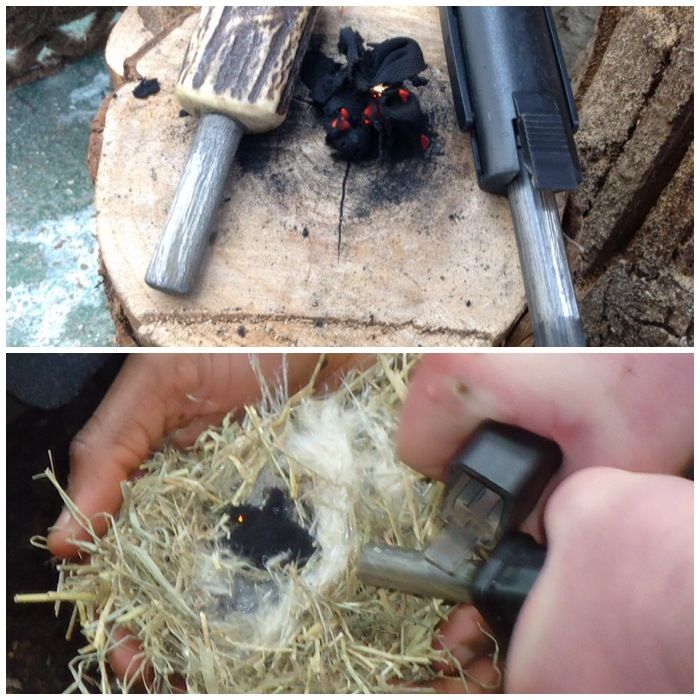
Once the charcloth was tucked inside the hay the whole team took it in turn to blow the bundle into flame. I like this collective method as it involves everyone.
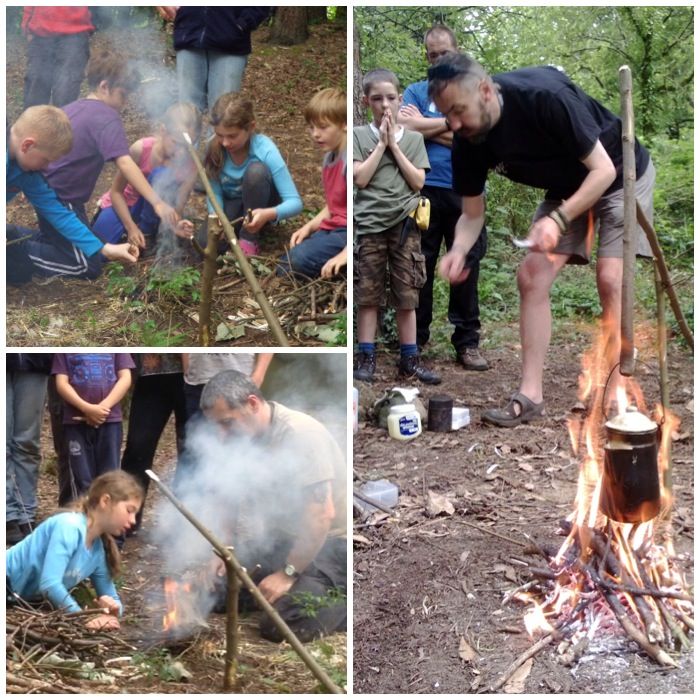
Once the bundle was going everyone started to build the fire up slowly. Occasionally the flames would die down so the students learnt how to get down real low with their cheek touching the ground and gently blowing into the heart of the fire to re-kindle it.
Lastly the cooking set up was put up and the kettle put on for a brew. I found sargey's group later whittling away creating one of these campfire set ups as they were so taken with it.
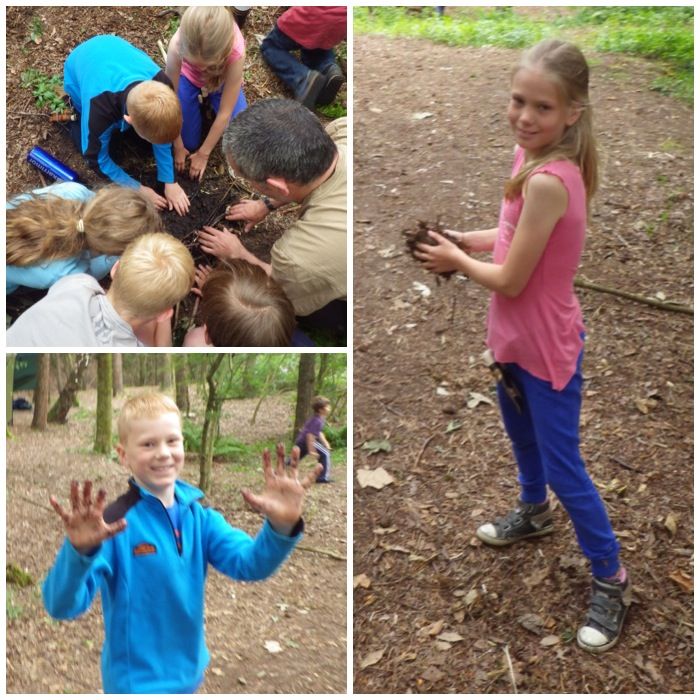
The last thing we covered was how to put the fire out safely. Water was poured over the whole fire and sticks were pocked into the ground to make holes. More water was then poured over the fire until no steam appeared. Lastly starting at the edges we started mixing all the mud around with our fingers to make sure we felt no heat before scattering the mud all around and laying fresh dirt and leaves over the scar.
My video BCUK Bushmoot 2014 - Day 1 has a fair bit of the starter course in it for you to see.
[video=youtube;d0eMixa6Rd0]https://www.youtube.com/watch?v=d0eMixa6Rd0[/video]
So if you are coming along to your first Bushmoot next year or if you missed the course this or last year come along and have a relaxed fun day learning some new skills.
Cheers
George
Last year the idea came up (either at a Mods meeting or the main meeting) that a starter course would be a good thing to have at the Moot. Experienced bushcrafters come to the Moot to try out new skills and practice existing ones, however many bring their families with them and also new bushcrafters come along every year. This course is designed to show these budding bushcrafters some of the key skills many of us take for granted.
The skills we agreed we could cover were:
1) Safe sawing
2) Safe knife use
3) Knots
4) Setting up a tarp and hammock
5) Collecting firewood
6) Lighting a fire with a firesteel
7) Looking at simple pot hangers
8) Putting a fire out correctly
Last year we had a lot of takers for the course so this year I asked around to get some more volunteers on standby. I have used pictures from last years course as well as this years course plus a couple from elsewhere. I am writing the post though because of one of the members - Pawprints (James) came on the course with his family this year and worked with me through the day. We had a great time and a couple of days ago asked if I would post up a thread on it. I am also using some of Pawprints pictures as well.
There were many instructors on the day and we all broke off after the intro into groups of about 15 students. Each instructor covered the same subjects but in their own style. This thread covers what my group did but it should give you a feel for what everyone else did.
The team were Sargey, Pete, Wayne and Paul
Also Richard, Mark and myself - I am sorry if I have missed anyone else out who came to help on the day.
To begin with we got everyone sat down and asked them to just watch what we did. Quickly we put up a tarp and hammock, split wood down for pegs, laid a fire, lit it and got the kettle on. We then had a quick Q & A with the students to ask them what they had just witnessed. This formed the overview and objectives for the course.
I learnt from last year we would need a lot of green and seasoned wood for the course. I had spent the previous day cutting down some sycamore, collecting rounds for working on and making sure we had some seasoned wood. We split everyone into their groups and headed off to collect all that wood and kit.
First up was to practice safe saw work. As most people were carrying Laplander type saws I focused on them. My style of sawing here when using a log as a rest is to get low down, brace the work piece with a knee and cross my arms as you see in the pictures. This is to help minimise the chance of the teeth connecting with my fingers.
Everyone had a demonstration first thing that morning on safe knife use but now they got a chance to practice for themselves. Everyone found themselves a clear area and parents helped out where needed. We covered a range of knife cuts to produce a small wedge in the end for battoning.
Once the wedges were made everyone learnt to batton with their knives in a safe manner. We ended up making some large tent pegs in the end which I used for putting up tarps later. Last year the students as you can see on the right made some campfire tongs.
We covered a few quick release knots starting with demonstrations using large rope.
The knots we tried out were the clove hitch (on a closed and also on an open spar), the evenk, the taut tarp, the timber hitch and also the guyline hitch.
We put up a tarp and as you can see in one of the previous pictures a hammock as well. I also had along my little EDC hammock seat in my bag. The students put this up using an evenk and taut tarp knot. Everyone had a go and it stayed occupied for most of the morning.
We spent a good amount of time discussing collecting timber in a safe and sustainable way. After enough wood had been collected an area was cleared and some straight sticks laid for a base.
Everyone got a chance to try out a firesteel. I showed them how to use one without knocking the tinder away by locking the arm holding the striker and drawing the steel backwards. Also how to slowly push down on the steel with the striker. Some of the younger ones found this difficult so they rested the steel against the tip of their boot and slowly pushed down on the steel. I got everyone to practice on pampas grass at first before moving onto char cloth.
It did not take long before everyone had lit a piece of char cloth. This was then popped into a bundle of hay.
Once the charcloth was tucked inside the hay the whole team took it in turn to blow the bundle into flame. I like this collective method as it involves everyone.
Once the bundle was going everyone started to build the fire up slowly. Occasionally the flames would die down so the students learnt how to get down real low with their cheek touching the ground and gently blowing into the heart of the fire to re-kindle it.
Lastly the cooking set up was put up and the kettle put on for a brew. I found sargey's group later whittling away creating one of these campfire set ups as they were so taken with it.
The last thing we covered was how to put the fire out safely. Water was poured over the whole fire and sticks were pocked into the ground to make holes. More water was then poured over the fire until no steam appeared. Lastly starting at the edges we started mixing all the mud around with our fingers to make sure we felt no heat before scattering the mud all around and laying fresh dirt and leaves over the scar.
My video BCUK Bushmoot 2014 - Day 1 has a fair bit of the starter course in it for you to see.
[video=youtube;d0eMixa6Rd0]https://www.youtube.com/watch?v=d0eMixa6Rd0[/video]
So if you are coming along to your first Bushmoot next year or if you missed the course this or last year come along and have a relaxed fun day learning some new skills.
Cheers
George
Last edited:
")