About this time last year I had finished my first attempt at a bedroll and sent it away to be reviewed. Since then I have made a few more, each one being, hopefully, better than its predecessor as I added new ideas to the basic design. A sort of rolling r&d, if you like
By the by, I felt the need to make up a bedroll that that would have all the accumulated ideas in one place and offered a fully functional basic model that could also be modified if necessary.
I made this with a view to me using it so it is quite long at 8ft. It is 34ins wide and has 6ins pleated sidewalls on both sides and across the foot. I made it with materials I had to hand,the base is a waterproof 15oz canvas which I had used for the entire construction of earlier rolls However having a suitable length of 9oz proofed tent canvas left over from a tarp build I decided to use that for the topworks.
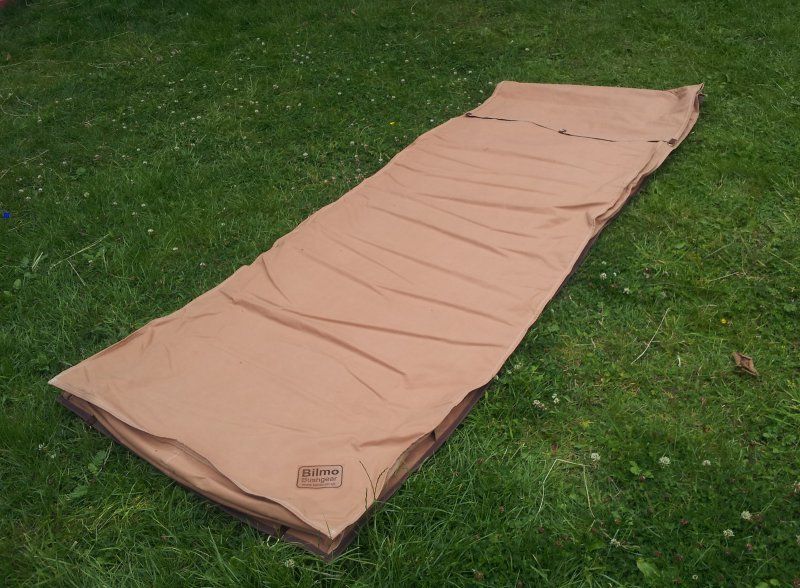
The bedroll has down each side a 2m long YKK no.10zip with inside & outside pulls. These allow the roll to be almost completely opened up.
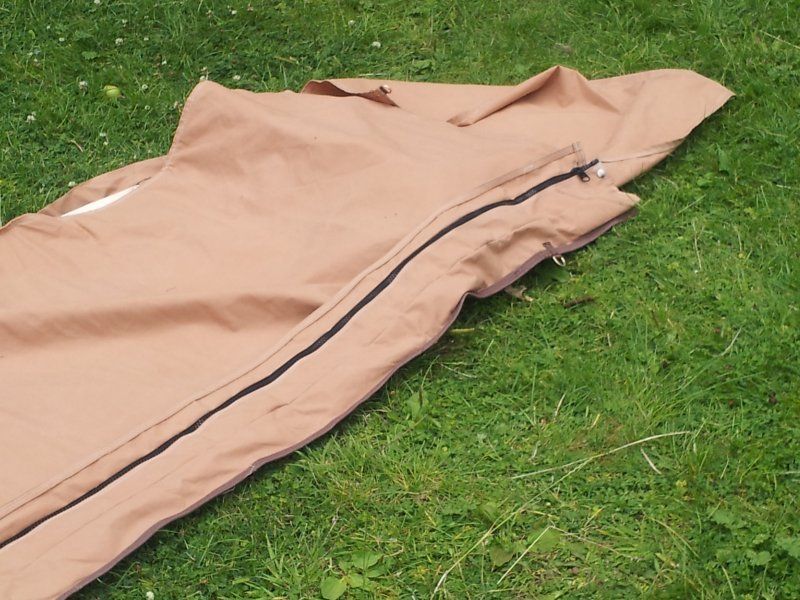
Th zips have canvas cover flaps to protect them from the elements and help reduce cold spots inside.
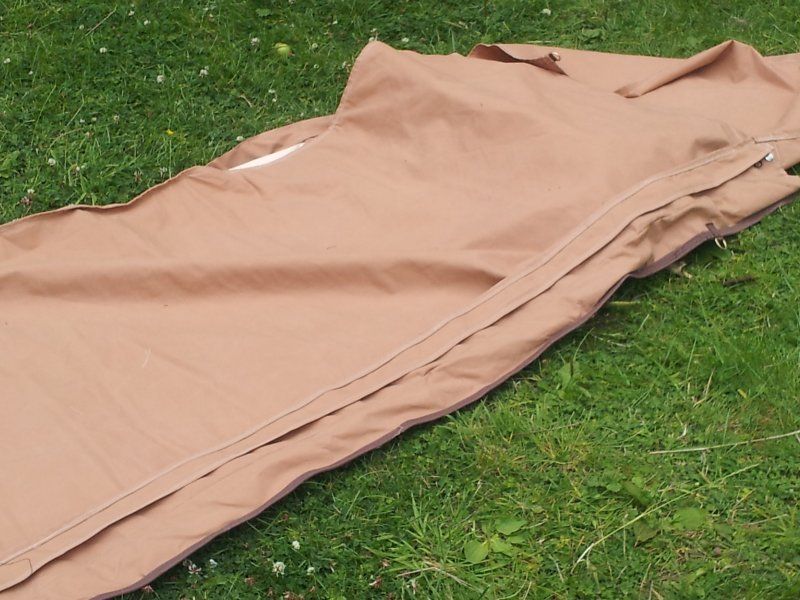
The zips stop short of the foot of the roll which creates an enclosed footbox with plenty of room. The sidewalls have 'lay-flat' corners and the zip covers are sewn down over the ends of the zips
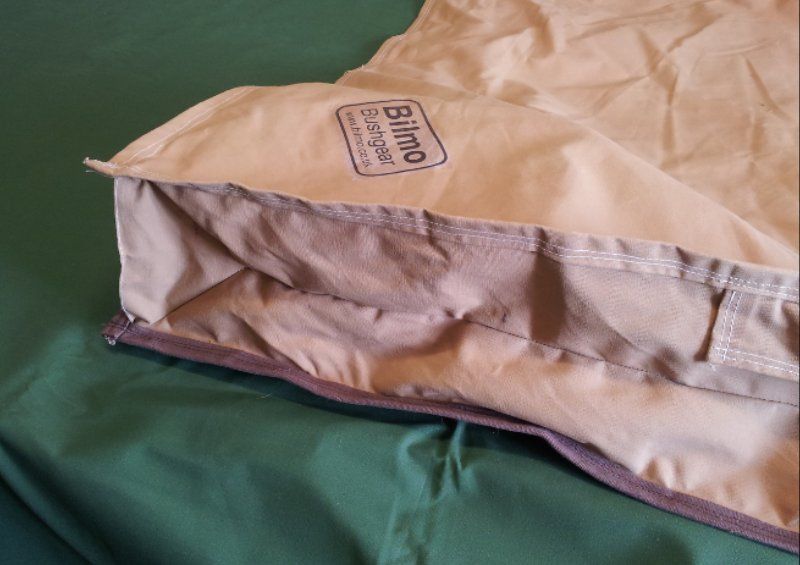
I have never had much success with having a kip mat loose in a bivybag or bedroll with me - it always seems to end up anywhere but underneath me. With this in mind I have fitted a liner to the bottom of the roll. Originally this was to simply slip a kipmat under, but has developed to offer other possibilities. The liner, which is detachable for cleaning and airing, is formed from two pieces of medium weight polycotton sewn together with a 2ft overlap in the middle.
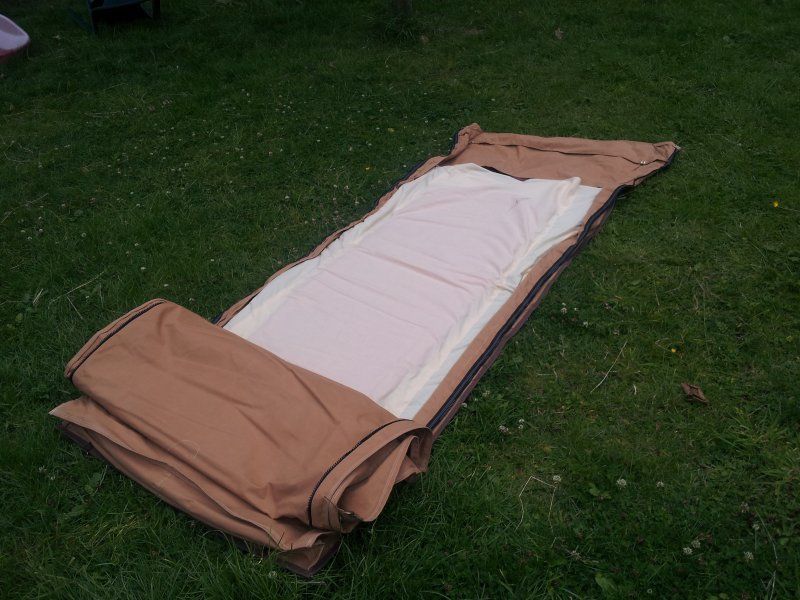
This overlap creates a sleeve which will comfortably accommodate a standard ccf mat or something a little thicker such as the Vango Trek mat shown here. The sleeve could easily be made to take even thicker mats.
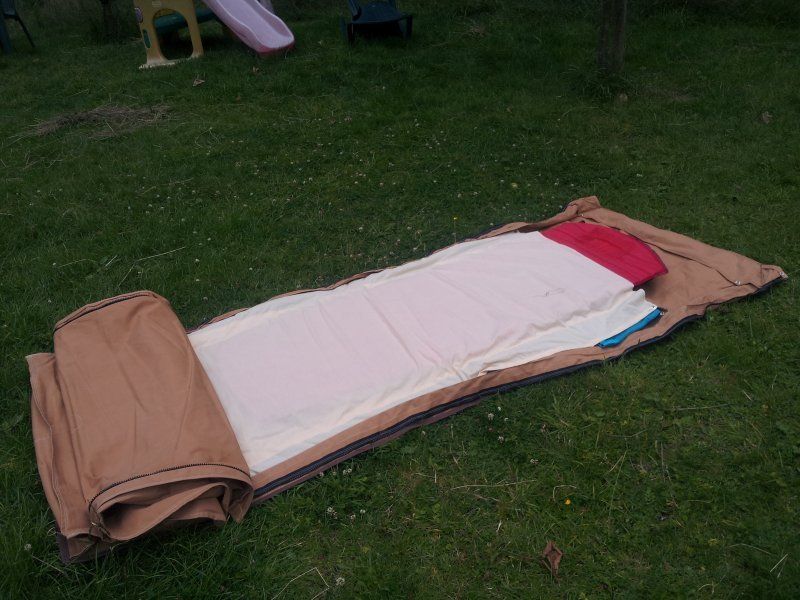
Alternatively larger mats or blankets can be fitted between the liner and the base which space offers the full roll width.
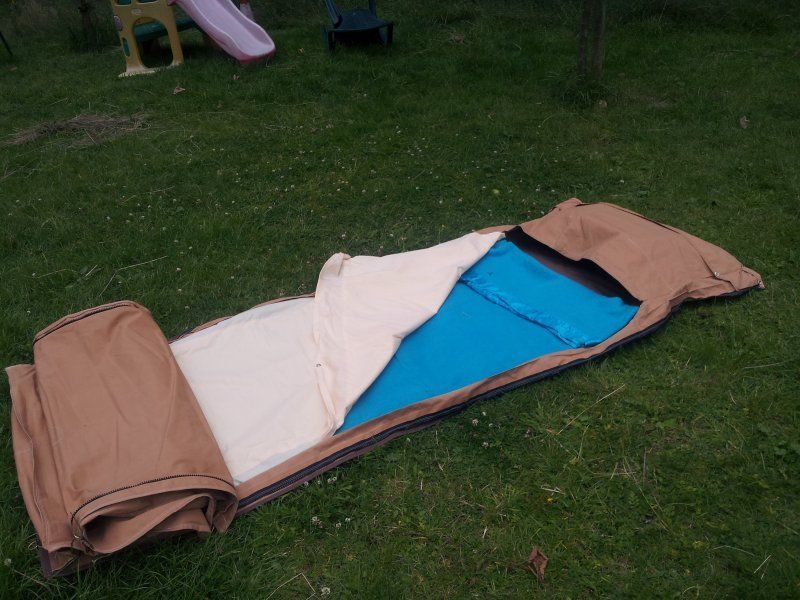
Moving to the head of the roll, a substantial 'pillow pouch' is fitted to for stowage of day clothes and padding out a pillow. I have fitted a simple slip pocket under the lower edge of the pillow flap at each side to keep small items such as phone/camera, keys, wallet safe and to hand. You can just see the outlines of these.
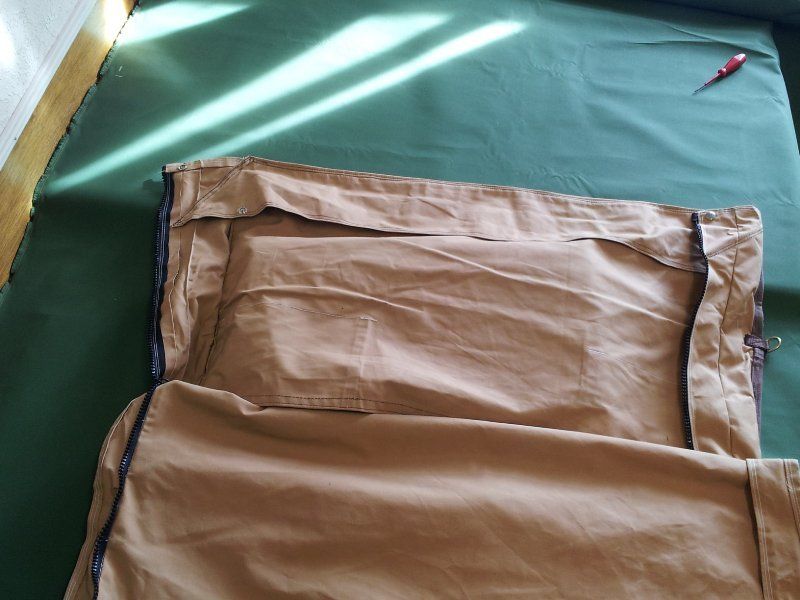
At the very upper edge of the pillow pouch I have fitted a threshold. This will lie flat against the pillow when the roll is opened, but when all zipped up it can be held upright by means of the press studs. Something to help keep out the weather and some unwelcome nocturnal visitors.
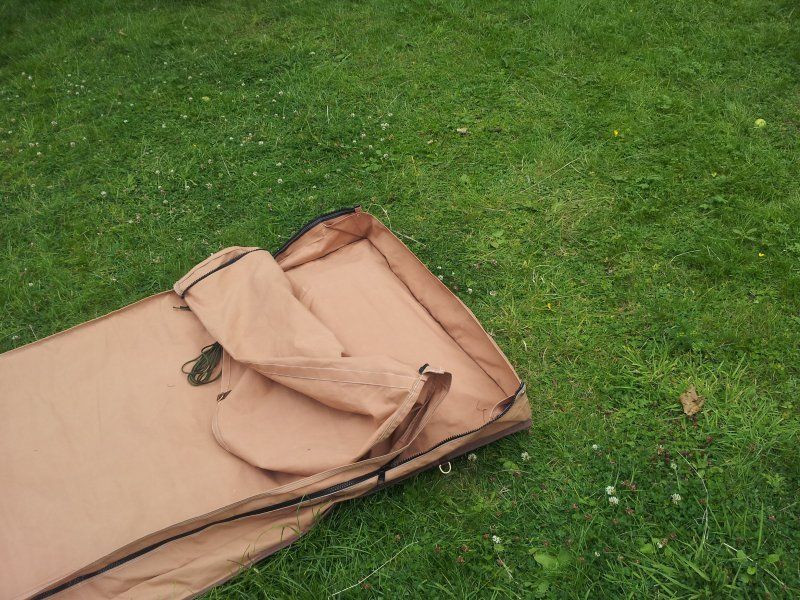
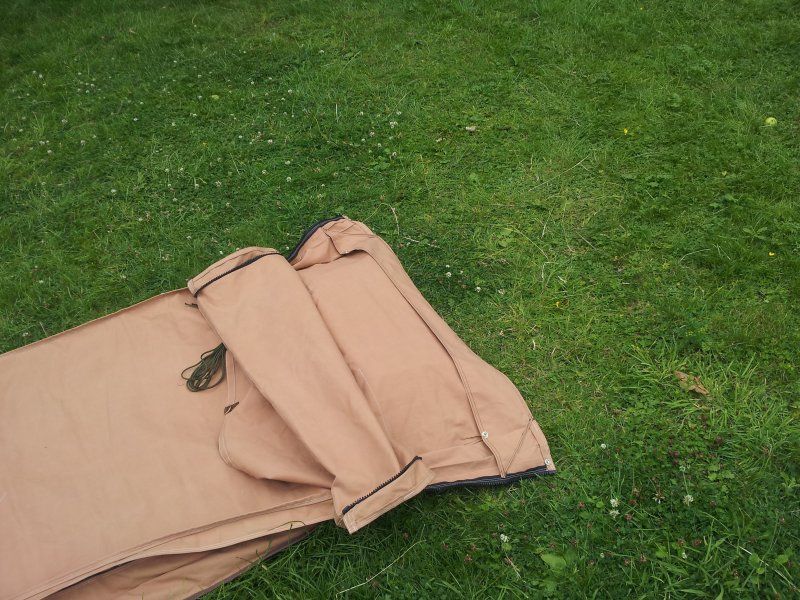
If you move around a bit in your sleep (as I do) or have occasion to pitch up on a slope, the roll has brass d-rings fitted at the head and foot. The foot rings are located on the foot edge of the roll and also help to keep the straps in place when rolled. The rings at the head end are fitted to the sides of the roll just short of the head.
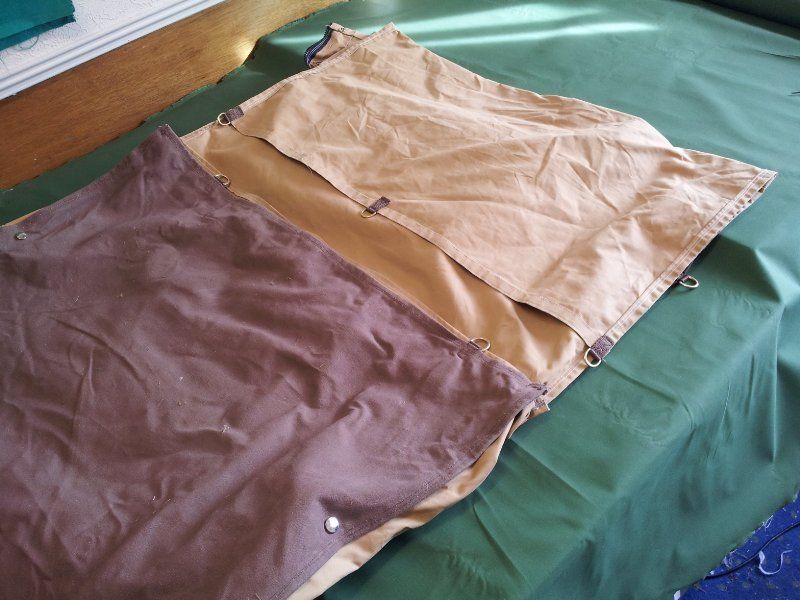
There's also 3 rings fitted to the edge of the head-flap so it can be rigged to provide extra shelter in a variety of positions. Here shown in a simple A-frame setup.
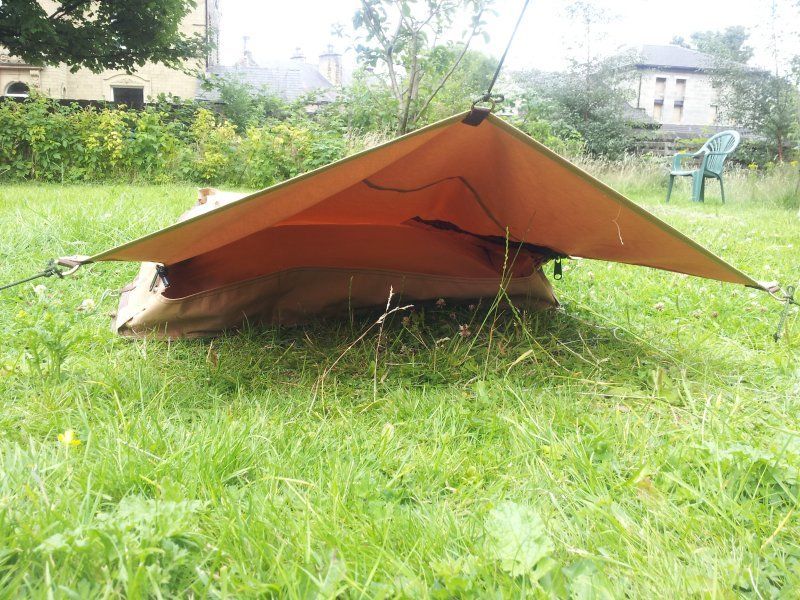
If the weather turns particularly unpleasant, the 2 rings at the headflap corners can be brought down under the head of the roll to peg or tie to the rings at the sides. Set up thus , the head flap and threshold effectively close the head end whilst ventilation is maintained. This set-up can be executed without getting out of the bedroll and does not interfere with the operation of the side zips which can be used fo access and/or added ventilation as required
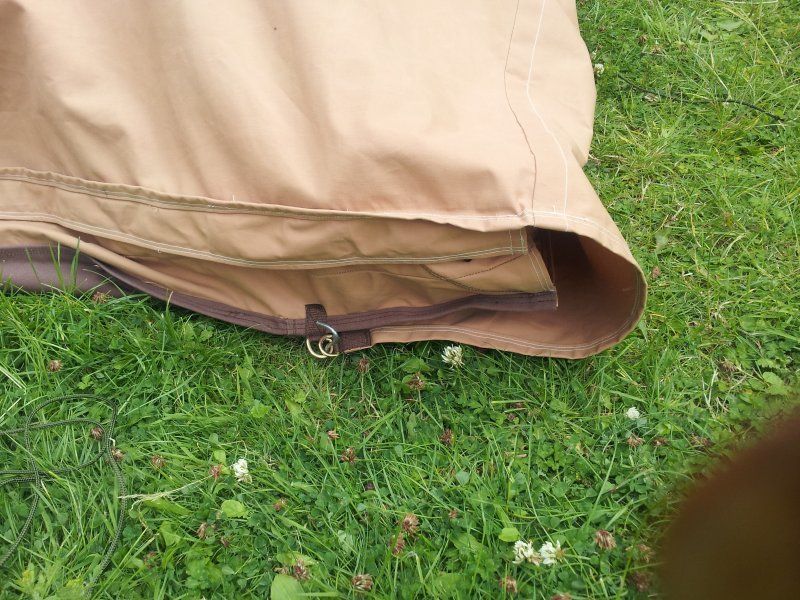
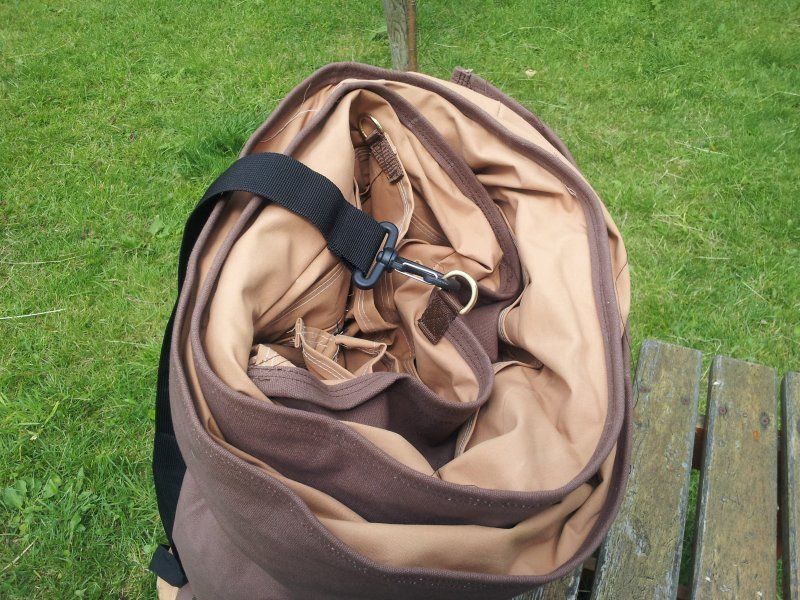
Experience suggests that it's better practice to roll the bedroll from the head end. This keeps the open end snugly tucked away in the middle of the roll, offers the foot d-rings for lashing the roll
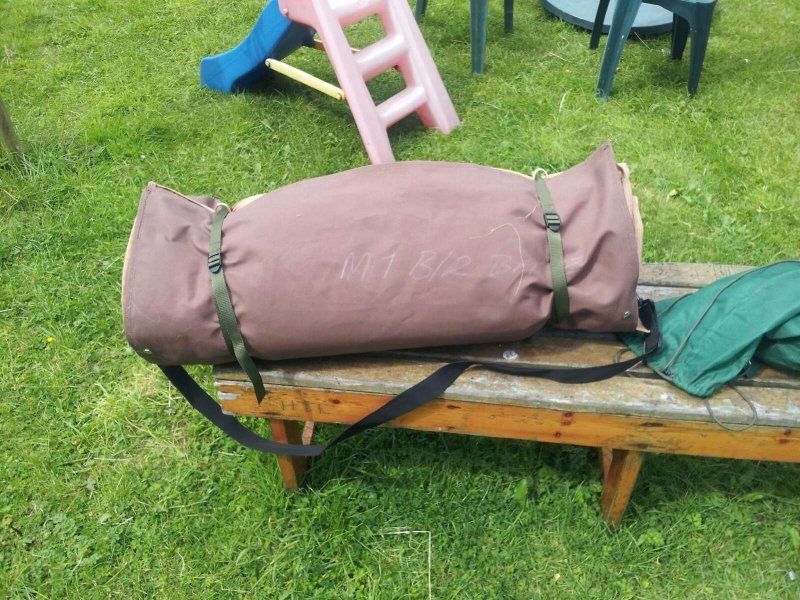
and the sideways pointing d-rings at the head accommodate a shoulder strap like they were meant to.
I spent Saturday night in this bedroll and am pleased to say it performed admirably.
By the by, I felt the need to make up a bedroll that that would have all the accumulated ideas in one place and offered a fully functional basic model that could also be modified if necessary.
I made this with a view to me using it so it is quite long at 8ft. It is 34ins wide and has 6ins pleated sidewalls on both sides and across the foot. I made it with materials I had to hand,the base is a waterproof 15oz canvas which I had used for the entire construction of earlier rolls However having a suitable length of 9oz proofed tent canvas left over from a tarp build I decided to use that for the topworks.

The bedroll has down each side a 2m long YKK no.10zip with inside & outside pulls. These allow the roll to be almost completely opened up.

Th zips have canvas cover flaps to protect them from the elements and help reduce cold spots inside.

The zips stop short of the foot of the roll which creates an enclosed footbox with plenty of room. The sidewalls have 'lay-flat' corners and the zip covers are sewn down over the ends of the zips

I have never had much success with having a kip mat loose in a bivybag or bedroll with me - it always seems to end up anywhere but underneath me. With this in mind I have fitted a liner to the bottom of the roll. Originally this was to simply slip a kipmat under, but has developed to offer other possibilities. The liner, which is detachable for cleaning and airing, is formed from two pieces of medium weight polycotton sewn together with a 2ft overlap in the middle.

This overlap creates a sleeve which will comfortably accommodate a standard ccf mat or something a little thicker such as the Vango Trek mat shown here. The sleeve could easily be made to take even thicker mats.

Alternatively larger mats or blankets can be fitted between the liner and the base which space offers the full roll width.

Moving to the head of the roll, a substantial 'pillow pouch' is fitted to for stowage of day clothes and padding out a pillow. I have fitted a simple slip pocket under the lower edge of the pillow flap at each side to keep small items such as phone/camera, keys, wallet safe and to hand. You can just see the outlines of these.

At the very upper edge of the pillow pouch I have fitted a threshold. This will lie flat against the pillow when the roll is opened, but when all zipped up it can be held upright by means of the press studs. Something to help keep out the weather and some unwelcome nocturnal visitors.


If you move around a bit in your sleep (as I do) or have occasion to pitch up on a slope, the roll has brass d-rings fitted at the head and foot. The foot rings are located on the foot edge of the roll and also help to keep the straps in place when rolled. The rings at the head end are fitted to the sides of the roll just short of the head.

There's also 3 rings fitted to the edge of the head-flap so it can be rigged to provide extra shelter in a variety of positions. Here shown in a simple A-frame setup.

If the weather turns particularly unpleasant, the 2 rings at the headflap corners can be brought down under the head of the roll to peg or tie to the rings at the sides. Set up thus , the head flap and threshold effectively close the head end whilst ventilation is maintained. This set-up can be executed without getting out of the bedroll and does not interfere with the operation of the side zips which can be used fo access and/or added ventilation as required

Experience suggests that it's better practice to roll the bedroll from the head end. This keeps the open end snugly tucked away in the middle of the roll, offers the foot d-rings for lashing the roll

and the sideways pointing d-rings at the head accommodate a shoulder strap like they were meant to.

I spent Saturday night in this bedroll and am pleased to say it performed admirably.
Last edited:

