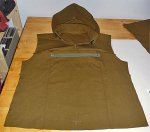
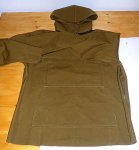
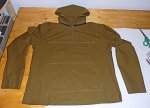
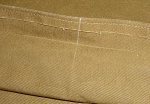
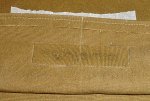
A Garment - McCall's Pattern M5252

N

Nomad

Guest
I recently scored a MkII Singer 201K in very good condition, sorted out a few bits that needed sorting, oiled it, and this seems to have rekindled my interest in sewing. After a few stuff sacks, I started looking at patterns with a view to making some sort of windproof top using some cotton that resulted from washing the oily stuff out of what was waxed cotton (see thread elsewhere). This wasn't the stuff with the gunk on it, but the other stuff that was originally too oily. A wash at 90° resulted in some nice medium weight olive green cotton that's substantially windproof.

After looking at one of the Green Pepper patterns (the Fairbanks anorak) and failing to find it in the UK, and being too tight to pay £20+ to order it from the US, I stumbled on Iain's recent video showing a blanket smock based on McCall's M5252, which looks to be a pattern for a fleece type jacket, which can also be made in a shell material, and has several style options - zip front or pullover, collar or hood, with or without arms. This looked like an easier pattern than the Fairbanks one (perhaps because this is unlined), so I decided to give it a go.

I've never made a garment before, and I've never made anything from a pattern, so this may or may not work out. For anyone in the same position who's thinking of trying something like this, I found this video helpful in understanding what's going on with patterns...


Quite long, but worth watching - she goes into plenty of detail and seems to cover everything.

Rather than sacrifice my pattern in the hope that it all fits, I decided to trace out all of the bits. After taking some measurements of myself and a jacket that I know is a tad too big, I reckoned size medium from the pattern should fit. I'm not 100% sure on some features yet, so I decided to trace all of the parts with no alterations.

The tracing was done on a roll of tracing paper 1m wide...

M5252 Tracing 01.jpg

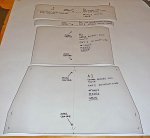
The white paper was taped to the table to give a light background, the pattern laid on top, and the tracing paper laid on top of that and taped down. Here are all of the bits after tracing and cutting out...

M5252 Tracing 02.jpg

The tracing paper is quite stiff - much stiffer than the incredibly flimsy tissue paper that the pattern is printed on. I've tested it for pinning to fabric by making a stuff sack with a round bottom. It seems to work okay - doesn't warp when the pins go through it. It's also pretty curly (coming off a roll). Giving it a gentle iron under a bit of cloth with the iron set to Cool seems to help, although it still curls a bit.

I've still to decide on what style I want to go for, but it will be a pullover type with arms, Not sure yet on hood or collar. The pockets will change, probably to a kangaroo pocket at the top (the yoke-based design seems conducive to this), and a single wide pocket at the bottom. I think there will also be a drawstring at the hem, and Velcro tabs at the cuffs.

Next steps are to finalise the style and make any additional pattern pieces (pockets, and flap for top pocket), iron the cloth, and lay out the bits to see if there's enough. (I think there should be, but I'll check before I cut anything.) I also need to see if there are any notions to get, although I'm pretty well stocked for that sort of thing (might need to get zips if my metres of continuous coil zip doesn't look like what I want).
 
  • Like
Reactions: Macaroon and Toddy

John Fenna

Lifetime Member & Maker
Oct 7, 2006
23,299
3,083
67
Pembrokeshire
Good work! - this is pretty much how I started out ... and ended up with a Btec OND in Fashion Design and designing for such folk as Craghoppers! :)
Keep it up - but beware ...it is addictive!
 
N

Nomad

Guest
Not sure I'll become addicted, but I'd certainly like to add making clothes to my skill set. :)

A wee update...

It turns out that medium is just a bit too small for me. I made up the front and back bits in plain cotton curtain lining, and it was just a bit too snug around the chest over a 5.11 shirt with stuff in the pockets. Not too tight such that the seams were getting stressed, but no ease in the fit. It looks like I'll need to redo the tracing for the large size. I think the effort in making a medium size tracing may not be lost, though - apropos the thread about wool fabrics, the medium size might just work for a shirt made from the Donegal Tweed that I liked from Truro Fabrics.
 
N

Nomad

Guest
I've retraced the pattern in the large size. This time, I decided to miss out the pocket pieces because I have no intention of using them. Even if I were to come back and make a zip-front jacket, I'd be more likely to have patch pockets.

My ironing of the curly tracing paper seems to have improved - the pieces lie much flatter now. The method was to set the iron to cool (on a 1950s Morphy Richards dry iron), put a later of thin cotton over the piece, do two slow passes of the iron, then leave the pattern piece and pressing cloth in place until they cool. Still a little bit of curl, and sometimes need to repeat, but seems pretty reliable overall.

I've also been thinking about features. I wasn't keen on the hood design on its own because it doesn't look like it offers much protection for the neck, but I still wanted the classic anorak look, so I decided to make a collar version with a zip-on hood. I had considered making the kangaroo pocket a suspended affair, but I reckon this will be too challenging for me, what with the neck zip, yoke parts, pocket top edges, pocket zip and pocket flap all meeting at a mid-point on the upper chest. I think it will be easier to make the pocket a patch on the outside, maybe with one side of the pocket zip incorporated into the seam between the yoke and front panel. Patch for the lower (full width) hand warmer pocket as well. Still undecided are whether to have zips on the hand warmer pockets, and pit zips. Planning to have Velcro tabs at the cuffs, and maybe similar at the back of the hood for adjustment if I feel it's needed.

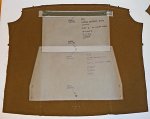
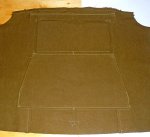
The bits are all pinned to the fabric...

M5252 Tracing 03.jpg


M5252 Tracing 04.jpg

I made two collar piece tracings so that I'd be sure to have the area for them allocated when laying the bits out. The space at the top right is about 15 x 25", which should be more than enough for the front pockets, pocket flap and Velcro tabs (especially given that it's two layers).

It's worth noting that the fabric is 2.2m long, which was just enough to fit all the bits that are cut on the fold and still get the sleeves in.
 
N

Nomad

Guest
It's coming along...

M5252 In Progress 01.jpg

The yoke parts have been sewn to the back, and the collar and neck zip done. Also made the hood, and done its zip as well. The front sides have been sewn to the front panel, and I got as far as clipping that to the yoke before deciding that now would be a good time to stop and do the front pockets. The horizontal zip isn't sewn on - just put in position so I can work out what the pockets will look like.

So far, the collar has been the trickiest part - pretty fiddly getting everything set up prior to doing the various runs of stitches. I decided pretty early on that trying to include the hood zip in all that was probably not going to go well, so I left that out and added it to the outside afterwards. Even then, it managed to creep along as I sewed it, such that the ends were well off-centre. So far, that's the only time the seam ripper has been out, so going pretty well so far.

With it draped over me, I'm happy to report that the collar is just right - fits nicely over the chin, not too snug, not too loose. I'm glad I went with the detachable hood because the bottom of that doesn't really get over the chin at all - the sides don't quite meet in the middle. If some volume adjustment is needed, it won't be much, so I'll decide on that when it's all finished.
 
  • Like
Reactions: MrEd
N

Nomad

Guest
Pockets are done.

After some thinking and scribbling, I made patterns...

M5252 In Progress 02.jpg

The flap for the kangaroo pocket is a single piece folded in half, and the thin bit below that is for a layer of interfacing to go inside. There won't be any Velcro or the like on the flap - it'll just be sewn along the top and down the two short ends, so relies on some stiffness to stay over the zip.

Pattern bits placed on the front to see how it looks...

M5252 In Progress 03.jpg

The chalk line along the top indicates where the seam will be with the yoke. I wanted some clearance here, partly to be sure that the neck zip on the yoke can be cut to length and not get in the way of the pocket flap.

The sewing for these all went pretty well...

M5252 In Progress 04.jpg

The camera flash is making the thread look lighter than it really is - it's actually a good match to the fabric. The kangaroo pocket fits within the seams at the left and right of the front panel, largely dictated by the 12" zip. The flap extends at each end so that the zip pull can be accessed without it disappearing into the top corners of the flap. The handwarmer pocket is wider at the top so that reinforcing stitches can go through the top corners and the seams on the main body. More of the same at the short vertical bits at the bottom corners. I decided to not bother with zips on the handwarmer pocket - didn't think of a way to do them, and I felt they weren't really needed since it's only really for holding the hood when not in use, and sticking my hands into.

I'm pleased with the zip on the top pocket...

M5252 In Progress 05.jpg

Runs nice and smoothly, so a bit of cord as a pull tab should work fine.

The white chalk marks are actually made with an artist's watercolour pencil - much easier to be accurate for the more finicky alignment marks.
 
  • Like
Reactions: MrEd and JohnC
N

Nomad

Guest
Just looking at the sleeves, and the pattern calls for ease stitching at the top where the seam sits at the shoulders. It seems that it's supposed to concentrate some of the seam length on the sleeve around the top, somewhat like a gather, for the purpose of easing the fit for arm movement.

After trying a test piece, I'm not so confident of getting this looking neat. The sleeve seam is about 40mm longer than the matching seam on the body, and the length of the eased section is about 235mm. If I pin the sleeve centre mark to the shoulder-to-neck seam, I get an overlap of about 15mm at the front and 25mm at the back.

For a garment like this, how necessary is it to ease the sleeves? Will it make the fit bad if I trim the sleeves a little to give matching seam lengths and do a plain seam all the way round?
 
N

Nomad

Guest
I procrastinated some more about the sleeve easing, and finally decided that I should give it a try. At least I could rip the seam out if it didn't work, which is less destructive than cutting the sleeves narrower and finding that doesn't work. Then I found that the positions of the marker triangles didn't match between the sleeves and the yoke/back parts - when I lined up the corners and pinned along the seam, the triangles were misaligned. Spent ages checking the pattern and the cut pieces by overlapping and measuring with a bendy ruler, and they all correlated between fabric and pattern, but pattern piece to pattern piece, and cloth to cloth, didn't.

This left me with a dilemma - how do I know which bit is wrong? If the alignment triangles are the correct distance from the centre, then there isn't much easing to add, and there's fabric to be removed from the long seam edges. If one or other is incorrect, but the ends are the correct distance from the centre (ie, I pin from the ends up to the easing points and ignore the triangles), then I end up with loads of easing. I clipped the seam together from the ends to the easing points, eased within that length and clipped the rest, then turned it inside out. It just looked wrong - the sleeve caps were rising up at the seam. They looked like they were for some other style of garment, and nothing like any outdoor anorak style thing I've ever seen.

I placed the centre marks on the sleeves at the shoulder-to-neck seams, and marked out new edges like this...

M5252 In Progress 06.jpg

Same thing at both sides, although wider at one side than the other. With the cut lines marked on the fabric, I then repositioned the pattern and traced the lines onto that for later modification. Then I cut the cloth to the new lines, sewed it together, and the sleeve caps looked fine.

That was followed by the side seams, and I decided that I would fit pit zips...

M5252 In Progress 07.jpg

With these done, I was finally able to try it on as an actual garment. The fit is really good - on and off over the head is fine, can get to the pit zips, and can fit and remove the hood with the anorak on. The height of the bottom of the handwarmer pocket is good - comfy, relaxed position for the arms. Plenty of arm movement without it riding up or getting tight anywhere, but still not a baggy fit. Arm length is quite long before hemming, so I'll try folding to various lengths to work out what's needed. Quite short at the bottom hem, which was what I was after so that I can cinch it at the waist and not have loads of blousing (barely hip length - not looking for bum protection).

Nearly there...

M5252 In Progress 08.jpg

Still to do...

The hems at the cuffs, and maybe Velcro tabs, although they're quite a close fit as it is.
Drawcord hem at the bottom of the body.
I reckon the hood will need a volume adjuster, and I'll be adding a drawcord to it as well.
Some light cord for pull tabs on the zips.
Various bartacks.
 
Last edited by a moderator:

MrEd

Life Member
Feb 18, 2010
2,148
1,059
Surrey/Sussex
www.thetimechamber.co.uk
This is superb, well done. I have dabbled with sewing for a long time but have only made small things like bags and pouches. Or repaired or modified clothes. Never made from scratch or followed a pattern - you make it look easy!

I might find a pattern and give it a go :)
 
N

Nomad

Guest
Thanks folks - I'm feeling pretty pleased with it so far.

MrEd, I would say our prior experience is similar. In the past, I've mostly made stuff sacks and some webbing things for when I was into airsoft. Also a made a couple of largish two-layer sheet things related to photography (dark cloth for a large format camera and a light-proof blind for blanking a window to convert a room to a darkroom). All of these apart from a couple of recent stuff sacks were done on my plastic fantastic Brother domestic machine.

As alluded to at the start, getting the Singer made a difference. In terms of power, it's similar to the Brother, although it feels much more solid - I used the Brother for the ease stitching (in red thread), and it was noticeably creaky-plasticy and lightweight. The big difference was in sewing with it - quite hard to get it to run slowly compared to the Singer, and I think the better speed control of the latter has helped a lot. Being able to run tricky sections more slowly is much less fraught.

A couple of other changes have also helped. One is a decent surface to lay the cloth and pattern out on. Before, I would lay a bit of thin plywood on my bed and use that as a cutting table, but the stooped position and smallish area was limiting. I recently made a decent sized table that's attached to the wall and swings down over the bed which now gives me much more space (1m deep, 1.75m wide) at a good working height. The other was a small change in technique - marking the stitch lines before I sew. I use a little ruler gadget with a sliding bit to put a series of dots along the seam at the right distance and then join them up. I find it much easier to follow the line than keep the edge of the fabric against the hem spacer thing on the machine. As noted above, the use of a watercolour pencil for marking out has worked well (the ruler gadget has a hole in it, which I poke the pencil through).

Using the pattern hasn't been too bad. Tracing the pieces was definitely a good idea - if I had cut it out at size medium, I would have had to buy a second pattern to make a size large (which would have been half the cost of the 20m rolll of tracing paper). The tracing was fairly time consuming, but well worth it, not least because the tracing paper is pretty robust. It's also straightforward to make altered versions of the pattern by tweaking the drawing and cutting out a new one. I found some small mistakes with M5252 - a couple of the round marks for the upper pocket are labelled incorrectly - and, as mentioned, there is something odd going on with the sleeve easing. I think it pays to question what you see while at the same time reading through the sewing directions carefully to ensure that they're fully understood. Similarly, if you deviate from the pattern or directions, think everything through carefully to make sure that you don't do something now that will make a later step difficult (eg, the pattern has you doing some of the collar, then fitting the neck zip, then the rest of the collar). I did my version of the pockets when I did because they would have been more awkward to do neatly once the front was sewn onto the yoke (more weight of fabric to drag about at the machine), and they would have been a pain if I had done the sleeves and side seams first.
 
Last edited by a moderator:
  • Like
Reactions: MrEd
N

Nomad

Guest
Hemmed the bottom and the cuffs today. With a drawcord in, the hood is sometimes okay without a volume adjuster, and sometimes drops over the eyes enough to be in the way, so it will get a volume adjuster. The cuffs will as well.

Here's how I did the eyelets for the bottom drawcord...

These are a potential failure point because the eyelets can get pulled out of the fabric if it gets stretched or pulled in undesireable directions, which may well be possible given that there's a drawcord in there that gets pulled about. After a little experiment, I came up with a way to reinforce the fabric in the critical area.

First, take a scrap of fabric and iron some interfacing onto it...

M5252 In Progress 09.jpg

Having worked out what the drawcord channel is going to look like, trim to width, cut to a reasonable length, and add a centre line...

M5252 In Progress 10.jpg

This is 18mm wide and about 3" long.

Extend the centre line on the garment to the inside, and add a horizontal line where the hem will fold...

M5252 In Progress 11.jpg

From the edge to the fold is 22-23mm, and the hem/channel will be sewn along the existing line of stitching, hence 18mm wide for the reinforcing bit.

Glue the reinforcement in place using Fiebing's leather cement...

M5252 In Progress 12.jpg

This stuff appears to be water based (no pong) and the small amount of seepage all but vanished with the aid of a hairdryer.

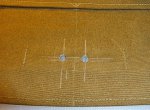
Once dried, add some stitches at the short ends...

M5252 In Progress 13.jpg

These should prevent the reinforcing patch from getting pulled up at the ends by the drawcord.

Turn over, make sure there's nothing underneath except the cheapo plastic chopping board and bang a couple of holes in the front...

M5252 In Progress 14.jpg

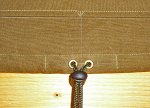
Then fit the eyelets, sew the hem and add the drawcord...

M5252 In Progress 15.jpg
 
  • Like
Reactions: MrEd

MrEd

Life Member
Feb 18, 2010
2,148
1,059
Surrey/Sussex
www.thetimechamber.co.uk
That’s a nice solution, good idea.

As for hood droop - I have wired a couple of the hoods on my jackets so that they stay ‘up’ and out of my face. Might be an idea?

I used solid copper wire, but left the insulation on to protect the copper a bit
 

birchwood

Nomad
Sep 6, 2011
458
108
Kent
The air vent / hood on my Terra Nova tent kept collapsing so I inserted a bit of strimmer plastic 'wire' into the hem. Works a treat .
 
  • Like
Reactions: MrEd

BCUK Shop

We have a a number of knives, T-Shirts and other items for sale.

SHOP HERE