Hey Everyone,
Today after having won the vote ( to be fair it already won the vote yesterday) I have a project that I have been working on for the past 6 months.
The restoration of a Mandolin which was 76 years old and had been lying neglected on an attic room for the past 40 years.
It was the mandolin of my neighbor who is currently 89 Years old and got the Mandolin on his 13th, he eventually stopped playing and stored the Mandolin in his attic,
Which is as some of you know one of the worst places to keep your vintage and delicate instruments.
The instruments glues were dried out so severely that it came apart, seventeen of the twentyone pieces that make up the back broke loose from the design, and 4 of those even warped.
And seeing the fact I didnt have any of the specific molds or original radius of the back I need to hand bend them after steaming, which took a while XD
I will first show you guys some before photo's of the worst damage and then show you some after photo's
So prepare yourself instrument lovers, this is going to be ghastly!
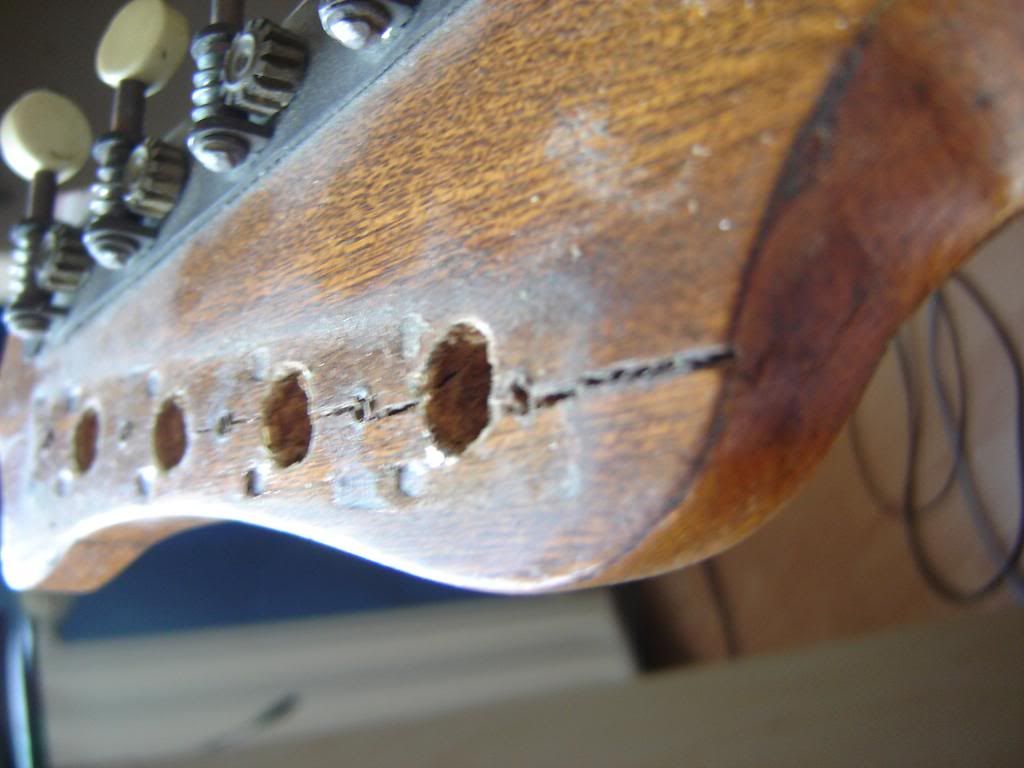
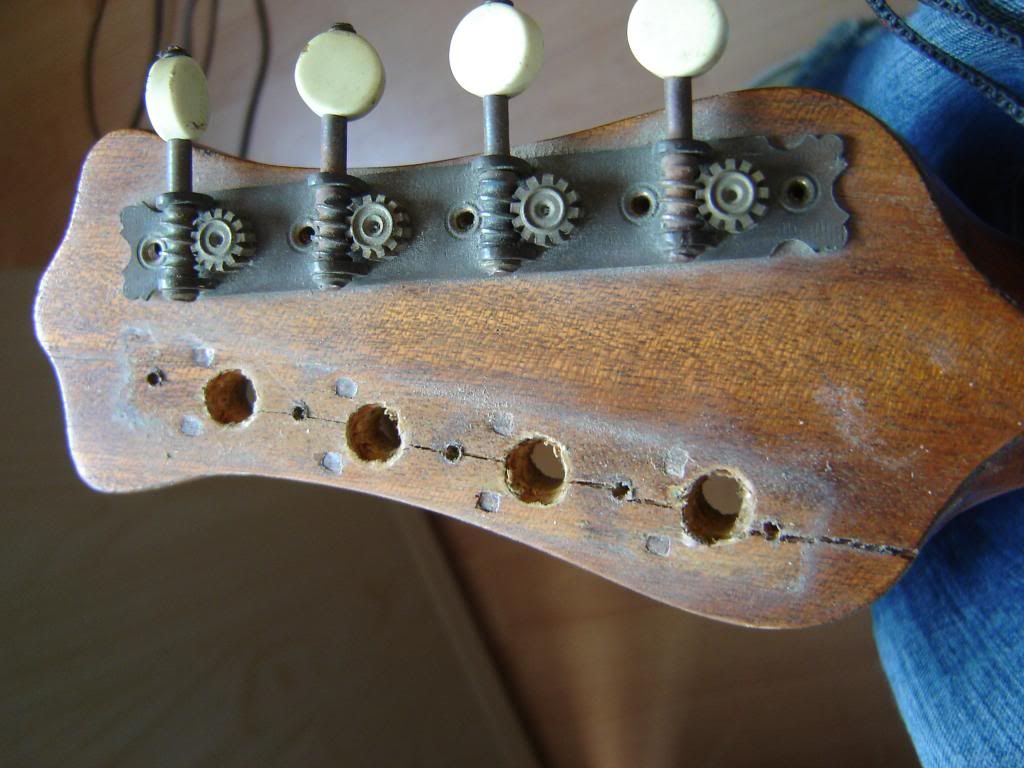
The tear through the headstock, ran through almost 3/4 of the depth, and put the side of the headstock on a 30 degrees angle with the rest of the headstock,
this might sound unimpressive but it is anything but, this instrument was inches from death at this part.
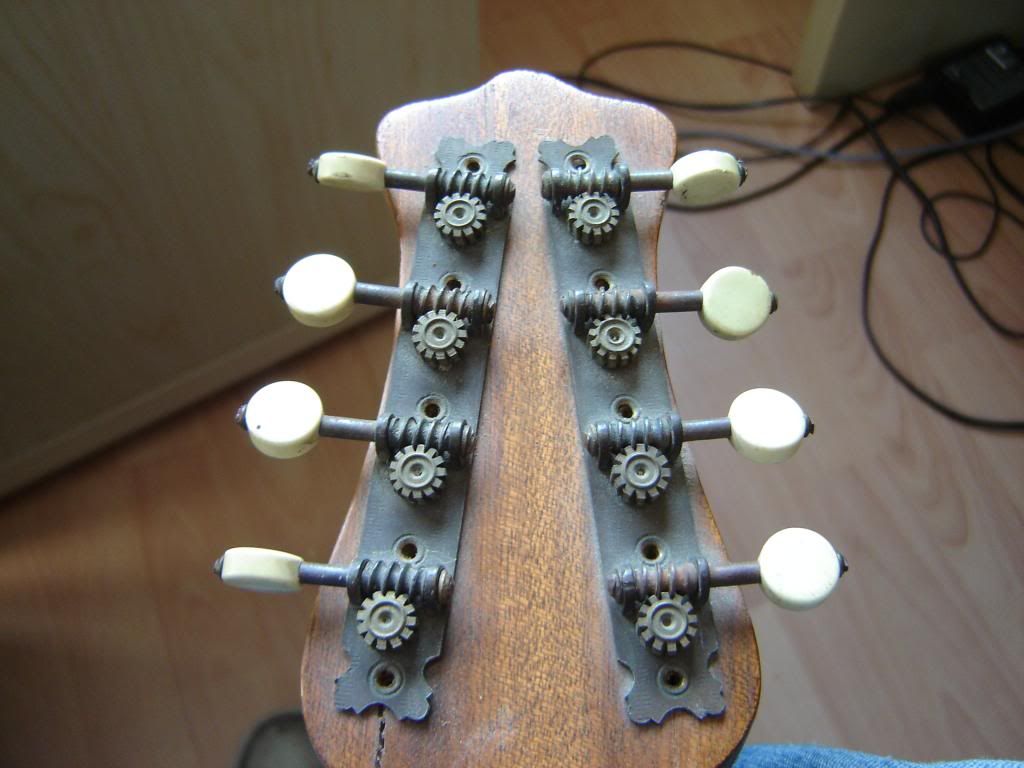
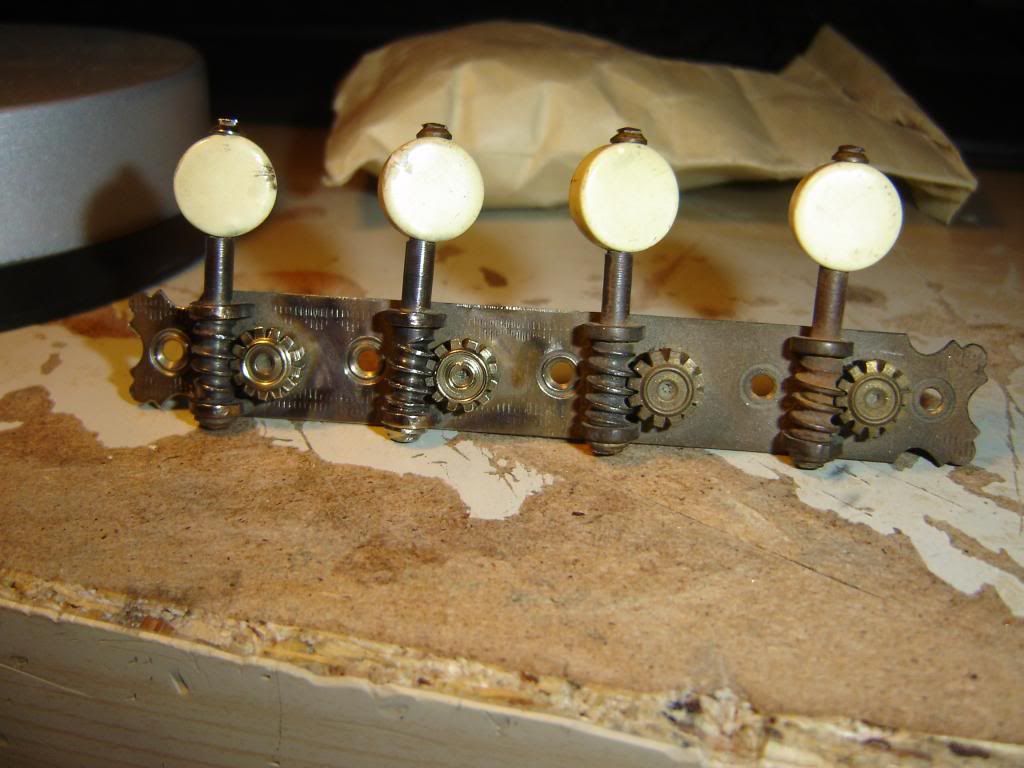
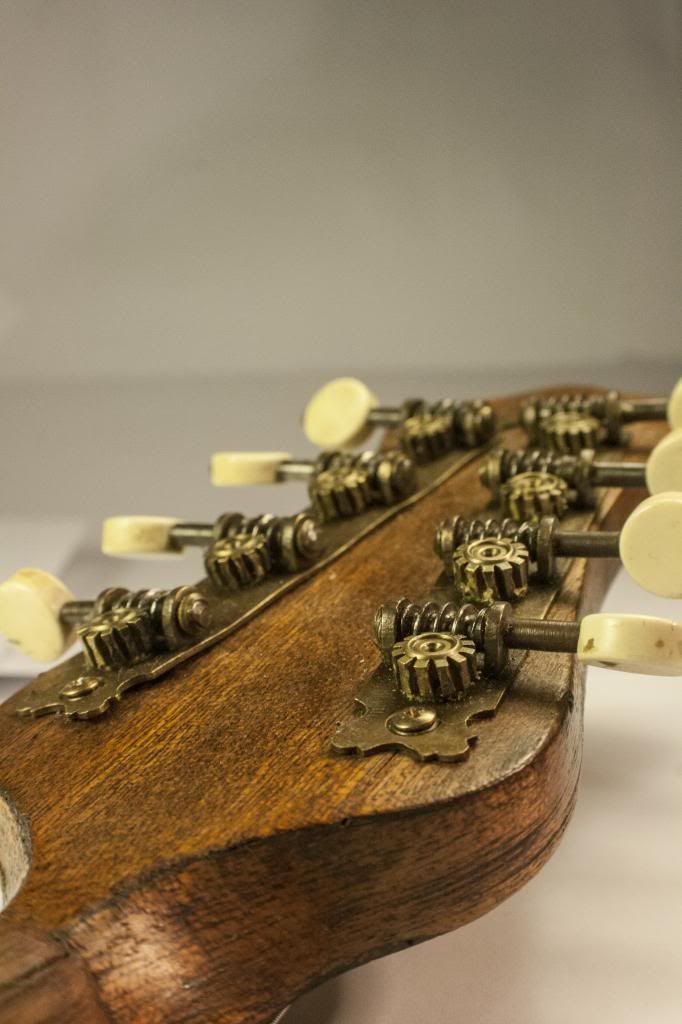
And the tuners were completely filled with rust, thus turned very "crunchy" if they even turned at all.
I carefully went at them with some very fine polishing compounds and clean of any excess rust trying to not mess with the character of the old instrument.
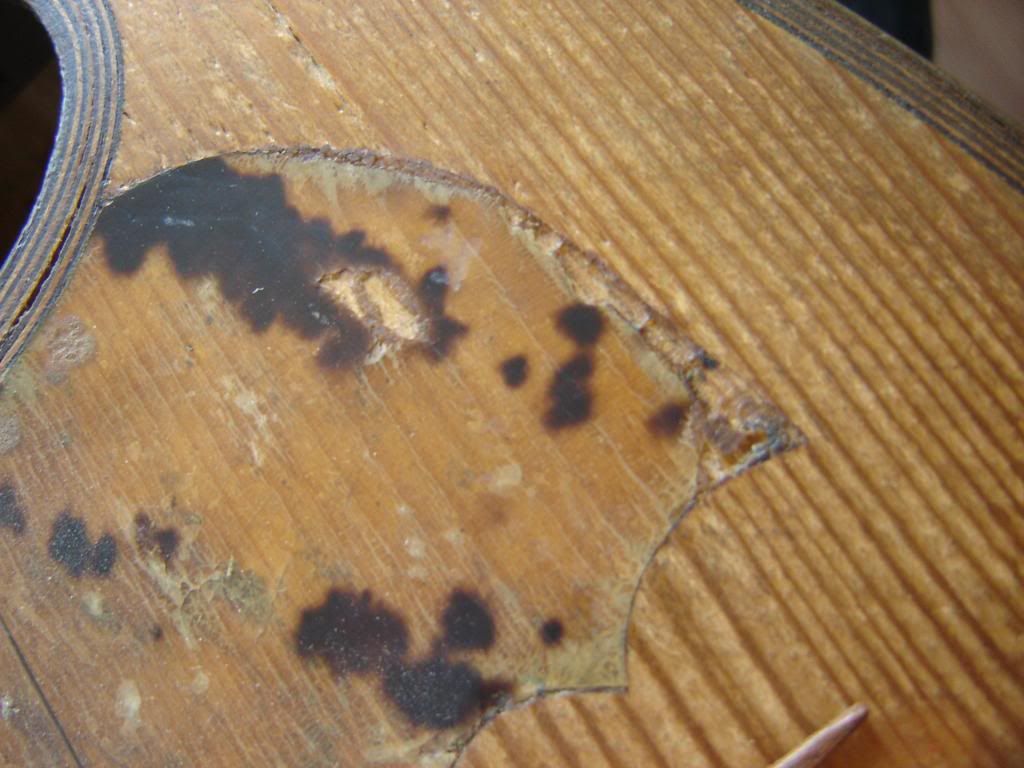
The old pickguard was completely coming apart,
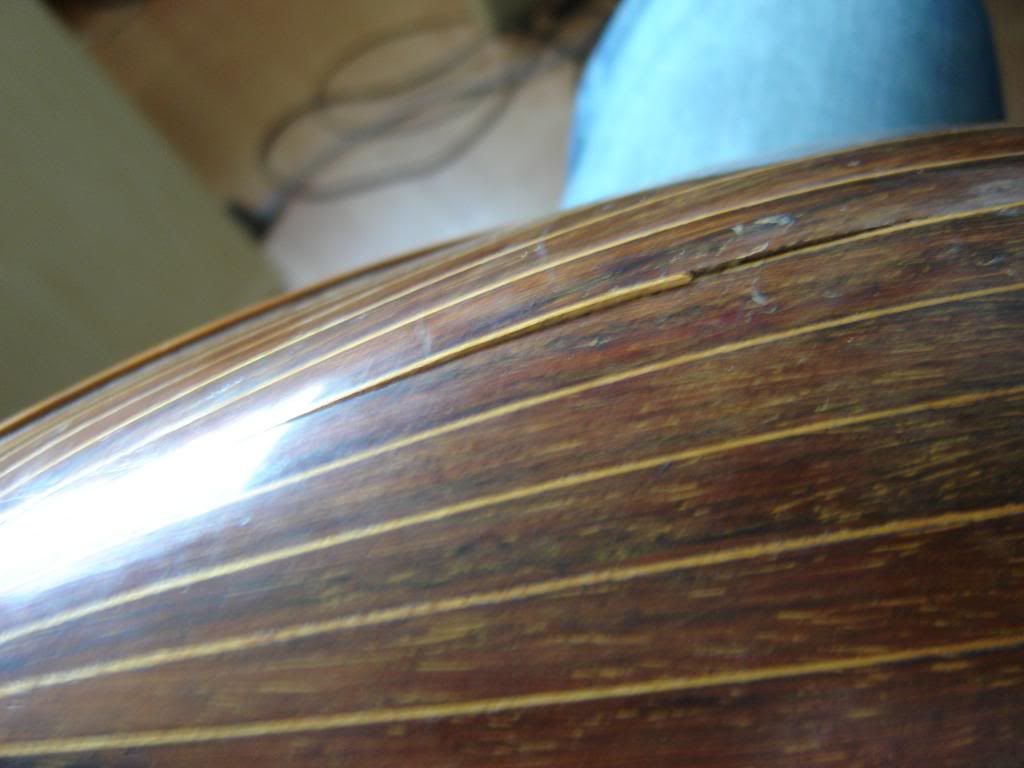
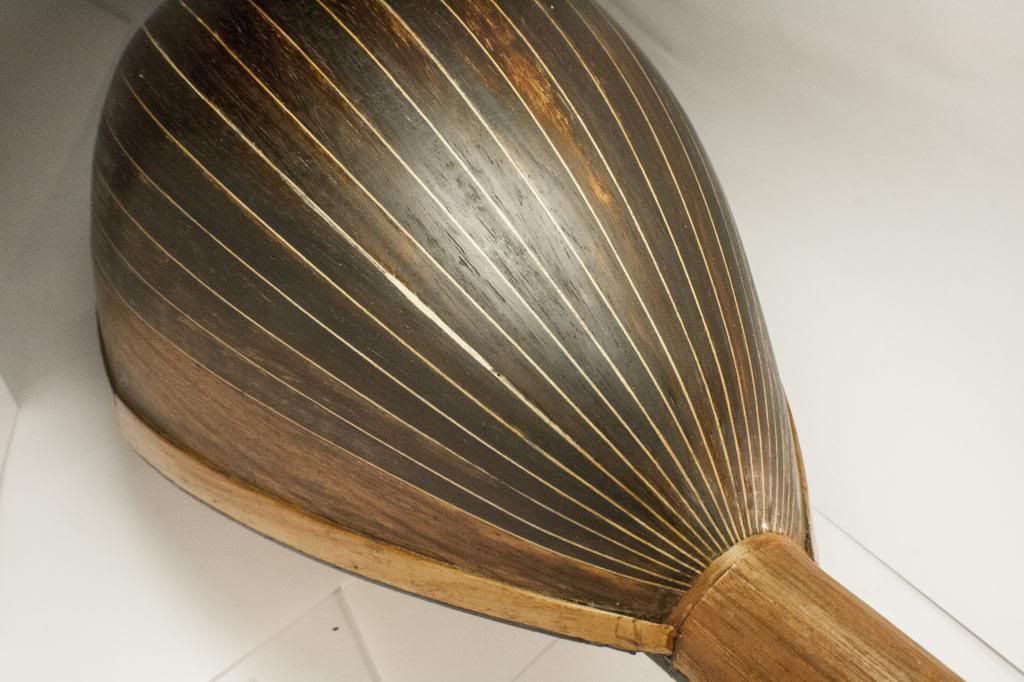
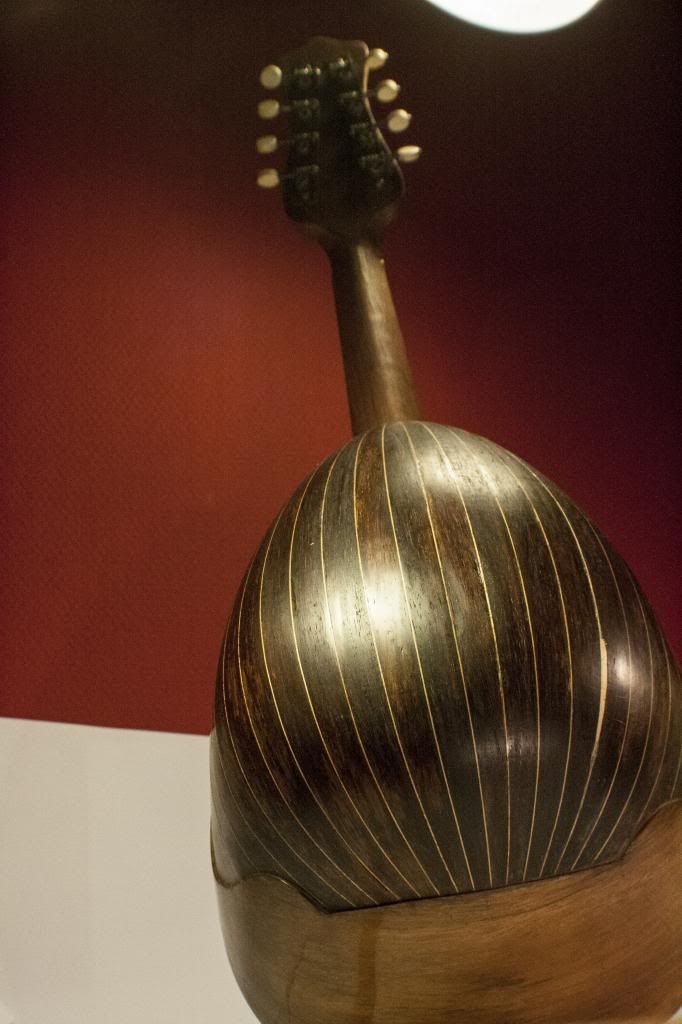
And most of the 21 backpanels were disconnected from eachother or needed serious reglueing in order to make a rigid bowl on the back again,
as the instrument requires a solid bowl on the back to give a feedback of the strings vibrations. And some of these section were even severely warped or even had chips or breaks out of them.
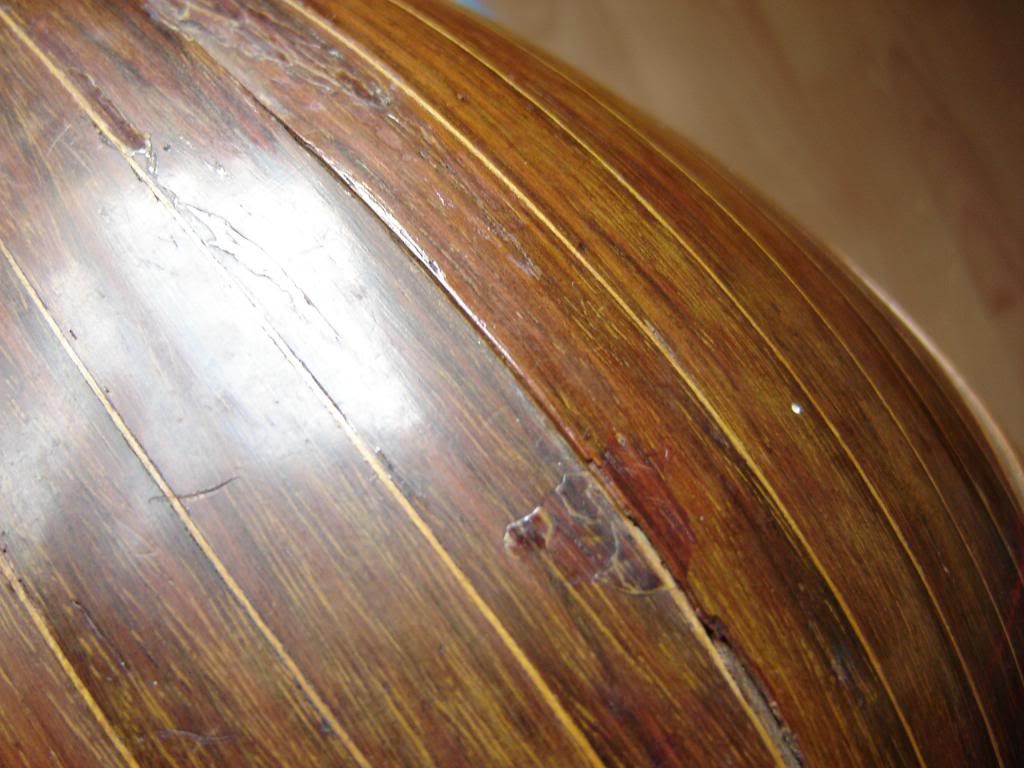
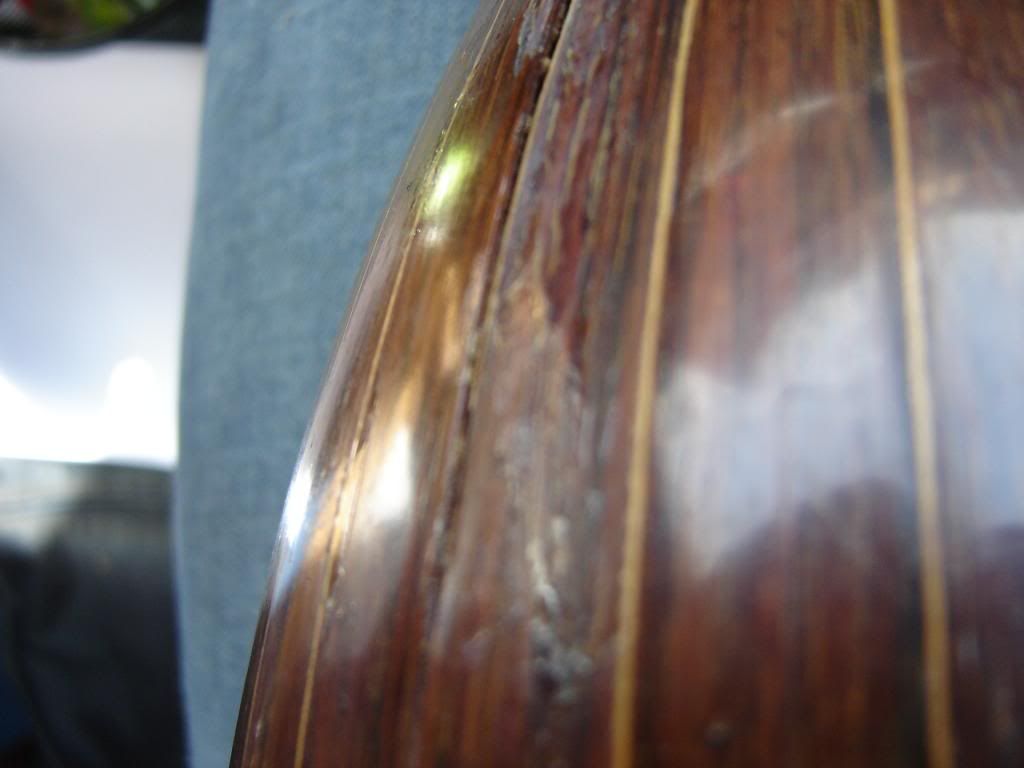
And as a final grand price, the top of the instrument had parted as it consist of 2 piece glued in the centre line of the instrument.
This was very much my work cut out for me, as I did not have any molds nor did I have any comparisons to work to.
I started with unglueing large part of the instrument, clearing away the old hide glue, steaming the warped parts and hand bending them back into the right shape,
and unscrewing all the fittings.
I then straightend the headstock over the course of 3 weeks as to much at once would crack it, and with the help of 38 large rubberbands, 5 Clamps, and 2 weights,
I reglued the center of the top of the instrument. I refitted the fretboard, and reglued it. completely removed the old pickguard and cleaned op the soundhole.
Now it was time.
Time to rip out the paper liner of the instrument and start refitting every single piece of the "bowl" back. this was all done by the still fitted pieces a lot of wedge, rubberbands and many many swearwords ^^
The broke pieces I made small mold cut wedges to shape, jammed them in, glued them flush, and the cut of the excess on both side ( which was a pig of a job to do on the inside ^^)
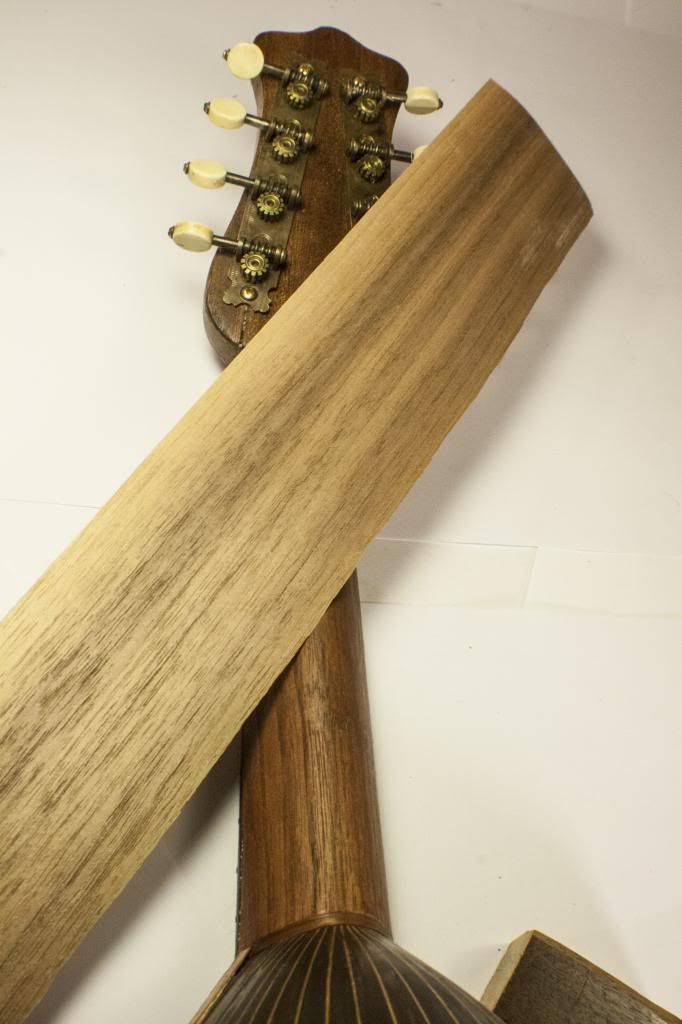
I then did a rough sand to get everything flush, made a new veneer backing for the neck from walnut which I redyed with Leather Oil Dye. and put everything back together.
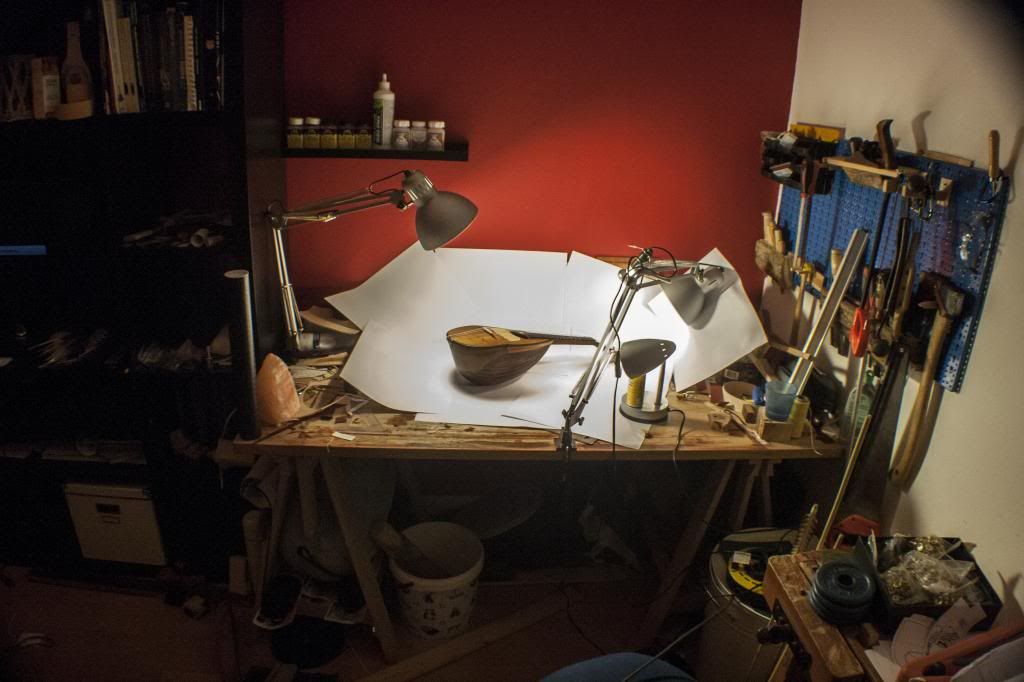
and now it is result time photography time!
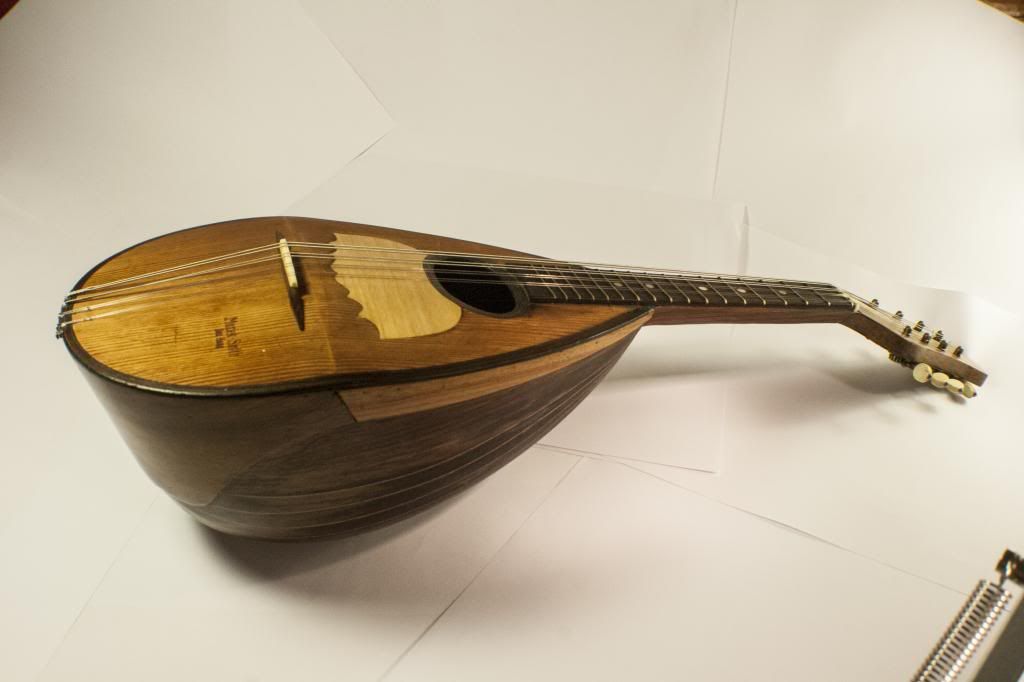
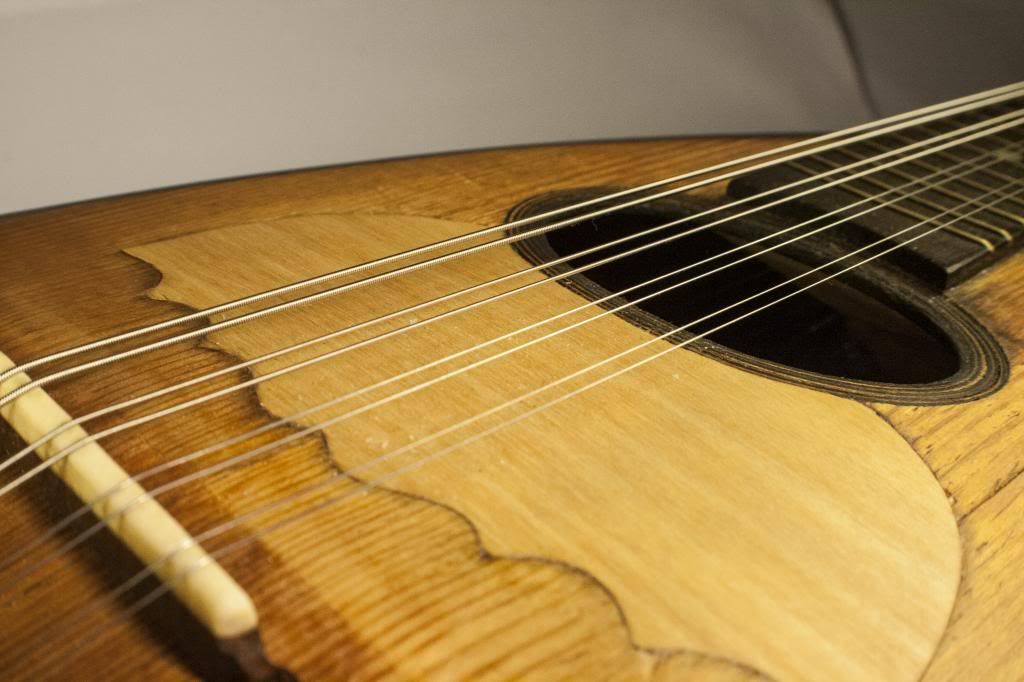
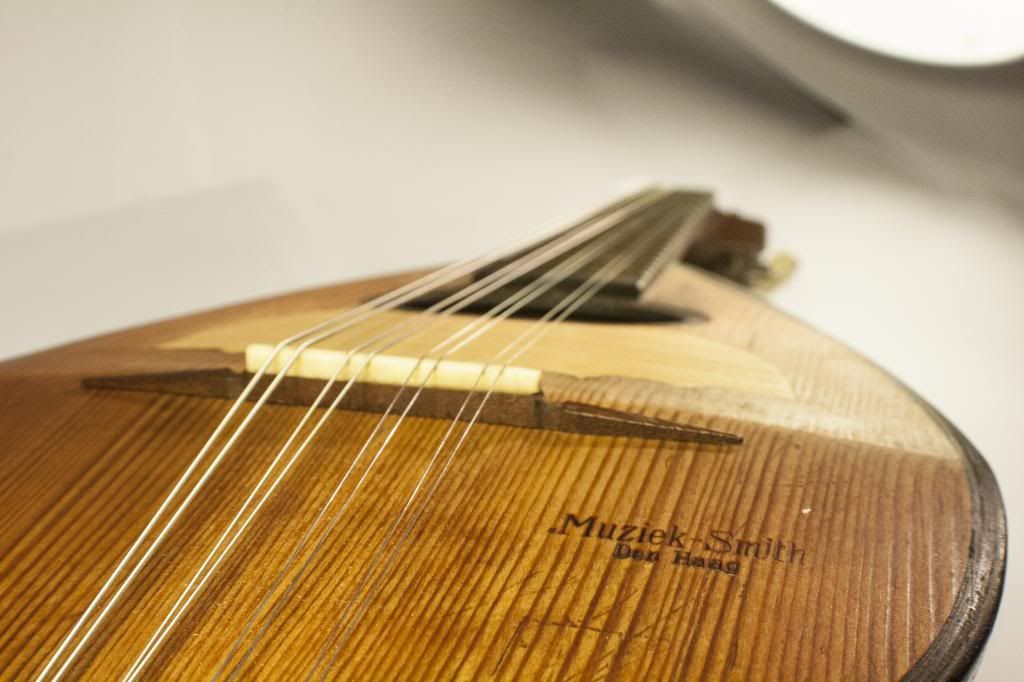
The Pickguard I refitted was from a piece of hard maple veneer ( rock maple). This was the most intricate part of the restoration, as the curves and points on the pickguards design were uneven,
were hard to make a template of, were made of only 0.25mm thick material ( so it would break by the smallest mistake) and that is why I made 6 pickguards in total XD
and then there was the fitting, but........ it was all worth it....
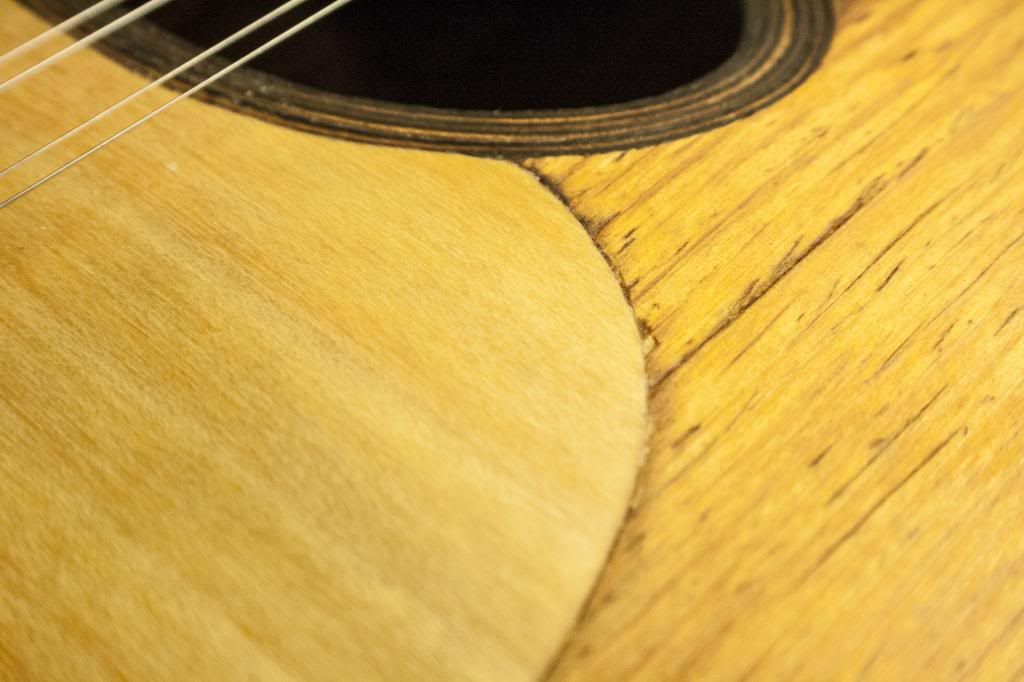
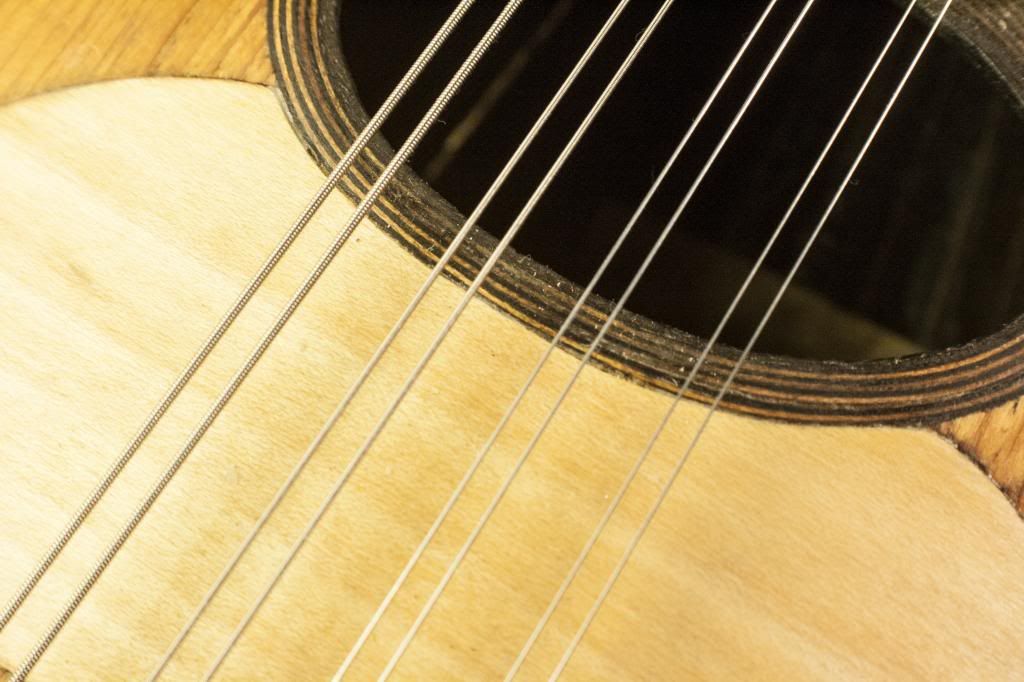
Here you can also see the small inserted wedge that was needed to repair the top of the instrument, as I didnt have the correct collour spruce I used some ash.
and as it is only 3/4 of a mm thick plus in the maze of strings you would only see it if you knew it was there.
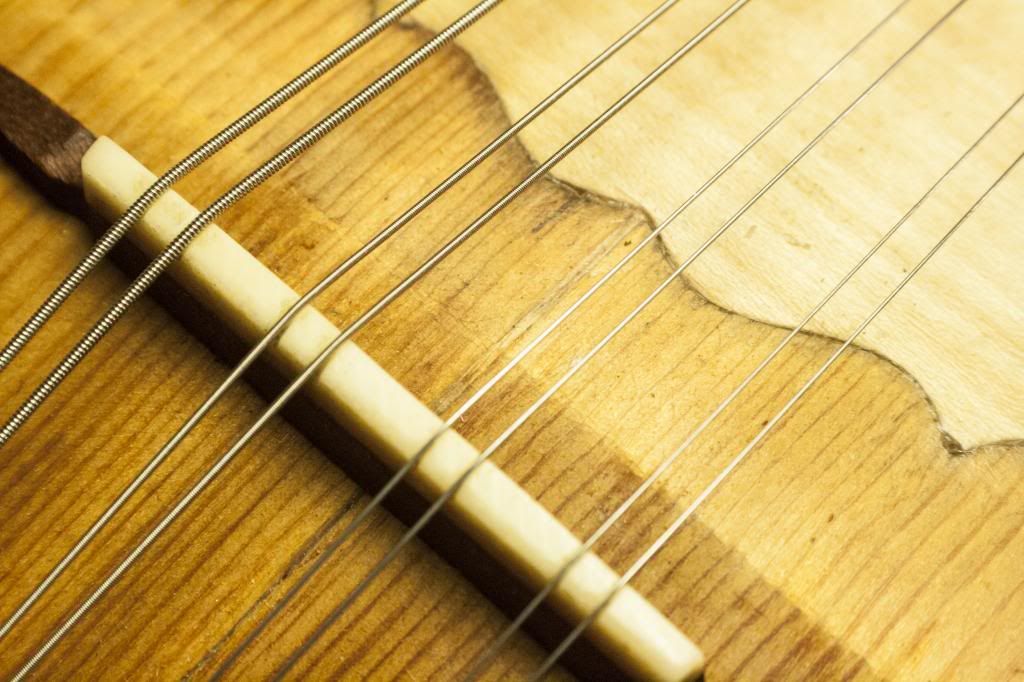
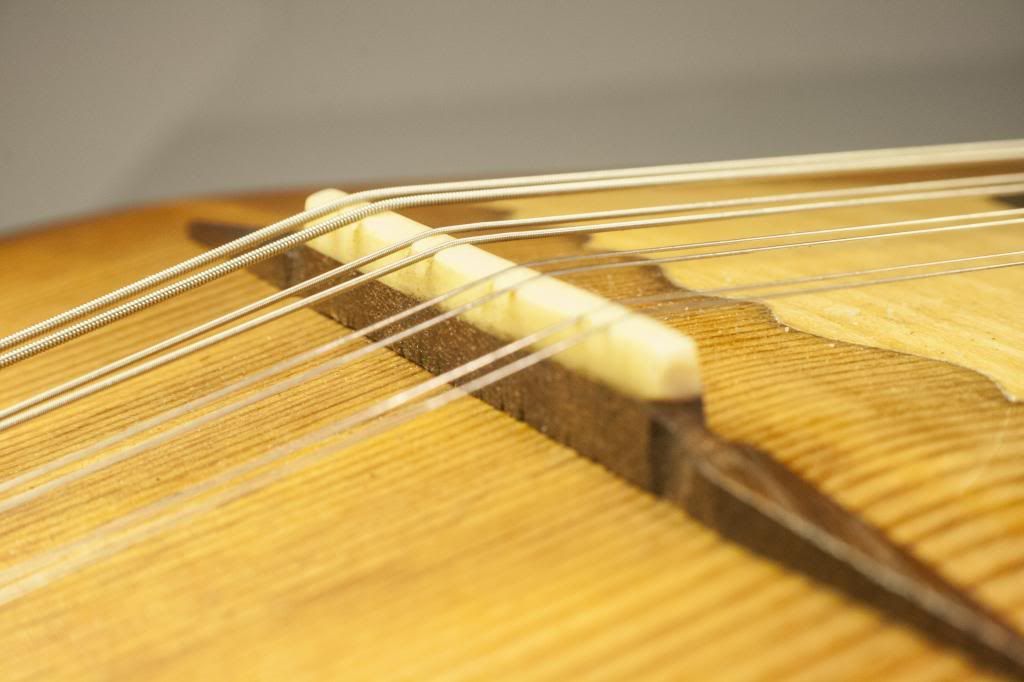
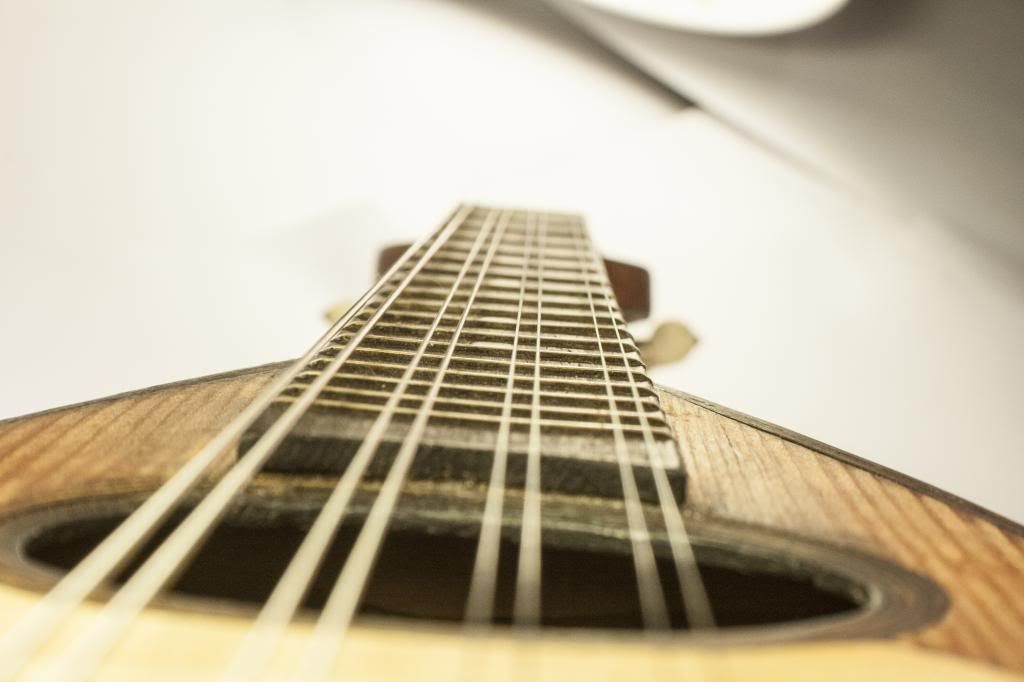
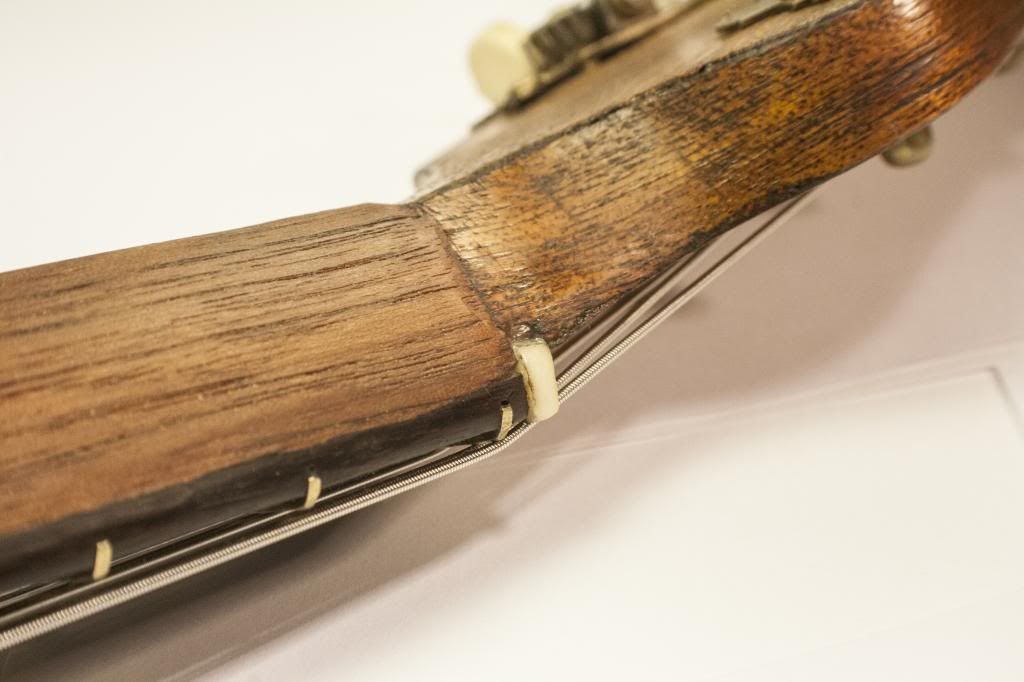
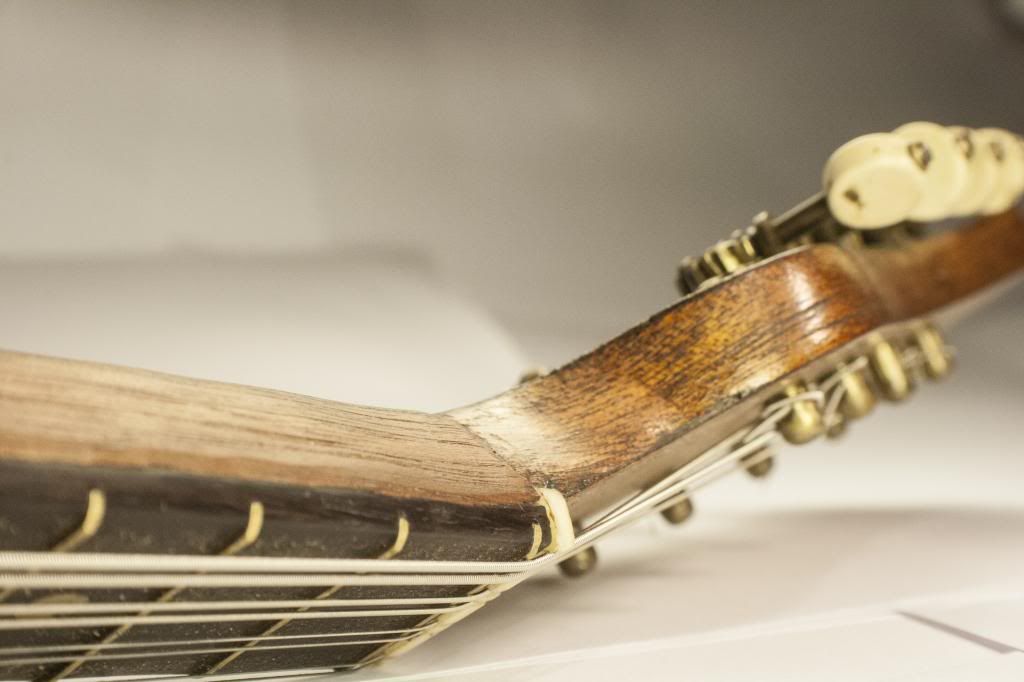
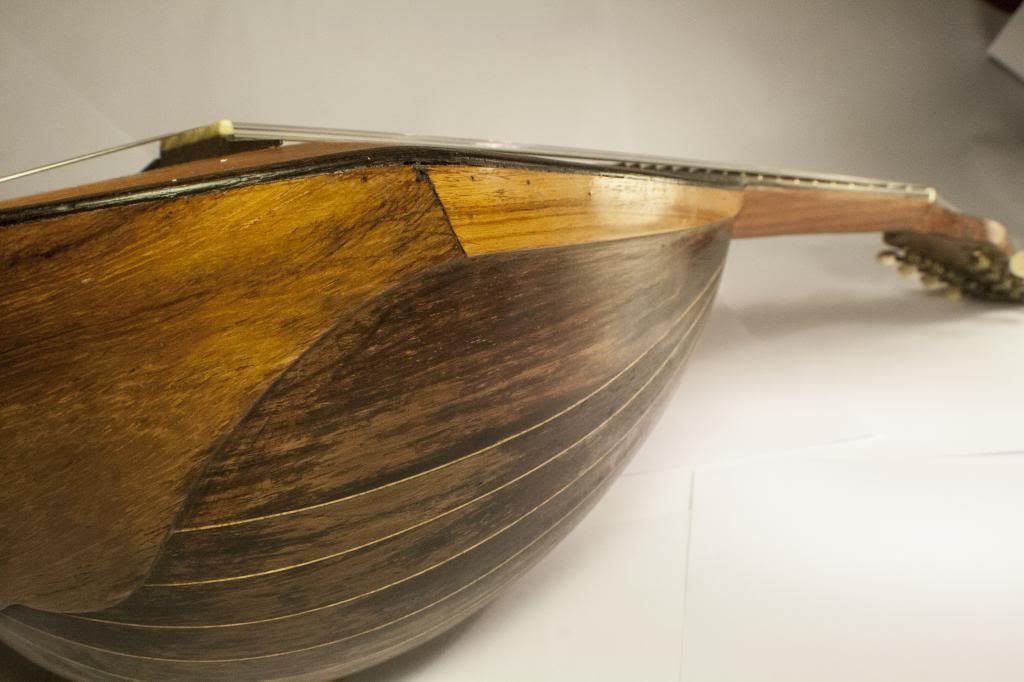
And here are some Close ups of plces I reglued, or refitted with material, keep in mind that the original pinstripes are only a 1/4 of a mm thick.
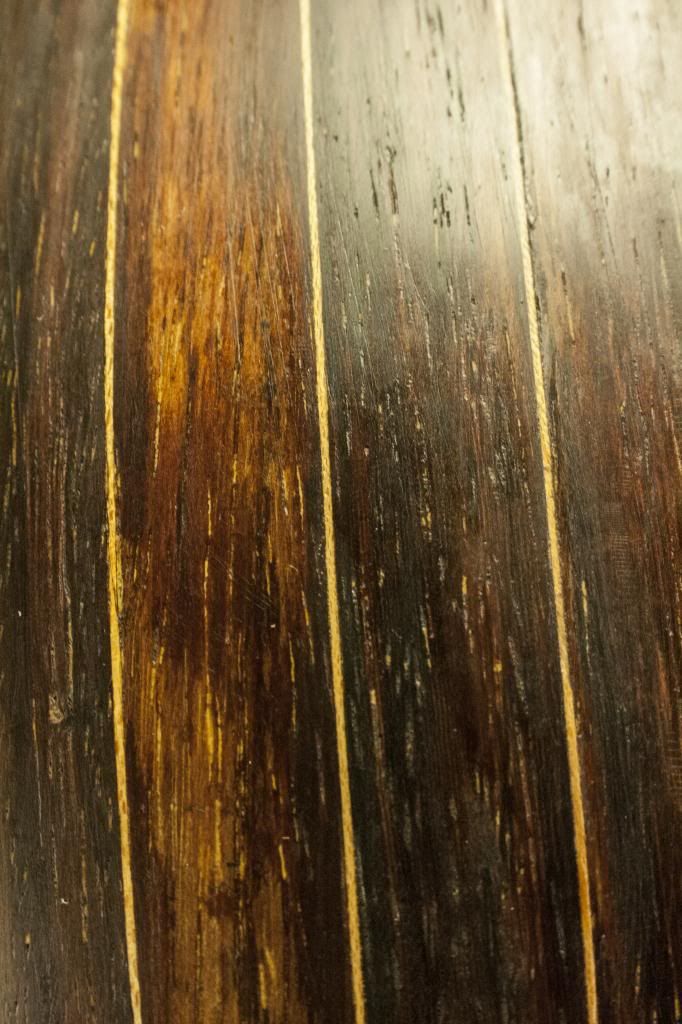
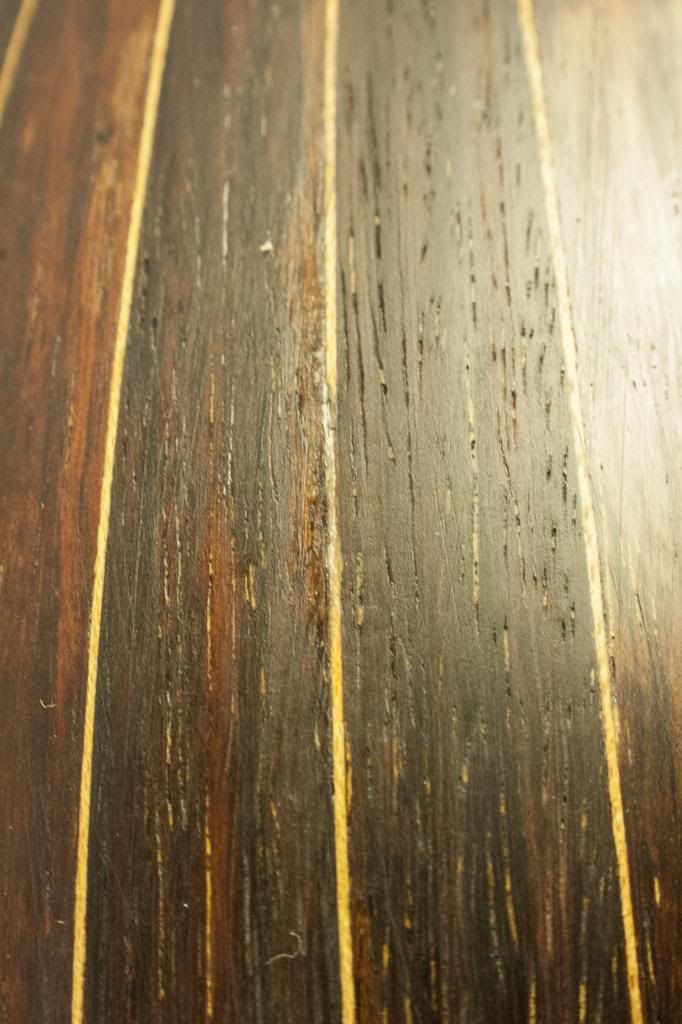
And here some of the piece I had to fill with new wood in order to make it solid again.
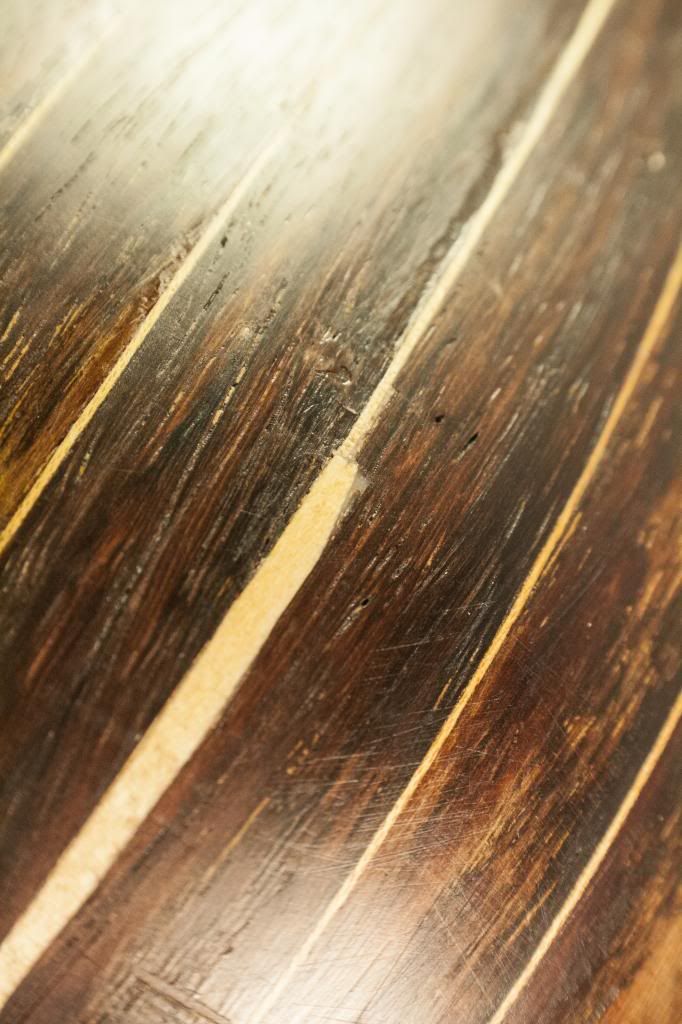
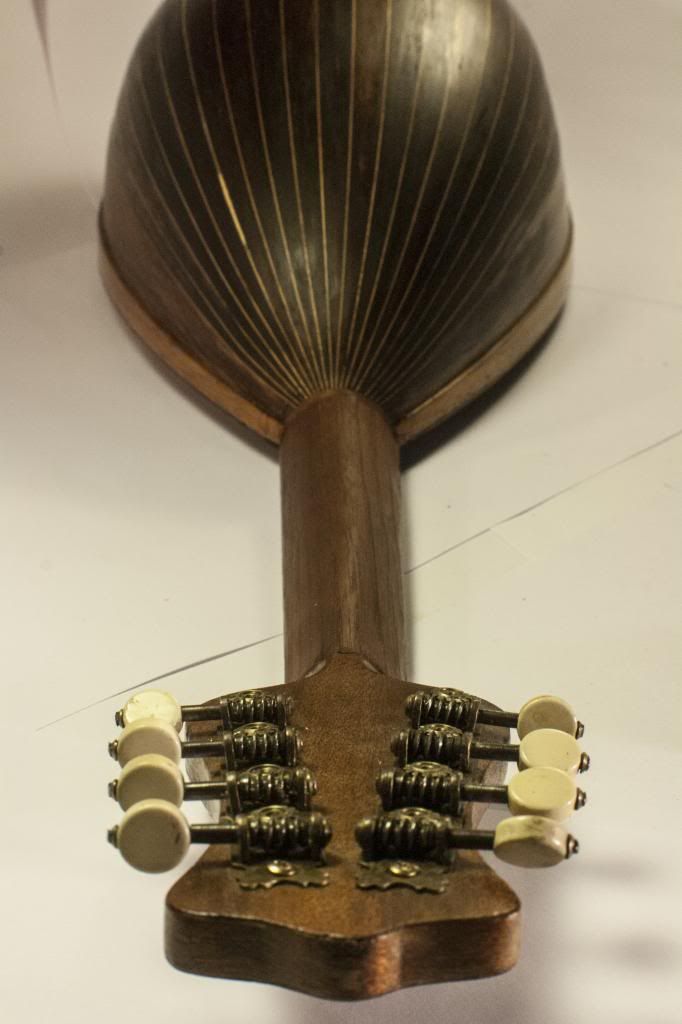
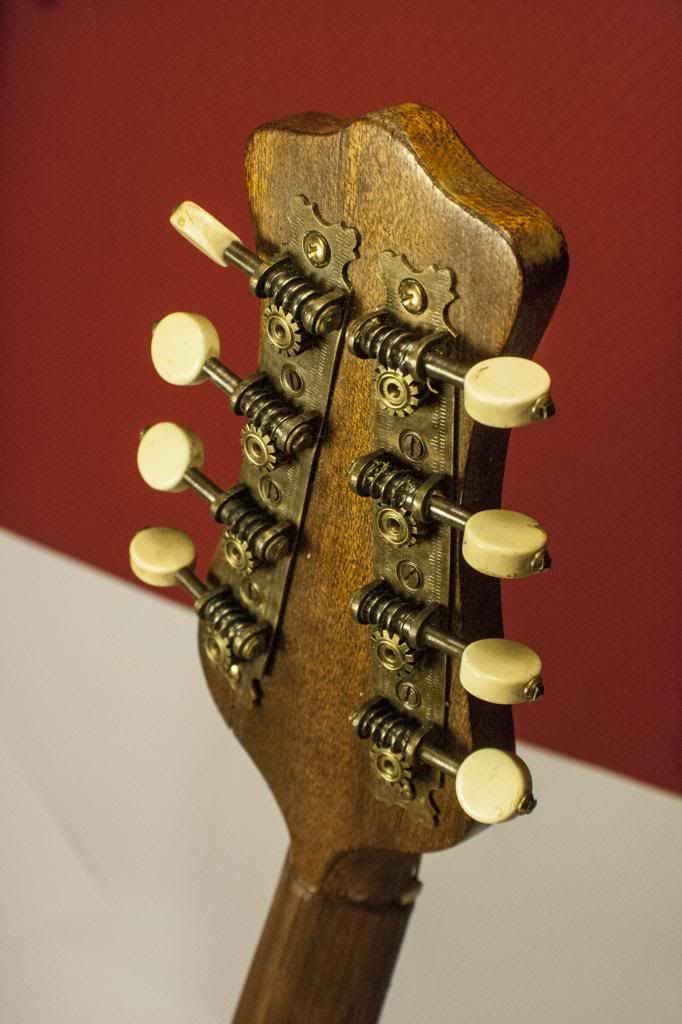
Here we have a picture of the necks backing with a piece of the Veneer it came from before it was dyed.
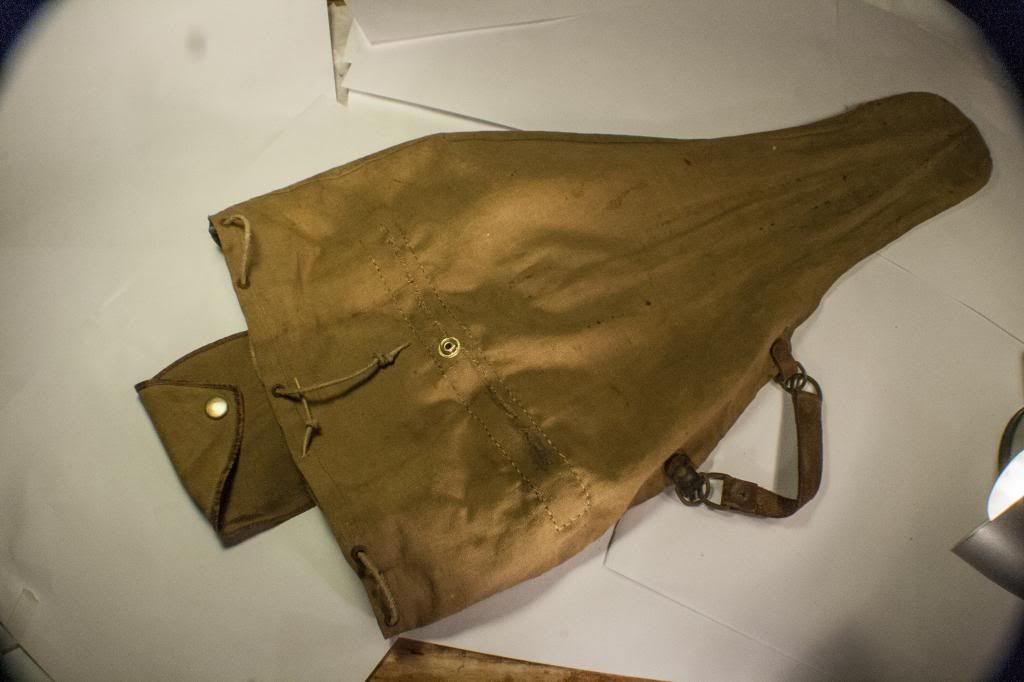
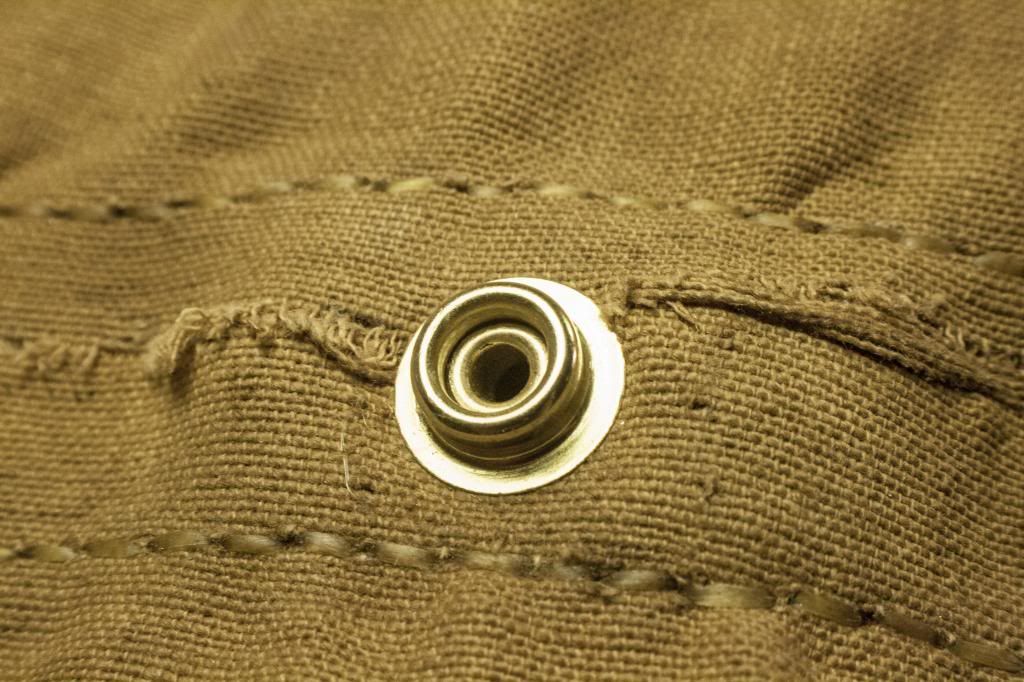
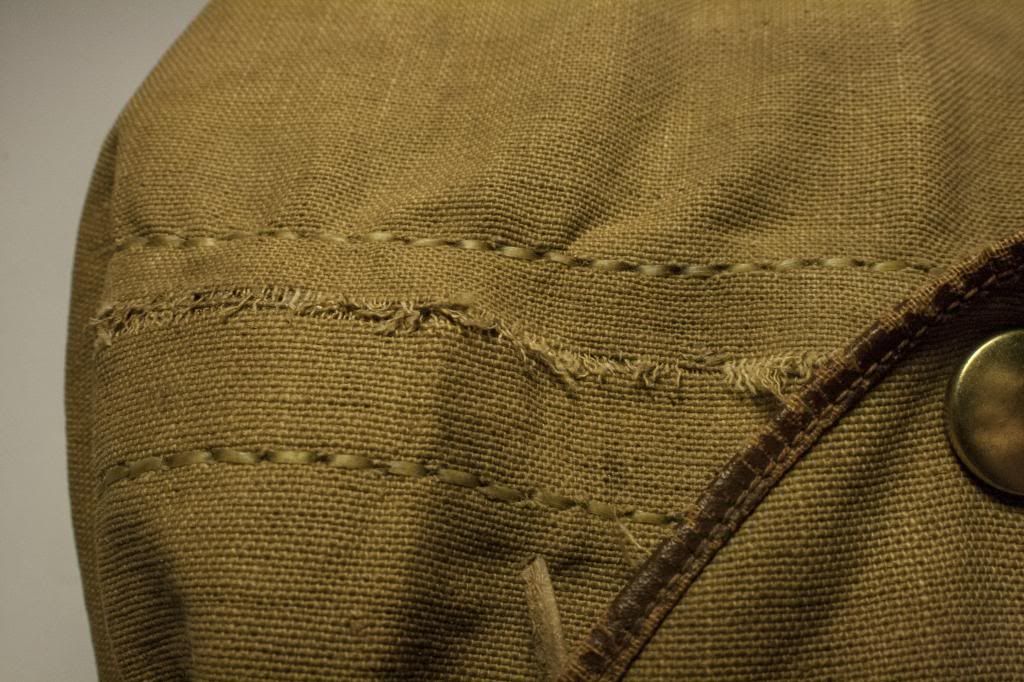
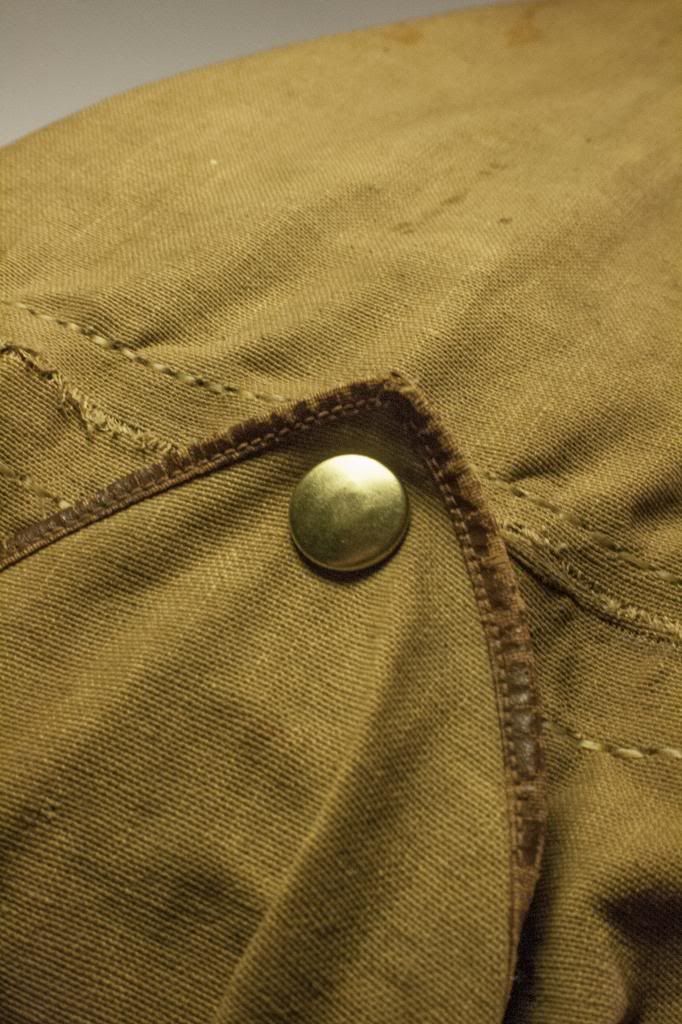
And finally I also restored the original carrying bag, which was pretty much in a state of decomposing itself.
I fitted a leather reinforcement strip along the width of it, fitted a new snap and glued the remaining pieces of fabric to the leather reinforcements.
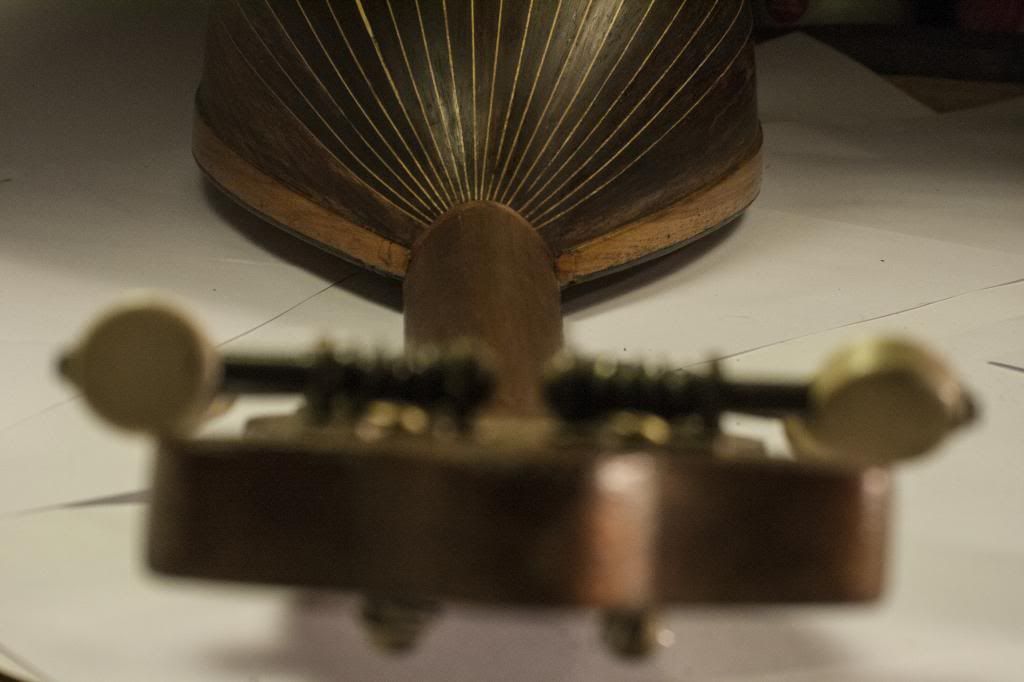
And to finish this all these are some shots of the complete product.
Thank you for sticking with me in this article that went waay overboard, and please excuse me if my grammar wasn't proper today ( it is a bit late and the alcohol was flowing XD).
I know I should have posted this in 3 part segments but here it is, so take you time and read it piece by piece ^^
please leave a comment and tell me what you think of this restoration.
Personally I would have liked to do it with the proper wood species and with the proper tools ( like the neck back from Mahogany Veneer, and routing out the pickguard section with a miniture router)
But you work with the tools that you have and I wasnt planning on spending hundreds on a job I do for free.
and might some of you sharp eyed woodworkers spot it, there is a crack left on the Headstock however this is only on the veneer that covers the structural wood, so inside it is completely solid again ^^.
Might you guys also want a tutorial on how to tune/ calibrate your instrument I could do such a thing.
As it is a entire profession at its own.
but though this thread was long enough as it is ^^
So tell me what you think. What you would like to see.
and of course dont forget to give someone a friendly Hug "very important" ^^
Yours sincerely Ruud
Today after having won the vote ( to be fair it already won the vote yesterday) I have a project that I have been working on for the past 6 months.
The restoration of a Mandolin which was 76 years old and had been lying neglected on an attic room for the past 40 years.
It was the mandolin of my neighbor who is currently 89 Years old and got the Mandolin on his 13th, he eventually stopped playing and stored the Mandolin in his attic,
Which is as some of you know one of the worst places to keep your vintage and delicate instruments.
The instruments glues were dried out so severely that it came apart, seventeen of the twentyone pieces that make up the back broke loose from the design, and 4 of those even warped.
And seeing the fact I didnt have any of the specific molds or original radius of the back I need to hand bend them after steaming, which took a while XD
I will first show you guys some before photo's of the worst damage and then show you some after photo's
So prepare yourself instrument lovers, this is going to be ghastly!


The tear through the headstock, ran through almost 3/4 of the depth, and put the side of the headstock on a 30 degrees angle with the rest of the headstock,
this might sound unimpressive but it is anything but, this instrument was inches from death at this part.


And the tuners were completely filled with rust, thus turned very "crunchy" if they even turned at all.
I carefully went at them with some very fine polishing compounds and clean of any excess rust trying to not mess with the character of the old instrument.

The old pickguard was completely coming apart,

And most of the 21 backpanels were disconnected from eachother or needed serious reglueing in order to make a rigid bowl on the back again,
as the instrument requires a solid bowl on the back to give a feedback of the strings vibrations. And some of these section were even severely warped or even had chips or breaks out of them.


And as a final grand price, the top of the instrument had parted as it consist of 2 piece glued in the centre line of the instrument.
This was very much my work cut out for me, as I did not have any molds nor did I have any comparisons to work to.
I started with unglueing large part of the instrument, clearing away the old hide glue, steaming the warped parts and hand bending them back into the right shape,
and unscrewing all the fittings.
I then straightend the headstock over the course of 3 weeks as to much at once would crack it, and with the help of 38 large rubberbands, 5 Clamps, and 2 weights,
I reglued the center of the top of the instrument. I refitted the fretboard, and reglued it. completely removed the old pickguard and cleaned op the soundhole.
Now it was time.
Time to rip out the paper liner of the instrument and start refitting every single piece of the "bowl" back. this was all done by the still fitted pieces a lot of wedge, rubberbands and many many swearwords ^^
The broke pieces I made small mold cut wedges to shape, jammed them in, glued them flush, and the cut of the excess on both side ( which was a pig of a job to do on the inside ^^)
I then did a rough sand to get everything flush, made a new veneer backing for the neck from walnut which I redyed with Leather Oil Dye. and put everything back together.
and now it is result time photography time!


The Pickguard I refitted was from a piece of hard maple veneer ( rock maple). This was the most intricate part of the restoration, as the curves and points on the pickguards design were uneven,
were hard to make a template of, were made of only 0.25mm thick material ( so it would break by the smallest mistake) and that is why I made 6 pickguards in total XD
and then there was the fitting, but........ it was all worth it....


Here you can also see the small inserted wedge that was needed to repair the top of the instrument, as I didnt have the correct collour spruce I used some ash.
and as it is only 3/4 of a mm thick plus in the maze of strings you would only see it if you knew it was there.


And here are some Close ups of plces I reglued, or refitted with material, keep in mind that the original pinstripes are only a 1/4 of a mm thick.


And here some of the piece I had to fill with new wood in order to make it solid again.


Here we have a picture of the necks backing with a piece of the Veneer it came from before it was dyed.

And finally I also restored the original carrying bag, which was pretty much in a state of decomposing itself.
I fitted a leather reinforcement strip along the width of it, fitted a new snap and glued the remaining pieces of fabric to the leather reinforcements.


And to finish this all these are some shots of the complete product.


Thank you for sticking with me in this article that went waay overboard, and please excuse me if my grammar wasn't proper today ( it is a bit late and the alcohol was flowing XD).
I know I should have posted this in 3 part segments but here it is, so take you time and read it piece by piece ^^
please leave a comment and tell me what you think of this restoration.
Personally I would have liked to do it with the proper wood species and with the proper tools ( like the neck back from Mahogany Veneer, and routing out the pickguard section with a miniture router)
But you work with the tools that you have and I wasnt planning on spending hundreds on a job I do for free.
and might some of you sharp eyed woodworkers spot it, there is a crack left on the Headstock however this is only on the veneer that covers the structural wood, so inside it is completely solid again ^^.
Might you guys also want a tutorial on how to tune/ calibrate your instrument I could do such a thing.
As it is a entire profession at its own.
but though this thread was long enough as it is ^^
So tell me what you think. What you would like to see.
and of course dont forget to give someone a friendly Hug "very important" ^^
Yours sincerely Ruud


