Fitting a stick tang knife handle

I’ll leave the actual making and shaping of a knife handle for another time, it’s just a simple matter of removing anything that isn’t handle
This is all about fitting the blade to the handle with simple tools. The same methods can be applied to tangs that go all of the
I rarely fit handles to sharp blades (preferring to grind edges on at the very end), but when I have to the edges are well taped and I only hold the back of the blade just in case.
The simplest handle is a single piece of material with a partial tang. Most of the time we are likely to use a nice piece of wood, some woods being easier to fit and shape than others. Some of the exotic hardwoods are tricky and downright nasty to work with. I only use native hardwoods these days (partly that’s an ethical choice) so I’ll be using a nice piece of oak today.
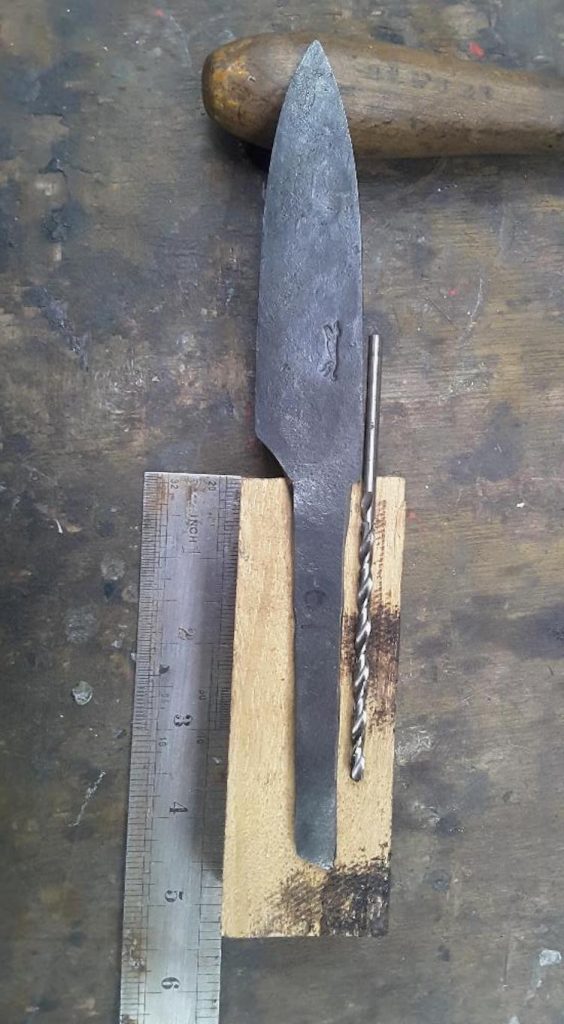
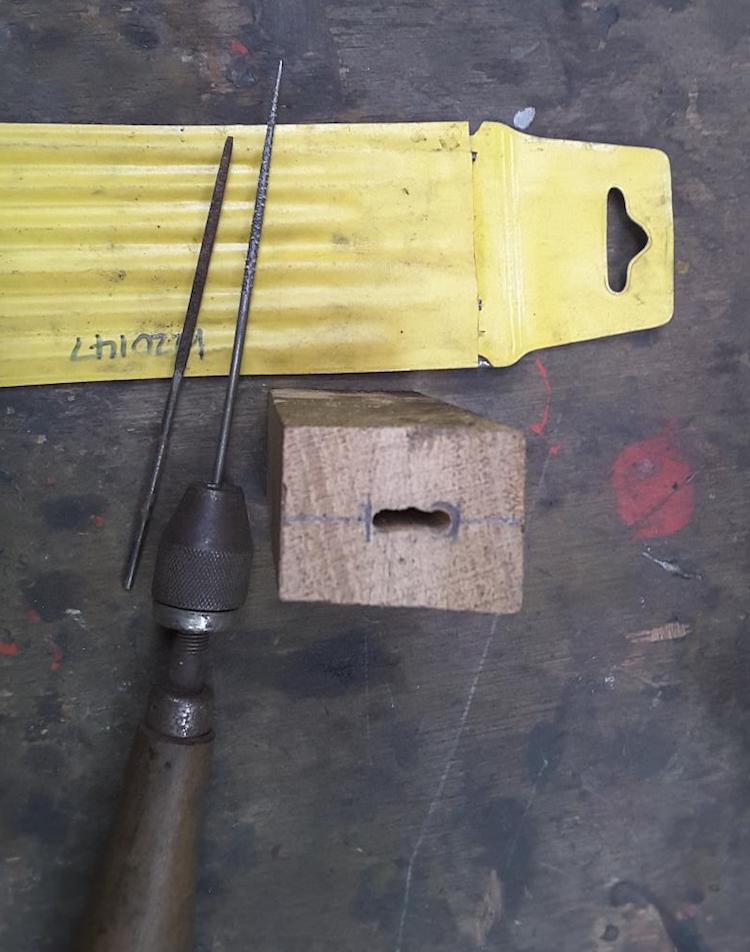
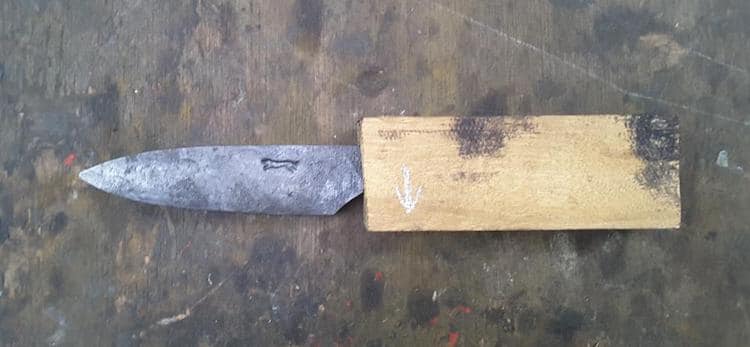
First off, I mark where I want the blade to sit within the block. I always use a piece of wood that is larger than I need just in case I have any surprises in the fitting (such as drilling the hole at the wrong angle).
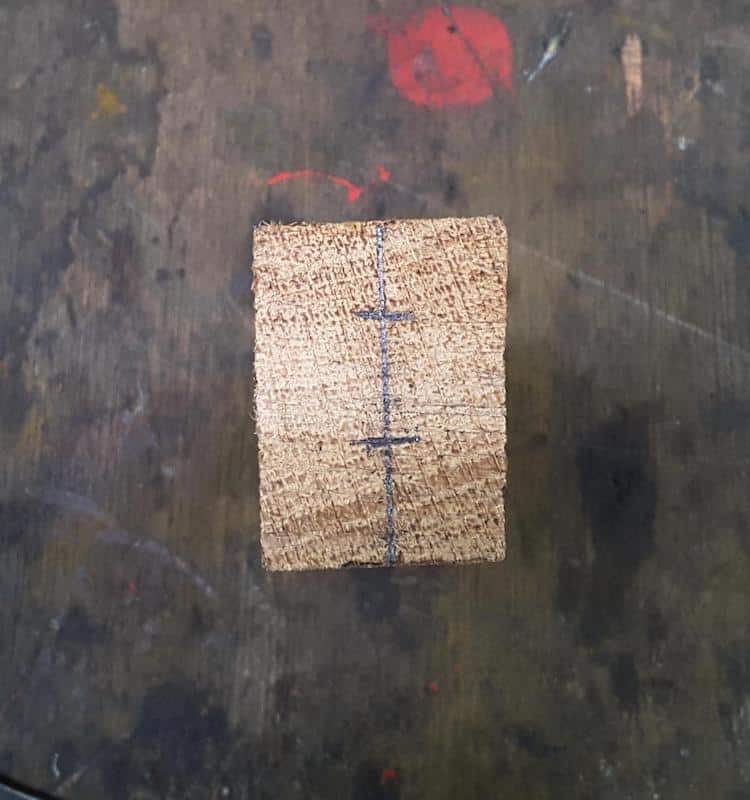
The first line is the alignment of the blade. Looking for best fit with grain orientation (largely aesthetic), avoiding defects in the wood and to best fit the final shape of the handle. The next pair of lines illustrate where the blade will sit, the lines are actually marked a little closer together than the maximum width of the tang.
Allowing enough material below the tang to allow for guards underneath and above the tang to ensure strength (and to allow for errors in fitting).
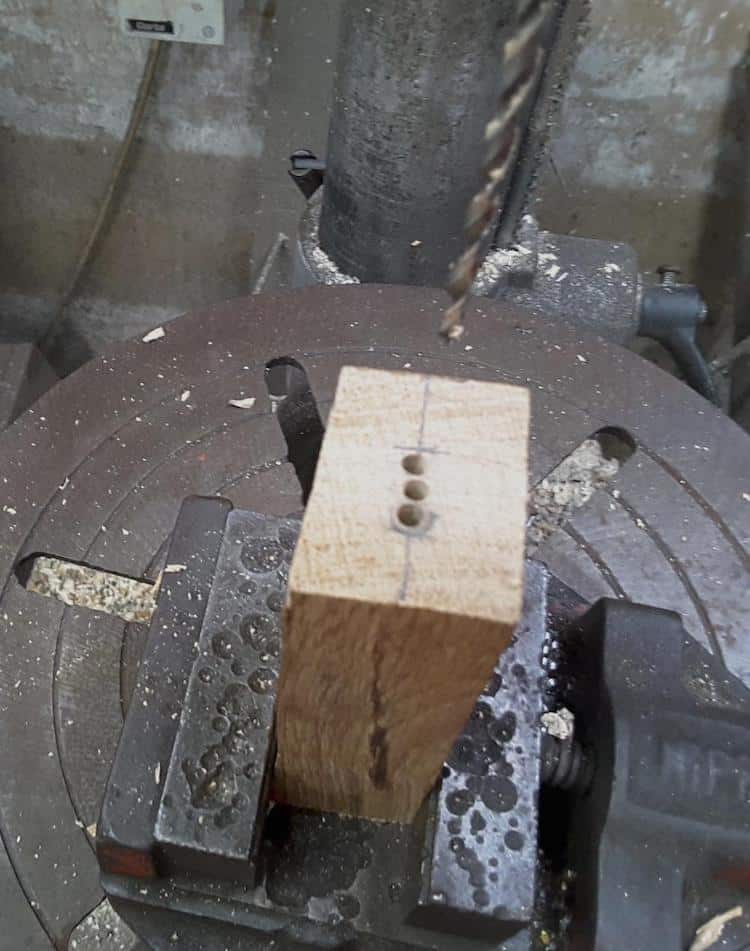
It’s a good idea to make centre marks with a sharp point to avoid the drill wandering. I use a drill bit that is slightly smaller in diameter than the thickness of the tang, so the majority of mine are drilled with a 4mm or 3mm drill. If I can, I will drill 3 holes in a line, but if the tang is too narrow, then a single hole in the centre has to do.
If 3 holes do fit (even if it’s one 4mm and two 3mm) between the lines, then I drill the middle hole first to be sure of at least one hole in the right place.
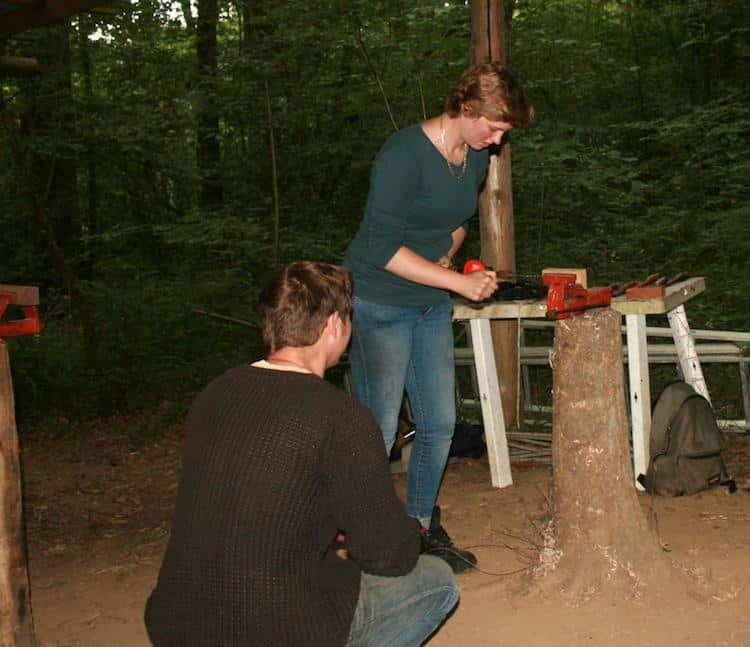
A drill press is ideal, but I you don’t have one then a hand drill works just as well. I have better success with a hand twist drill than an electric hand drill, but each to their own. The key is a sharp drill and a steady hand. Sight along the handle and be sure that the drill bit is pointing exactly in the line of the tang (I often get students to spot for each other doing this), once you’ve started drilling don’t try changing direction as the bit may break.
Start drilling and if the bit begins to stick as you progress, keep the drill turning (in the same direction) and withdraw to clear the waste before continuing.
Long series drills can be found easily enough and the 4mm drill is plenty long enough for a partial tang knife. If you need to drill all the way through and can’t reach, then good luck drilling form both sides to meet in the middle! I often angle the outside two holes to meet the middle one, but having them running parallel is fine (I just like to be flash). I drill the holes a little deeper than the length of the tang to give space for excess glue, air bubbles, etc. I cut the tang down to the length of the fluting if it’s longer than it needs to be.
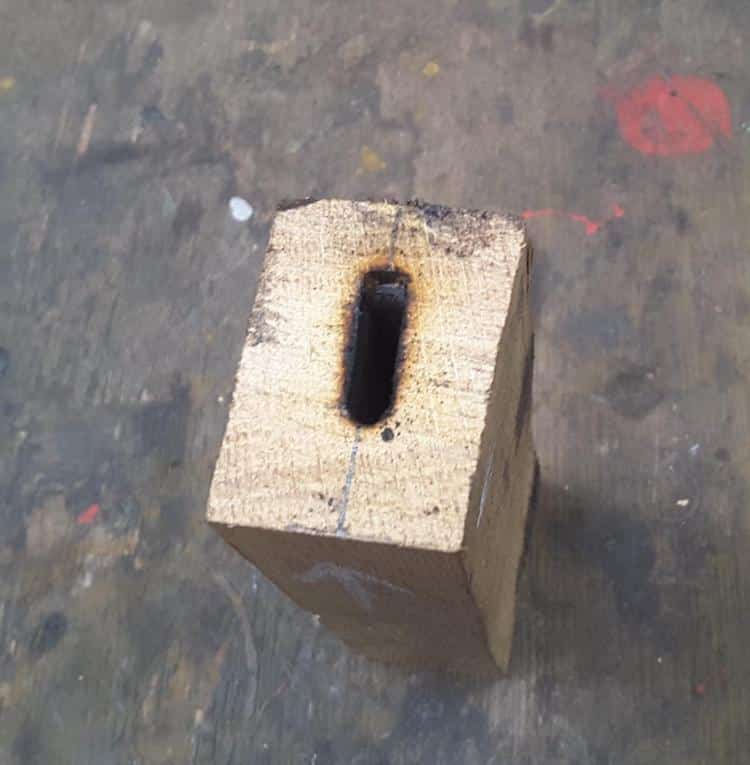
Some people open the tang hole up with a small rasp, coping saw/jigsaw blade, chisel or broach, but I prefer to burn the tang in. Burning in is by far the quickest and gives the closest fit. Some materials don’t lend themselves to burning, such as antler, horn and synthetics. That said, you can often do a little final fitting with heat if you are careful.
The more wood that can be removed before burning, then the quicker and cleaner the result (and the less chance of splitting the wood). I use tungsten grit rasps or needle rasps (sold as ‘wax files’) for that.
Be careful not to open the slot up beyond the width and thickness of the tang where it enters the handle.
I use a torch to heat the tang as it gives a precise fit (with practice) and is nice and quick.
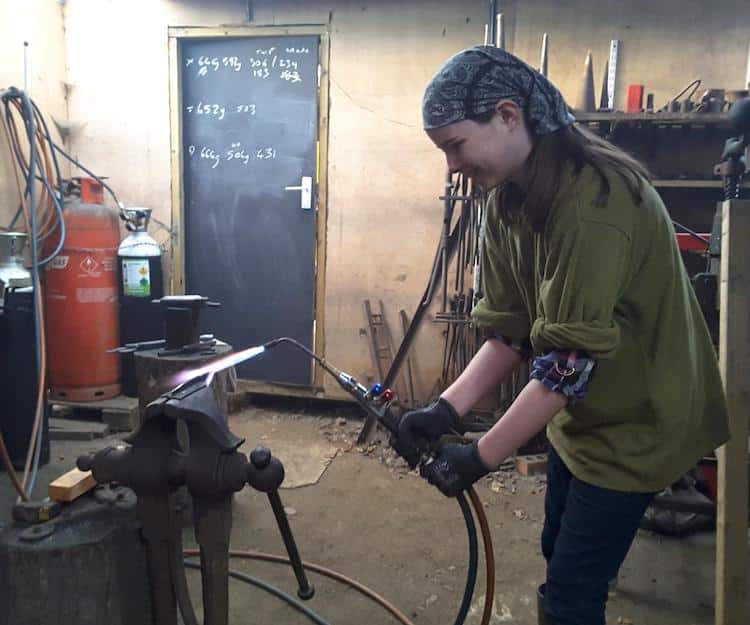
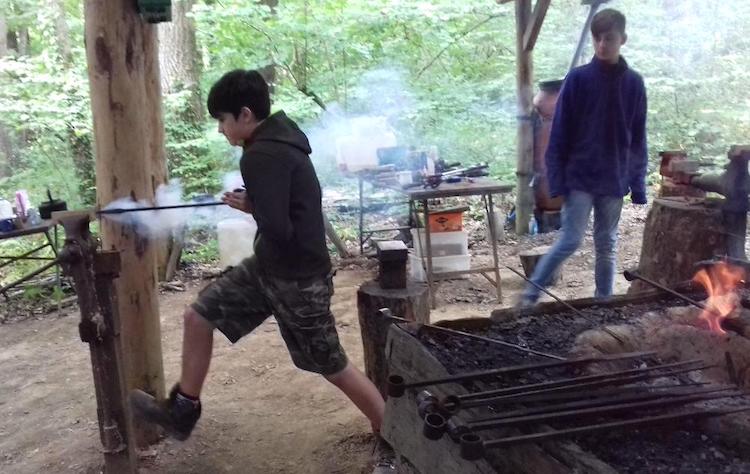
When I teach people to use the most basic tools, I have some bars of mild steel forged into generic tang shapes. The bars are heated in the campfire and pushed into the hole until the tang fits to within a few mm of home. In either case be sure to get everything straight and lined up as you burn into the wood. If I’m using the actual tang, then I clamp the blade VERY securely in a vice with aluminium soft jaws (to protect from scratches) with the tang and a few mm of the blade sticking out.
The vice acts as a heatsink and prevents the temper being drawn from the blade. With the heated bars, they can be wiggled about to gradually open the hole to size.
In either case, the metal doesn’t need to be all that hot to burn the hole open. Anything over a few hundred degrees will work, though obviously hotter is quicker. The downside to red or orange heat is that the wood will be charred to a greater depth around the hole, which can sometimes show through in the finished handle and can cause splitting or the opening to be large and ugly.
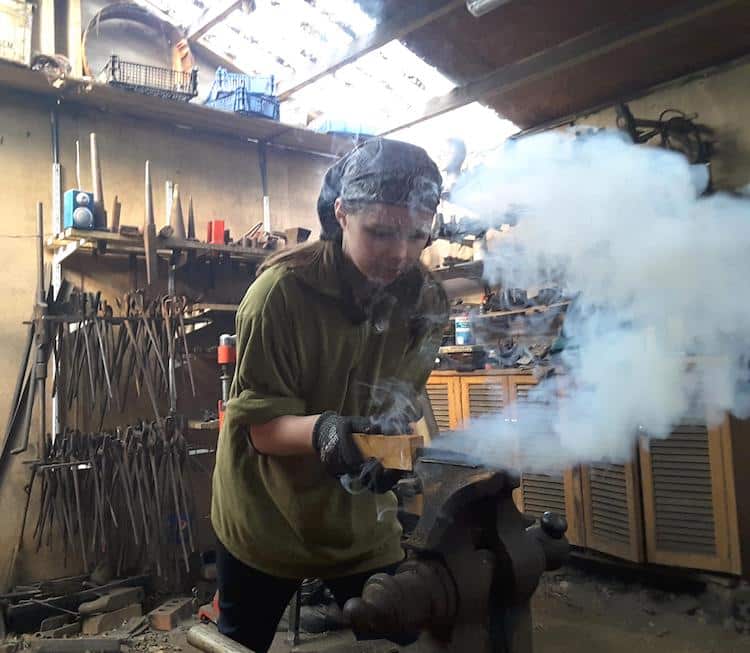
An orange hot tang/bar can also bend as it goes in, which results in a really big hole and/or poor alignment of the blade.
I normally start hot (bright red, almost orange) and then cooler (just the peacocks of tempering) as I get close to the end, giving me the best combination of speed and control for a good clean fit. The key is to push the wood and metal together HARD until they don’t move and then reheat. If progress stalls, clean out the charcoal and wood by running the drill down the hole.
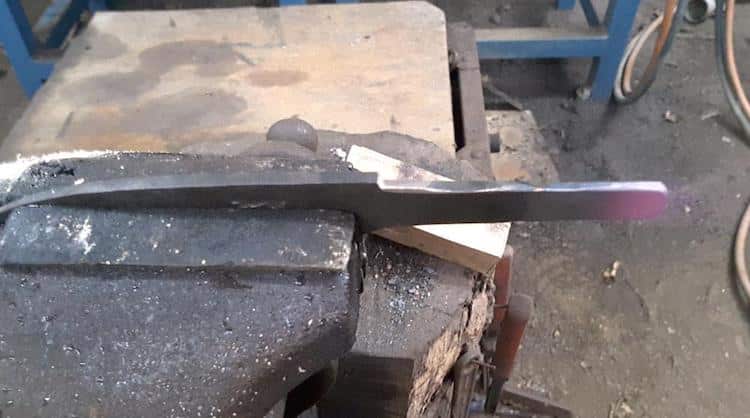
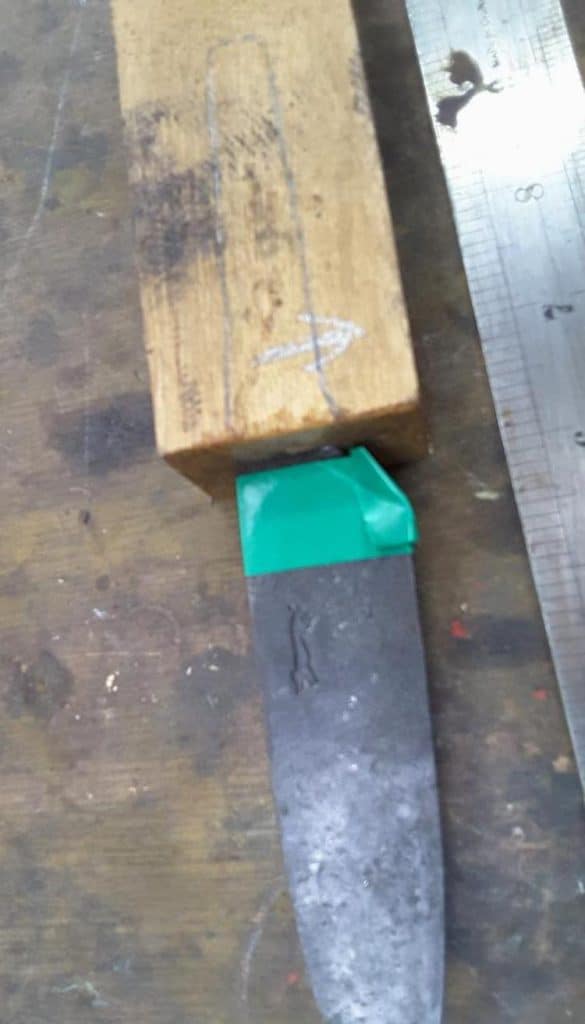
Don’t be tempted to drive the wood on with a hammer: it is quite likely to split! I do sometimes tap the last few mm home with a light hammer, but if it doesn’t move then I reheat and try again. I like to get the blade fitted so that the shoulders of the tang-blade transition are recessed into the wood by a couple of mm. This maintains a tidy fit and doesn’t leave any tang exposed when finished.
Once the tang is seated, I true up the front face of the block. With the blade in place, I check that the front of the block is perpendicular to the blade when viewed from the blade spine and edge. I can also adjust the angle of the front surface of the handle, so if I want the front of the handle rounded, sloping back or forth then this is the time.
The easiest way to adjust the shape here is with a belt or disc sander, but you can equally just use a good rasp. If using a rasp, I highly recommend a Shinto saw rasp. They look like double sided saw blades riveted together into a lattice, one side coarse and the other fine. These are also great for shaping the handle later too.
When I’m happy with the angle of dangle, I sand the front face to finished (mostly 400-600grit). A resist of beeswax applied to the front surface of the wood and a wrap of electrical tape to the blade help with removing dried epoxy. I clean out any charcoal and wax with a needle rasp or a scraper made from a bit of coat hanger, leaving only lightly charged wood behind.
It’s important to remove any loose material without opening the hole any more than necessary. Blow/tap the dust out and it’s ready for gluing.
The tang is cleaned of any charred wood and hammerscale with some old abrasive paper and then degreased before gluing.
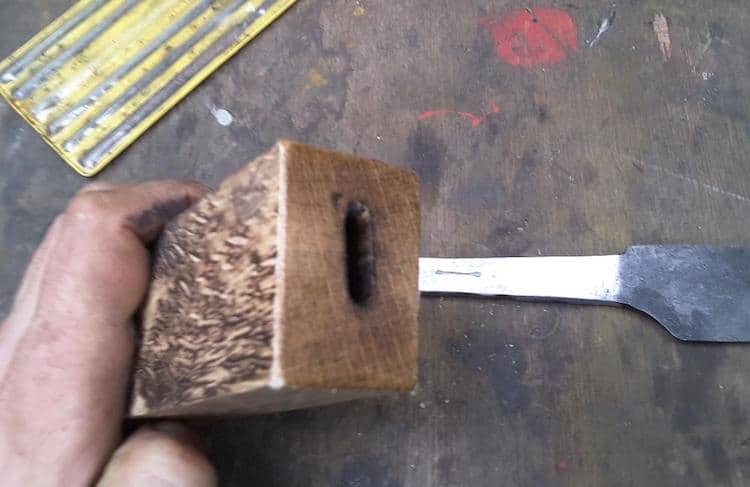
You’ll notice that I have drawn arrows on the handle, these help me make sure that I don’t fit the handle on the wrong way round! I also get students to draw where the tang fits, to avoid exposing it when they shape the handle later.

Time for gluing.
For a stick tang, the type of glue is not so important as with a full tang as you are extremely unlikely to be able to pull the blade out. I’ve got one workshop knife held together with hide glue (just gelatine and water), that has been abused for over a decade and shows no sign of loosening.
Most people use epoxy but I’ve heard of people using polyurethane or even super glue (the least appropriate as it’s very brittle), heck I’ve even used melted plastic bags as hot melt glue! I normally use a toughened epoxy that takes 8 hours to set, massively over kill but I like it.
Assuming that you’re using epoxy, go for slow setting (hours not minutes) rather than a fast setting (I count 30mins as fast and 5mins as very fast). Not only do they give you more working time (less stressful), but they are more likely to fill the voids as air bubbles have time to escape the handle and the cured glue is always tougher (less brittle as well as better adhesion) than the faster setting epoxies.
The glue should be thoroughly mixed and fed into the hole until no more will go in, the tang is gently pushed in until a pop is heard (air bubble). I pull the blade out until I see bare metal, spread more glue onto those bits and push the blade back in; if another bubble pops then I repeat. When the blade goes all the way in, I wait few moments to see if it lifts out of the hole (another bubble); if it does then I hold it in place until the bubble bursts. I push the handle on hard with the point of the blade braced against a hard surface or clamped in a vice.
Pushing it on hard makes sure that the blade goes all the way on straight and doesn’t bounce out or split the wood, as can happen if hammered on.
If the blade is polished and a perfect fit, then I clean the excess glue off with a tissue. Most of the time I leave a blob of glue around the blade so that air bubbles are automatically filled rather than leaving an ugly hole to be filled later. Stand the knife up in a safe corner and leave to dry.

Once dry, the glue can be cleaned off by slipping a sharp knife or chisel (I have one made of brass for this, but micarta, boxwood, etc also work) behind the glue. The tape and wax make it easy to remove the bulk of the glue, leaving only a small amount to trim against the blade.
The blades in this article are my normal forged finished ones and so the area of tang/blade that is right at the opening is triangular rather than rectangular as the tang (and thus hole) is. I add black pigment to the glue, so when I trim it off, the hole matches the blade finish and doesn’t look awful.
Obviously, a rectangular tang and a rectangular blade (one with a ricasso), or triangular blade and triangular tang will leave no gap and can be cleaned up whilst still wet with a tissue and a little acetone.
If it’s not a perfect fit and you clean it up, then the epoxy will often sink below the surface of the wood.
Now all that is left is to shape the handle!
Dave Budd is an accomplished knife maker based in Devon who’s happy to share his knowledge and skills. Have a look on www.davebudd.comfor more information and to see the great stuff he makes.