Here is the next instalment of the Ecozoom stove review, the first part can be found here: Unpacking the Ecozoom Versa.
The plan was to get this out into the woods this week but decided we’d use it to feed the family, so Jenna became the designated chief in charge of getting the stove going and cooking on it.
Now I didn’t pick Jenna to do it because i’m lazy but rather I thought that it would be a great test to see how easy it is to get the Ecozoom Versa lit and going, she and a friend went off looking for sticks and came back with an armful, most of which seemed ok, they were found hanging in bushes or off downed branches etc so nothing off of the floor, the girls knew they’d get a fire going with these sticks, newspaper and a bit of maya stick we also had on hand.

It was surprisingly hard this first time to get it lit, they did well to create some kindling and tinder and they got it lit with the maya stick, then it went out, then out again and again, it seemed that the fire source wasn’t lasting long enough to get the too damp materials lit in such a small space, when it did light it burned out quickly, a mistake she made was to add newspaper newspaper to it through the top hole, this flared up, burned bright and then smothered the fire with the ash left.
In the end she pulled most of it out of the stove and started again and went to the woodshed and got 2 year dried kindling and larger sticks, got some shavings and some more maya stick and set to, this time with more success because the fuel caught light quicker and easier and she was able to take more time in managing the fire. She got it going with a few good breaths into the bottom chamber which then flowed up under the fire itself.

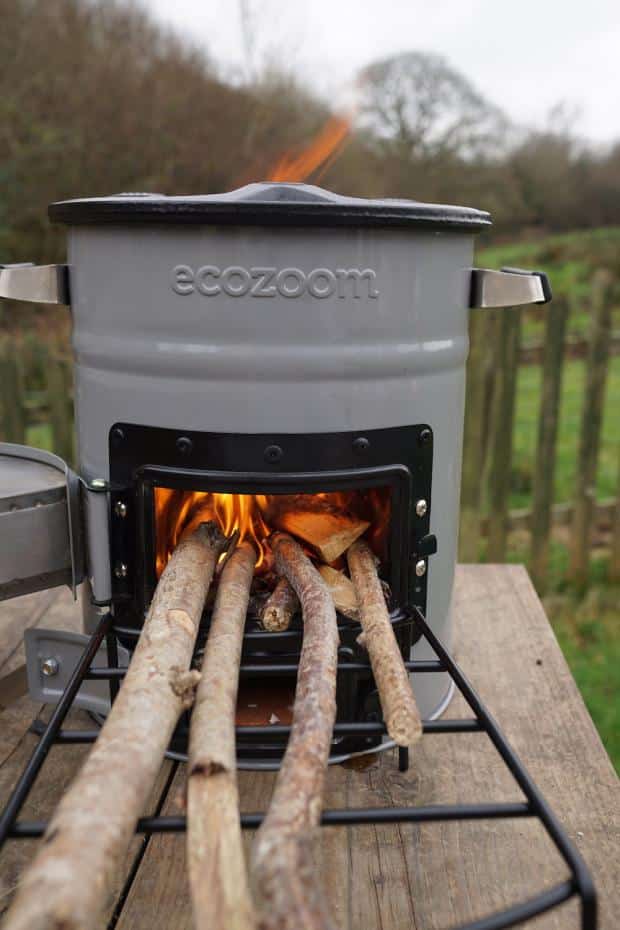
It’s all alight and burning well, now it’s a case of getting used to feeding the sticks in to keep the fire going, this takes some juggling as a bent stick might lay too close to the next one and stifle the fire, or sit up in the air and not be close enough, you also have to be careful you don’t get it too crowded or performance goes down a bit. In the picture below the stick on the left is a bit less than an inch, or about 20mm thick so that gives you an idea about the other sticks, it burned well with 3 or 4 of the 20mm sicks placed nicely next to each other (with a little gap) and you could put thinner ones on top as well to create a bigger fire in the chamber.
The wood burned through quite quickly so we needed to feed the sticks in quite regularly to sustain a good temperature for the wok. A good thing about using the seasoned wood was that it burned hot and clean.
We didn’t play with the bottom door to regulate airflow, we’ll do that another time, the stove was situated with the doors away from the wind, it was cutting across from the back for the most part so the fire was creating it’s own draw.

Wok on top, it’s a fair sized wok and it fitted perfectly, the 3 raised ribs on the cast iron top allowed the curve of the wok to sit in very securely, it was great for Jenna as the wok couldn’t just slide off of the stove top. The fire and heat were evenly displaced on the bottom of the wok and it got up to temperature very quickly.
There’s something very satisfying seeing those flames coming out the top of the stove and licking away at the pan on top, you just know it’s all working as it should.
Here’s a link to the Unpacking the Versa Stove article
There’s a discount available for this stove in the Full Members area.If you’ve had any experience with this stove then please leave your comments and if you want to read more about kit in general please visit the Kit section of Bushcraft UK

Leave A Comment
You must be logged in to post a comment.