The Tinderbox – Part 1

Making up and using a tinderbox
My two favourite subjects are history and science. If you make a Venn diagram with both, the tinderbox could happily sit in the middle.
It is great to have all the modern convenience of a Ferro rod, a lighter, or even a box of matches, but if you want to connect with history and have some fun doing it, making up your own tinderbox is a fantastic exercise. It is also very sustainable, as you are not using Petro chemicals or plastic from wrappers of fire lighters and packaging.
Safety first
A note of caution – We are dealing with fire here and some accelerants that can cause nasty burns.
Please enjoy fire responsibly. Make sure you make provision for burns in your first aid kit.
Now on to the fun bits.
A selection of tins
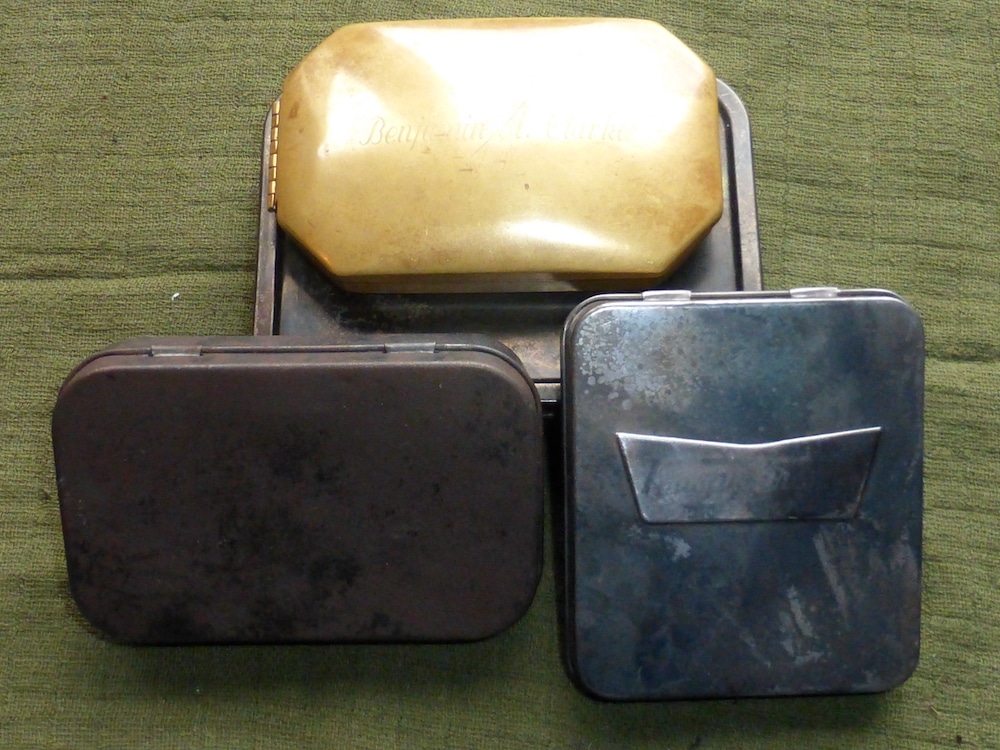
Choosing a tin
When looking for a suitable tin to use as your tinderbox, there are a couple of things to consider. You can use mints tins such as Altoids mints or Krispy Kreme doughnuts mints. Tobacco tins come in lots of cool sizes and shapes, or if you want to invest a bit more, then historical reproduction brass boxes are available.
1. Your tin needs to be made of metal, either steel or brass. It is going to get hot on a regular basis so using plastic, wood, or even thin aluminium just won’t cut it when being pulled in and out of a campfire.
2. Other than the larger boxes used at home that would sit on the mantelpiece, most tinderboxes where pocket-sized so you could have a convenient way of carrying your fire-making kit with you.
3. When using your tinder box to make char cloth, you will need to have either a tin with hinges (so it already has holes) or you will have to puncture a hole in it to release the hot gases that are produced.
4. Lastly, having a tin with hinges can be helpful, from having the previously mentioned holes but mostly for being able to close the container with one hand easily.
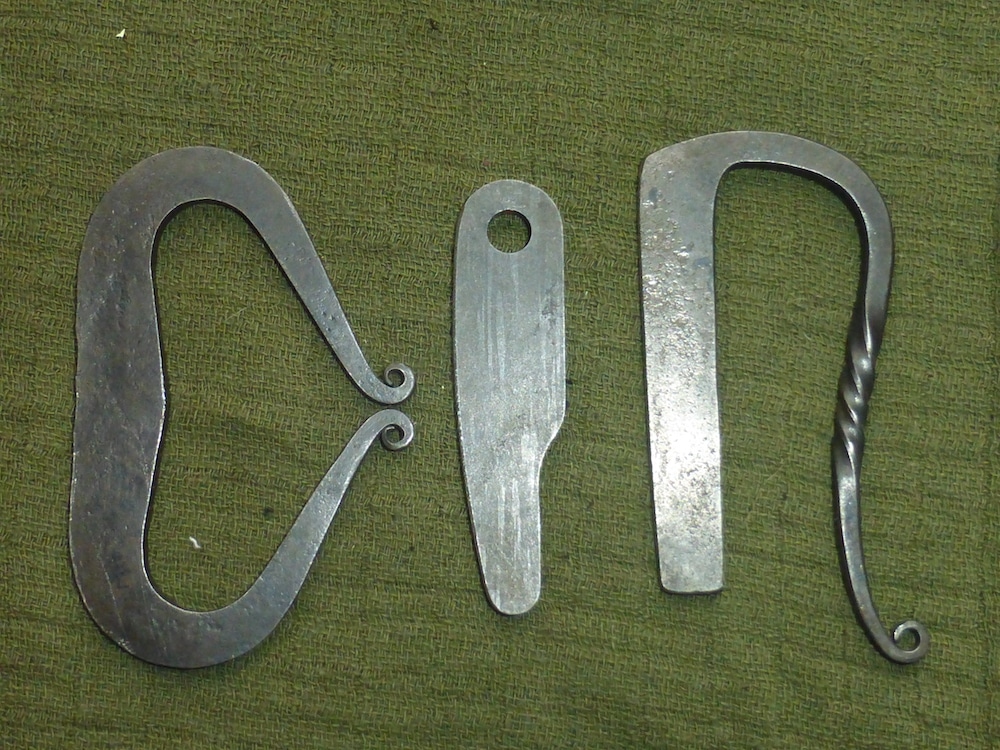
A selection of steels
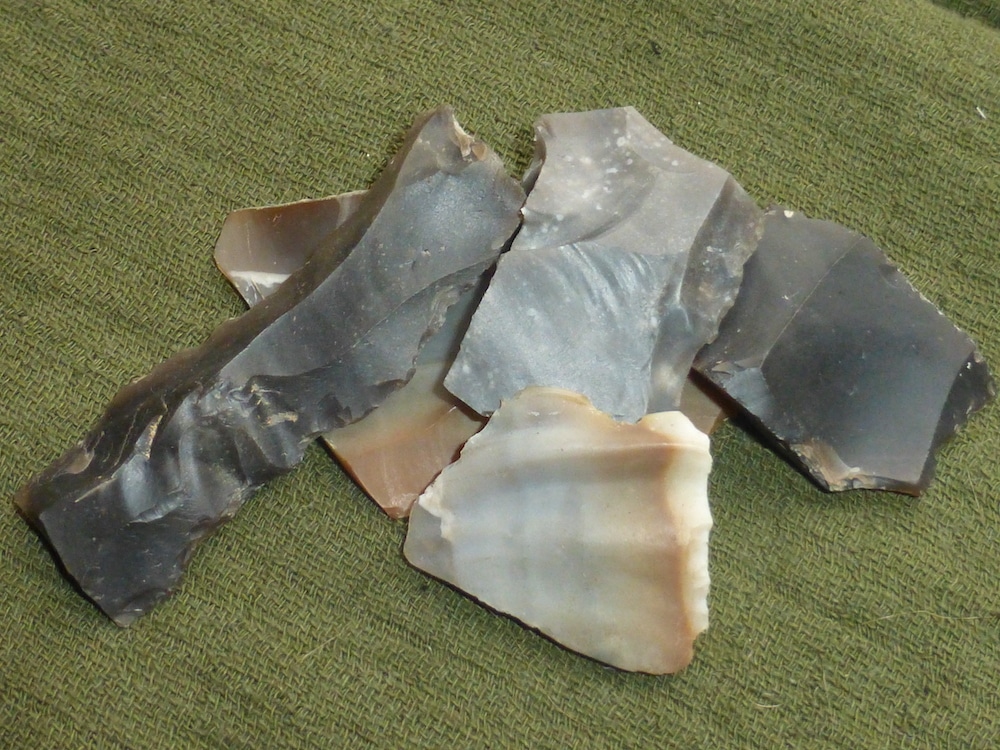
Selection of flints
Choosing your Steel and Flint
Choosing your steel comes down to personal preference and how you want to use your tinderbox.
There are hundreds of designs to choose from, from historically accurate versions from all around the globe to fantasy and mythological ones. I’ve always found that a steel with a curved edge helps get a good number of sparks to fly.
Steels can be found online on Etsy, eBay and from all kinds of makers of hand-forged items. Andrew Kirkham and Dave Budd make some beautiful examples. Beaver Bushcraft have an amazing selection of steels, tinder and other fire lighting sundries online.
As for the flint, this can be anything that is harder than the steel. You can use flint, chert and quartz to achieve this. Good old English flint is the preferred choice, and this can be found on beaches and in fields or bought online.
Charred punk wood
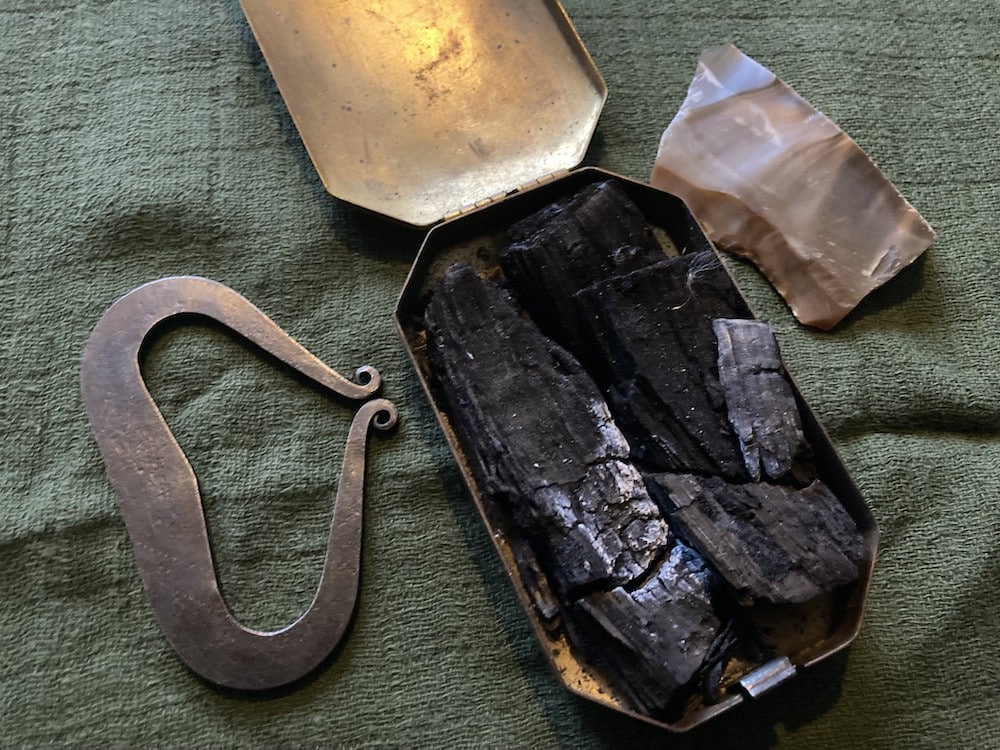
Basic setup
The most basic way to use your new tinderbox is simply to fill it with charred punk wood. Punk wood is wood that has rotted down and has the feel and weight of polystyrene. After this has been charred (I will write an article on this soon) in your tin, all you have to do is drop sparks down into your tin and then gently blow on the glowing embers.
Using a small fluffed-up nest of either hemp strands or dried grass, cover the embers and continue blowing until the fibres catch fire.
Let’s have a quick look at some of the other tinder’s and ways of creating an open flame, starting with
charcloth.
With all the tinders and matches described below, an article will be coming soon explaining how to prepare and make them. So, keep an eye out for part 2 of The Tinder Box.
Tinders and ignition
Charcloth
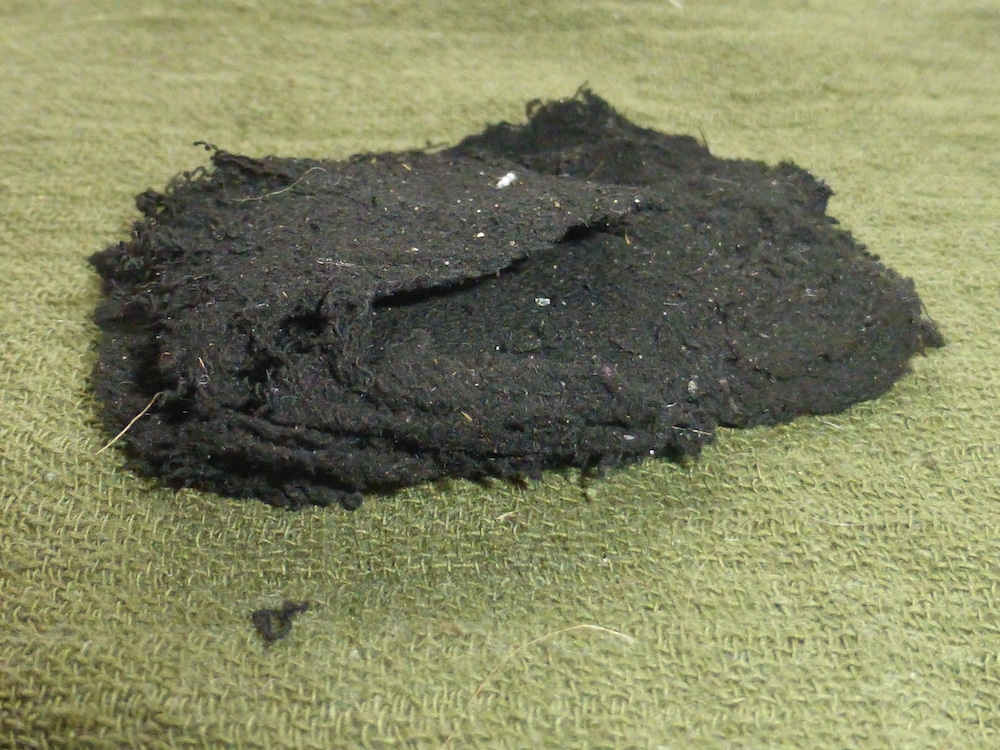
Charcloth has been used for centuries to light fires and was mainly used in towns and cities where sourcing punk wood was tricky. It is made by superheating the cloth in a closed air-free environment such as a sealed tin. This process burns off most of the impurities and makes it easily accept a spark from your flint and steel set.
Charcloth has to be made from a 100% natural material like Cotton, Hemp or linen. If there are any manmade fibres in its mix, the charring process won’t work properly. Keep it in your tin in small strips that you can easily tear up and use.
Amadou
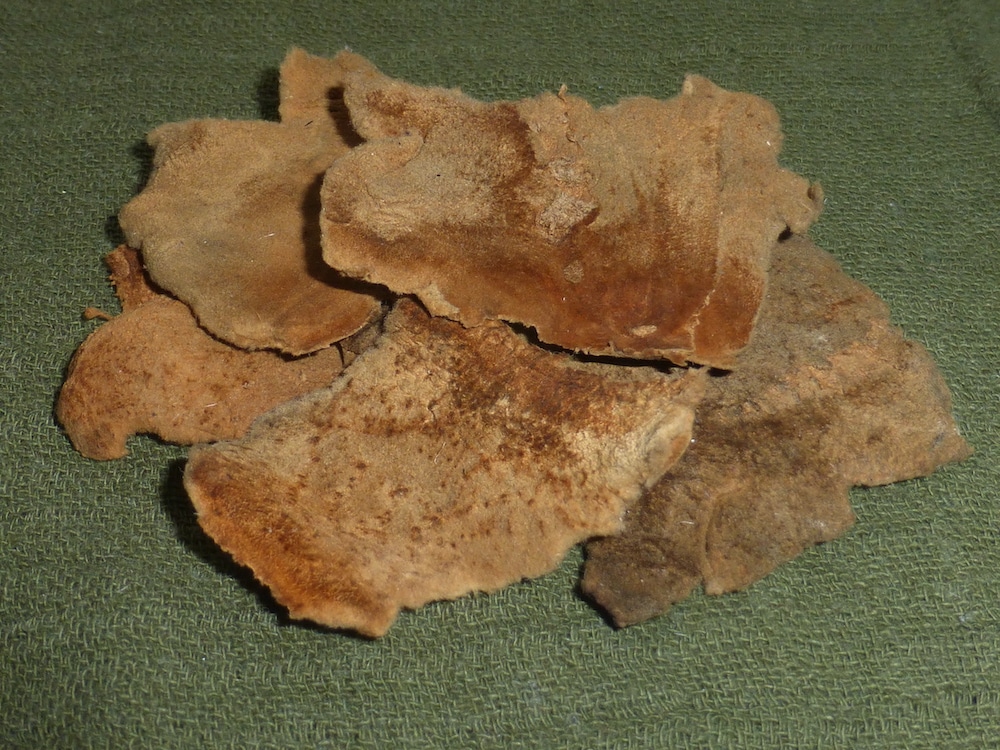
Amadou has been used for thousands of years as a tinder. Otzi, the iceman, had some in his fire kit 5,300 years ago while trekking through the Alps, so you know it’s got to be a good tinder. It’s made from the inner part of a bracket fungus, most typically the horse hoof fungus (Fomes fomentarius), which also goes by the name Tinder fungus or Tinder conk. It burns slowly and at a lower temperature than charcloth.
It will accept a spark from your steel set well if it is fluffy enough, especially on a freshly torn edge.
Sometimes it was soaked in a solution of Saltpetre, one of the constituent components of gunpowder, which greatly improved the burning of the Amadou. This as called German tinder.
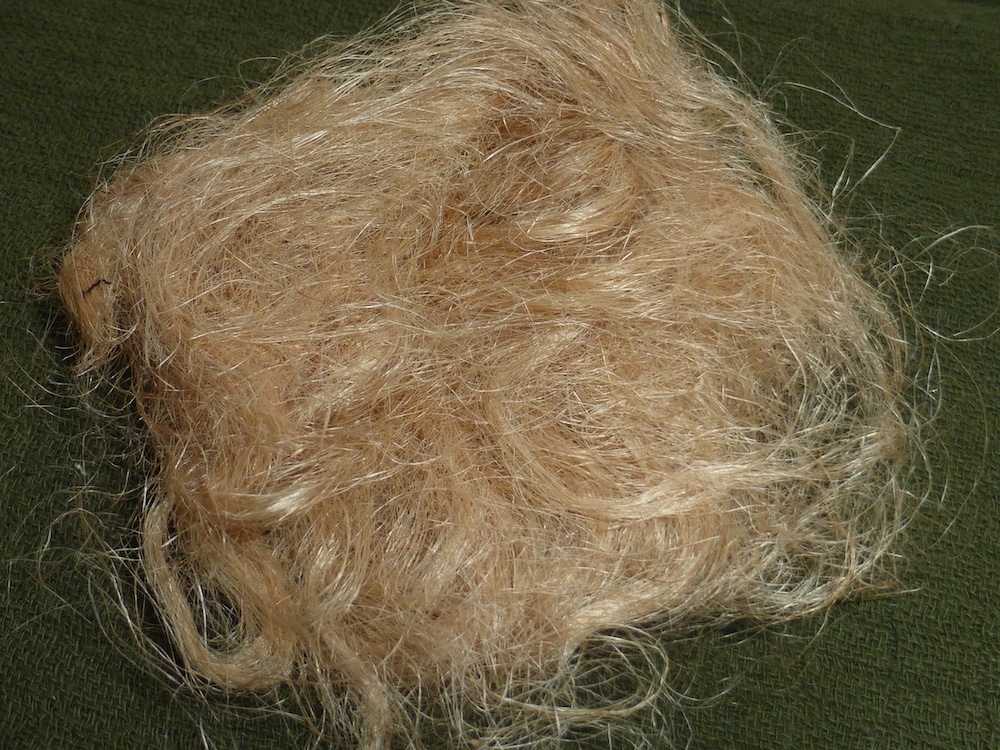
Jute fibre cordage.
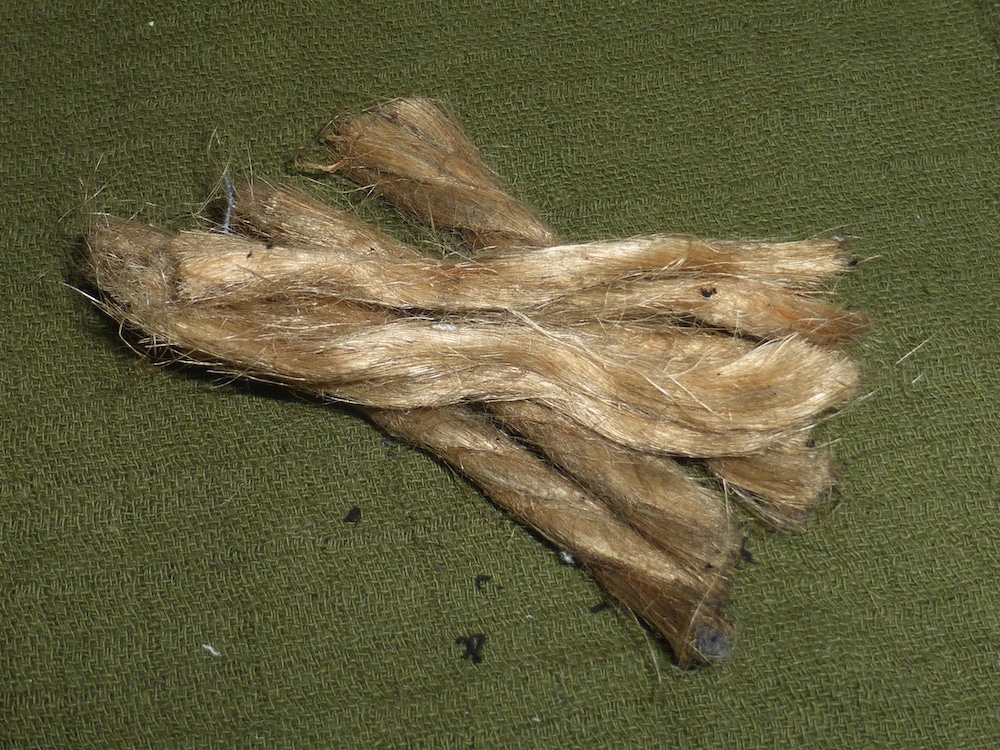
Having some short lengths of jute cord in your tin can be useful. They can be teased apart and fluffed up to make a bird’s nest (pictured below) that you can add your ember to. This can then be blown into flame in the same way that you would do with a bow drill ember. You always want to try and preserve your resources by using what you find along the way, such as dead and dried grasses, inner tree bark or Greater reed mace fluff for your nest. In a pinch, two lengths should be enough for a small bird’s nest to get a well-planned fire lay started.
Jute fibre cordage teased apart.
Sulphur matches
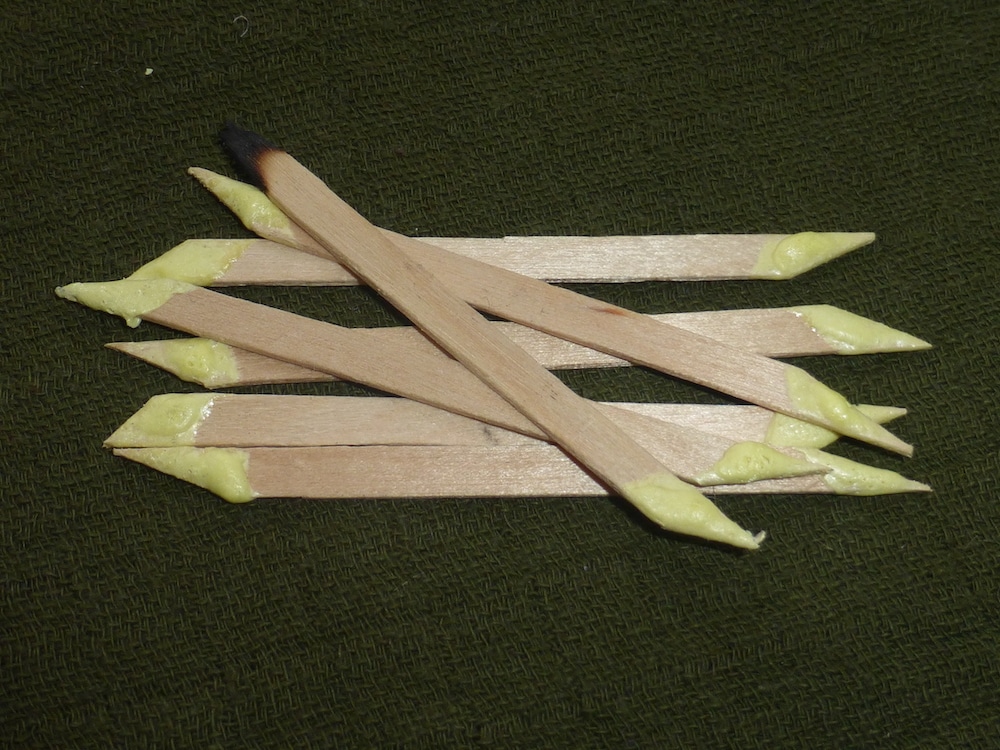
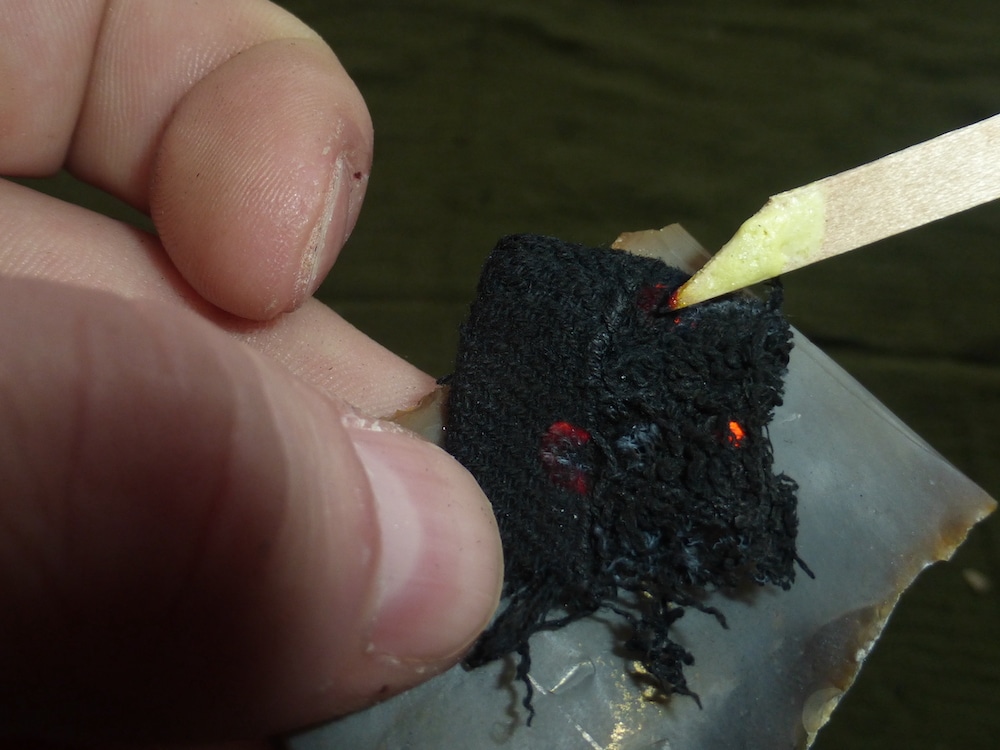
Sulphur matches, also known as Spunks, have been used since roman times. They consist of thin wooden sticks known as Spills that have been pointed and dipped in liquid Sulphur. Sulphur has a low ignition point (232 degrees Celsius) and, when held against an ember, will burst into flame(picture below), this, in turn, lights the Spill, and you now have an open flame to light a candle or to put into your fire lay.
The flame from the sulphur is blue and can sometimes be tricky to see; it will become more familiar yellow once the wooden Spill catches light.
Warning
Be careful when using this type of match as the Sulphur can drip while lit and will continue to burn. Also, the match will produce Sulphur dioxide gas which has a rotten egg smell and, if inhaled, can cause irritation to your eyes, nose, throat, and lungs. So use only outdoors or in a well-ventilated space.
Lighting a sulphur match using charcloth
Char box with sulphur matches and candle.
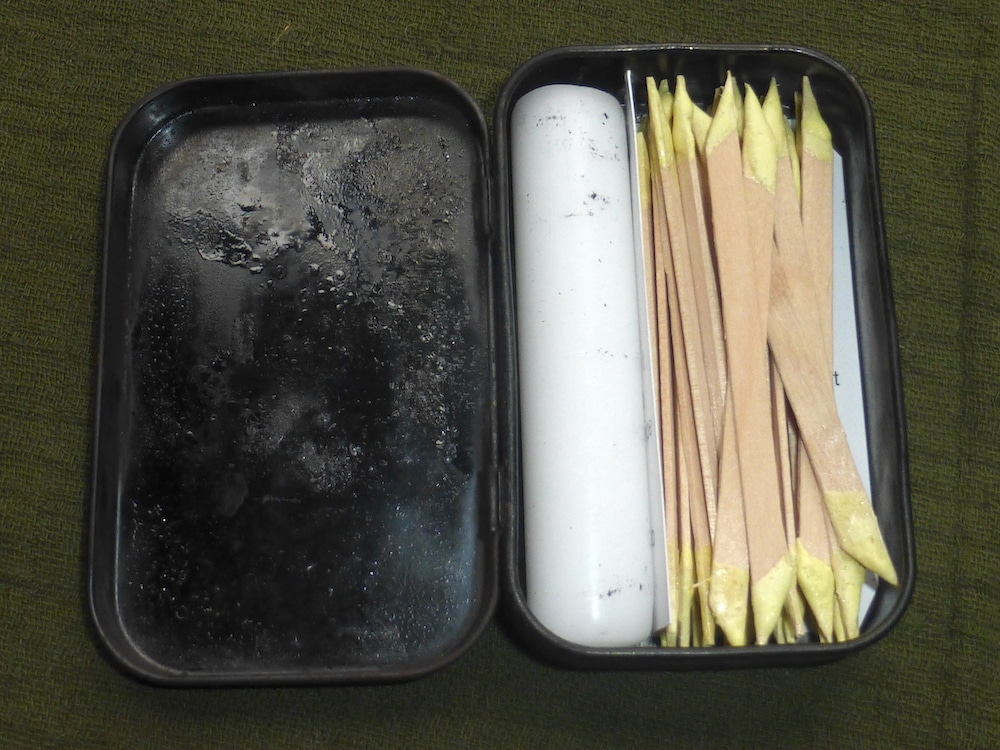
I keep spare matches and a candle stub in a separate tin that I use for charring tinder. I do this so I can keep my brass tinder box shiny. Having a candle in your kit is great for light, extending the burn times of certain tinder and waterproofing and sealing items.
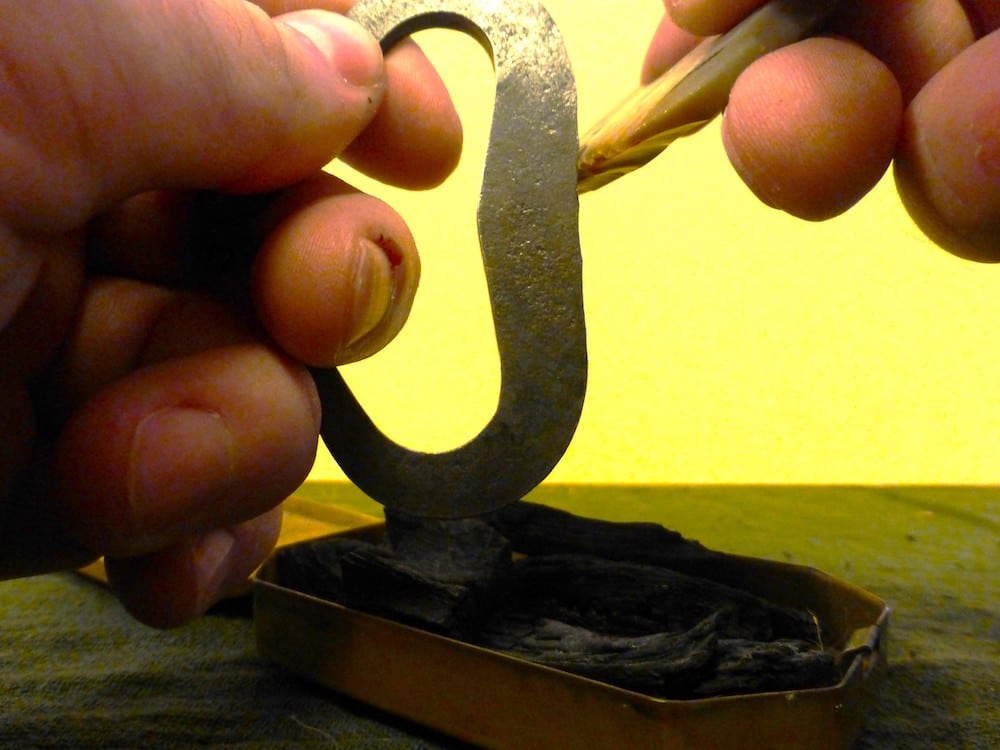
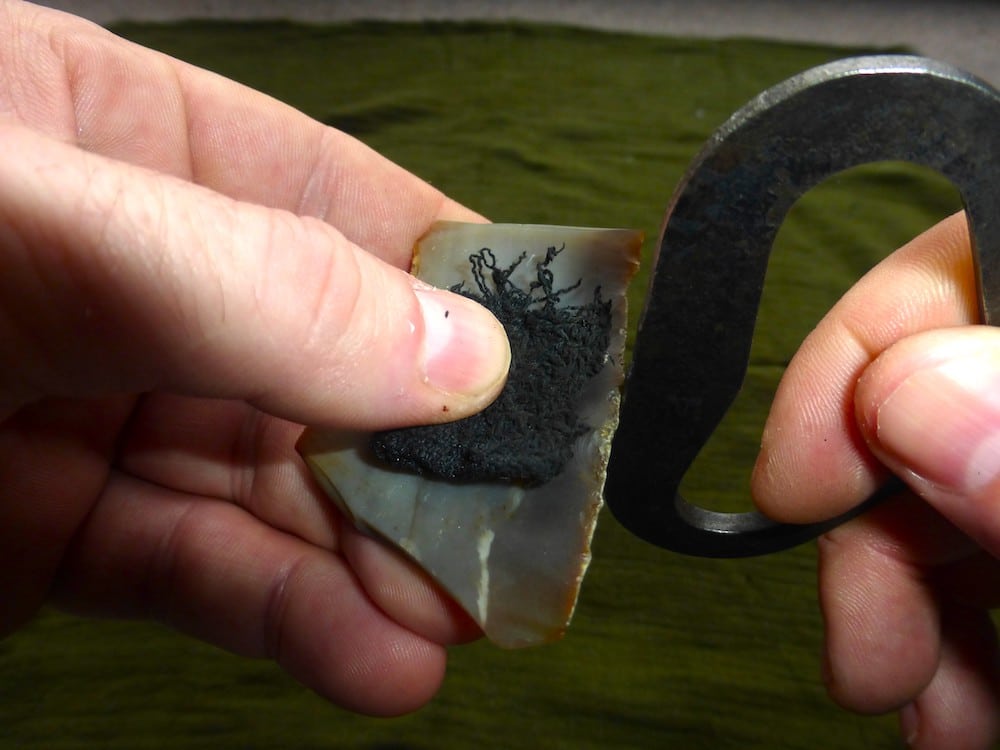
Striking sparks down
Striking it right
There are basically two ways to use your tinder box to get an ember. Either striking sparks down into your tinder box (picture above) or taking tinder out of your box and striking to make the sparks go up (picture below) and land on your tinder.
When striking sparks down into your tinder box hold your steel in your non-dominant hand with the flint in your other hand. The aim of the game is to get a slicing movement, glancing the flint down the surface of the steel. This carves off very thin slivers of metal which burn in the oxygen in the air. The optimum angle for the flint to hit the steel is between 30-45 degrees.
Sometimes you are lucky and will have a spark land straight away, and sometimes it will take a few goes. Don’t be discouraged if it doesn’t happen right away, just keep going, and you’ll get the hang of it in the end.
Striking sparks up
When you want to take tinder out of your box, and strike sparks up and onto it, strike the steel down onto the flint, keeping that same 30-45 degrees angle. Tear a small piece of tinder off and place it on the top of the flint. Some of the sparks will eventually land, and an ember will develop.
One final piece of advice is to make sure you always have a sharp piece of flint. The sparks made will be longer lasting and more plentiful.
The main thing to remember is to have fun with your new tinder box.
Try new combinations of tinders, steels, and flints to see what works best for you. Practice often and always have a backup when out in the woods.
BEN CLARKE
My formative years were spent reading the SAS survival handbook and watching Ray Mears on tracks on the telly. Learning a lot about the outdoors from my grandad who was a park ranger.
My first love of bushcraft will always be lighting fires, learning the techniques and history. When I was eight, I nearly burned the house down after hiding a lit candle from my parents under the bed. My sister luckily told on me. I can say that I’m a little safer with my pyromaniac tendencies now.
After being a scout and doing the duke of Edinburgh awards, I now practice my bushcraft skills with a great group of friends from all over the country.