Trangia Multifuel Burner Review
Just before i start, I'm not associated with Trangia in any way, other than a long-time user of their stoves. This is just to help anyone making a decision on a multifuel stove, I'm not a salesman.
First impressions
Straight out of the box, the Trangia Multifuel burner felt like a quality piece of hardware. The fuel bottle came with the pump pre-installed, and it all felt very well screwed together. The fuel pump has a very smooth solid stroke, and doesn't feel flimsy. There's a female quick-disconnect type connector anyone who works with air driven tools will be familiar with, again good quality. The bottle is a 600ml capacity metal bottle, with a reported maximum capacity of 450ml (15 fl. oz) with the pump installed.
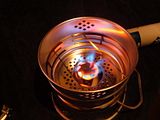
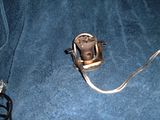
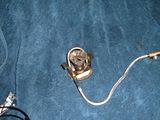
The burner itself is well packaged in a thick plastic bag, and is further packed with a large and very thick nylon fabric bag. The burner would appear to be a slightly modified Optimus Nova burner, even bearing the "Optimus Nova" patent mark on the control handle. The burner is contained in a cup-like metal assembly, with a spring steel clip to hold it in the base of the stove's windshield, and a priming sponge. The burner is connected to the bottle by a tough braided steel hose with the male part of the quick disconnect at one end.
My burner was a bit rough looking when i got it out of the bag. Don't worry if yours is the same! They don't finish them nicely because to do so would be pointless. As soon as they come to temperature they'll be glowing red hot, so a fancy finish would burn or corrode away.
Also included were some manuals in various languages, and an ingenious multi-tool which can be used to strip and clean the stove. The nylon carry pouch has a cylindrical inner pouch to hold a fuel bottle safely, and there's a thick brass loop, presumably to be used to clipping the bag to something?
It's worth noting that the entire stove seems to have been built to be taken apart and maintained. Not something you will need to replace instead of repairing!
Clipping the windshield into the stove is somewhat fiddly. One must push the braided steel hose through a small circular port at the very base of the windshield, extend the fuel control handle, push that through the large aperture in the middle of the windshield, and push down to clip in place. It's fiddly, but not something that would be difficult to do after the first time. I must say it could be a challenge if your hands were chilled to the bone. I understand this is not a problem when using the larger 25 series stove.
Once the burner is clipped in place, it is very securely held by the clip and the steel hose. At this stage, it's worth mentioning the fuel bottle again. On the screw in pump the words "ON" and "OFF" are clearly etched into the metal.
With the pump in the "ON" position, opening the valve pushes fuel through the hose. To cut the fuel flow, simply flip the bottle over so "OFF" is facing up, and the fuel will no longer flow. Air will be pushed through the hose, so when the fuel in the hose has been burned off the stove will go out. This is supposed to aid in clearing out the jet nozzle, but i don't know how much truth there is to that.
To ignite the stove, for those of you that have never used a liquid fuel stove before, you pressurise the fuel with 20~ strokes of the pump handle, and attach it to the stove. You then open the valve 1.5 turns to allow fuel to drip onto the priming sponge, then close it again. Igniting the sponge will burn the fuel you released, and heat the burner. This is known as priming. Once the flames have died down somewhat, open the valve again. If the stove is hot enough, it will roar into life, if it isn't it will just flare up again. If you need to, close the valve and allow the stove to heat some more.
I chose to use Kerosene (Paraffin) for fuel, since it's not as explosive as petrol or naphtha, and its pretty cheap. 6 quid for 5 litres, as opposed to 12 quid for 5 litres of unadulterated petrol.
Field Use
First of all, i apologise here, my digital camera didn't work when we got out there, so no pics as yet.
I went on a quick day trip just off a local footpath to try out the stove, and the weather was obligingly very windy and overcast. Rain occurred later in the session. The quoted boil time for 1 litre of water was 3.5 minutes. The kettle boiled in little more than a minute, and a litre of water in the pot (dangerously full, don't try this at home!) boiled in about 2.5 - 3 minutes.
Boiling with the kettle slightly too full caused water to bubble out. Thanks to the curved underside of the smaller 27 series Trangia kettle caused the spillover to drip neatly into the burner, neatly extinguishing the jet. This was a pain in the wotsits to re-ignite, requiring the use of a rolled up bit of toilet paper (my lighter and hand wasn't going to that cloud of paraffin fumes!).
The problems with boil-over were easily mitigated by not overfilling the pots or kettle, and re-ignition would be trivial if I'd thought to bring a long handled lighter or even matches.
We brought with us a selection of wonderful tinned foods for convenience. Next time i do a longer excursion than a few hours i will cook something proper to show you all.
Simmering was absolutely trivial to control. I could go from a rolling boil to a verylight simmer with easy adjustments of the control handle. Keeping food warm without incinerating it would not be a problem here.
Packing up was easy, with the exception that it was nececary to wait for the burner to cool down. I wasn't going to put the red hot burner into a polymer fabric bag along with a canister of paraffin.
Cons: It doesn't pack down into the Trangia container itself, at least not with the 27 series unit. It requires cooling before packing away, and priming before use, though this is an issue with all liquid fuel stoves. Adding the fuel canister, burner, and bag to your kit is going to take a notable chunk of space in your pack. The pumping handle doesn't appear to have any sort of lock, and likes to slide about of its own free will. This could get damaged if you're travelling rough terrain. Can't be used seperately. Fuel is not immediately cut off as you would expect flipping the tank to the "OFF" position. It takes quite some time to expend the fuel in the hose, and if it isn't allowed to blow through then you're left with petrochemicals in the hose.
Pros: The versatility of a true multifuel burner. You can burn kerosene, diesel, naptha, ethanol, meths, or even automotive or aviation fuel in a pinch (not reccomended!). The fuel siphon in the tank contains a filter, and so does the hose where it mates to the stove. Absolutely bombproof build quality, easy to maintain with full tooling and instructions supplied. If you already have a Trangia this is a fantastic upgrade for your favorite stove.
On the whole, if you're not fussy about setup, and you're not needing to be able to pack up and be gone in seconds, the Trangia Multifuel is an excellent piece of kit. Though it may not be considered convenient, i would STRONGLY reccomend you carry your meths burner in the kettle and a small bottle of meths for priming and just-in-case purposes. Petrol flashes too easy, diesel not easily enough. Many campers, bushcrafters, and ex milly chaps i know carry hexy stoves as backup when they go out, you could use the traditional burner instead.
Oh, and don't use biodiesel. Bad idea, apparently.
Ramble done, happy camping!


