This is a bit of a “quest” for me. It’s a longish post because it was a longish process. I hope its interesting enough to someone to justify reading it.
This year I set out to make my own mustard. Entirely mine – from scratch. Before I did that I had to be able to produce a vinegar or cider base to make it “keep” well (although mustard can be made with water but it doesn’t keep as well). Anyway – my forays into wine and vinegar making have been well covered in other pictorials so lets take it as read that I have plenty of entirely home produced wine and vinegar to hand.
To start off, lets wind back to early spring. I started off with a load of mustard seed. Basic yellow mustard seed is often sold in garden centres for growing sprouted “mustard “ as in “mustard and cress”.
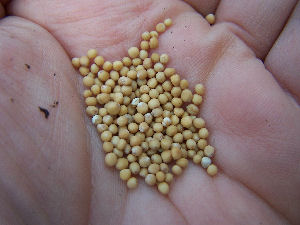
However a little reading on the subject indicated that the very best mustards are grown from brown and black seed
A few phone calls to catering suppliers supplied whole grain mustard in brown and black
Now given this stuff was intended to be cooked with, not grown, I had no idea if it would germinate. Only one way to find out though – get it planted!
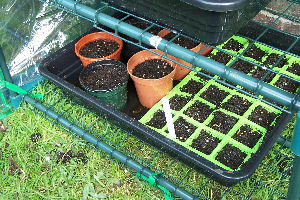
I used a variety of planting techniques – plug trays – three inch pots etc. The technique was the same though. Plant up a well draining seed compost (a mix of sharp sand and garden compost that had been sieved), pop the mustard on top.
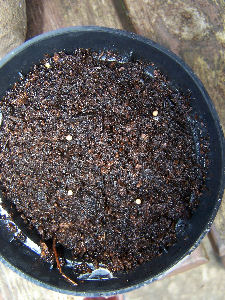
Then a light sprinkle of potting mix over the top and a label. I suspected that the devil would be in the detail – type and growing medium would come into play and I wanted to know which type of mustard was what!
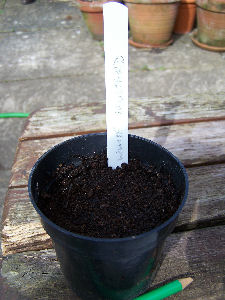
The pots were placed into cold germinating frames to await developments
Keep an eye on the little sneakers now – two maybe three days will see them sprouting. Remember growing mustard on blotting paper? Shows how easy it is to germinate
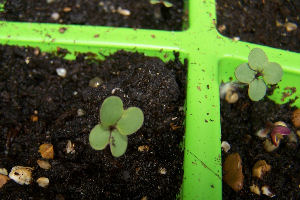
Now when “singling out”, don’t pull out your spares, cut them off with scissors. This prevents root damage by disturbing the remaining plants – plus the “trimmings” are delicious!
Once the plants get four good leaves, pot on any “plugs” you have grown
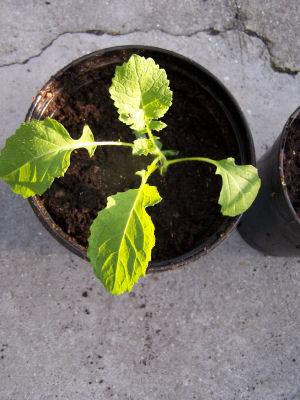
Once you achieve a good 6” plant its ready for planting out
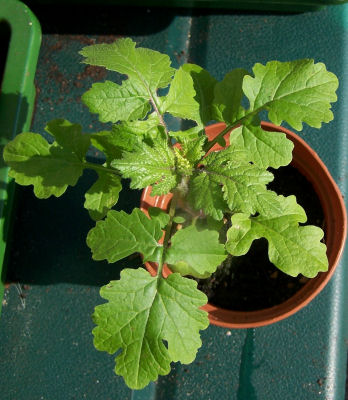
If you want to pot grow these plants get huge – even from the tiny seeds. Pots should be at least “bucket” sized. Even then they will need copious water. Planting in 18” rows in the garden and thinning out will be far better. I pot grew many experimental varieties this year. Never again.
Once thinned out or potted on, let your mustard grow…and grow….and grow. It may be a baby seed but it grows BIG. 3’ tall by 3’ across. Ever seen a field of oilseed rape? That big.
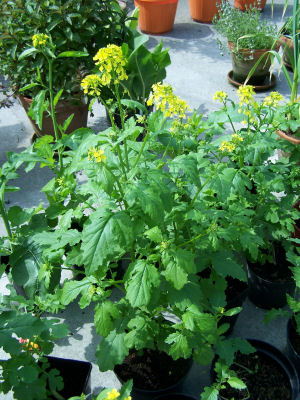
When its 2’ tall it will start to flower. It looks like this

It will keep growing as it flowers though – each plant can produce more than a hundred flowers and many hundred seeds
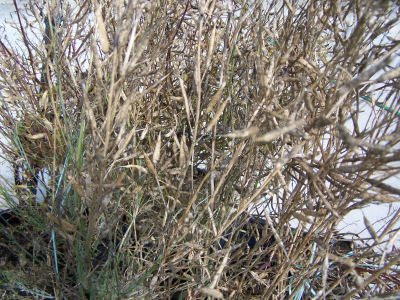
Eventually (and it takes till August / September) the flowers will turn to seedpods and the plant dies and dries. Again, it takes far longer than you might expect
The Yellow mustard makes short stubby seedpods with three to five fat large seeds in each

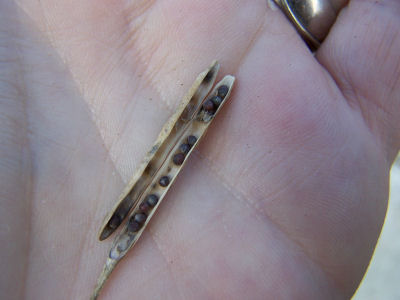
Black and Brown mustard makes smaller longer pods but with many more seeds in each
testing readiness to harvest is tricky. My way was to take a seed pod and roll my hand around it. If it popped open offering clean dry seed – Its ready
Now basic cutting is going to depend on scale. For home use I decided on a fairly economical approach – cutting down with grass hook or even secateurs and then stripping into a bucket. Best achieved by gripping the stems and ripping the pods off against the lay. Use gloves as they are sharp wee things.
Interestingly my black / brown mustard ripened three or four weeks before the fatter yellow pods. Only more experience will tell me if this is normal
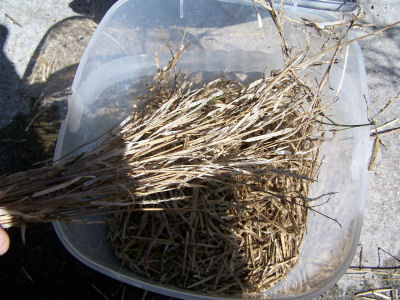
Eventually a bucket of seedpods is achieved. On a larger scale whole plants could be threshed in the same manner as wheat or rice. I would advise doing so on a sheet or tarp to gather the gleanings.
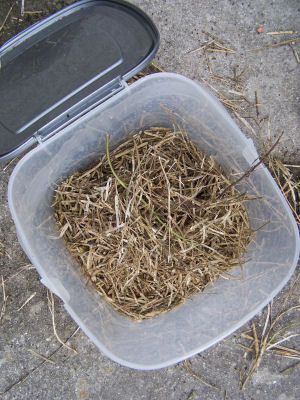
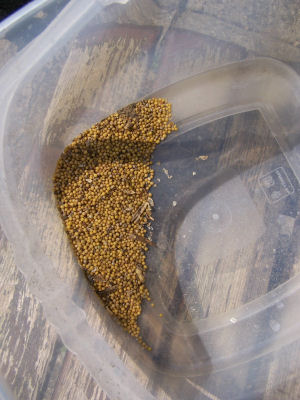
Shaking the crushed pods lets the seeds fall to the bottom. The husks can easily be picked up in handfuls and added to the compost heap
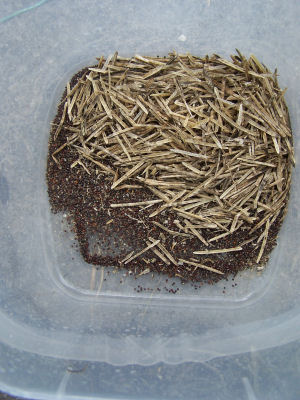
Eventually all the larger husks can be separated from the seed just by shaking and picking. But some finer dust and “chaff” remains
I struggled a bit to remove this chaff. Then I thought of old fashioned “winnowing” on a windy day. Traditionally done in a dished wide basket. Of course I had nothing like that……or did I. In a moment of inspiration I grabbed the Wok
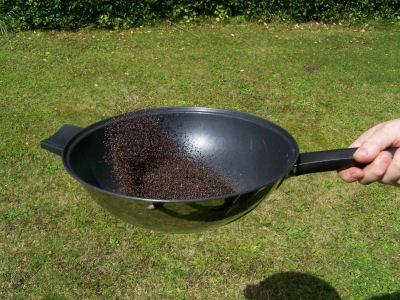
Tossing the seed on a windy day allowed the wind to take the lighter chaf away whilst the seed dropped back in the pan. In an ideal world I would use one of the older birch bark (wider and shallower) winnowing baskets – it would be more efficient. But the work surely proved the process
A few weeks later I separated the yellow mustard in the same way.
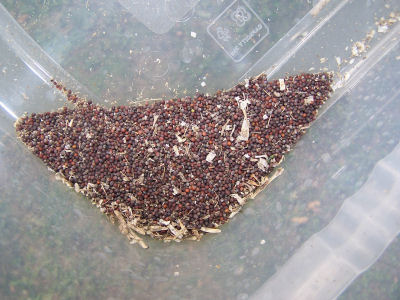
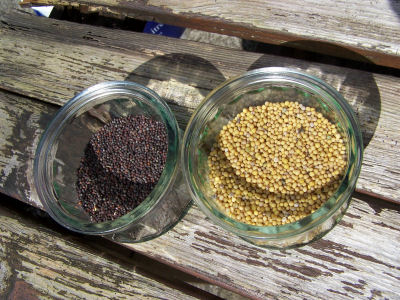
You can clearly see the difference in size of the black and yellow seeds (the brown are very similar to black in both plant structure and size)
Now that we have some seed its time to process it. The first step is to grind some seeds to a fine powder. This forms “mustard flour” (a good way of thinking how fine it should be). For a basic honey mustard, I start with some yellow mustard seeds
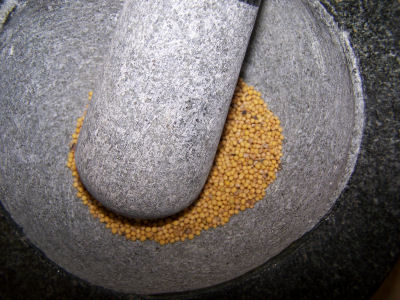
As you can see, I’m using a heavyweight pestle and mortar. If you want to use modern tools that’s fine. Either a specialist spice grinder or cheap coffee grinder works. I would advise though that you clean the blades between coffee and spices – brush out all the powder you can see than then grind some dry breadcrumbs to absorb any lingering flavours. Oils cause the pungency in mustard so it will linger.
A good workout later and we have mustard flour
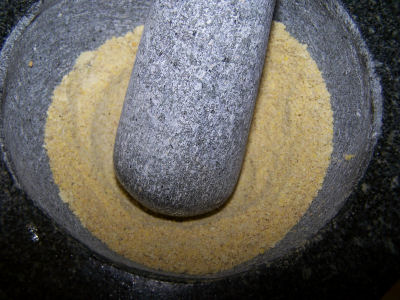
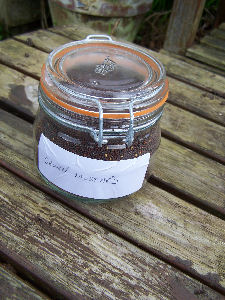
If you want to store this stuff, my advice is to store the un-ground seed. The flour will last longer than mixed mustard so there’s no harm in keeping some mustard flour for a good few months and mixing it up as needed – keep it in an airtight jar though.
A jar of mustard is simply mustard flour mixed with a liquid – water is fine. I find better flavours can be achieved (and better “keeping” qualities) by using wine or vinegar. My advice is to make water based mustards in small quantities and use quickly or keep in the fridge.
Lets make some quick English honey mustard
You will need:
¼ cup yellow mustard flour
3 tbs COLD water (never hot in mustard making)
1 tbs olive oil
¼ tsp honey
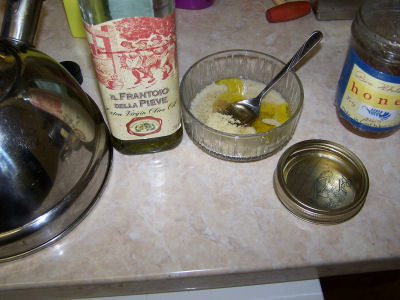
Put all the ingredients into a bowl. I find putting the water in first easiest as the dry ingredients float and soak up water – you don’t get dry clumps at the bottom.
Blend well with a fork
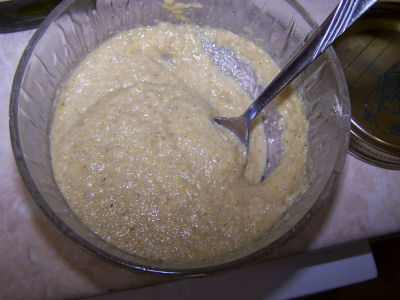
Pack into a jar and keep in the fridge
That’s it – a jar of slightly honey flavoured “English” mustard. Easy huh? The flavours will actually improve if you leave it a couple of weeks before sampling – bet you don’t though!
Okay the next one is more of an illustration of what can be achieved with relative ease. Sadly I cannot become self sufficient in some of the spices…yet although substitutes are easily possible. However it’s worth considering that really fine whole grain mustard is easily within the reach of the home grower
Whole Grain Mustard
1 cup water
1 cup brown mustard flour
¾ cup black mustard seed
1 ¼ cup white wine (see wine making threads)
1 cup vinegar (see vinegar making threads. You see how all this stuff snowballs)
½ cup brown sugar (honey makes a good substitute)
¼ cup finely chopped onion (from the garden naturally)
1 ½ tsp cinnamon (struggling to find a good substitute but many herbs are available.)
½ tsp salt
½ tsp turmeric
2 egg yolks (as emulsifiers)
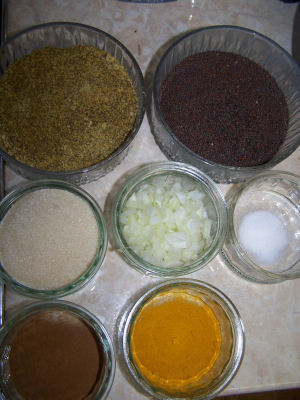
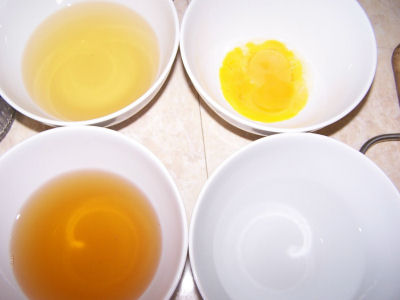
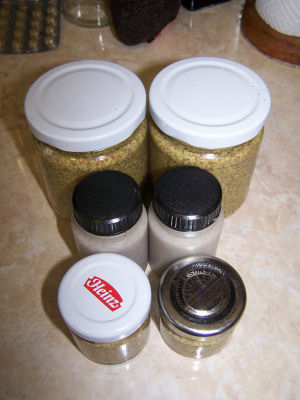
I tend to pre measure the ingredients – it saves flapping later
Dry ingredients
Wet Ingredients
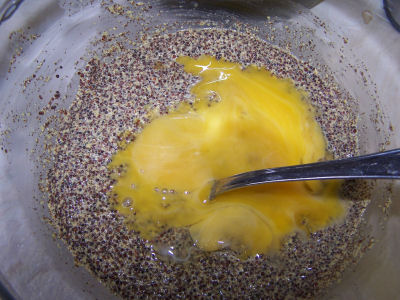
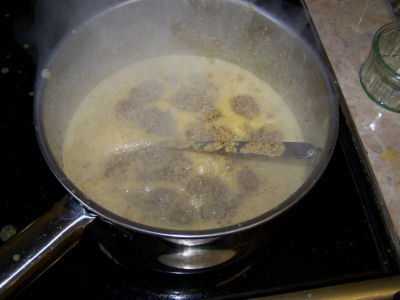
Mix the water, mustard flour and mustard seed in a bowl

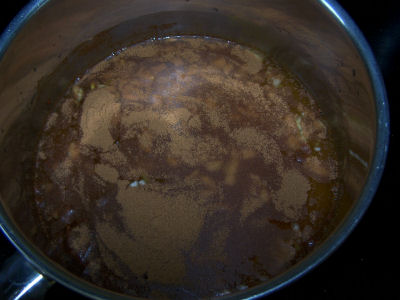
Put the wine, vinegar, sugar, onion, cinnamon, turmeric and salt into a saucepan. Bring to the boil and reduce to a gentle simmer. Simmer for 20minutes then turn off the heat and leave to infuse for another 10 minutes
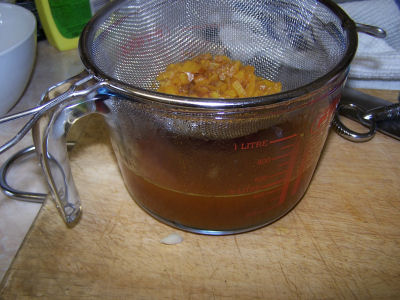
Strain the contents of the pan into a jug
Stir the egg yolks into the mustard mix
Add a cup of the strained “liquor”
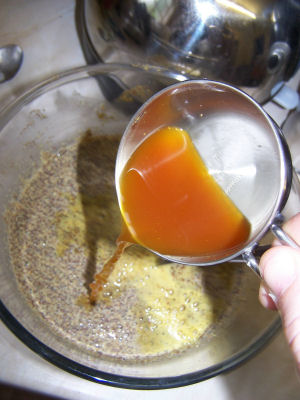
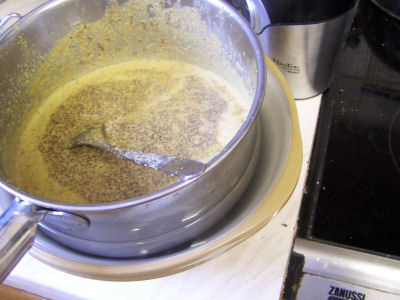
Put the completed mixture back in your saucepan and return to the heat. Stir over a medium heat until the mixture thickens
When thick and bubbly, quickly chill the mixture by plunging the pan into ice water and stirring for a couple of minutes
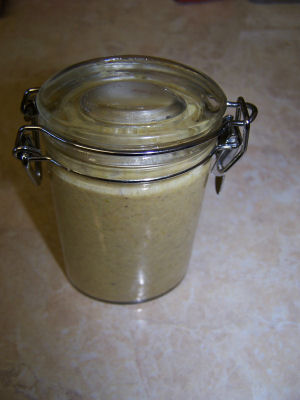
Transfer your cooled mustard to suitable sized jars – a jam funnel is really going to help here
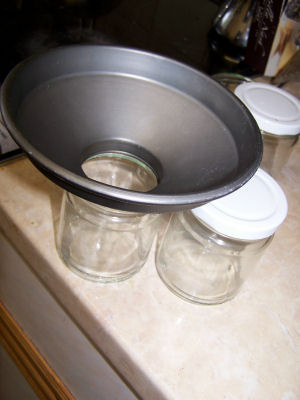
Seal well and there we have it – high grade, handmade, whole grain mustard
The last thing to do is save some of your mustard seed for next years planting – so you can start again
Red
This year I set out to make my own mustard. Entirely mine – from scratch. Before I did that I had to be able to produce a vinegar or cider base to make it “keep” well (although mustard can be made with water but it doesn’t keep as well). Anyway – my forays into wine and vinegar making have been well covered in other pictorials so lets take it as read that I have plenty of entirely home produced wine and vinegar to hand.
To start off, lets wind back to early spring. I started off with a load of mustard seed. Basic yellow mustard seed is often sold in garden centres for growing sprouted “mustard “ as in “mustard and cress”.
However a little reading on the subject indicated that the very best mustards are grown from brown and black seed
A few phone calls to catering suppliers supplied whole grain mustard in brown and black
Now given this stuff was intended to be cooked with, not grown, I had no idea if it would germinate. Only one way to find out though – get it planted!
I used a variety of planting techniques – plug trays – three inch pots etc. The technique was the same though. Plant up a well draining seed compost (a mix of sharp sand and garden compost that had been sieved), pop the mustard on top.
Then a light sprinkle of potting mix over the top and a label. I suspected that the devil would be in the detail – type and growing medium would come into play and I wanted to know which type of mustard was what!
The pots were placed into cold germinating frames to await developments
Keep an eye on the little sneakers now – two maybe three days will see them sprouting. Remember growing mustard on blotting paper? Shows how easy it is to germinate
Now when “singling out”, don’t pull out your spares, cut them off with scissors. This prevents root damage by disturbing the remaining plants – plus the “trimmings” are delicious!
Once the plants get four good leaves, pot on any “plugs” you have grown
Once you achieve a good 6” plant its ready for planting out
If you want to pot grow these plants get huge – even from the tiny seeds. Pots should be at least “bucket” sized. Even then they will need copious water. Planting in 18” rows in the garden and thinning out will be far better. I pot grew many experimental varieties this year. Never again.
Once thinned out or potted on, let your mustard grow…and grow….and grow. It may be a baby seed but it grows BIG. 3’ tall by 3’ across. Ever seen a field of oilseed rape? That big.
When its 2’ tall it will start to flower. It looks like this
It will keep growing as it flowers though – each plant can produce more than a hundred flowers and many hundred seeds
Eventually (and it takes till August / September) the flowers will turn to seedpods and the plant dies and dries. Again, it takes far longer than you might expect
The Yellow mustard makes short stubby seedpods with three to five fat large seeds in each
Black and Brown mustard makes smaller longer pods but with many more seeds in each
testing readiness to harvest is tricky. My way was to take a seed pod and roll my hand around it. If it popped open offering clean dry seed – Its ready
Now basic cutting is going to depend on scale. For home use I decided on a fairly economical approach – cutting down with grass hook or even secateurs and then stripping into a bucket. Best achieved by gripping the stems and ripping the pods off against the lay. Use gloves as they are sharp wee things.
Interestingly my black / brown mustard ripened three or four weeks before the fatter yellow pods. Only more experience will tell me if this is normal
Eventually a bucket of seedpods is achieved. On a larger scale whole plants could be threshed in the same manner as wheat or rice. I would advise doing so on a sheet or tarp to gather the gleanings.
Shaking the crushed pods lets the seeds fall to the bottom. The husks can easily be picked up in handfuls and added to the compost heap
Eventually all the larger husks can be separated from the seed just by shaking and picking. But some finer dust and “chaff” remains
I struggled a bit to remove this chaff. Then I thought of old fashioned “winnowing” on a windy day. Traditionally done in a dished wide basket. Of course I had nothing like that……or did I. In a moment of inspiration I grabbed the Wok
Tossing the seed on a windy day allowed the wind to take the lighter chaf away whilst the seed dropped back in the pan. In an ideal world I would use one of the older birch bark (wider and shallower) winnowing baskets – it would be more efficient. But the work surely proved the process
A few weeks later I separated the yellow mustard in the same way.
You can clearly see the difference in size of the black and yellow seeds (the brown are very similar to black in both plant structure and size)
Now that we have some seed its time to process it. The first step is to grind some seeds to a fine powder. This forms “mustard flour” (a good way of thinking how fine it should be). For a basic honey mustard, I start with some yellow mustard seeds
As you can see, I’m using a heavyweight pestle and mortar. If you want to use modern tools that’s fine. Either a specialist spice grinder or cheap coffee grinder works. I would advise though that you clean the blades between coffee and spices – brush out all the powder you can see than then grind some dry breadcrumbs to absorb any lingering flavours. Oils cause the pungency in mustard so it will linger.
A good workout later and we have mustard flour
If you want to store this stuff, my advice is to store the un-ground seed. The flour will last longer than mixed mustard so there’s no harm in keeping some mustard flour for a good few months and mixing it up as needed – keep it in an airtight jar though.
A jar of mustard is simply mustard flour mixed with a liquid – water is fine. I find better flavours can be achieved (and better “keeping” qualities) by using wine or vinegar. My advice is to make water based mustards in small quantities and use quickly or keep in the fridge.
Lets make some quick English honey mustard
You will need:
¼ cup yellow mustard flour
3 tbs COLD water (never hot in mustard making)
1 tbs olive oil
¼ tsp honey
Put all the ingredients into a bowl. I find putting the water in first easiest as the dry ingredients float and soak up water – you don’t get dry clumps at the bottom.
Blend well with a fork
Pack into a jar and keep in the fridge
That’s it – a jar of slightly honey flavoured “English” mustard. Easy huh? The flavours will actually improve if you leave it a couple of weeks before sampling – bet you don’t though!
Okay the next one is more of an illustration of what can be achieved with relative ease. Sadly I cannot become self sufficient in some of the spices…yet although substitutes are easily possible. However it’s worth considering that really fine whole grain mustard is easily within the reach of the home grower
Whole Grain Mustard
1 cup water
1 cup brown mustard flour
¾ cup black mustard seed
1 ¼ cup white wine (see wine making threads)
1 cup vinegar (see vinegar making threads. You see how all this stuff snowballs)
½ cup brown sugar (honey makes a good substitute)
¼ cup finely chopped onion (from the garden naturally)
1 ½ tsp cinnamon (struggling to find a good substitute but many herbs are available.)
½ tsp salt
½ tsp turmeric
2 egg yolks (as emulsifiers)
I tend to pre measure the ingredients – it saves flapping later
Dry ingredients
Wet Ingredients
Mix the water, mustard flour and mustard seed in a bowl
Put the wine, vinegar, sugar, onion, cinnamon, turmeric and salt into a saucepan. Bring to the boil and reduce to a gentle simmer. Simmer for 20minutes then turn off the heat and leave to infuse for another 10 minutes
Strain the contents of the pan into a jug
Stir the egg yolks into the mustard mix
Add a cup of the strained “liquor”
Put the completed mixture back in your saucepan and return to the heat. Stir over a medium heat until the mixture thickens
When thick and bubbly, quickly chill the mixture by plunging the pan into ice water and stirring for a couple of minutes
Transfer your cooled mustard to suitable sized jars – a jam funnel is really going to help here
Seal well and there we have it – high grade, handmade, whole grain mustard
The last thing to do is save some of your mustard seed for next years planting – so you can start again
Red
")
