During these dark winterdays I have taken up on another restorationproject. I love lowbudget, so I re-use as much as possible.
This time I took an old hatchet, which started life as a cheap DIY-store hatchet.
During its early days it has taken quite a beating as a gardenerstool, hitting more that just wood!
After a while it ended up in the shed, where it has been lying around for quite some time.
Eager as I was to get started I forgot to take pictures at the start, so I will give you a small discription;
Originally the head was painted a bright red, with a golden undercoat. The unprotected parts matched the red with a bright orange rustred..:yikes:
The tip of the edge once came into a violent contact with a hidden rock (Sparks flying around and hand and wrist useless for a few minutes!). The rest of the edge didn't fare much better and neither did the handle for that matter.
I sanded the head and handle bare by hand. I deliberately did not use tools, just to get the feel of it. After that I took a file to take care of the damages in the edge, followed by a treatment with a sharpeningtool to get some shape back into it. It's the one in one of the pictures actually. I didn't sharpen it yet. That will come last.
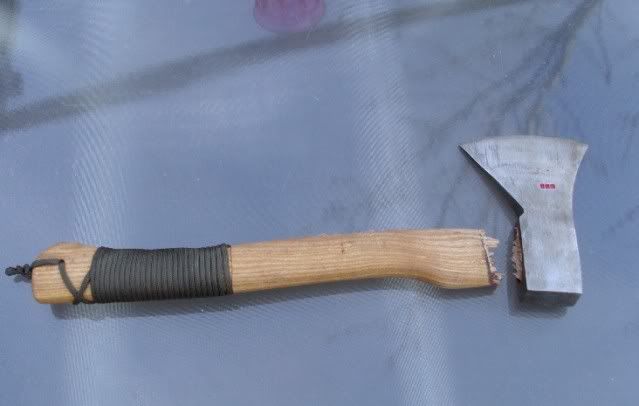
The handle was sanded bare too and the grippart was sanded a bit deeper, because I want to wrap some paracord or leather around that part. I like the idea of leather more....
The hatchet looks like this now;

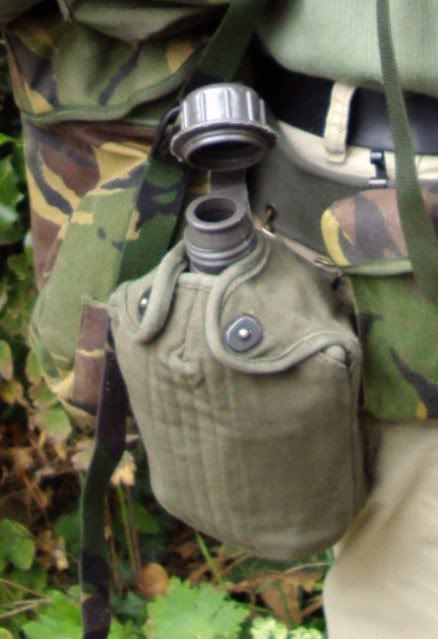
The hatchet did not have a pouch, so I made that one myself. I used one of those old Dutch military canteenpouches used in the 70's.
One similar to this;
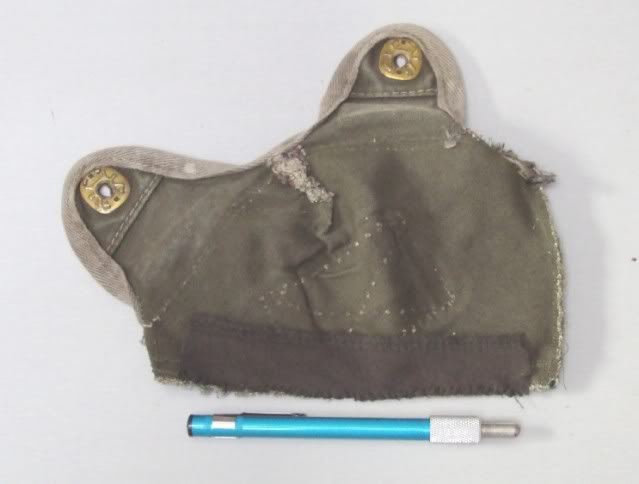
I tore the thing completely apart, removed the liner and the stitching and put the whole thing back together again, so that it took the shape of the hatchet's head.
The top is straight, because I added a little bonus; a storagepossibility for a sharpening tool. That's the dark green strip at the bottom of the pic, which is upside down.
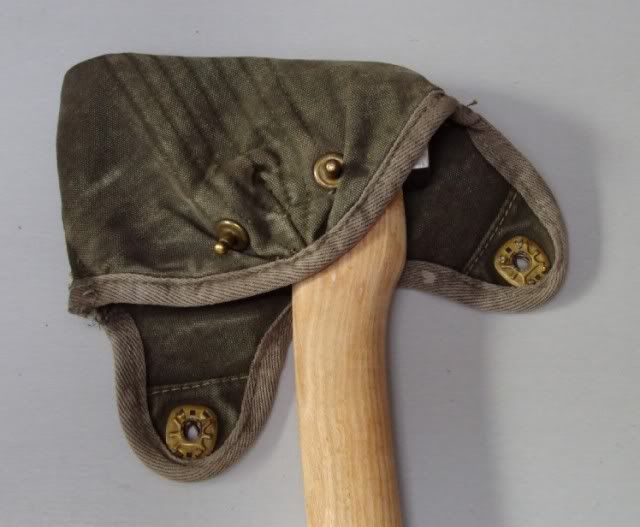
At the back I added a loop, wide enough to fit an army webbingbelt.
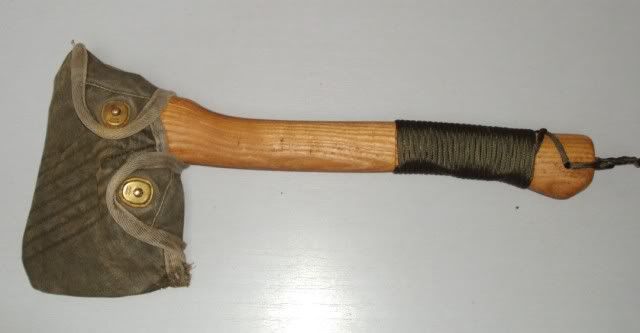
Hatchet in its'cover;
The colour of the cover was really faded, so I tried dying that with a natural dy; ironsulfate.
I boiled some water, chucked in the cover added the sulfate and now I'm waiting for it to dry, so I can see what it turned out like...
Total costs for this project som far; 0!
Workinghours not included.
What still needs to be done;
drilling a hole at the bottom of the handle to fit a loop,
Treating the head and handle with lineseedoil,0
adding the grip itself,
sharpening it. I might even learn that too and this is a great exercise for that, isn't it?
This time I took an old hatchet, which started life as a cheap DIY-store hatchet.
During its early days it has taken quite a beating as a gardenerstool, hitting more that just wood!
After a while it ended up in the shed, where it has been lying around for quite some time.
Eager as I was to get started I forgot to take pictures at the start, so I will give you a small discription;
Originally the head was painted a bright red, with a golden undercoat. The unprotected parts matched the red with a bright orange rustred..:yikes:
The tip of the edge once came into a violent contact with a hidden rock (Sparks flying around and hand and wrist useless for a few minutes!). The rest of the edge didn't fare much better and neither did the handle for that matter.
I sanded the head and handle bare by hand. I deliberately did not use tools, just to get the feel of it. After that I took a file to take care of the damages in the edge, followed by a treatment with a sharpeningtool to get some shape back into it. It's the one in one of the pictures actually. I didn't sharpen it yet. That will come last.
The handle was sanded bare too and the grippart was sanded a bit deeper, because I want to wrap some paracord or leather around that part. I like the idea of leather more....
The hatchet looks like this now;
The hatchet did not have a pouch, so I made that one myself. I used one of those old Dutch military canteenpouches used in the 70's.
One similar to this;
I tore the thing completely apart, removed the liner and the stitching and put the whole thing back together again, so that it took the shape of the hatchet's head.
The top is straight, because I added a little bonus; a storagepossibility for a sharpening tool. That's the dark green strip at the bottom of the pic, which is upside down.
At the back I added a loop, wide enough to fit an army webbingbelt.
Hatchet in its'cover;
The colour of the cover was really faded, so I tried dying that with a natural dy; ironsulfate.
I boiled some water, chucked in the cover added the sulfate and now I'm waiting for it to dry, so I can see what it turned out like...
Total costs for this project som far; 0!
Workinghours not included.
What still needs to be done;
drilling a hole at the bottom of the handle to fit a loop,
Treating the head and handle with lineseedoil,0
adding the grip itself,
sharpening it. I might even learn that too and this is a great exercise for that, isn't it?
")