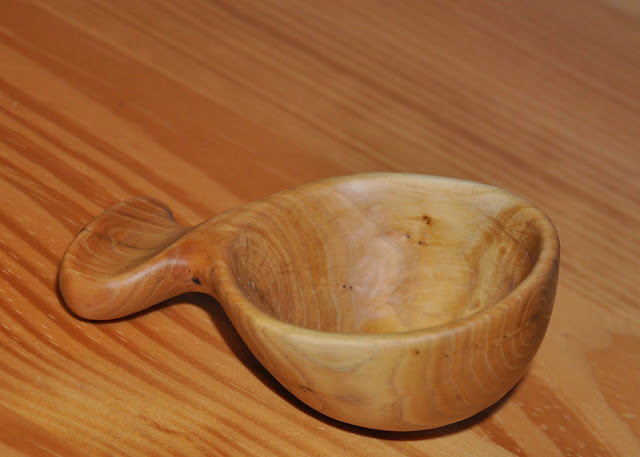
This is my first post here, so I thought I'd dive right in and show my kuksa with a mini-tutorial. I made a number of mistakes with it but learned a huge amount.
I wanted to make it from a burl but we don't get many of those on our trees (chalk it up to fairly mild weather, I guess). I ended up using a spalted birch log:
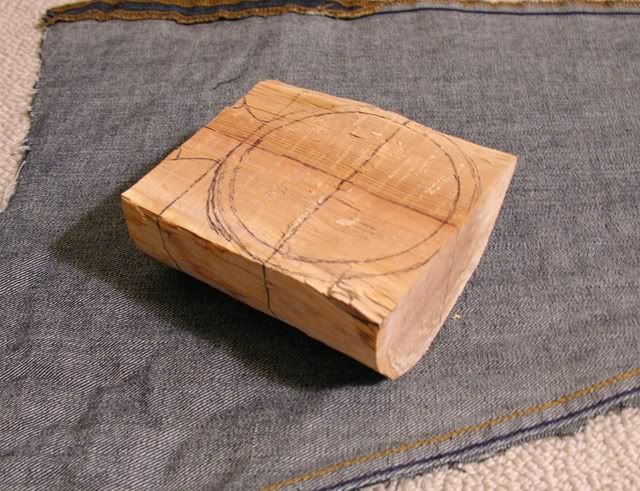
To begin with you just take a decent size log and split it in half. I wanted the bowl to end up at around 4" across and about 2.5-3" deep, but sort of messed up on the length. There are all different types of handles on these things but leaving yourself extra room when starting on it is probably the best idea. I resigned myself to a little nubbin, but I actually sort of think is nice. I start work with my axe and rough out the shape, trying as much as possible to stick to the circular outline I've drawn on top. It didn't come out as bowl shaped as I'd like, but it looked alright.
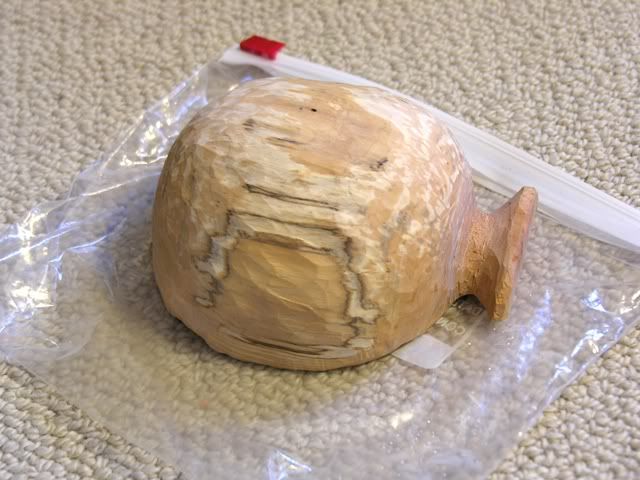
Once the shape is basically done I switch to my knife and start to refine things, working for smooth curves and a more semi-spherical shape. You get a good shot of the spalting patterns here, as well as the handle-nubbin. My house is very dry in the winter and there is essentially no way to keep things wet other than wiping the surfaces with a little water and placing them in a mostly airtight plastic bag. If I were planning to leave it in there long-term I would worry about mold, but given that I never went more than 12 hours without taking it out and working on it some I didn't feel bad about getting it a little wet. With the main outer shape done I switched to shaping the inside of the bowl:
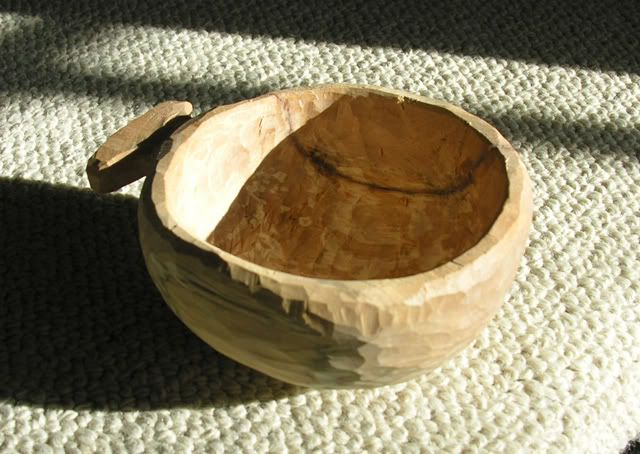
90% of the carving done and only final finishing required (I'm waiting on a new tool for that, details coming soon...). You may notice a large dark band on the far side of the bowl that just doesn't quite blend with the spalting. About halfway through the axe carving I got a little carried away trying to clear a pesky chunk of wood and split the whole side of the block off. It had just snowed two feet and finding another piece of wood was out of the question, so I just took some epoxy mixed with sawdust and glued the piece back on. It doesn't look nice, it doesn't carve well and I have questions about its strength, but at least I got to finish the thing. With hours of effort behind me I had a brilliant idea that gave me some problems:
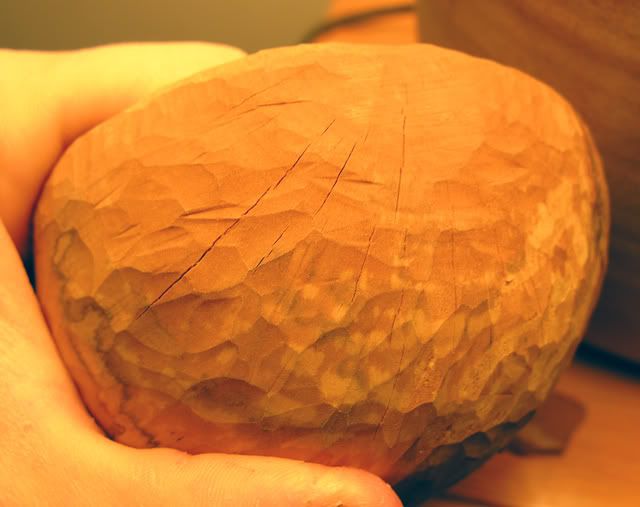
I had read in a number of places that a nice way to get the woodgrain to pop before finishing was to soak it in hot, very dark coffee. So I filled a bowl with Folger's instant and let it soak for a couple of minutes. I took it out to let it dry, came back two hours later and found some sizable checking. I'm not so much surprised as annoyed with myself, but this can serve as a valuable lesson both to myself and others: no matter how dry your carving is dunking it into water for longer than about 10 seconds means you must dry it slowly again. The endgrain absorbs wood more readily than the face grain, which then dries at different rates and gives you nasty results. Had I put it back in the bag and let it dry over a day or two it would probably have been fine.
In any case I had so much fun making this that I think I'll do a series of them as practice. Winter will be coming to an end soon and there should be a good supply of birch and other woods for me to work with, so hopefully in the end I'll get one that doesn't have any serious defects. Hopefully.
I wanted to make it from a burl but we don't get many of those on our trees (chalk it up to fairly mild weather, I guess). I ended up using a spalted birch log:
To begin with you just take a decent size log and split it in half. I wanted the bowl to end up at around 4" across and about 2.5-3" deep, but sort of messed up on the length. There are all different types of handles on these things but leaving yourself extra room when starting on it is probably the best idea. I resigned myself to a little nubbin, but I actually sort of think is nice. I start work with my axe and rough out the shape, trying as much as possible to stick to the circular outline I've drawn on top. It didn't come out as bowl shaped as I'd like, but it looked alright.
Once the shape is basically done I switch to my knife and start to refine things, working for smooth curves and a more semi-spherical shape. You get a good shot of the spalting patterns here, as well as the handle-nubbin. My house is very dry in the winter and there is essentially no way to keep things wet other than wiping the surfaces with a little water and placing them in a mostly airtight plastic bag. If I were planning to leave it in there long-term I would worry about mold, but given that I never went more than 12 hours without taking it out and working on it some I didn't feel bad about getting it a little wet. With the main outer shape done I switched to shaping the inside of the bowl:
90% of the carving done and only final finishing required (I'm waiting on a new tool for that, details coming soon...). You may notice a large dark band on the far side of the bowl that just doesn't quite blend with the spalting. About halfway through the axe carving I got a little carried away trying to clear a pesky chunk of wood and split the whole side of the block off. It had just snowed two feet and finding another piece of wood was out of the question, so I just took some epoxy mixed with sawdust and glued the piece back on. It doesn't look nice, it doesn't carve well and I have questions about its strength, but at least I got to finish the thing. With hours of effort behind me I had a brilliant idea that gave me some problems:
I had read in a number of places that a nice way to get the woodgrain to pop before finishing was to soak it in hot, very dark coffee. So I filled a bowl with Folger's instant and let it soak for a couple of minutes. I took it out to let it dry, came back two hours later and found some sizable checking. I'm not so much surprised as annoyed with myself, but this can serve as a valuable lesson both to myself and others: no matter how dry your carving is dunking it into water for longer than about 10 seconds means you must dry it slowly again. The endgrain absorbs wood more readily than the face grain, which then dries at different rates and gives you nasty results. Had I put it back in the bag and let it dry over a day or two it would probably have been fine.
In any case I had so much fun making this that I think I'll do a series of them as practice. Winter will be coming to an end soon and there should be a good supply of birch and other woods for me to work with, so hopefully in the end I'll get one that doesn't have any serious defects. Hopefully.