The March project is a little leatherwork. I (Bardster) am going to show you how I make a mask for an axe. So for this we are going to need a knife, some thick leather and some basic tools. Also an axe.
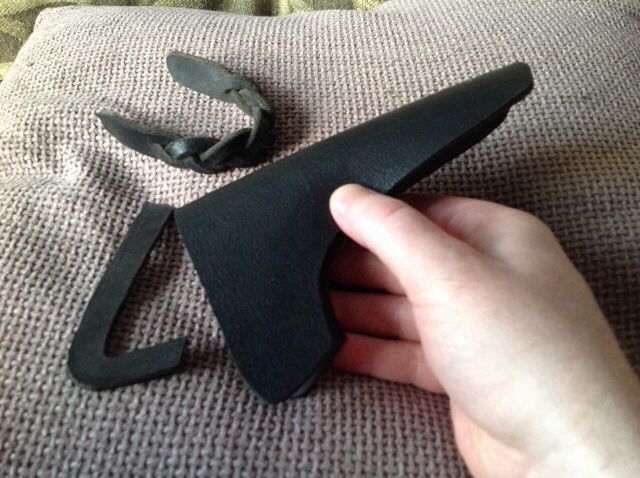
There are various styles of axe mask we could make, my personal favourite is the style as used on the green mask. I have been asked to make a replacement mask for the husqvarna axe in the style of the gransfors axe so that's what we will do.

Next stage is to draw round your axe and establish a pattern. Take into account the thickness of the top of the axe.

If you are using thin card, like a cereal box, you can test fit your pattern around the axe. Looks good from here. Now to transfer the pattern to some leather and cut it out, as well as the welt to protect the stitching.

Leather now cut out and I am going to dye it at this stage as I find it easier than when all sewn together.

The dye I use is Eco-flo professional water stain. It goes on easy and contains oils and waxes so leaves a nice finish on the leather and doesn't dry it out. If you don't have access to leather dyes, coloured shoe Polish will do an excellent job.. For this project I have used Bordeaux with about 30% medium brown to get the colour I want.

Now that dye has dried, I have glued in the welt and added the strap and Sam Browne post. I have also burnished the exposed edges. Time for a test fit. Had to trim a little off the bottom of the welt but now fits perfectly. We could at this stage use rivets, either modern or copper, to fix it all together, but for this one I am going to sew two lines of stitches.

Tines to mark distance from the edge

And the other way to mark the stitch distances

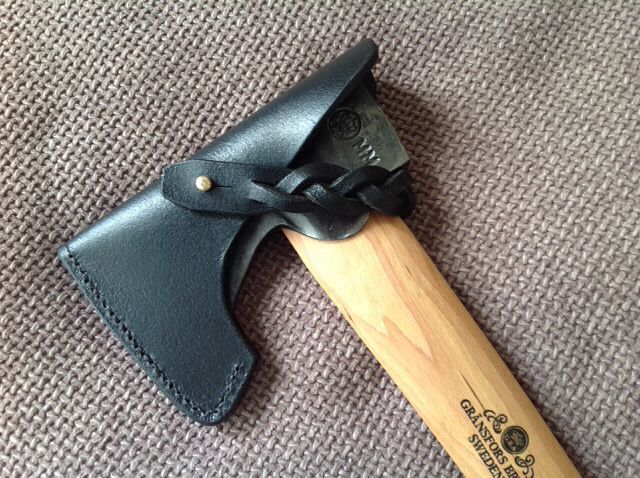
Having finished the sewing, it's a cleanup of all the edges by sanding them smooth and burnishing them. Mark the length of the strap and make the hole for the stud. Give it a polish with a waterproof wax, I use sno-proof and it's ready to go.

And the last thing.... Don't forget your makers mark!
This is my mini wild boar I use when there isn't room for my full stamp.

This is just another example of what we do at The Bushcraft Magazine. Click my signature for more information")
There are various styles of axe mask we could make, my personal favourite is the style as used on the green mask. I have been asked to make a replacement mask for the husqvarna axe in the style of the gransfors axe so that's what we will do.
Next stage is to draw round your axe and establish a pattern. Take into account the thickness of the top of the axe.
If you are using thin card, like a cereal box, you can test fit your pattern around the axe. Looks good from here. Now to transfer the pattern to some leather and cut it out, as well as the welt to protect the stitching.
Leather now cut out and I am going to dye it at this stage as I find it easier than when all sewn together.
The dye I use is Eco-flo professional water stain. It goes on easy and contains oils and waxes so leaves a nice finish on the leather and doesn't dry it out. If you don't have access to leather dyes, coloured shoe Polish will do an excellent job.. For this project I have used Bordeaux with about 30% medium brown to get the colour I want.
Now that dye has dried, I have glued in the welt and added the strap and Sam Browne post. I have also burnished the exposed edges. Time for a test fit. Had to trim a little off the bottom of the welt but now fits perfectly. We could at this stage use rivets, either modern or copper, to fix it all together, but for this one I am going to sew two lines of stitches.
Tines to mark distance from the edge
And the other way to mark the stitch distances
Having finished the sewing, it's a cleanup of all the edges by sanding them smooth and burnishing them. Mark the length of the strap and make the hole for the stud. Give it a polish with a waterproof wax, I use sno-proof and it's ready to go.
And the last thing.... Don't forget your makers mark!
This is my mini wild boar I use when there isn't room for my full stamp.
This is just another example of what we do at The Bushcraft Magazine. Click my signature for more information