(Please excuse my bad english  )
)
Good evening, long time no see,
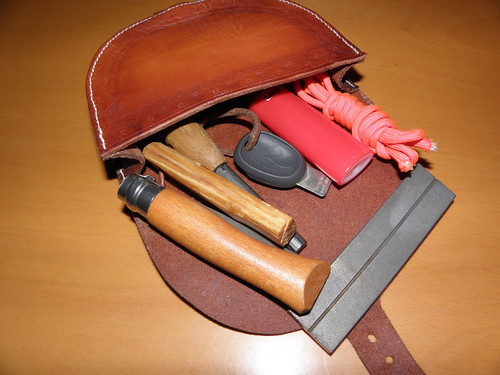
I want to show you the new belt pouch I just made. It's my first try in leather stamping although I worked with leather very often. The leather I used is oak tanned with a thickness of about 2 mm.
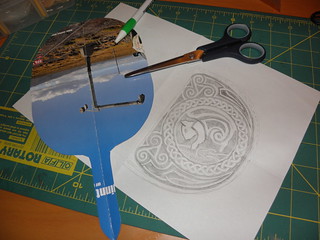
First you need a pattern, I have chosen the emblem of our german bushcraftportal: a squirrel with a figure eight knot with some celtic knot pattern around and two triskells. I directly cutted out the leather for to see the final result:
Projekt: punzierte Gürteltasche von wildhog9910 auf Flickr
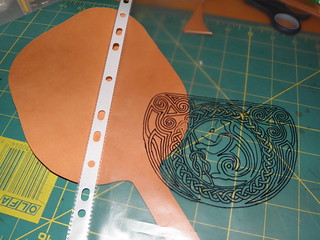
I traced the pattern onto a transparent sheet:
Projekt: punzierte Gürteltasche von wildhog9910 auf Flickr
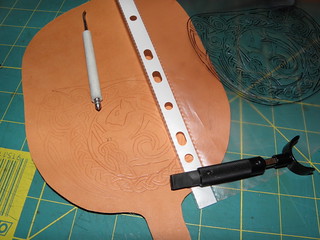
The leather has to be a little moist, so the outlines could better traced with the ballpen. After that, the leather must dry, so you can cut the surface much easier:
Projekt: punzierte Gürteltasche von wildhog9910 auf Flickr
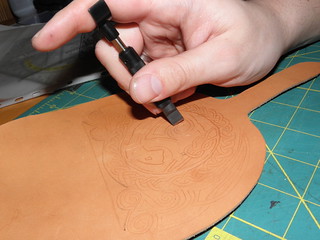
The outlines are cutted onto the surface with the swivel knife. It will also worc with a small knife or a scalpel, but with a swivel knife its much easier and you can cut tighter radiuses:
Projekt: punzierte Gürteltasche von wildhog9910 auf Flickr
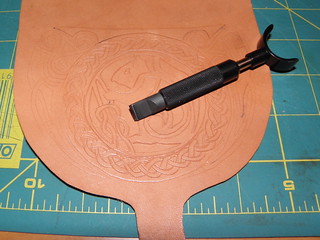
Heres a little mistake I made: I used the same tool for tightening the outlines then for tracing, and had a bit of colour on it. So the colour is now on the leather surface:
Projekt: punzierte Gürteltasche von wildhog9910 auf Flickr
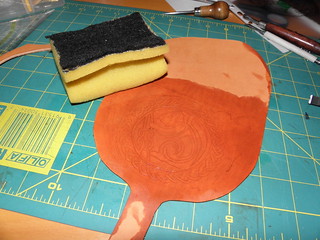
Are all outlines cutted in, the leather has to be moistured for stamping from both sides. I guess I overacted it an it became too wet. If the leather ist too wet, the stampings will not last for a longer time.
Projekt: punzierte Gürteltasche von wildhog9910 auf Flickr
The outlines where opened with an stitching awl:

Projekt: punzierte Gürteltasche von wildhog9910 auf Flickr

Projekt: punzierte Gürteltasche von wildhog9910 auf Flickr
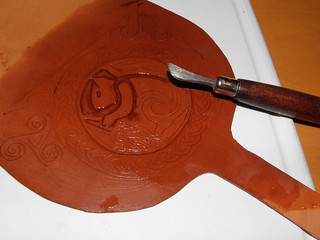
The I have done the leather embossing with different tools. For the flap I didnt use any special stamping tools, just the modelling tool:
Projekt: punzierte Gürteltasche von wildhog9910 auf Flickr
Even screwdrivers or similar tools are suitable for leatherstamping
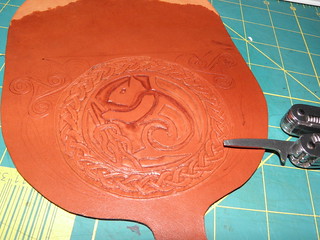
Projekt: punzierte Gürteltasche von wildhog9910 auf Flickr
At first I wanted to attach more knot figures on the flap, but I made a mistake on the drawing. I had luck, not to cut the patterns on the surface at this time. So I decided to attach a small dor pattern, for which I just pushed the ball pen onto the surface.

Projekt: punzierte Gürteltasche von wildhog9910 auf Flickr
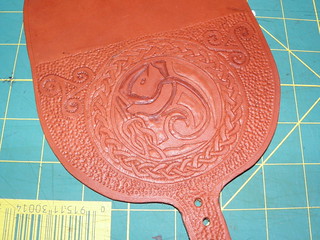
Projekt: punzierte Gürteltasche von wildhog9910 auf Flickr
Here are the leatherparts ready for sewing. When the leather gets dry, the patterns will look a bit boring:
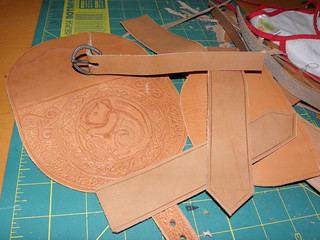
Projekt: punzierte Gürteltasche von wildhog9910 auf Flickr
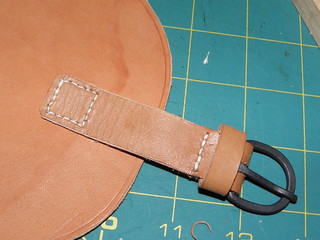
The little buckle is attached on a small leather thong. For the little loop I have sewn the edges stump together. The loop is slipped behind the buckle and secured with a seam.
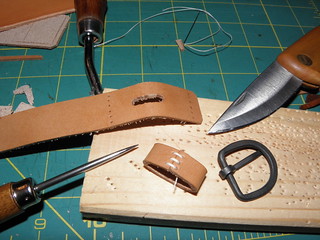
Projekt: punzierte Gürteltasche von wildhog9910 auf Flickr
These leather parts has to be attached first:
Projekt: punzierte Gürteltasche von wildhog9910 auf Flickr
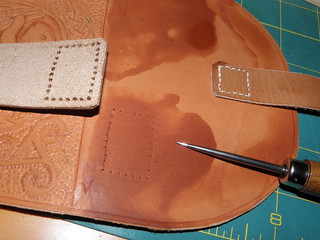
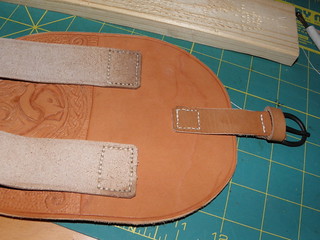
After that, I attached the belt loops:
Projekt: punzierte Gürteltasche von wildhog9910 auf Flickr
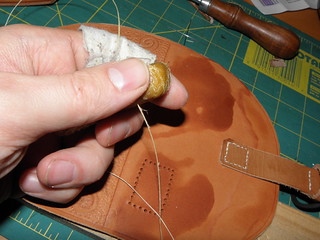
For sewing I used Linen thread which I have drawn through a special wax. I often see guys, drilling holes through the leather and draw thick needles through it with nippers. It works, no question. But when you stitch through the (wet) leather just with an awl, and use little needles, you will get a more sturdy seam with less effort. Its like modern wood fastening and traditional carpenter skills... it works both.
Projekt: punzierte Gürteltasche von wildhog9910 auf Flickr
Projekt: punzierte Gürteltasche von wildhog9910 auf Flickr

Projekt: punzierte Gürteltasche von wildhog9910 auf Flickr
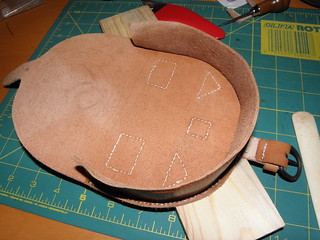
Now I sewn the back part and the middle part together. The leather I used is a bit sturdy, so I had to moisture it while sewing. Sewing ist much easier when the leather is thinned out on the seams.
Projekt: punzierte Gürteltasche von wildhog9910 auf Flickr
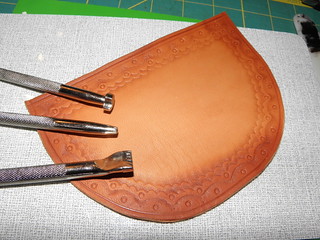
The front I stamped with leather tools:
Projekt: punzierte Gürteltasche von wildhog9910 auf Flickr
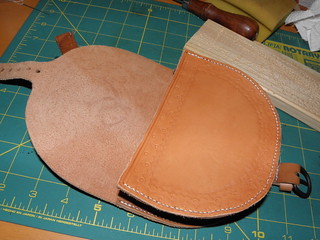
When you attach the front you must be careful to begin on the same side than on the back as the whole pouch will get slope. After finishing the seams, the peaces can be formed with a folding leg.
Projekt: punzierte Gürteltasche von wildhog9910 auf Flickr
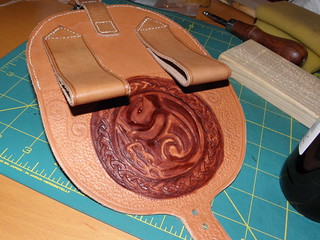
For getting the bag more rustic I used swedish linseed oil to patinate. After that procedure, I greased the whole pouch with dubbin.
Projekt: punzierte Gürteltasche von wildhog9910 auf Flickr
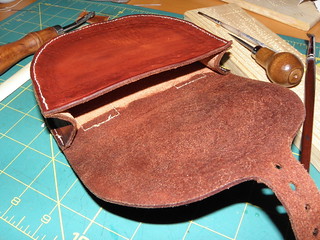
Projekt: punzierte Gürteltasche von wildhog9910 auf Flickr
On the pictures the bag seems to look glossy but in fact it has a matt finish.
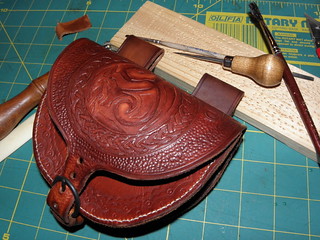
Projekt: punzierte Gürteltasche von wildhog9910 auf Flickr

Projekt: punzierte Gürteltasche von wildhog9910 auf Flickr
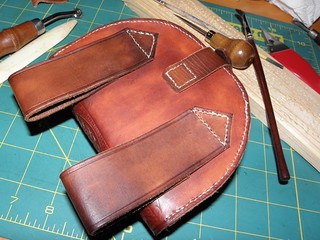
Projekt: punzierte Gürteltasche von wildhog9910 auf Flickr
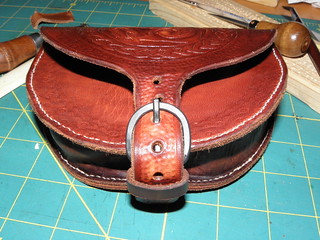
Projekt: punzierte Gürteltasche von wildhog9910 auf Flickr
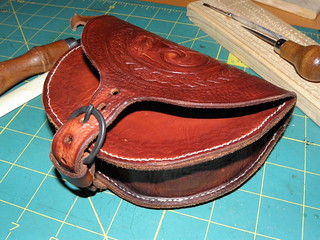
Projekt: punzierte Gürteltasche von wildhog9910 auf Flickr
I hope you like it.
Cheers
Stefan
Good evening, long time no see,
I want to show you the new belt pouch I just made. It's my first try in leather stamping although I worked with leather very often. The leather I used is oak tanned with a thickness of about 2 mm.
First you need a pattern, I have chosen the emblem of our german bushcraftportal: a squirrel with a figure eight knot with some celtic knot pattern around and two triskells. I directly cutted out the leather for to see the final result:

Projekt: punzierte Gürteltasche von wildhog9910 auf Flickr
I traced the pattern onto a transparent sheet:

Projekt: punzierte Gürteltasche von wildhog9910 auf Flickr
The leather has to be a little moist, so the outlines could better traced with the ballpen. After that, the leather must dry, so you can cut the surface much easier:

Projekt: punzierte Gürteltasche von wildhog9910 auf Flickr
The outlines are cutted onto the surface with the swivel knife. It will also worc with a small knife or a scalpel, but with a swivel knife its much easier and you can cut tighter radiuses:

Projekt: punzierte Gürteltasche von wildhog9910 auf Flickr
Heres a little mistake I made: I used the same tool for tightening the outlines then for tracing, and had a bit of colour on it. So the colour is now on the leather surface:

Projekt: punzierte Gürteltasche von wildhog9910 auf Flickr
Are all outlines cutted in, the leather has to be moistured for stamping from both sides. I guess I overacted it an it became too wet. If the leather ist too wet, the stampings will not last for a longer time.

Projekt: punzierte Gürteltasche von wildhog9910 auf Flickr
The outlines where opened with an stitching awl:

Projekt: punzierte Gürteltasche von wildhog9910 auf Flickr

Projekt: punzierte Gürteltasche von wildhog9910 auf Flickr
The I have done the leather embossing with different tools. For the flap I didnt use any special stamping tools, just the modelling tool:

Projekt: punzierte Gürteltasche von wildhog9910 auf Flickr
Even screwdrivers or similar tools are suitable for leatherstamping

Projekt: punzierte Gürteltasche von wildhog9910 auf Flickr
At first I wanted to attach more knot figures on the flap, but I made a mistake on the drawing. I had luck, not to cut the patterns on the surface at this time. So I decided to attach a small dor pattern, for which I just pushed the ball pen onto the surface.

Projekt: punzierte Gürteltasche von wildhog9910 auf Flickr

Projekt: punzierte Gürteltasche von wildhog9910 auf Flickr
Here are the leatherparts ready for sewing. When the leather gets dry, the patterns will look a bit boring:

Projekt: punzierte Gürteltasche von wildhog9910 auf Flickr
The little buckle is attached on a small leather thong. For the little loop I have sewn the edges stump together. The loop is slipped behind the buckle and secured with a seam.

Projekt: punzierte Gürteltasche von wildhog9910 auf Flickr
These leather parts has to be attached first:

Projekt: punzierte Gürteltasche von wildhog9910 auf Flickr
After that, I attached the belt loops:

Projekt: punzierte Gürteltasche von wildhog9910 auf Flickr
For sewing I used Linen thread which I have drawn through a special wax. I often see guys, drilling holes through the leather and draw thick needles through it with nippers. It works, no question. But when you stitch through the (wet) leather just with an awl, and use little needles, you will get a more sturdy seam with less effort. Its like modern wood fastening and traditional carpenter skills... it works both.

Projekt: punzierte Gürteltasche von wildhog9910 auf Flickr

Projekt: punzierte Gürteltasche von wildhog9910 auf Flickr

Projekt: punzierte Gürteltasche von wildhog9910 auf Flickr
Now I sewn the back part and the middle part together. The leather I used is a bit sturdy, so I had to moisture it while sewing. Sewing ist much easier when the leather is thinned out on the seams.

Projekt: punzierte Gürteltasche von wildhog9910 auf Flickr
The front I stamped with leather tools:

Projekt: punzierte Gürteltasche von wildhog9910 auf Flickr
When you attach the front you must be careful to begin on the same side than on the back as the whole pouch will get slope. After finishing the seams, the peaces can be formed with a folding leg.

Projekt: punzierte Gürteltasche von wildhog9910 auf Flickr
For getting the bag more rustic I used swedish linseed oil to patinate. After that procedure, I greased the whole pouch with dubbin.

Projekt: punzierte Gürteltasche von wildhog9910 auf Flickr

Projekt: punzierte Gürteltasche von wildhog9910 auf Flickr
On the pictures the bag seems to look glossy but in fact it has a matt finish.

Projekt: punzierte Gürteltasche von wildhog9910 auf Flickr

Projekt: punzierte Gürteltasche von wildhog9910 auf Flickr

Projekt: punzierte Gürteltasche von wildhog9910 auf Flickr

Projekt: punzierte Gürteltasche von wildhog9910 auf Flickr

Projekt: punzierte Gürteltasche von wildhog9910 auf Flickr
I hope you like it.
Cheers
Stefan

