Kelly kettle hacks

  • Thank you for your patience today we had quite a big update to install which has added/changed some features. We're still reconfiguring but everything should at least be working now.
Not having seen one in action, but why in both makes is the burn chamber smaller than the diameter of the kettle? I see the Petromax has stabilising legs, but having a smaller chamber at the bottom on both seems to make everything unnecessarily unstable?
The burn pot stacks inside the kettle for storage and transport so it has to be an inverse conical shape so it fits in, if that's what you mean?
I have the stabilising legs for my smaller ghillie kettle and find they work quite well. Once the kettle is off the burn pot it's very stable as the base is the widest point, but tbh I've never had a problem with stability. It's no different to making sure you have a small gas stove level and stable before you put a pot on top. The main benefit of the legs on the stand IMHO is that it raises the burn pot off the ground.
 
Ah! The stability issues that I mentioned referred to the kettle with the pot rest placed up in the flu and then a cooking pot on top of that.

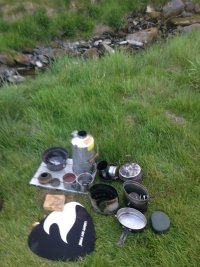
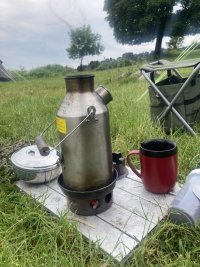
Instead of legs I carry a very light weight aluminium table without legs. It keeps the Kettle off the ground, it gives me somewhere to put the hot kettle when I’m using Hobo and I can put anything else that’s hot down without damaging the herbage. It is small enough to fit into the washing up basin that also carry.

I’m in the hills. I’ll put up a picture of the table later
 

Attachments

  • IMG_2183.jpeg
    IMG_2183.jpeg
    243.9 KB · Views: 15
  • IMG_4961.jpeg
    IMG_4961.jpeg
    282.1 KB · Views: 15
  • Like
Reactions: birchwood
Thanks, the pictures are very helpful. I was under the misunderstanding that the base was smaller than the body, and looks that way on the Petromax version. To me it still looks like a weight balanced up high and a lot of hassle for boiling water, but to each their own.
 
To me it still looks like a weight balanced up high and a lot of hassle for boiling water, but to each their own.

Not a bad judgement! They have their uses, family or group camping where a lot of hot water is needed, or around the homestead (where I use mine mostly).

Realistically for anything less than that, a little TLUD gasifier which packs into itself in sections will do the same job, AND cook food, and will fit inside one pot or two nesting pots which can cook and boil. And it will run for 30-45mins without feeding or fiddling. Fraction of the weight and space, that's my setup of choice when using fire rather than liquid fuel stoves.

Kelly kettles are utterly windproof though, and for the fire-starved they are a good toy.
 
  • Like
Reactions: TLM
Thanks, the pictures are very helpful. I was under the misunderstanding that the base was smaller than the body, and looks that way on the Petromax version. To me it still looks like a weight balanced up high and a lot of hassle for boiling water, but to each their own.
I struggle with balance every time I use mine, it is very topple-y - especially when using a fire striker, I tend to knock it with that action. The kettle sits well in the fire base, but the leg accessory is not sturdy at all - they sell the same one to fit all sizes of kettle, instead of a design which is to size.

My understanding is the main advantage is efficiency and speed. Certainly, boiling the whole kettle is faster for me than using the stove to steam a spoonful of water for 'just heat through' rice on the hobo stove.
 
1. Don’t use the legs. I don’t even own any.

2. I’ve watched folk knock their tinder all over the shop with their ferro scraper.
So
Hold your ferro scraper still where you want the spark then PULL the rod. Nothing knocked anywhere and an accurate spark.

Unless rules or site conditions absolutely dictate that I use the Trangia, I won’t use anything other than the Trekker kit and a ferro rod but that’s me :)
 
  • Like
Reactions: Falstaff
The trekker kit looks ok but I'm surprised neither Kelly or Petromax offer a tripod hanging version, it wouldn't take much to make the fire base a clip-on/twist off item.
 
Hold your ferro scraper still where you want the spark then PULL the rod. Nothing knocked anywhere and an accurate spark.:)
I've tried the pull to scrape technique and it still goes everywhere, and takes forever XD I thought I must have a duff ferro rod or maybe one that's too short, for the second time running, but the guys I know have borrowed it and they make a beautiful shower of sparks so it's def something in my technique.

Right now I light the cotton next to the kettle on a stone, and have a long thin stick in the cotton ready. Then when it burns, I pick up the stick and poke it into the nest. There's absolutely no way to create any kind of stick arrangement and strike into it, I'll knock it over.
 
You’re not the first here to suggest that pulling the ferro is difficult. This surprises me as when I learned it it changed my fire lighting forever. We each have different preferences and different motor skills so no two people are the same.

I’m up to my neck just now - I went camping when I should have been prepping a performance and gardening!
BUT
Sometime in December I’ll try and do a video of this way of using a ferro. It might be interesting and it might not.
I only ever use a ferro rod for lighting fires whether in camp, garden or my front room open hearth.

I find in life you shake down your methods by practicing the things that make sense to you, rejecting those that don’t and abandoning those that may call to you but just become too much hassle.
Hence my long relationship with my Trekker. Others will have totally different views.
 

Ferro Rod Techniques from a Green Beret​

Here you go, saves making a new video. Not all rods are the same, I use the pull method and my other rods work fine, but I have one that throws lots of sparks but cannot light a thing, not even a fire lighter.
 
  • Like
Reactions: Pattree
@haptalaon is probably using the same ferro rod that I use regularly. It very probably comes from the same batch.

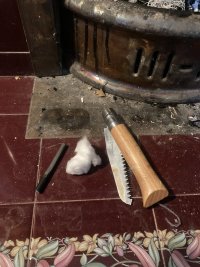
It’s almost a cliche to use the back edge of an Opinel as a scraper but you need that beautiful sharp 90 degree edge correctly angled. I don’t even open the knife. Better still is the back edge of an Opinel #12 pull saw. A great scraper and very effective little saw in camp.
A piece of hacksaw blade works wonders too.
 
Thanks @Falstaff You’ve saved me a lot of time that I don’t have.

Notes from video:

I’m with him all the way with tinder and ferro dust.
However when using a Kelly Trekker your tinder nest is quite small and you don’t want to turn it over.

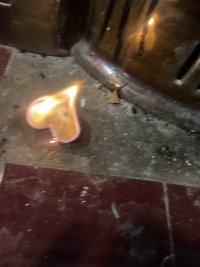
If I’m using a cotton wool ball then I’m careful to fluff it up thin. Same with bush candle wicks of course.

I can quite easily light a paper handkerchief (No balsam!!) or a kitchen towel by shredding it and making a very small nest.

After I’ve gently scraped a little ferro dust I don’t go manic. I lock the wrist holding the scraper against my (kneeling) leg. That scraper is not going to move once it’s positioned where I want the spark. Unlike the video I hook the rod UNDER the scraper so that pulling up into the scraper and pulling hard does the job. Usually no more than two pulls are necessary.

Let me just check that right now:

Ready.
IMG_7120.jpeg

Scrape.

PULL
IMG_7123.jpeg

One pull did it.
I really am not talking out of my bum.

I’d say to anyone: it’s up to you. Ferro, fire bow or Bicc - there is nothing inherently “bushcraft” in any of them.
 
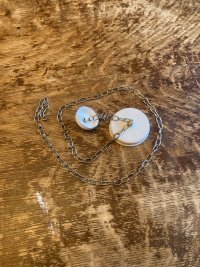
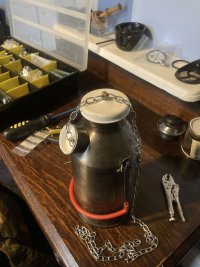
This is cobbled up from what I have about the place:


IMG_7125.jpeg
IMG_7124.jpeg

I wouldn’t use this but if I did
I’d want to be sure I carried it upright and probably in a plastic rubble sack. As @Hammock_man said: it’s probably better for carrying water from source to camp.

There you go.
If you want it you can have it, if not then it’s back into the bits drawer.
 
Last edited:
Thanks @Falstaff You’ve saved me a lot of time that I don’t have.

Notes from video:

I’m with him all the way with tinder and ferro dust.
Unlike the video I hook the rod UNDER the scraper so that pulling up into the scraper and pulling hard does the job. Usually no more than two pulls are necessary.
Do you know I never noticed that he does it on top, I've always used underneath too, for the same reason as you, it just seemed natural. Presumably, weather permitting, it might be possible to light the tinder outside the fire box then put the burning tinder in.
 
I believe that is what @haptalaon does with a clever stick technique.(outside of the fire base.)

I don’t because I don’t have the problem. I light it in the fire base.
I’m not sure why H is having trouble cooking on the Kelly Hobo. Is usually the only thing that I use - porridge, bacon and eggs, spuds and veg, curry - all on the little Hobo. As demonstrated, I’ve made bread with the bigger one. That requires the Hobo running for nearly thirty minutes full bore.

Ah! Not a hack but definitely a technique:
The first thing that I do is boil a Kettle full. This gets the fire roaring quickly. I may make a drink, I may use the hot water in cooking or it may sit there for the washing up.

If I do let the fire die down a bit and there is no wind, I put on a handful of thin sticks (matchwood) then I pick up the whole fire bucket with a pot gripper with the vent pointing sideways and waft it gently backwards and forwards. Soon gets it blazing again.

Edited to add:
The energy that lights up that high temperature spark from your ferro all comes from your arm muscles and maximum friction. Give it some wellie.
And
If you suspect your rod, change your scraper first.
 
Last edited:
This is cobbled up from what I have about the place:


View attachment 91490
View attachment 91491

I wouldn’t use this but if I did
I’d want to be sure I carried it upright and probably in a plastic rubble sack. As @Hammock_man said: it’s probably better for carrying water from source to camp.

There you go.
If you want it you can have it, if not then it’s back into the bits drawer.
If it's no trouble, then I would like the plug lids - I'll report back if they're a useful addition or not. I've just learned netting specificslly to strap my water carriers on the outside of my rucksack.

Thank you for continuing advice about my fire skills ^_^ today I managed to re-light my kettle from warm embers alone, three times, so I'm very chuffed about skilling up on that. I've also got a new appreciation for how many additional rounds of tinder (thank you for the birch bark) and matchsticks keep the fire cycle going,

& that clearing out the fire base of messy clutter is periodically required as the old stuff collapses into an airless heap. I did try and put some larger pieces in to like, have the Trekker equivalent of a big log to 'hold onto' heat but it's not working well. You know like a fire is like going up the gears in a car? I'm not sure what that 'sustain' point is in a Kelly, or if you just have to keep feeding it sticks.

I also experimented with semi-splitting some sticks so they stand up in lil tripods, because forming a teepee of sticks is impossible in Trekker scale, but a split stick will hold together as a base. A lot of my big fire tricks are about spacing so it's figuring out how to scale that down.

I'm interested by the suggestion of trying to keep the fire burning pretty low, right now I tend to aim for a roaring chimney of flame because it's satisfying and feels correct, but I know fire =/= the goal of a fire, in all circumstances.

I'd also like to figure out how to quiet down a fire without soaking it, I'm really uncomfy with the way a finished fire will smoke and smoke and smoke as long as it pleases, my spidey sense says that's a horror for the lungs and worth avoiding. Its not safe put at a distance from my tent but I certainly don't want to sleep next to it.

Its very possible I'm being too timid with my striking, and holding the stick rigid braced against a body part is a good idea. I have a folding oppinel, but it's very well loved and poorly cared for so I wonder if the back edge is just bashed in some way. Hmmm.

I will watch the video when I have a real Internet connection again.

I'm not an especially confident cooker in even a normal kitchen, so the extra constraints of the fire and the tiny fire pit and limited resources are double challenging. I'd be very anxious about simmering porridge.
 
Yes you will be feeding your fire to keep it going but what else are you going to be doing for the minutes it takes while you are cooking?

Don’t bother trying to simmer, just lift.

Porridge is just three minutes of stirring. I do it every morning in camp.

Look at my avatar top left of my posts. Flames that you can’t see by daylight are two feet high at night. Nothing wrong with that.

I always have glowing coals and a bit of smoke when I’m done. I just sit up wind or knock it about. I really can’t remember doing anything much so I probably don’t do anything :)

Drop a bunch of six inch sticks down the chimney once your fire is going. They’ll burn out in minutes then drop chunks ready for cooking.

It’s just practice and shakedown.
 
It’s a handle that I made from 3mm Spring steel wire and some silicon tube. The shape comes from the Svea M40 (Stainless steel version of the “Swedish Army Trangia”.). I needed the handles on pot and Kettle to pack flush for my convertible bag/mat. I suspect that with a little patience you could make a simple hoop bale do the same thing but I liked this. The “pistol grip” effect makes lifting easier too.

I’ve put it onto my Zebra pots and the Trekker (0.6L). I’ll convert the Base Camp (1.6L) when I get round to it. It keeps its shape when a 16mm Zebra pot has 2 litres of water in it and is swung about.

There is also a small hack to the hooks so that the handle packs flush under the spout for transport but on the other side where you want to lift, it’s raised clear of the flames in use.

Patrick Kelly was sufficiently impressed that he’s messing about with it. Maybe for a new style little KK. (He liked the bag too but he’s also very polite as well as approachable).
 
  • Like
Reactions: Firemagnet

BCUK Shop

We have a a number of knives, T-Shirts and other items for sale.

SHOP HERE