Building a Long term shelter

Bridging the gap between “survival” and “primitive living”.
Editors note – We first published this article back in 2007 and it inspired some great projects among our Bushcraft UK members and beyond, we hope that sharing it all these years later inspires the same inspiration for those that want to tackle an awesome, fun project.
For more and more people, practising Bushcraft or Primitive Survival slowly turns into more than just a weekend away from a hectic lifestyle. It becomes more than simply seeking the solitary moments the woods can offer or indeed the camaraderie of being outdoors with a group of like-minded people. It even transcends the joy of learning and practising the skills themselves. It becomes a way of life. A way of being.
The skills that you will be interested in initially when getting into Bushcraft will likely be very basic. They are often skills such as building and lighting a fire with only primitive means, providing basic shelter, gathering food, and the like. As your interest develops and your proficiency in these basic skills grows, the skills you will find interesting will inevitably become more “in depth”. Making cord, building clay pots, weaving, flint-knapping and other such skills come to mind. This learning process continues with quite “advanced” skills such as brain tanning, canoe building, bow building, and so on.
Interestingly enough, this process of learning closely mirrors the reality if you were to be in a real-life survival situation, whether this situation was Interestingly, this process of learning closely mirrors the reality of being in a real-life survival situation, whether it is forced or voluntary. You would first be looking after your most immediate needs. (We all know the priorities list: Shelter, Water / Fire, Food)
Then, as these most pressing needs are provided for, you will try to make it a little easier to look after them (Containers, cutting tools, cord, etc).
Being able to provide for your needs more easily and efficiently will give you more time to make things that will make life even easier and more comfortable. (Bows and arrows, clothes, transport,…) And so the process continues.
You can see that at some point during that survival period, the act of “trying to stay alive” has become “primitive living”.
For me personally, the true turning point comes when you move yourself and your few belongings from your temporary emergency shelter (whether this is a debris hut, lean-to, or basha) into a more comfortable long-term shelter. It is the difference between a quick temporary shelter and a true home.
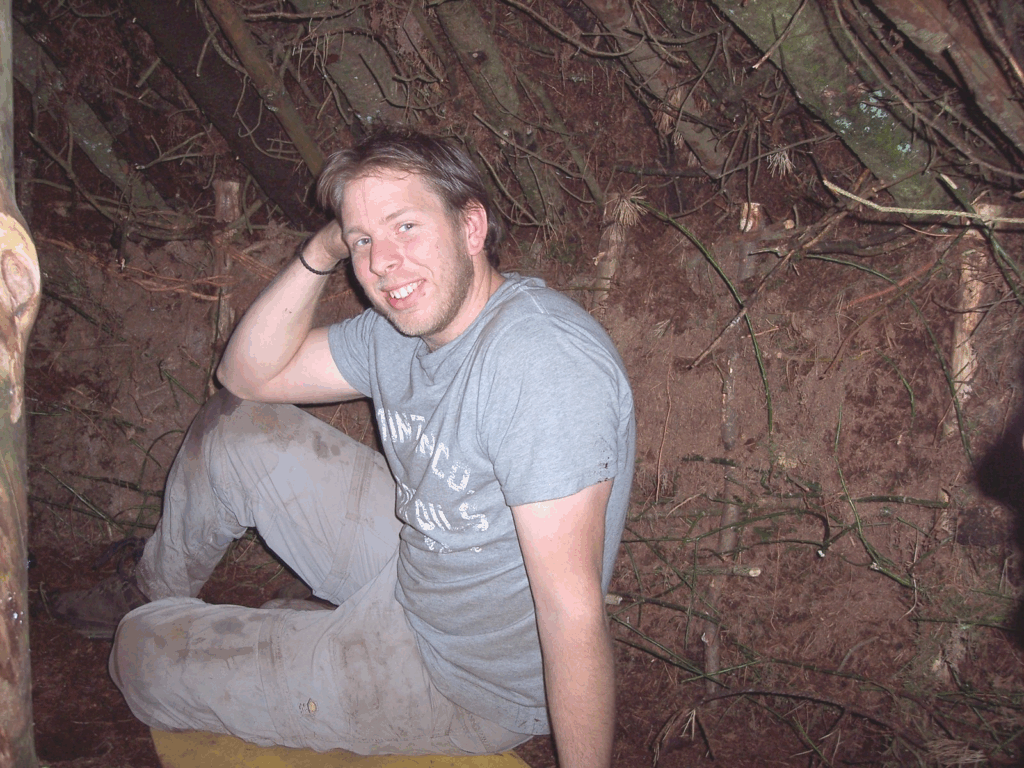
There are no words for describing the emotions that flood through your body when you get to relax next to the first fire in your toasty new bush-home with a big sigh of comfortable contentment, while a clay cup of pine-needle tea or acorn-coffee is brewing on the fire, and the smell of roasting meat is touching your nostrils.
When you have achieved the building of such a shelter, then the above rewards are more than your due, because building a big shelter can mean a lot of work, especially if the tools you have at your disposal are limited.
Location:
If you are in a survival situation, then chances are you have already picked an appropriate location for your shelter. However, you may have been forced to remain in a small unsuitable area and you may not have had time to explore the area thoroughly when you first entered the situation. It is also possible you found a much better site during your daily wanderings for food, water and other essentials.
What you are looking for is an area that has:
- Easy access to reasonably clean water (Yet not too close for fear of polluting the water, precipitation, flooding or midges and other insects)
- Safety from strong winds, falling branches, dangerous animals (humans?), landslides, flash floods, etc
- A certain amount of “natural shelter” from wind and rain, yet exposed enough to receive plenty of daylight.
- A certain level of comfort. (Level site, no big unmovable rocks, well-drained soil, etc.)
- Good access to resources such as food, firewood and building materials.
- Permission from the land-owner (If applicable)
- Benefit to the natural environment (You will be using a lot of resources, so it is vital to ensure that taking those resources selectively will actually benefit the area as much as possible.)
- After your shelter is built, you should not use ANY resources within a radius of 250 yards from your shelter, as this will make your home area into a peaceful, undisturbed area for plant and beast, which can double as an emergency larder should you fall ill or become incapacitated in any way.
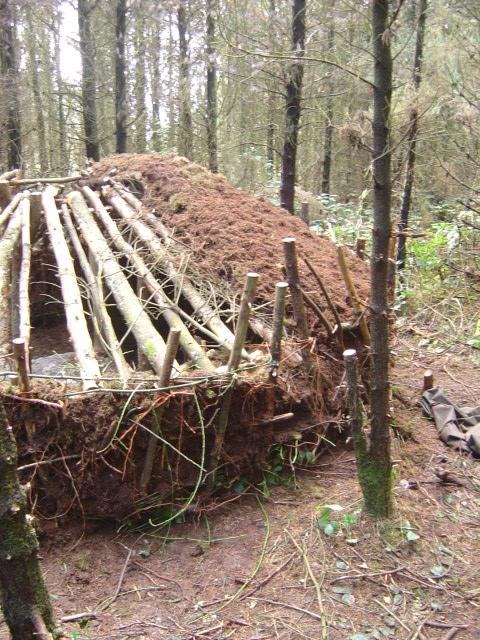
The shelter pictured in this article was built right on the border between thick, heavy dark pine and spruce woods overgrown with brambles and filled with standing dead trees (3/4th of the trees had died, while half of those were rotten) and a fairly open transition zone between the above woods, a mountain stream and meadows.
This means that we have plenty of (dead) materials from the dense woodland, such as logs, poles, and leaf litter, while we have very clean water reasonably nearby. The transition zone was still too full of dead standing trees, but it provided a lot of forest litter and shelter from the wind. The meadows and transition zones provide good food gathering and hunting / trapping grounds. The actual site itself is level enough, and any rocks and tree stumps were easily removed.
The benefit we provided to the land by building the shelter there is that all the building resources we needed are more than abundant, and choked the forest. Due to the trees being far too close together, dead trees didn’t fall, and daylight was blocked, resulting in a dark, damp, rotten forest where new growth had no chance. Apart from blackberries, there is hardly any other lower plant cover, meaning the animals stay away because they cannot find the food they need. Even if there was food, the forest is impassable due to the brambles. There is no biodiversity.
The poles we needed for the shelter came from the dead, non-rotten trees that were still standing.
While we were at it, we also pulled down some of the rotten trees and broke them up. Of course, standing dead trees also fulfil a purpose, so we were selective in picking the ones we did fell. This meant that the forest canopy was opened up a lot, so sunlight can now reach the ground. Spaces were created where other plants can grow without being overly crowded. Existing trees can expand and increase their strength and wind resistance. Hopefully (With our help), other tree and plant species can grow too, increasing the forest’s resistance to disease.
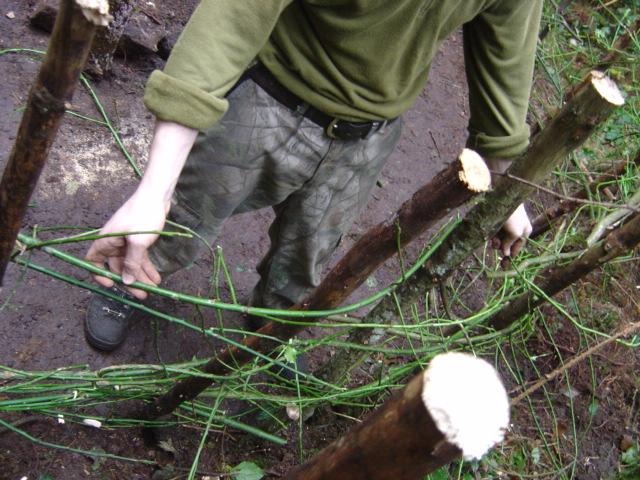
The ground litter we needed for the cover and insulation of our shelter came from areas with litter so thick that nothing could grow into the soil, and all that grew there were lichen and blackberries. Other material we needed was weaving material. We tried as much as possible to use pine and spruce roots (Encouraging growth of new roots for existing trees) and Blackberries (There were far too many). We also needed Holly, which was not a detriment to the forest, but we tried to be selective and conservative in our use.
Building the shelter:
Of course, there are many different types of shelters that can be built to suit a myriad of different needs and locations. We chose a type of shelter that would be very well insulated and easy to heat, while keeping out the Irish wet weather.
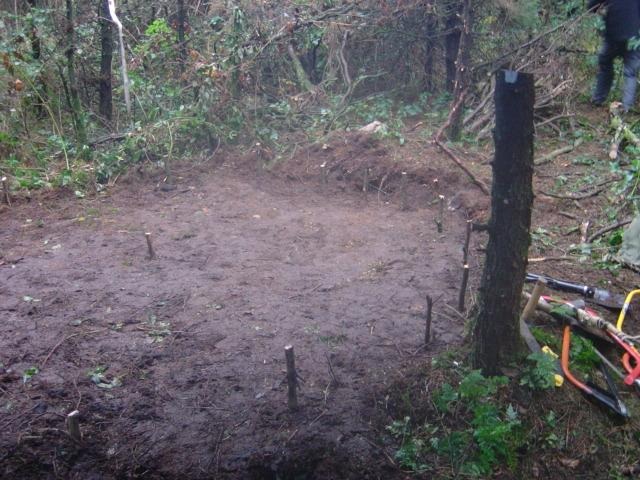
As we have already picked a site, the next job is to prepare the ground. Now, remember that this is going to be a permanent shelter that we want to use for many years to come. The building and presence of this shelter will undoubtedly alter the landscape, as this is very obviously not a “leave no trace” project. But to counter our “trace”, we have ensured our trace is beneficial rather than detrimental, as described in the previous paragraphs.
Because we want to use the shelter for a long time, which requires a strong, sturdy build, we decided to level the ground to ensure a high level of comfort and safety. Stone and dead roots were pretty much all we removed, and any soil dug out was placed on the lower part of the “slope”, creating a level site. All in all, we had to dig down only about half a foot, or 15cm, on average, on the upper half of the slope.
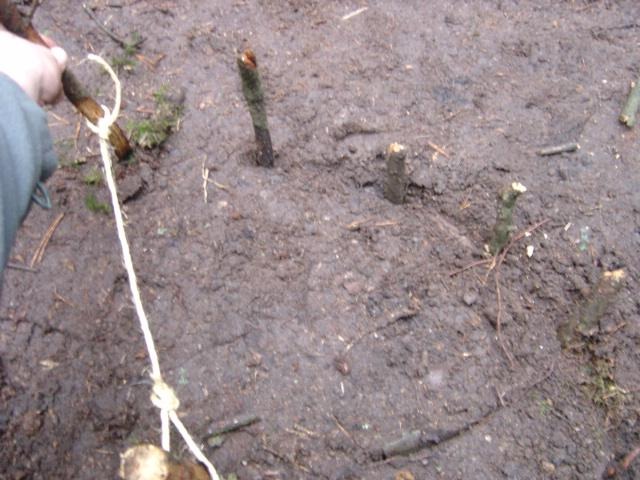
After this was done, we decided on the inner radius for the shelter and traced it out by placing a peg in the centre of our site, loosely attaching a cord with the correct radius, and placing pegs at the limit of the cord. The inner radius of our shelter was decided at 51/2 feet, or roughly 1.75 meters, which would provide 6 of us ample space plus a safe fireplace in the centre.
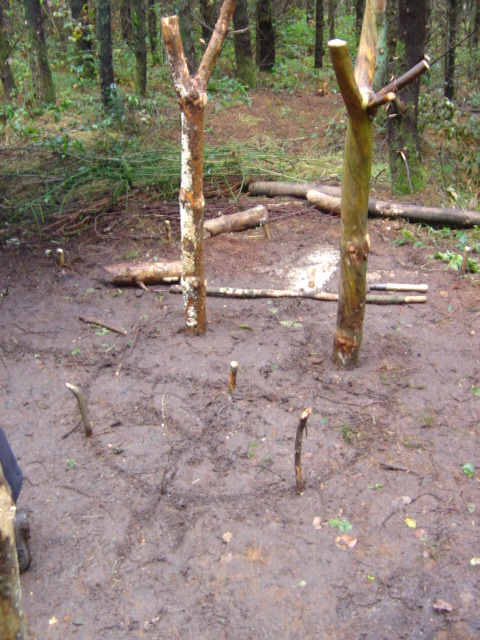
The next step was to draw out our fireplace onto the ground and mark where the posts were going to go. It is vitally important to leave more than enough room for the fire, as the entire shelter is built of some of the most combustible materials the forest can produce. I generally leave a circle with a minimum diameter of three feet exclusively for the fire. The central posts would be just outside these three feet. In the case of our shelter, the fireplace itself was given about 3 ½ feet (just over a meter), plus an additional foot (30cm) to provide room for the central four posts.
Our fire-place drawn out including the space needed for the four central posts. The cross indicates the wind-directions. And the sticks indicate where the outside of the posts will go
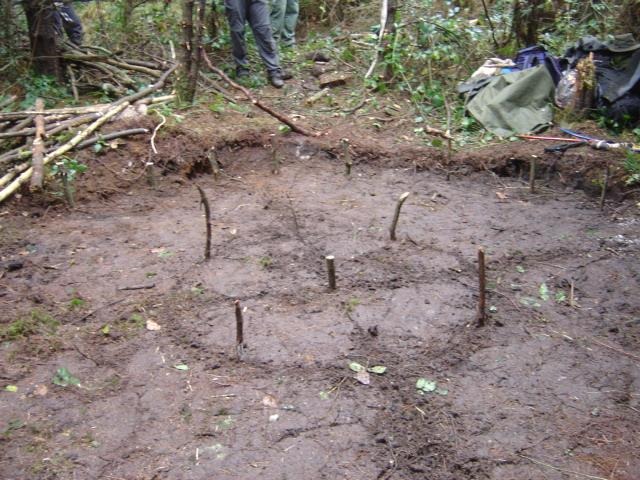
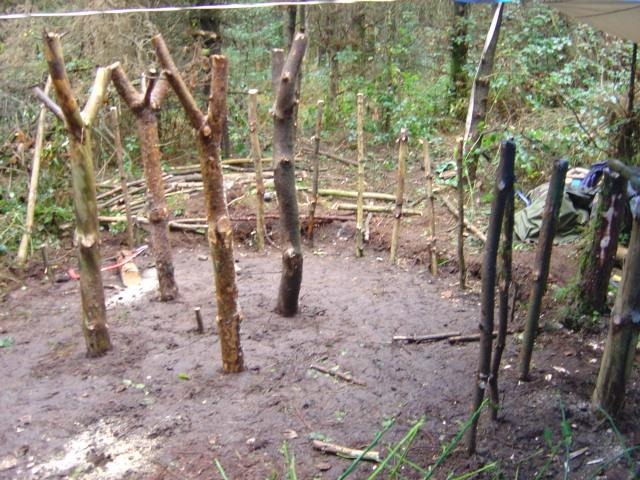
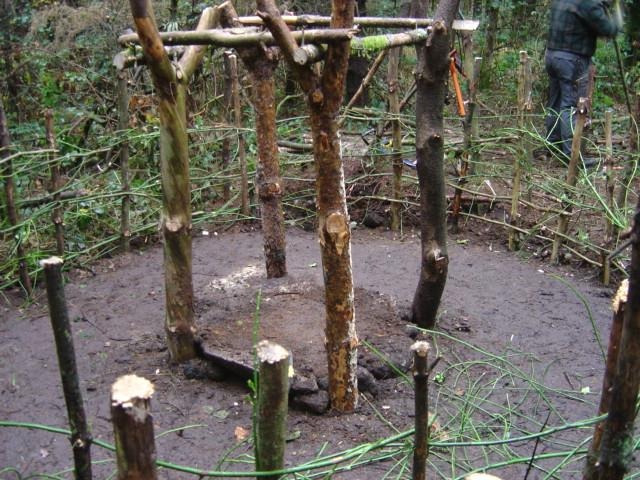
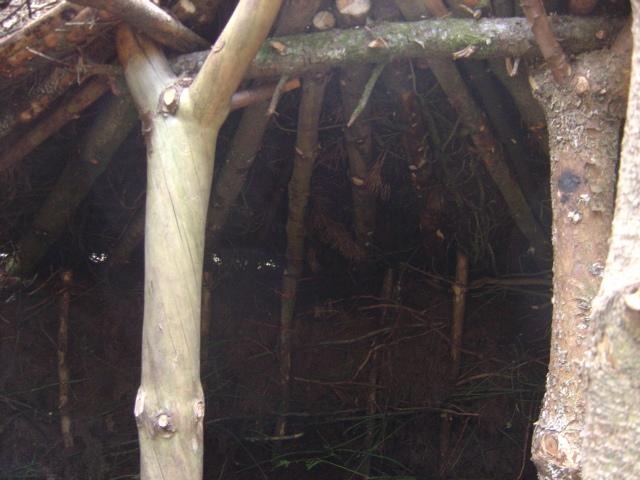
After this was completed, it was time to place the central poles. We collected 4 posts that had strong Y-shaped tops. Due to the immense weight of the roof and also for fire safety, we used poles that were a good 10 inches in diameter. Although the roof is so heavy that it will secure the poles in place, I decided to dig them into the ground to ensure they could not be accidentally knocked over from inside the shelter by bumping into the base of one of the poles. The other benefit was that I managed to dig the holes down to a sturdy gravel layer about a foot below ground level, which will prevent the poles from sinking deeper over time. The height of the poles after they were erected is about 5 feet. Before the roof is placed, these four posts will be connected by sturdy cross branches forming a square. This will place the height of the actual roof at roughly 5 ½ feet (1.75m) when measuring exactly in the centre.
Once the poles had been placed and final dimensions were double checked, it was time to start pounding into the ground a circular row of 4 – 5 foot long posts that would form the inner wall. We used a big lump-hammer and a primitive grooved stone hammer, but a heavy stone could easily have been used as well. The gaps between the poles are roughly a foot. We planned for the posts to sink into the ground for at least 6 – 12 inches (15-30cm), leaving us with an average wall height of about 3 ½ – 4 feet (1-1.2m). We tried to surround any weaker poles with plenty of stronger ones to ensure the wall’s strength was even.
The wall of this shelter actually consists of two circular rows of poles spaced a foot apart, forming an inner and an outer wall. Once the inner wall had been finished, we started work on the outer wall, which was a foot away from the inner wall and parallel to it.
While this was happening, I started work on the fireplace. Using large stones, I raised the fireplace of the ground by about half a foot (15cm). This is important because there will be rushes on the floor to keep us insulated, and they would form a hazard if they were too close to the fire. Raising the fireplace also helps to spread the heat from the fire better than if we had built a fireplace by laying stones in a circle and having the fire inside this circle, as was the only other option of keeping the fire safe. The platform also provides a convenient place to cook or prepare glues and other items that require embers or fire.
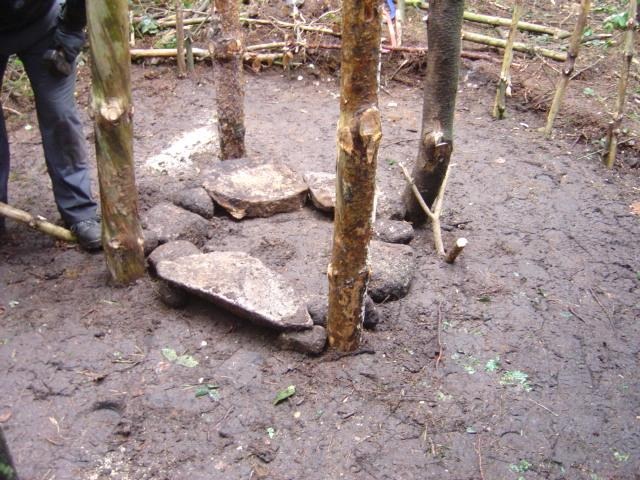
I made a raised platform for the fire by placing large stones and filling the circle with soil. It is important to either gather dry stones, or insulate wet stones from the fire with soil, as they may explode in the heat.
While I was doing that, the inner wall was finished by weaving flexible material between the poles to hold the debris in place, which will later be stuffed between the inner and outer rows of poles. It is important to do this correctly so that the weaving not only holds the debris but also strengthens the structure. A few poles could not be hammered in deeply enough due to rocks beneath the surface. There were also some poles that went into the ground at an angle or were simply a bit on the weak side. Using proper weaving techniques enabled us to fix these poles up and form a strong wall. The weaving can be as tight as you wish, but it only needs to be tight enough to hold in the debris. If you had access to a lot of weaving material, you could elect to do a very tight weave on the inside of the shelter. This means you have a nicer finish, which you can even decide to plaster with daub at some point, vastly improving the heat-retention and comfort of the shelter.
The weaving should tie in all the poles and form them into a strong continuous wall. It is a good opportunity to guide poles so they stand more upright if they were hammered into the ground at an angle.
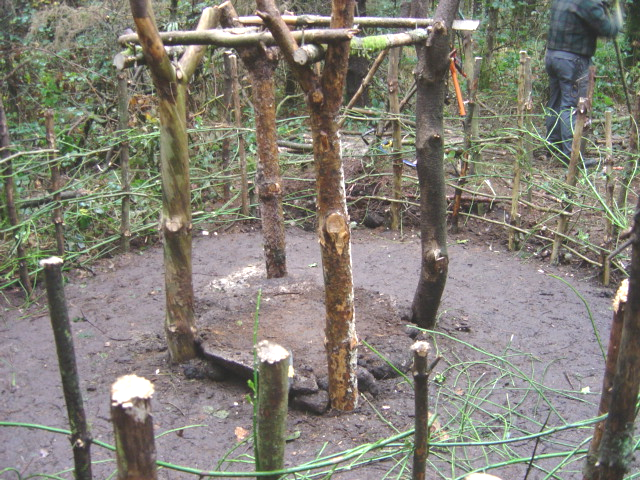
The poles in the centre had to be connected with four strong pieces of wood, forming a square. These will hold the roof rafters later, once the walls are finished. I used the opportunity to try to puzzle these four branches into the forked central posts so they would lock the poles in place, providing a stronger, more stable platform. The square being formed by these branches also doubles as the smoke hole. At a later stage, when we were building the roof, I raised myself onto this square several times and found that the cross branches could support my weight easily.
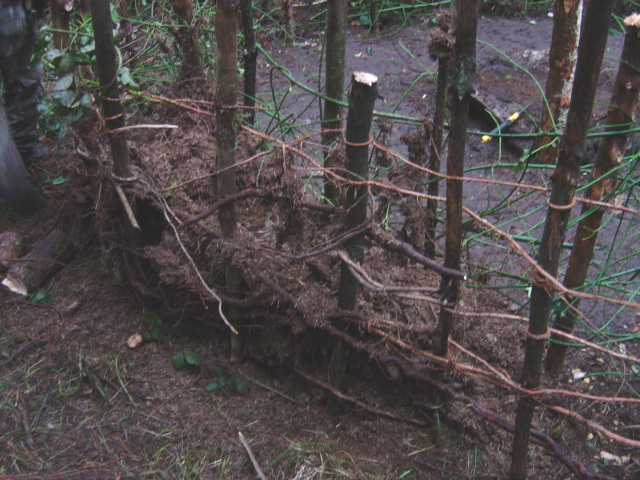
Once both rows of poles had been completed, it was time to start with the real work: gathering enough debris to fill the foot-wide gap between the two walls. The walls will be filled to a height of a good 3 ½ feet (1.1m). This debris is packed down as much as possible, as the wall will support a lot of weight, also once the roof is finished. Different debris has different properties. We were lucky with a deep layer of pine and spruce needles, as this litter packs down very tightly and doesn’t rot too quickly, keeping its shape for many years. Broadleaf litter, on the other hand, rots very quickly, leaving you with a wall that needs to be filled up once a year or so.
Of course, the wall is not continuous, as we have left a gap in the East, where our doorway will be. As discussed above, the walls are a foot in thickness. However, due to the pressure of the debris, in some places the poles were pushed apart, so at the top of the wall the thickness was closer to two feet. Even though this didn’t really matter much, as all posts were strong enough to handle it, we used pine and spruce roots to tie the two rows of poles together after the wall had been filled to the correct height.
Once the walls were finished, it was time to place the roof-poles. We ensured that the roof-poles didn’t overlap the square smoke-hole too much, as we needed to keep enough space for the fire’s smoke to filter out. On the other hand, we did make sure we left about 6 inches of overlap to accommodate the inevitable settling of the walls. The roof poles were all cut from the sturdiest dead wood we could find. We also stayed away from barely dead wood, as these would be a lot heavier. Once the roof-poles had been laid down, we placed smaller branches and twigs on top of them to fill the gaps between the poles a little and prevent debris from falling through. It is important not to allow these twigs to stick out too much, as they can create holes or hollows in the debris layer.
It is often necessary to build the roof in sections, as it would be hard to reach the highest portions of the roof to place debris otherwise. Building in sections also allows you to store your equipment out of the rain or break for the day and sleep dry, even if the shelter isn’t completely finished.
On the wall, it is important to place sticks underneath the roof-poles. This spreads out the weight of the roof over the entire wall, rather then concentrate all the weight of the roof in the butt-end of the poles. It is also a good idea to trim all side-branches neatly off the roof-poles since they form a hazard when you are inside the shelter as it is easy to bang your head into a protruding spike. (Not nice)
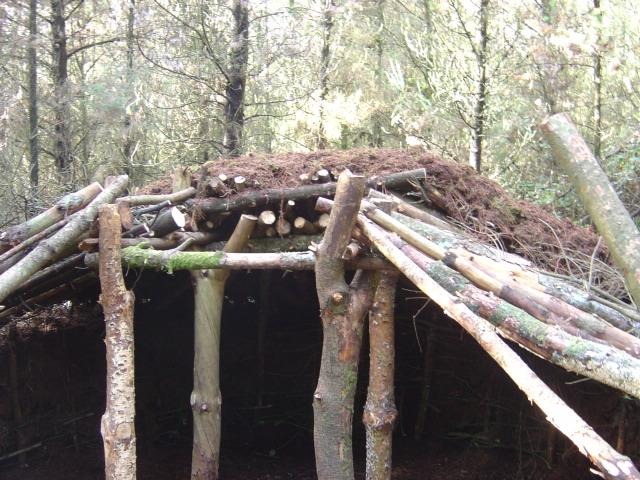
The debris on top of the roof should be a good foot-and-a-half thick to ensure water doesn’t leak into the shelter. If you have access to large sheets of bark or similar, then it may be a good idea to use those to further increase the water-shedding capabilities of your roof. Due to the debris settling over time, you will end up heaping more layers of debris over the roof as the years pass.
Before we finished the entire roof, we also made sure that we had a half-foot of dry and fluffy debris inside the shelter on the floor. That time right before the last section of the roof is built is a good opportunity to build any inside furniture, bring any heavy items inside or even stock up the shelter with firewood. After the roof is finished, the only access will be through a tiny door, which is always too small for carrying in just that one thing that you need…
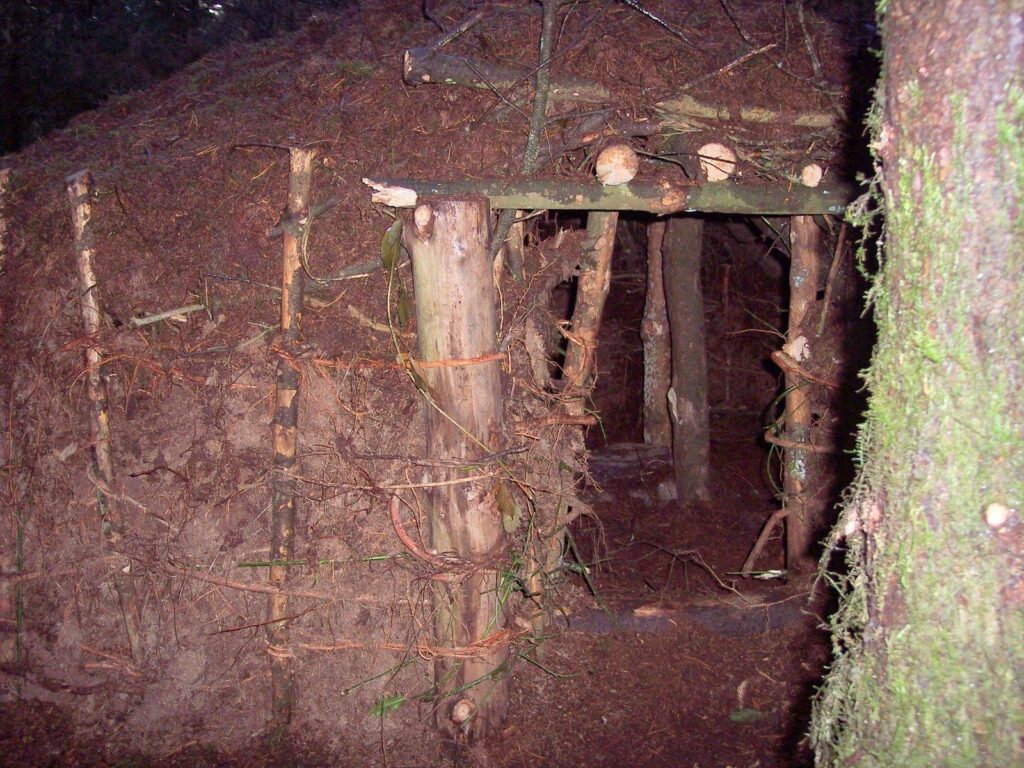
The final section of our roof was to be built over the entryway. We made sure the entrance was built even stronger than any other part of the structure, as it is subjected to a lot of wear and tear, and if something does go wrong inside the shelter, it is important to have a solid way out. It is not always easy to make a strong doorway, as in this structure, it is automatically the weakest part of the wall. We oriented the shelter in such a way that a dead tree-stump became one door-post, while we placed a second strong post deep into the ground as a second door-post. By leaving small side-branches near the bottom end of the roof poles, we managed to “hang” these poles upside down off the smoke-hole square to prevent them from wanting to push outwards on the doorframe.
We spent the best part of two days working on this shelter, although we admittedly used a few modern tools to help speed up the process. We used a few bow-saws, a hatchet, a lump-hammer and a basha (For collecting debris)
The shelter was designed to fit 6 people easily, even with a bit of equipment. Inside, we built 4 stacks of firewood, so that every occupant could easily reach this pile. This shelter will not stay warm on its own, unlike a good emergency shelter. It requires continuous heat input to keep it warm when it is cold outside. Since we tried to sleep without sleeping bags, we organised a “fire-watch” system so that every person would mind the fire for 1 ½ hours. This ensured we all had about 7 and a half hours’ sleep in a cosy (at times too hot, actually) shelter. There would be plenty of room to store a week’s supply of firewood, plus all of the equipment for three or four people to move about in this shelter comfortably. Due to the large smoke-hole and a large supply of good-quality firewood, there is no smoke formation inside the shelter. The large fire hole also allows in some light, although even during the day, shelters such as these are gloomy at best.
The next project at this site will surely include some platforms inside the shelter for sleeping, a latrine, a small, roofed but open-sided workshop, and a firewood “shed”. I am sure that, in time, there will be a nice outdoor fire pit, a flint-knapping place, a pottery-firing pit, a hide-tanning place, a food cache, and all the other essentials of living in the wild.
For now, however, we were all simply happy that the building was finished, and we could relax, sheltered from the drab Irish weather, sip that coffee, and enjoy that deliciously roasted meat.
Anthonio Akkermans
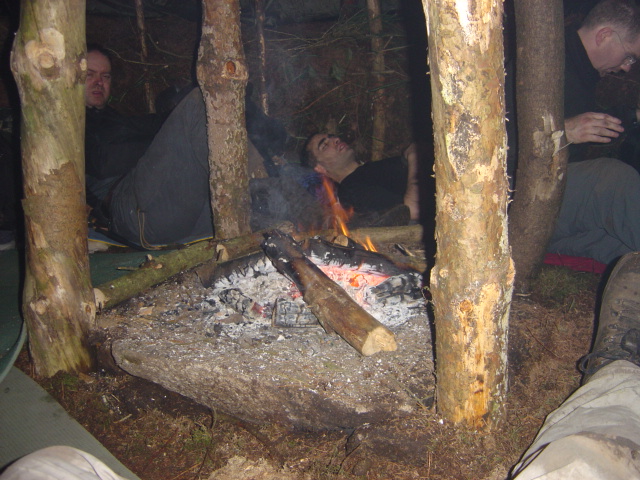
A look inside with a wonderful fire keeping us warm. Most of us were asleep within moments after relaxing as it had been such a long day.
Most of the images were taken by myself, but credit must go to Liam and Jess for some of the photographs.
Also, it needs mentioned that being part of a group, I am only responsible for 1/7th of the effort and sweat this project cost us and 9/10th of the bossing around!
Thanks must go to everybody who attended the course and realised this project.
Antonio Akkermans first started learning outdoor survival skills under the tutelage of Ofer Israeli during his teenage years, and continued practising outdoor skills while gaining more knowledge from teachers around the globe and in different climates and environments as an adult. In 2001, he moved to Northern Ireland, where he started his school, Wild-Live, offering bushcraft and survival skill courses. Since that time he has worked around the world teaching survival skills, most recently setting up a wilderness school for children in China. Anthonio also specialises in more advanced skills such as flint knapping, hide tanning, pottery and bow making. These skills lead him to collaborate with Queens University, Belfast and various local museums, replicating artefacts and assisting with experimental archaeology.