Squish’mups: Compression Panel Day Pack

  • Hey Guest, Early bird pricing on the Summer Moot (29th July - 10th August) available until April 6th, we'd love you to come. PLEASE CLICK HERE to early bird price and get more information.
Squish%25E2%2580%2599mupsDeeSide1Small.jpg

Squish%25E2%2580%2599mupsDeeBack1Small.jpg

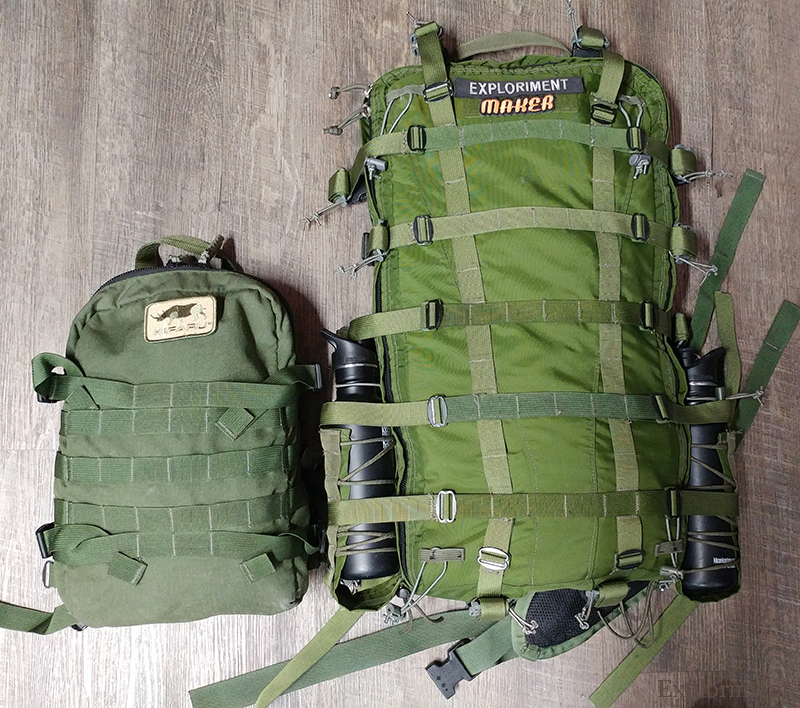
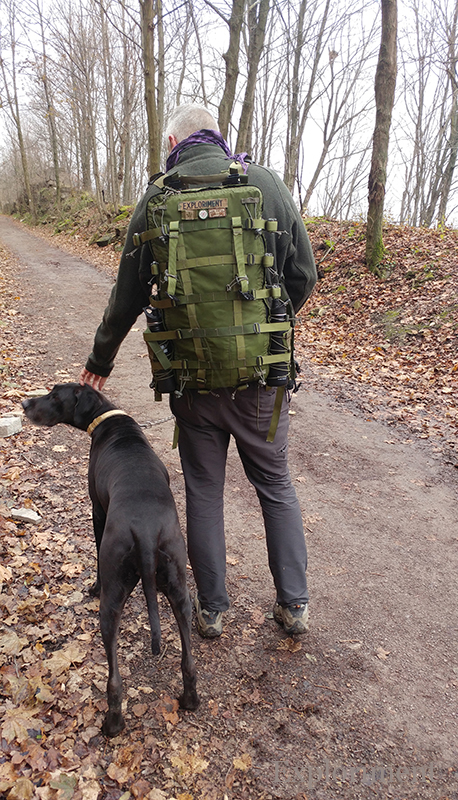
My new compression panel day pack, the Squish’mups.
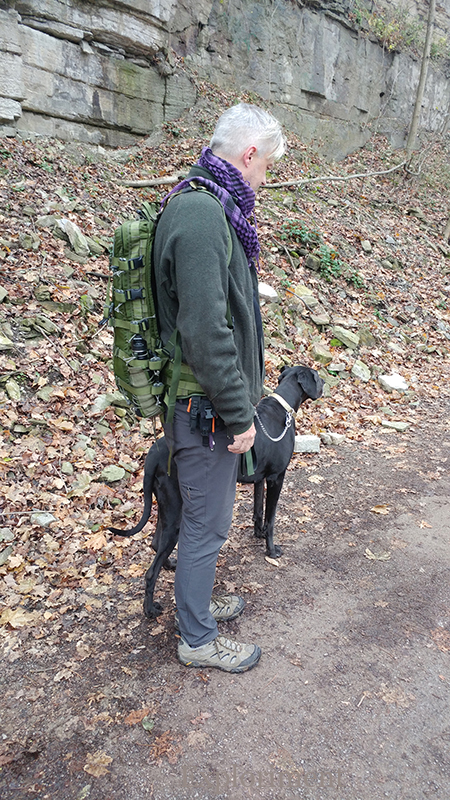
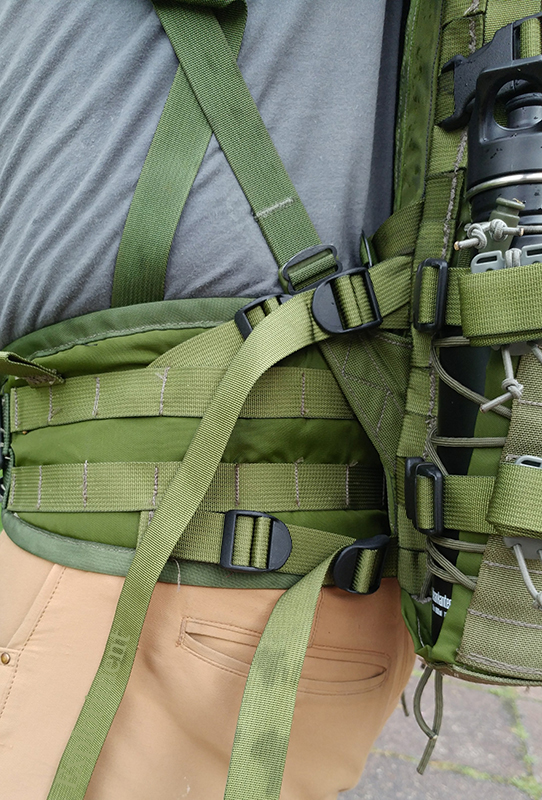
(And just to give you a sense of the size, I’m 203 cm (6'7") and 113 kg (250 lbs). Yes, I make a 130 lb. Great Dane look small.)

I’ve tried a few approaches to this idea, and they all fell a bit short. But I’m certain this will be the solution! I think. Maybe...

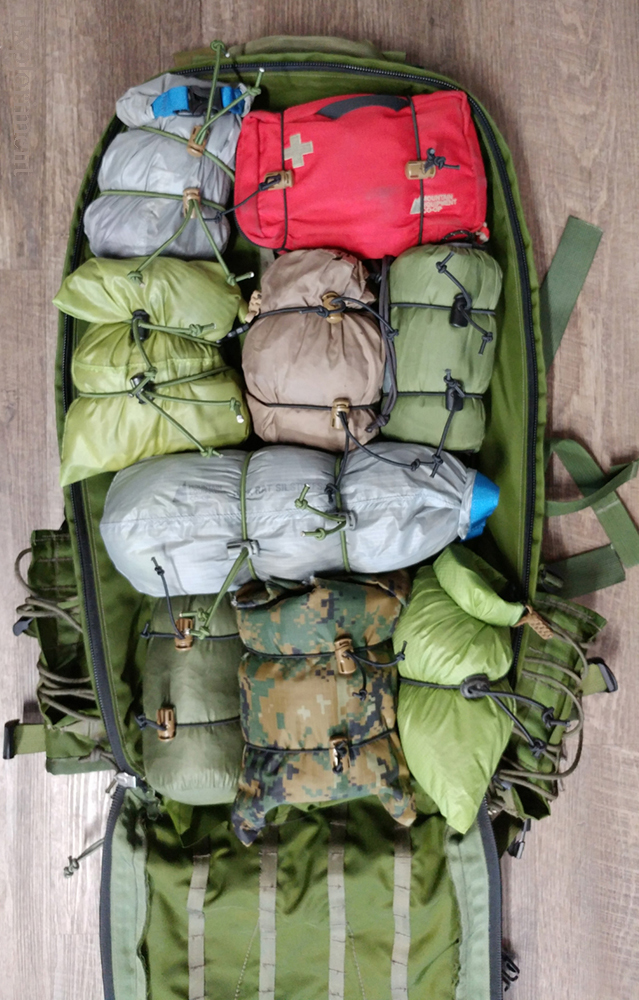
The idea is to have a detachable day pack that I would have with me on a two hour hike or a two week canoe trip.
There are things that are necessary for both – what changes usually is insulation, shelter, food, etc., on longer trips and time of year.
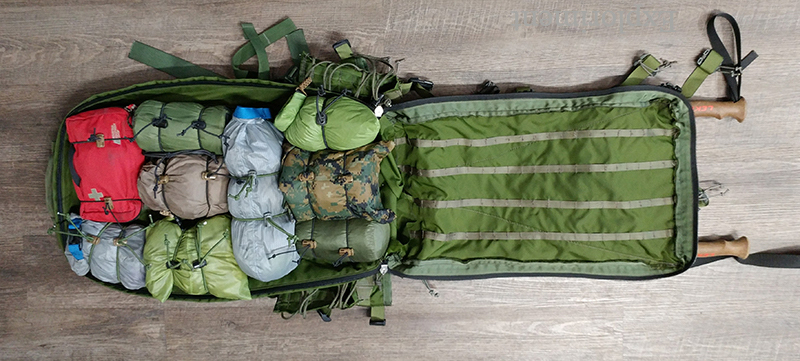
I want to have a way to carry the necessities; water, means to purify it, first aid kit, rain protection, some insulation, a day of food, etc.

Besides being able to carry it as a stand alone day pack (with or without a waist belt, and with a frame sheet, aluminum stays, or both, or none) or have it attached to a frame (Kifaru or the one I’ll eventually build),
it’ll serve as a compression panel. Between the Squish’mups and the frame I can carry a no-frills pack sack (the next thing I’ll make), a duffel bag, a dry bag, a barrel, a Pelican case, a rifle drag bag, etc., etc.

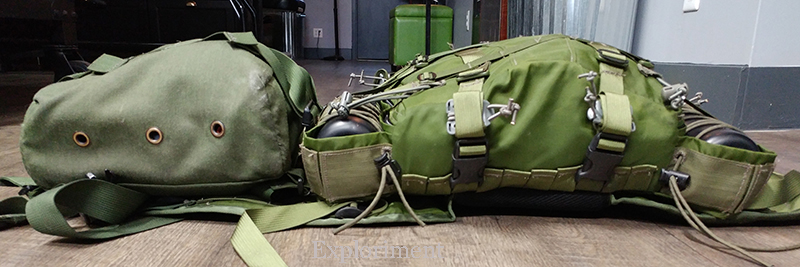
The difference between some of my other attempts, is to have a pack not very deep, but wide and tall.
Keeping the depth of it down helps prevent the center of gravity from being put too far out.
The dimensions are 60 cm (23") x 33 cm (13") 10 cm x (4").

Using some very complimicalated mathematics*, I derived at a figure of this being about a 37 liter pack, or approximately 2250 cubic inches.

*( C = W + D x 2 ÷ π ÷ 2 = R
π x R² x H = V )
Squish%25E2%2580%2599mupsMainBack2Small.jpg

Any of you at all in the know, will automatically recognize that the belt and the way it’s attached, and really the whole suspension, is pretty much my take on the Kifaru Omni system.
I’ve been using it for a decade, it works very well - so why re-invent the wheel as far as that went. Some ideas for the belt were also nicked from the Hill People Gear Prairie Belt.)
This is to a large degree a larger E&E with an Omni suspension.

Squish%25E2%2580%2599mupsDeltaStraps1Small.jpg

Squish%25E2%2580%2599mupsDeltaStraps2Small.jpg

Squish%25E2%2580%2599mupsDeltaStraps3Small.jpg

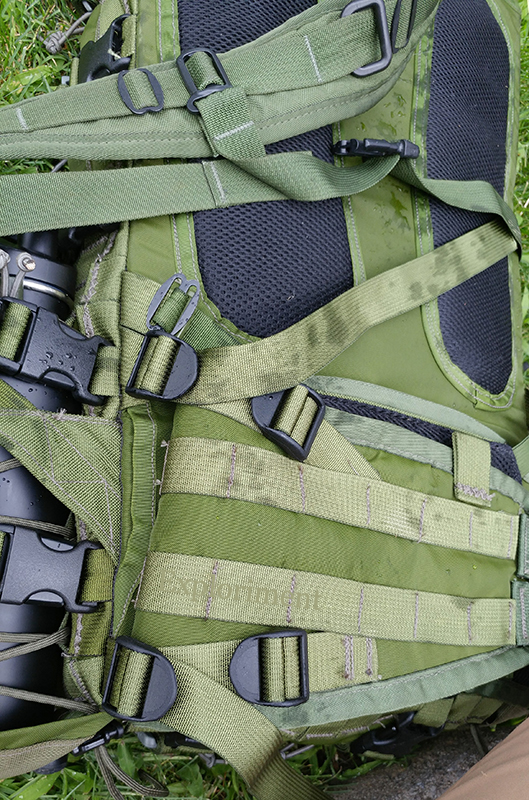
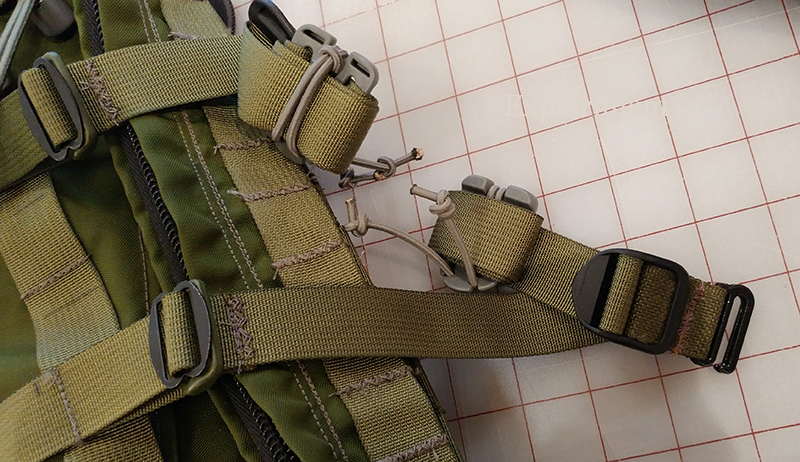
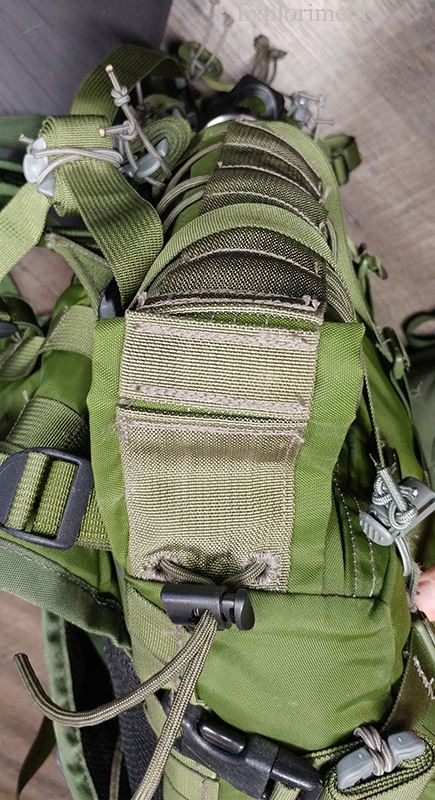
Some closeups of the belt. I changed the Delta Straps a little by adding removable ladder locks. In Kifaru’s the webbing is sewn into the belt.
I wanted to be able to have this as a stand alone belt if need be, and wanted to be able to remove them altogether. (The HPG belt does something similar.)
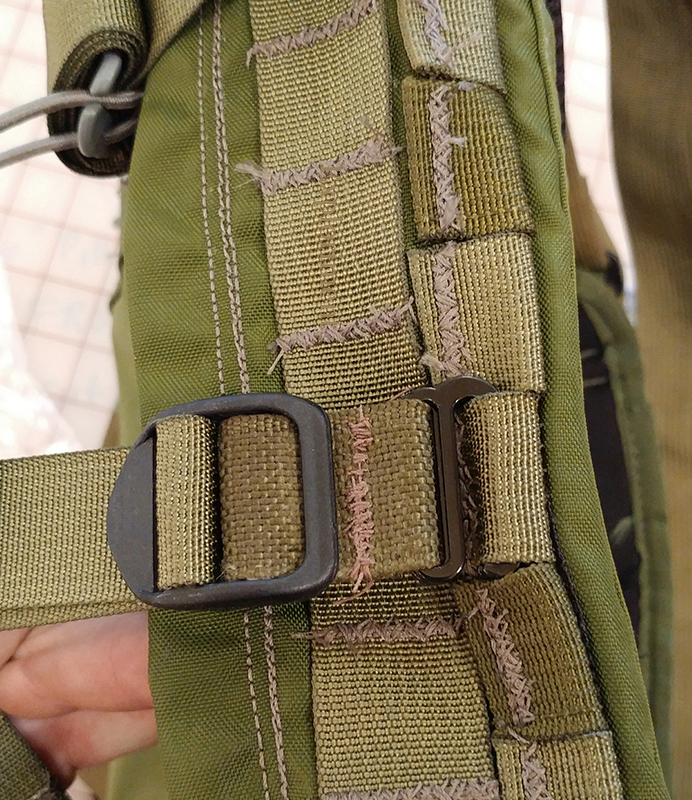
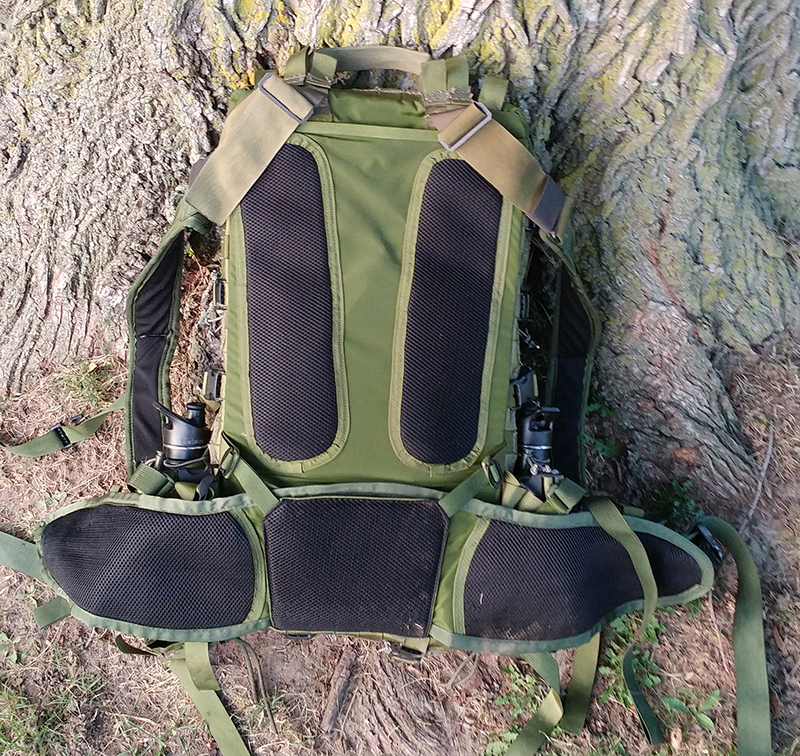
I also added four tabs along the top so that I could attach suspenders.
The other things I did was attach Eva-Zote foam and spacer mesh to the belt (as well as two strips along the back) both for padding and - hopefully - a bit of comfort on hot days.

Squish%25E2%2580%2599mupsBelt1Small.jpg

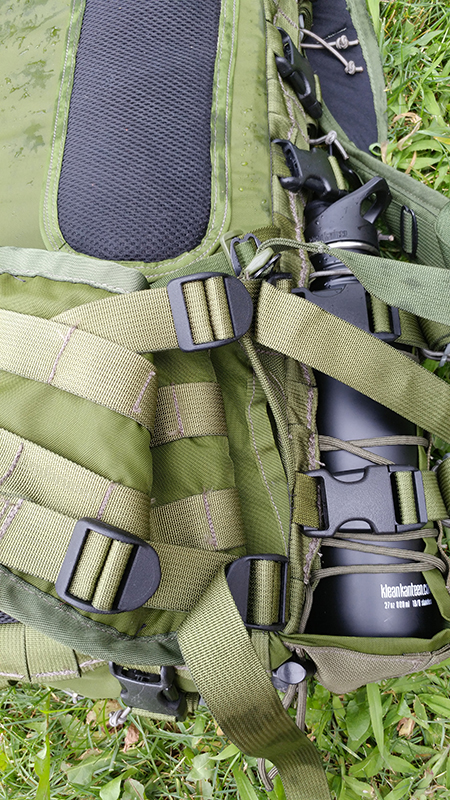
Another view of the belt with the ladder locks removed and the suspender tabs more visible.
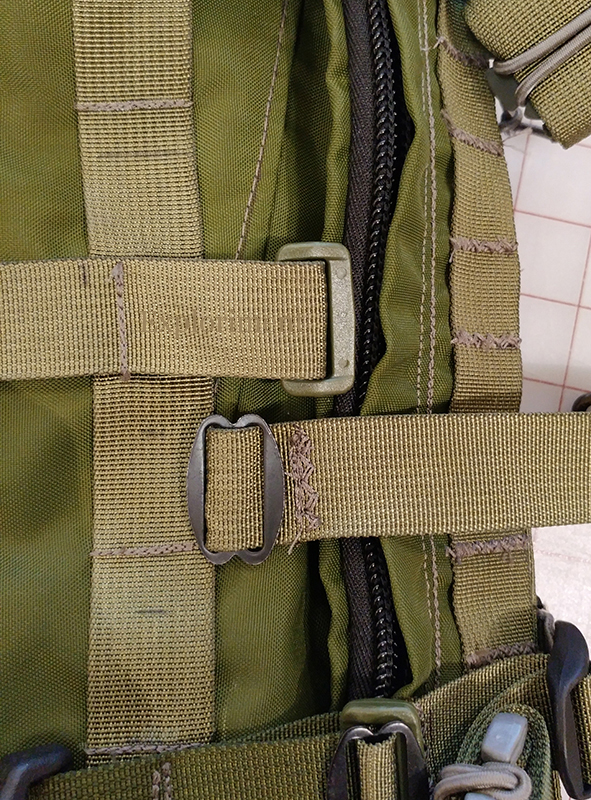
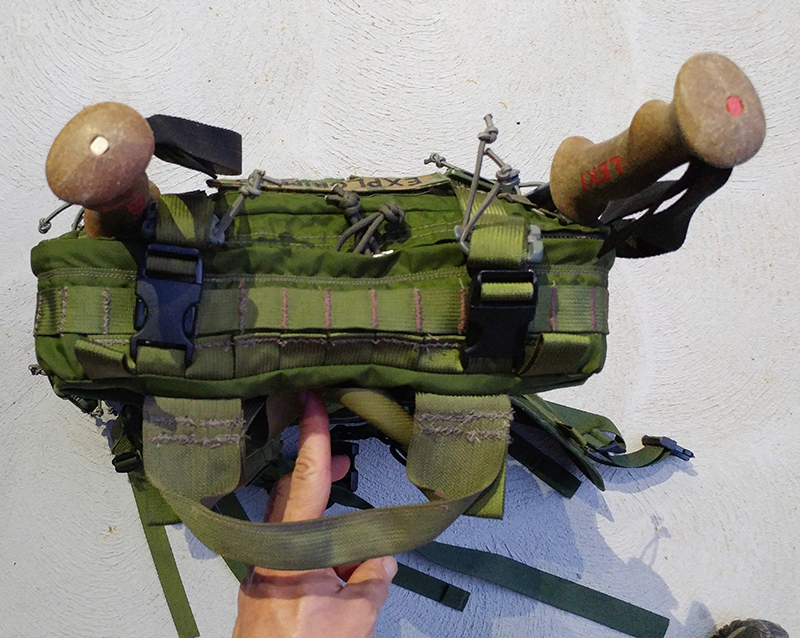
The other thing I did was use a buckle arrangement similar to the HPG Prairie Belt.

Squish%25E2%2580%2599mupsBack2Sided1Small.jpg

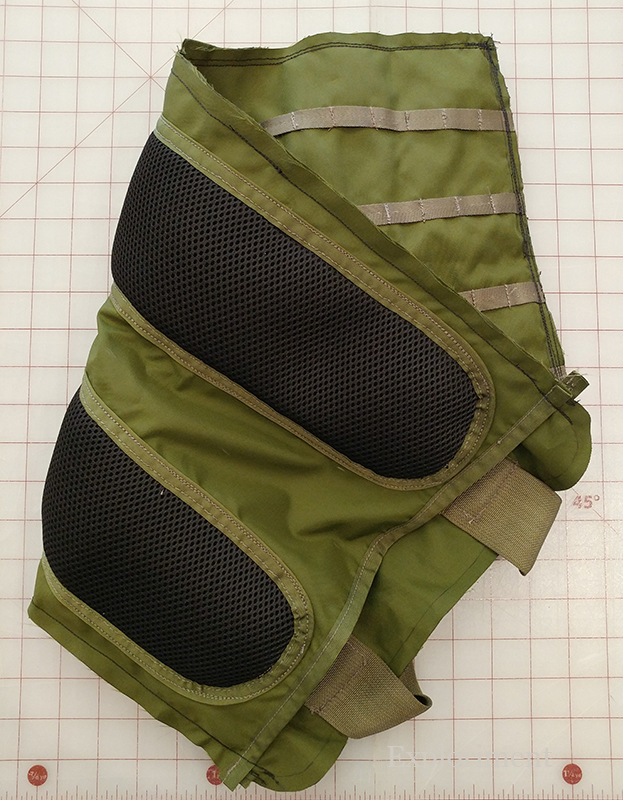
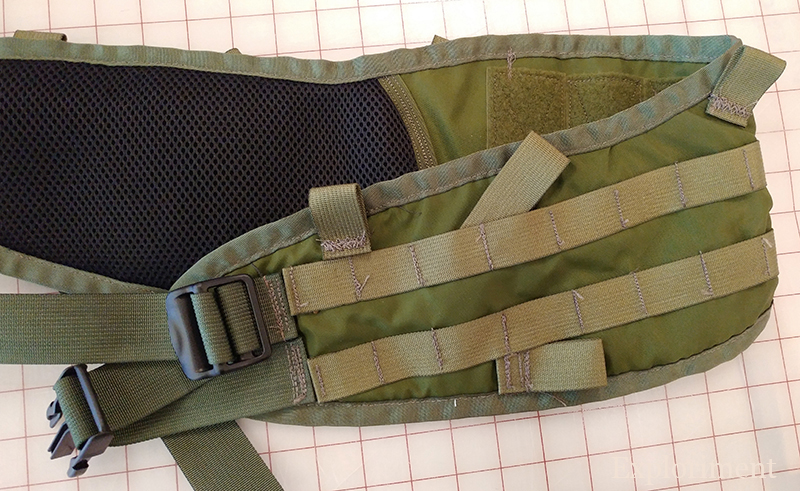
The back, showing the inside and outside. The 2" straps at the top go all the way to the bottom, and serves as a carry handle.
Squish%25E2%2580%2599mupsBack2Sided2Small.jpg

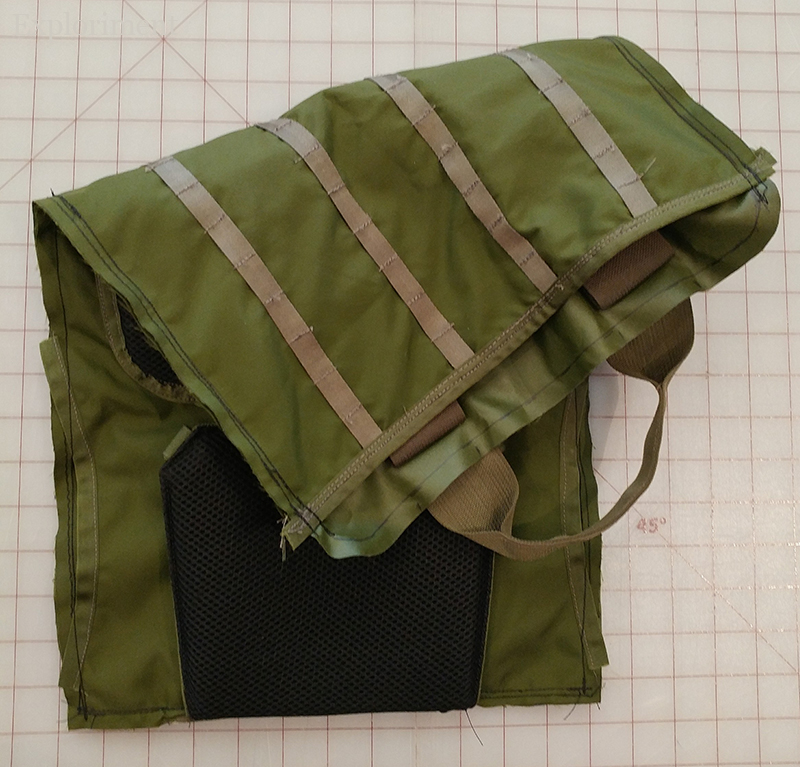
The back, showing the inside and outside. Inside I put 4, ½" strips of webbing on both the front and the back,
so that I could hold things in place with bunjee cords and cord locks.
Inside is also a slot for an HDPE frame sheet and you can just see the 2" slot pockets for aluminum stays. I can use one or the other, or both, or none.

Squish%25E2%2580%2599mupsMainBottom1Small.jpg

Bottom. Bit hard to tell, but it’s an irregular hexagon.
One piece of gear that I absolutely wanted to use was my MSR Titan Kettle – which was a bit bigger than the depth I had envisioned for this.
I shaped the pack so that only the bottom part I would put it in was sized to accommodate it. The rest tapers away to be as slim as possible.

Squish%25E2%2580%2599mupsMainSideLeft1Small.jpg
Squish%25E2%2580%2599mupsMainSideRight1Small.jpg

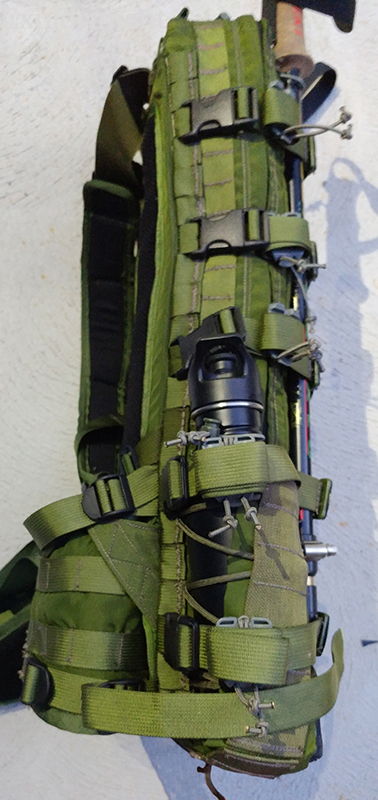
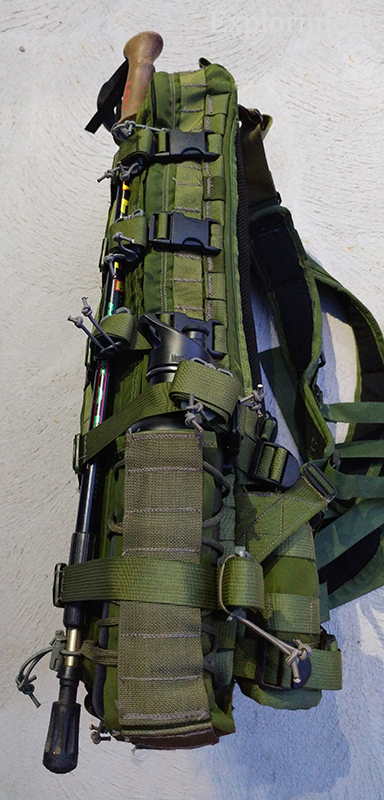
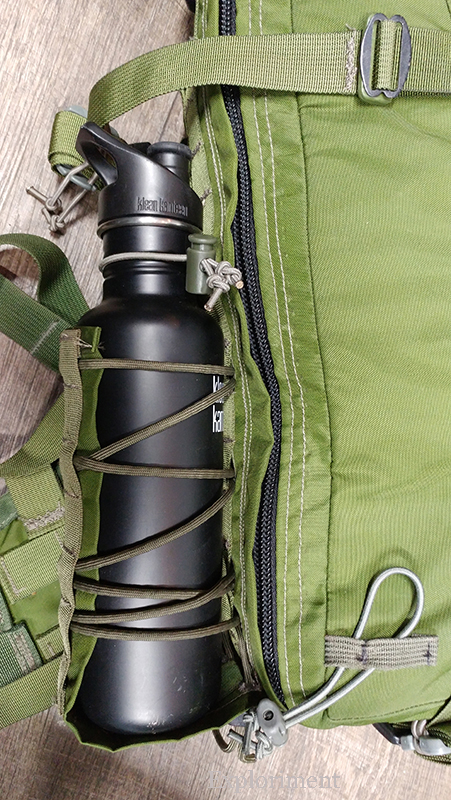
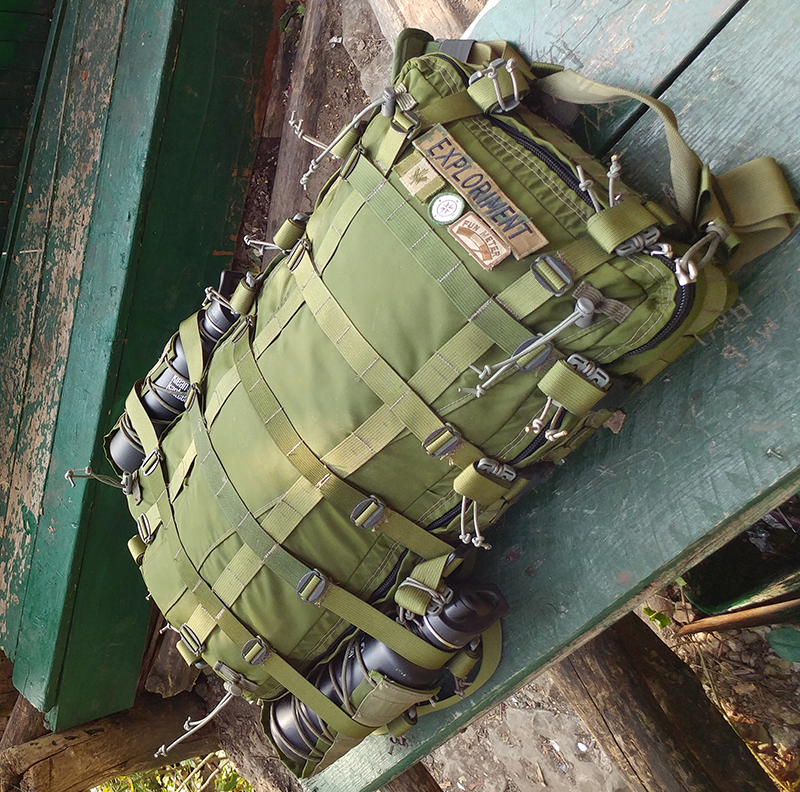
Sides showing the water bottle holders (corsets so that any size bottle can be accommodated), compression straps, and the daisy chain riding up the sides and over the top.

Squish%25E2%2580%2599mupsMainTop1Small.jpg

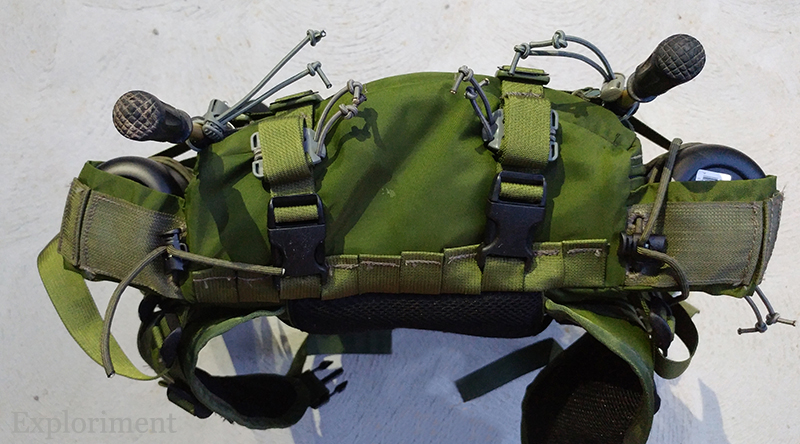
Top, again showing the daisy chain and the compression straps, as well as carrying handle (the straps go all the way along the back to the bottom).

Squish%25E2%2580%2599mupsPoleHolder2Small.jpg

Squish%25E2%2580%2599mupsPoleHolder3Small.jpg

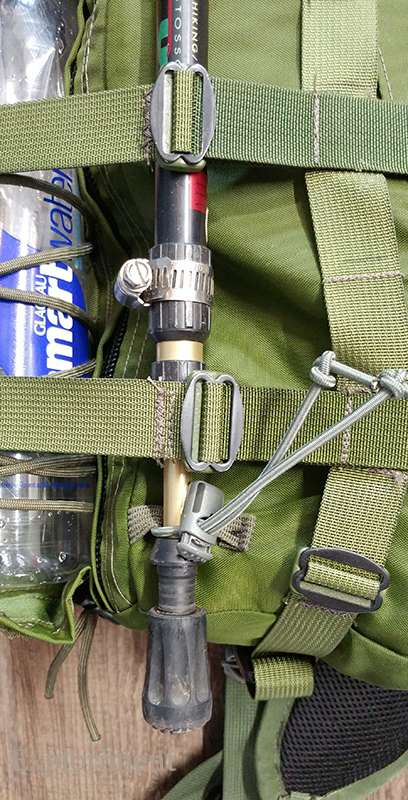
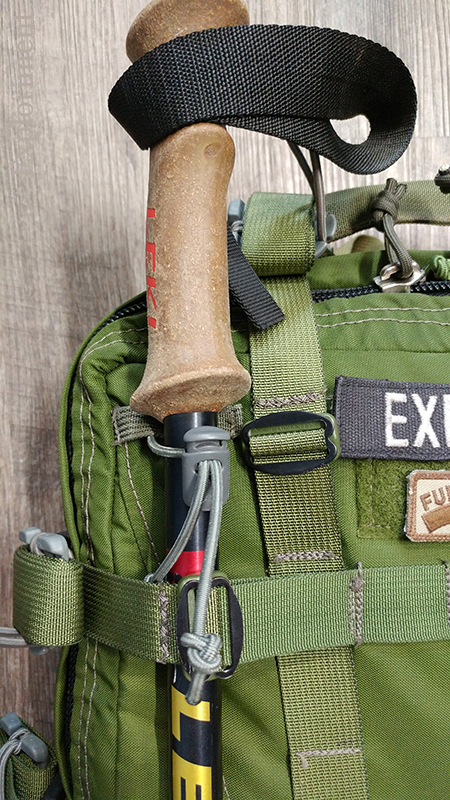
Trekking pole holders on the front. A strip of ½" webbing, sewn to be 2 channels, with bunjee cord and a cord lock.

Squish%25E2%2580%2599mupsUliPlatform2Small.jpg

The straps that will attach the compression pack to the frame.
 
Squish%25E2%2580%2599mupsCompressionStrap1Small.jpg

Squish%25E2%2580%2599mupsCompressionStrap2Small.jpg

Squish%25E2%2580%2599mupsCompressionStrap3Small.jpg

Some closeups.

Squish%25E2%2580%2599mupsWaterBottleHolder1Small.jpg

Squish%25E2%2580%2599mupsWaterBottleHolder2Small.jpg

Closer look at the water bottle holders. I wanted to be able to accommodate different sized bottles if need be.
I did the bottom so there is a hinge, to better fit either Kleen Kanteens or the Classic 1 liter Nalgenes. And on the bottom by the seam you can see the two holes I put for the cord to emerge from.

Squish%25E2%2580%2599mupsE%2526ESidebySide1Small.jpg

Squish%25E2%2580%2599mupsE%2526ESidebySide2Small.jpg

The Kifaru E&E and the Squish’mups side by side. I got the E&E a decade ago for the purpose I outlined earlier.
Just found it too small for my needs. I also found the fact that I can only attach it via the sides meant it always sags down.
Squish%25E2%2580%2599mupsMainInside2Small.jpg

The ½" strips of webbing and how things are held in place with bunjee cords and cord locks.
If it was a top opening pack I could just shove things down inside. Given that it opens all the way up, I wanted to makes sure everything stayed put when I opened it.
Squish%25E2%2580%2599mupsMainInside1Small.jpg

To give a description of what’s all here:
Starting top left, first aid kit (I’m going to make one specifically to fit along the width along the top, and have it be a tear-away),
below that a pouch with some miscellaneous stuff - repair kit, toiletry kit, headlamp, gaiters.
To the right of that, at the top, an inflatable seat pad, below that a ground sheet (foot print from a 1 person MEC tent) below that a bag with approximately a days worth of food.
To the right of that a bag with a sweater, gloves, socks, toque and buff, all in merino wool.
To the right of that at the top, a Swiss mesh scarf.
About a meter square, it’s one if those items I could in theory live without, but it’s so versatile it always comes along and I always find a use for it.
As a scarf, I drape it over or wrap it around my head when I sleep, I’ve rigged it up as a sun shade, it can serve as camouflage, collect leaves for a debris shelter,
I’ve strung it up as a place to put gear so it’s off the ground - the uses are endless.
Below that is a cozy that fits a home made dehydrated meal and inside of it is my trusty MSR Titan kettle
and LMF cup with a homemade stove and wind screen and fuel bottles and lighter.
Below that is an Integral Tactical silnylon poncho. Thin and light, it serves as both wearable rain protection and shelter.

Anyway, my confident prognostication that this will be THE solution ... fell a bit short. It’s very close, but not quite. It’s really comfortable, but then again, it’s an Omni suspension, so it would be.

My biggest gripe is the water bottle carriers. The bunjee cord adjustment system mainly.
The next go round will be attached in the seam at the bottom, and via SRB at the top, and instead of a cord lattice, it will be webbing straps adjustable via Velcro.

The daisy chain up the sides and top will be dispensed with, since its main purpose was for the bottle cord lattice to weave through.
And my initial thought was maybe use as an attachment point for something. Would rather dispense with the weight.

Also the way the compression straps attach to the pack itself when not on the main frame, will change. I had attachment points all the way up the sides, top and bottom.
Instead there will only be tabs specifically for those straps to connect to. Again, unnecessary weight for, maybe I might attach something to it some time.

The way the compression webbing attaches will be different as well. Part of my original design was to have a mesh panel that I could use to stick a wet rain jacket or tarp under.
Then it hit me. Duh. Why not just use those compression straps for that purpose. The next iteration will do away with the metal tri-glide / loop-loc attachment, have it be one piece and route through webbing tabs.
I can loosen it, stick what I need under it and cinch it tight. Basically, the Kifaru Cargo Net.
Slightly different, but essentially, as soon as it’s no longer sewn to the pack, that’s what it became.

Another idea that seemed good at first, but had to actually use for a while to realize the shortcomings of,
are the trekking pole holders on the front. The next iteration will have them be attached to the main frame instead.

It will also be just a pocket, rather than a full on pack. Rather than a built in suspension, I’ll simply attach it to the main frame.
I think I may keep shoulder strap and waist belt attachment points (and maybe include pockets for aluminum stays).
If I want to take it off the frame and carry it alone, I can if I do that.
I intend to put a pocket along the back to slip a piece of foam in, both as a seat pad and to give the pack some rigidity.
(And that would also clear up room inside currently taken up by the inflatable seat pad I have in there.)

I also have the idea to do an iteration of it which is just a top opening pack, rather than a full clamshell opening.
While everything is neatly attached, I wonder if it’s really such a good use of the space available.
 
  • Like
Reactions: Macaroon and leaky5

Macaroon

A bemused & bewildered
Jan 5, 2013
7,209
362
73
SE Wales
That's a lot of time and effort gone into that project, and it shows to the good in both the design and the execution. A great pack and one I'm sure will serve you well ; it'd be very interesting to see it in it's future.
 

Tiley

Life Member
Oct 19, 2006
2,364
374
60
Gloucestershire
Wow! That is one hell of a lot of work!

I do agree with you about the E&E pack: it's a great idea but just that annoying bit too small. Your improvements/extension to it seem to be just the business. I particularly like the external bottle holders. Will yours take the US canteen-shaped water bottles or only the more cylindrical, one-litre Nalgene ones?

Great work - I can only admire the skill and patience involved in creating that!
 

BCUK Shop

We have a a number of knives, T-Shirts and other items for sale.

SHOP HERE