N
Nomad
Guest
I've been tinkering and came up with a one-cup brew kit that uses a spirit burner.
It mainly consists of a stainless cup from Decathlon for 3 quid...
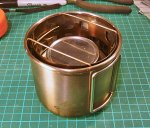
And some sort of tealight holder thing (also stainless) from Ikea for £1.50...
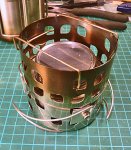
...along with some heavy gauge stainless steel wire (welding rod), some small screws, washers and nuts, and a little bit of thin aluminium strip (once used to keep a hot water jacket wrapped around the hot water tank).
The three legs are curved to fit into the cup when it's packed away, and they're splayed when in use...
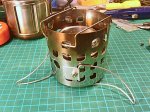
The pot support at the top hinges up to get access to the burner...
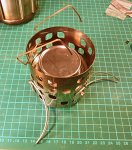
The two free ends push down into the holes in the side of the tealight holder and it all stays in place with friction...
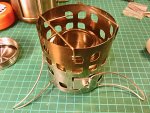
Stick cup on top to brew up...
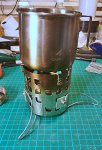
All works nicely. To extinguish the burner, I take the o-ring out of the cap and there's enough space to drop it between the pot supports to get it over the burner. (I tried a few times with a couple of lengths of the wire spaced apart with tape to find a balance between having room for the cap, and still supporting the cup.)
The pot supports made a big difference to the boil time. The cup was reasonably stable directly on top of the tealight holder, but it affected the draught quite badly. Indoors, with a bit of blowing from the side to simulate a slight breeze, it took about 16 minutes to boil 300ml of water. Raising the cup on the supports reduced this to an average of about 6 minutes.
The legs stay splayed quite well, more by accident than by design. The bottom of each leg goes into a small hole drilled in the base of the tealight holder, while the top drops into the tubular shape in the aluminium. The result is that the axes of the two vertical ends are offset. When partially splayed, they won't stay in position, trying to either close up or splay further.
Stability is pretty good - there's a small amount of bounce on the legs, and the cup stays in place when it has the weight of the water in it. Total weight is 420g with a full burner (stainless Tatonka in this case).
When packed up, it all fits together nicely with friction - nothing rattles or falls out. I'm on the lookout for a container of some sort that will fit into the space in the top, to hold some teabags and the like.
It mainly consists of a stainless cup from Decathlon for 3 quid...

And some sort of tealight holder thing (also stainless) from Ikea for £1.50...

...along with some heavy gauge stainless steel wire (welding rod), some small screws, washers and nuts, and a little bit of thin aluminium strip (once used to keep a hot water jacket wrapped around the hot water tank).
The three legs are curved to fit into the cup when it's packed away, and they're splayed when in use...

The pot support at the top hinges up to get access to the burner...

The two free ends push down into the holes in the side of the tealight holder and it all stays in place with friction...

Stick cup on top to brew up...

All works nicely. To extinguish the burner, I take the o-ring out of the cap and there's enough space to drop it between the pot supports to get it over the burner. (I tried a few times with a couple of lengths of the wire spaced apart with tape to find a balance between having room for the cap, and still supporting the cup.)
The pot supports made a big difference to the boil time. The cup was reasonably stable directly on top of the tealight holder, but it affected the draught quite badly. Indoors, with a bit of blowing from the side to simulate a slight breeze, it took about 16 minutes to boil 300ml of water. Raising the cup on the supports reduced this to an average of about 6 minutes.
The legs stay splayed quite well, more by accident than by design. The bottom of each leg goes into a small hole drilled in the base of the tealight holder, while the top drops into the tubular shape in the aluminium. The result is that the axes of the two vertical ends are offset. When partially splayed, they won't stay in position, trying to either close up or splay further.
Stability is pretty good - there's a small amount of bounce on the legs, and the cup stays in place when it has the weight of the water in it. Total weight is 420g with a full burner (stainless Tatonka in this case).
When packed up, it all fits together nicely with friction - nothing rattles or falls out. I'm on the lookout for a container of some sort that will fit into the space in the top, to hold some teabags and the like.
