heat treating - DIY forge

W

warnerbot

Guest
Hey guys,

only a few days old on BCUK so apologies if this is in the wrong place, or doesn't follow some rules!

I'm in the process of making my first knife by stock removal, for the first just following the ole classic woodlore clone using O1. Nothing electrical except a hand held power drill for pin holes. Photos to come when I make some significant progress.

Anyway, I need to work out a way of heat treating the blade and want to make something simple which will just perform the basic requirements of

- achieving a high enough temperature for hardening
- heating the blade evenly enough throughout
- being inexpensive and easy (ish) to produce.

The closest thing I've found so far is something like this

http://www.instructables.com/id/How-to-Make-a-Soup-Can-Forge/

Has anyone used this plaster of paris/sand mix? any good? I was planning on doing this with a large can, maybe an oversized beans can or a paint tin etc.

Do I need to get the whole blade & tang in? or just the blade? We all know how big a woodlore clone is, so advice based on this much appreciated

Thanks guys!
 

Everything Mac

Bushcrafter (boy, I've got a lot to say!)
Nov 30, 2009
3,131
96
37
Scotland
If you click on my username and search for forge in my started topics and indeed in my posts you will see I've done a few things on forges and such like.

For general forging I typically recommend that you go for a solid fuel forge. Will this be solely for heat treating your blades?

i suggest you search for "two brick forge" and the member on here "jojo"

i built one of those forges and it is excellent.

Andy
 

Ogri the trog

Mod
Mod
Apr 29, 2005
7,182
71
60
Mid Wales UK
Heat treating temperatures are relatively easy to attain in an average barbeque or charcoal fire. A bit of a blow from an old hair-drier or bellows helps and if the fire is big enough it'll be OK without.
The simplest method of checking if the metal is hot enough to harden is to try sticking a magnet to it (when it doesn't stick, it is ready to quench). Quench straight down into old oil to prevent any bending of the finished blade (beware of the resulting flame). A quick clean up back to bare metal and then tempering can be done in a domestic oven (thorough cleaning recommended) or gently with a gas blow-torch to attain a light straw colour then let the blade cool again and another clean up.

There are a good few descriptions of "how to" on here and Youtube.

Good luck

Ogri the trog
 

Firebow Swagger

Tenderfoot
Sep 15, 2013
77
0
United Kingdom/Essex
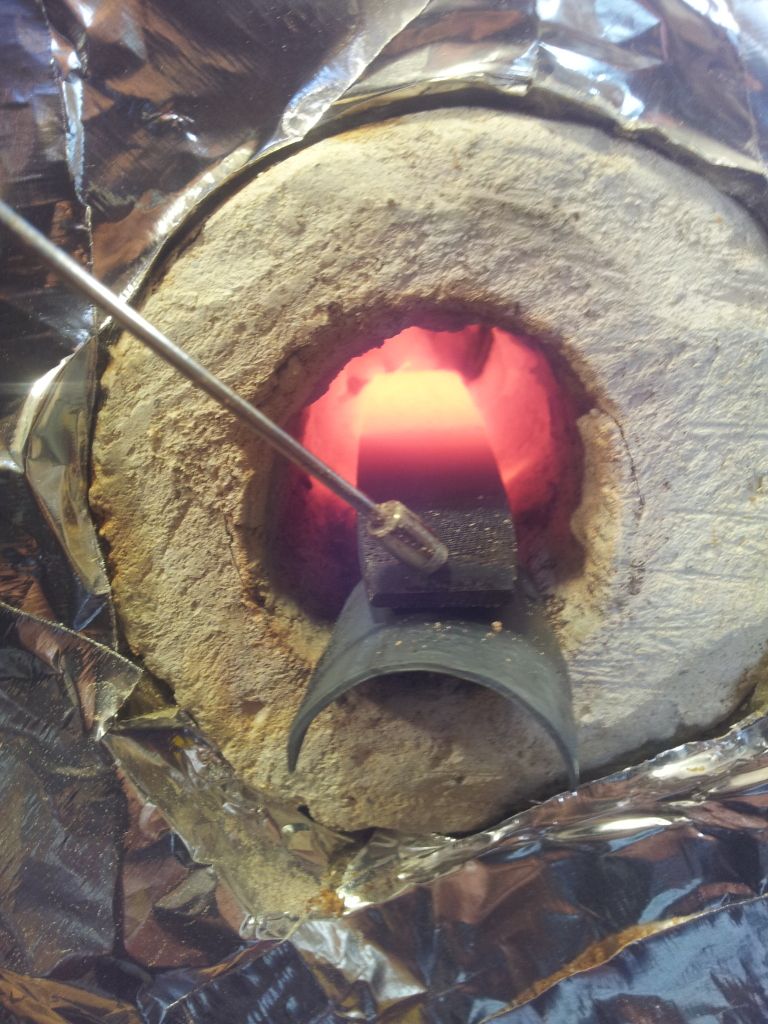
Hi I have this can forge its made from a homebrew beer tin . about the size of a big tin of dog food
Ive also wraped it in rockwook to keep in the heat

you need a good blow torch Mine is off a 11kg lpg bottle rather than a portable plumbers blow torch . Im also a big fan of instructables I found this useful http://www.instructables.com/id/From-File-to-Knife-with-simple-tools/

the plaster holds up well to heat ,but im unsure how long it will last for. Be warned the plaster and sand will set ridiculously quick so if you mix a whole batch it will set too quick and if you leave holes it won't work properly and crack /collapse . so take your time and be ready for lots of mess

Ive seen people online using a 5ltr paint can but that will need a bigger burner still , if you want to treat something big chuck it in a cheap bbq and blow air on it.

My endeavours at making a knife are here , so you can learn from my stupidity

http://www.bushcraftuk.com/forum/showthread.php?t=113016
 
W

warnerbot

Guest
Hi Andy,
Yes, my forge will be rarely used, and purely for heat treating blade (in the foreseeable future). I'll have a look at your projects, there are so many around though! I guess a bbq job seems easiest/lowest cost for the first couple of tries, as I do't own any sort of blowtorch/burner

Ogri,
tell me about it, there's so much out there. a marvel really. to think people once had to pay to learn this skills directly from a craftsmen. for all the technophobe moan and groan, the internet is a fascinating resource! thanks for the pointers - heat proof gloves a must then for the oil flames? regulator block still necessary if you manage to get a quench tub deep enough for vertical submersion?

Weekender,
Thanks so much, you're a Norwich-er as well aren't you? In this instance I'm heat treating only though, so no call for an anvil just yet!

Firebow Swagger
Good looking forge, and thanks for the tips about the larger, the more heat required. I have access to a blow torch I could borrow, but I think its a weakling one, do I need enough room to get the whole blade/tang in? or just the blade? If it's just the blade, I could probably get by with a tiny soup tin, because woodlore clones (which I'm starting with) are pretty small.

I was admiring this thread that you linked yesterday by coincidence. If I get anywhere near what you've achieved there on my first couple of attempts, I'll be very chuffed. Did you find that sort of filing jig to be problematic when you get to the end of the blade and have to follow the curve?

Thanks everyone for all advice! nick
 

Firebow Swagger

Tenderfoot
Sep 15, 2013
77
0
United Kingdom/Essex
when I heated my file knife it heated all over and went nonmagnetic ,even tho it stuck out of the forge about and inch. Im not too sure if it would matter that much if the tang is not totally heated as its not the business end and will have support from the scales

..But keep in mind if its a cock up chuck it in the bin and make another one ...if you are worried about it failing out in the field, Make two :rolleyes:

As long as you stick to high carbon steel , heat treat and leave to cool (this makes it soft) , file and shape it , then heat it back up and oil quench (this makes it hard but brittle), then temper it in an oven ( if done right it makes it hard and strong ) ....at least thats how I understand it

We picked up a beautiful 400mm makita circular saw blade last week (it was blunt and in the bin), perfect thickness and high carbon :cool:, also leaf springs, lawnmower blades, old files and also the steel you want.

the filing gig worked fine , but i did find you need to keep square to the blade, if you try to turn it around the tip this changes the angle of the file and looks rubbish ...but as always everyone has their own ways ..just get on and have a play see what works for you ..if you research it too much you will just end up confused and nervous.
at the end of the day a caveman could cut up a cow with a lump of flint ..What ever you make will be equal or better than Flint
 
Last edited:

Everything Mac

Bushcrafter (boy, I've got a lot to say!)
Nov 30, 2009
3,131
96
37
Scotland
Right then chap,
have a look at this thread: http://www.bushcraftuk.com/forum/showthread.php?t=100296

I built that forge in a morning and was forging by the afternoon.

Then take a look at this thread: http://www.britishblades.com/forums/showthread.php?57990-Hobbyist-Heat-Treating

you'll see a blade I made get heat treated long before I could do it myself. There's a lot to be learned from the forums. ;)

I don't tend to heat my oil up these days. 01 will harden very well in oil that is room temperature.

The terms of heat treating can be confusing.

Annealing: this is what you do before you do the heat treatment. Heat the blade in your forge to a cherry red colour themn shut off the air supply and let it cool by itself. This relieves the stress in the blade.
Once it is cool make sure it is not warped...

Hardening: this is the rapid cooling of the steel, in oil in this case. If I have to use a solid fuel forge to heat treat then I try and do it late in the evening or a ideally at night so I can see the colour of the steel better.

Tempering: once your blade is hard you need to soften it ever so slightly so it is not brittle. Do this by putting the blade in the kitchen oven at about 220 degrees for about an hour. After an hour turn the oven off and allow to cool. When it cone out it will be a straw yellow colour.

All the best
Andy
 

BCUK Shop

We have a a number of knives, T-Shirts and other items for sale.

SHOP HERE