Charcoal Making

Way back when I would buy my charcoal in from various woodsmen but after a while, I started to make my own in oil drums, as I have access to an unlimited amount of wood around my workshop!
A couple of years ago, a friend moved his small kiln into my woods for safekeeping, and I have been making ‘black gold’ at a slightly more commercial level ever since.
Until this year, I didn’t sell to the public, but that changed when I offered charcoal to those at the Summer BushMoot.
This is how I make it…
In the old days, an earth clamp was used by wood colliers.
This involves building a neat stack of wood, covering it in soil and watching it for leaks over many hours until the wood is cooked. The earth clamp is a tremendous amount of work over the whole duration of the process and colliers would often move the earth to new kiln sites with the seasons (once the right consistency had been achieved, it was worth the effort).
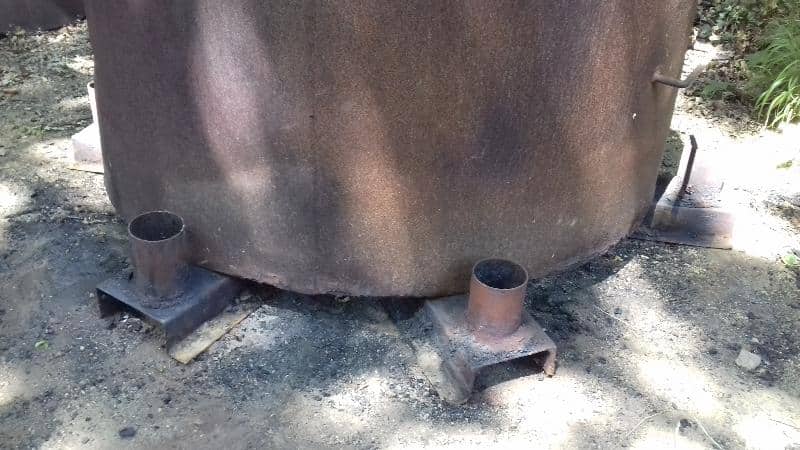
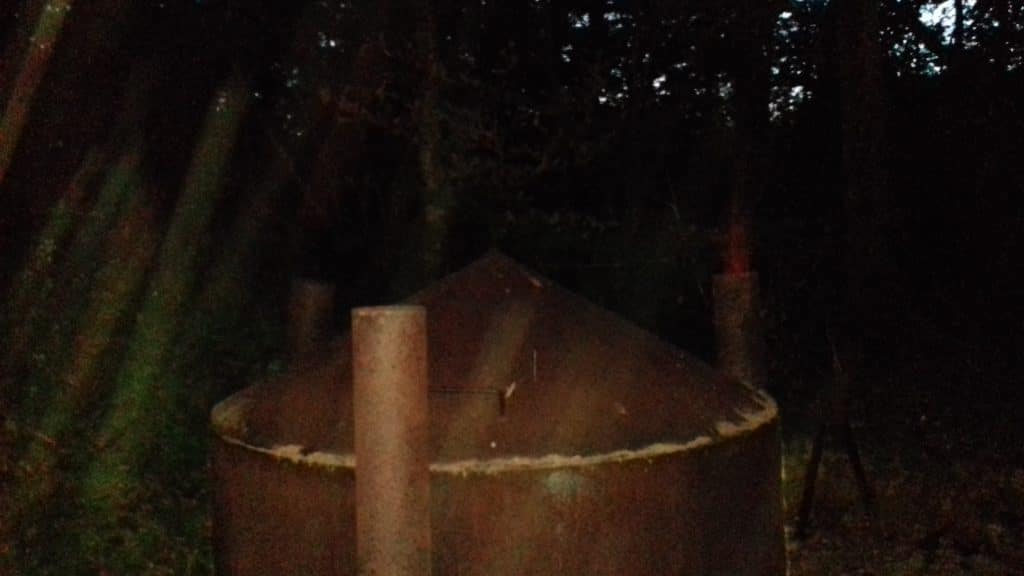
For much of the 20th century and into the 21st, the most common method has been to use a ring kiln. A ring kiln is a metal drum with chimneys and a lid that acts as an oven in just the same way as the soil once did.
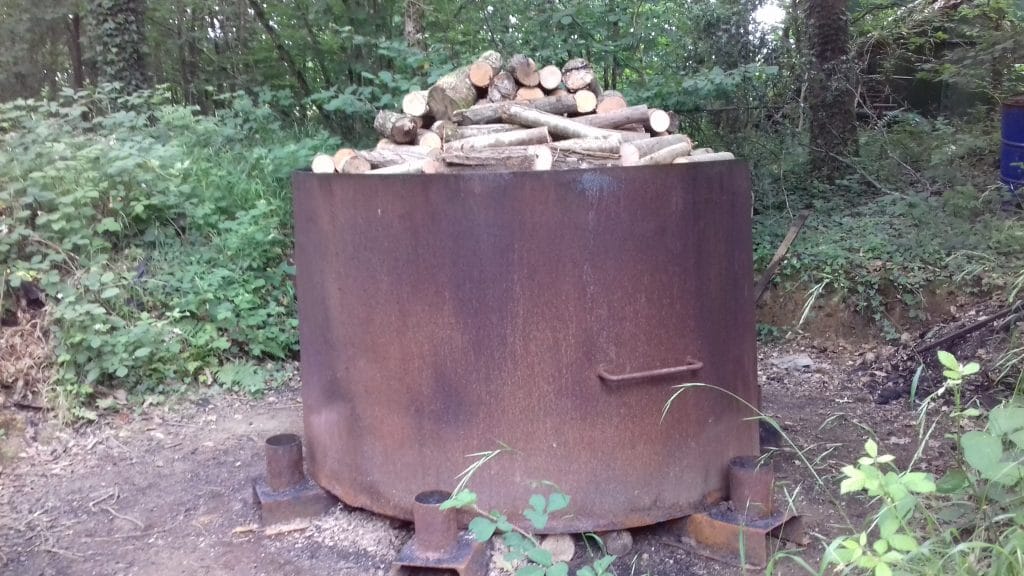
Kilns come in a range of sizes, but the most common is either 6’ or 8’ in diameter and 4’ to 5’ in height, some people stack two rings on top of each other to create a larger kiln. Mine is a baby at only 5’ wide and 4’ high, but it will still produce about 120kg of charcoal at a time.
The kiln site needs to be relatively flat, dry and free of too many loose stones; ideally, the same location is used each time so that the ground bakes off and the stones gradually get weeded out. The site needs to be relatively sheltered as any wind can make the burn run out of control making it difficult to manage, but if it is too sheltered the burn takes much longer to run its course.
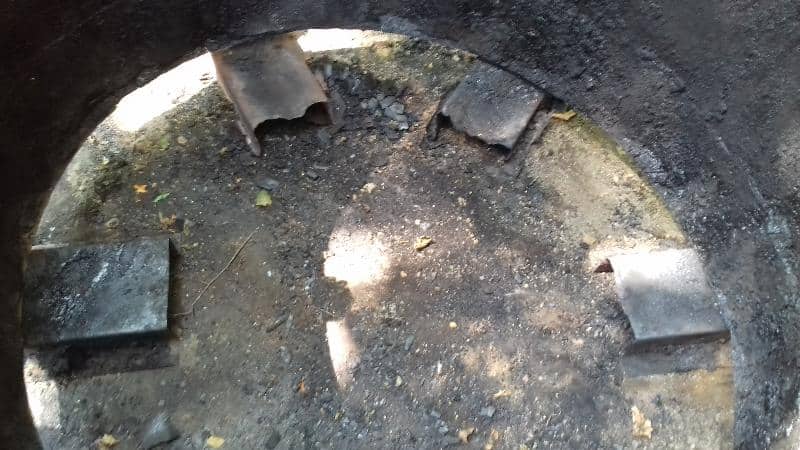
My 5’ kiln has 6 ports and 3 chimneys. The larger ones will have 8 ports and 4 chimneys or more.
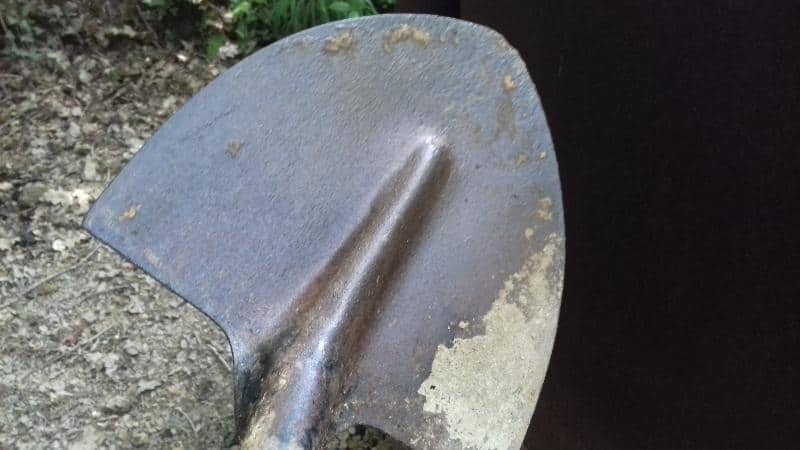
I also have a bag of sand to seal the kiln lid, a shovel and a riddle to sieve/grade the charcoal.
The wood that goes into it needs to be reasonably dry but doesn’t need to be as well seasoned as for firewood.
Over years of using charcoal in the forge, I’ve found that the species of wood doesn’t make nearly as much difference as the quality of the burn and the condition of the wood when it was coaled, so no slightly rotten wood goes in the kiln.
Charcoal is generally made in the summer when the ground is dry, and the wood, cut during the previous winter, has had a little time to season, but a year of drying is better.
The burns that I have carried out this year used wood cut about 18 months earlier and was very dry, so I got great results although I did have to slow the actual burns down so that they didn’t go too far.
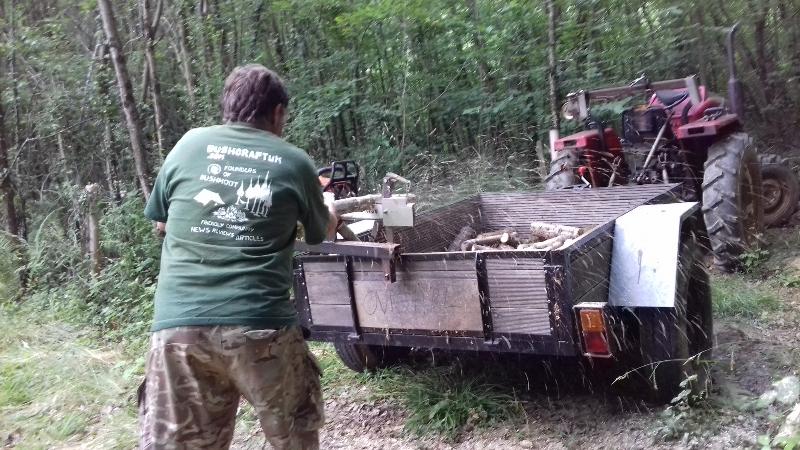
The wood was mostly alder, willow and ash and was from an area being thinned, so the logs varied in diameter from about 30mm to 120mm.
Loading
I start loading the kiln by placing logs between the ports (like spokes on a wheel) and a pile of kindling and sacrificial wood in the centre, this is where the heat will be generated to kick off the charcoaling process. The charge (rest of the wood) is packed in as tightly as possible to reduce the amount of air space and get the most charcoal from each burn.
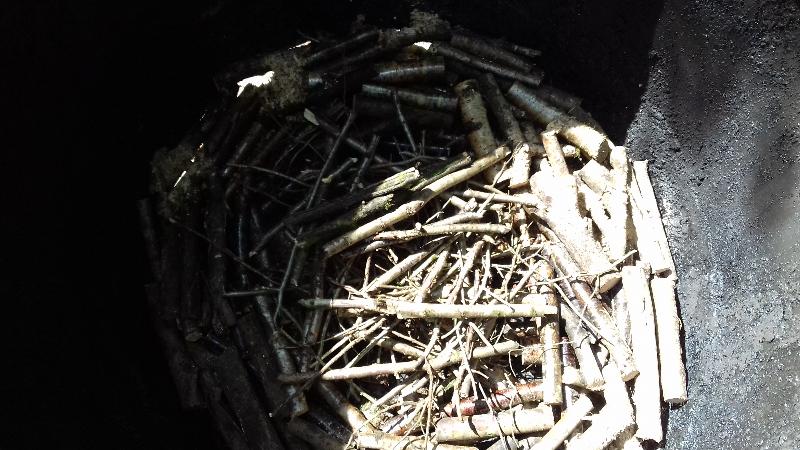
I build it up placing the smaller pieces of wood around the outside of the kiln (where it will be coolest) and the largest pieces nearer the centre and the top (where it will get hottest).
I also build the wood up into a peak in the middle to fill the space inside the conical lid. With the lid in place, but propped up on a couple of bits of wood to allow airflow, I’m ready to burn.
Firing it up
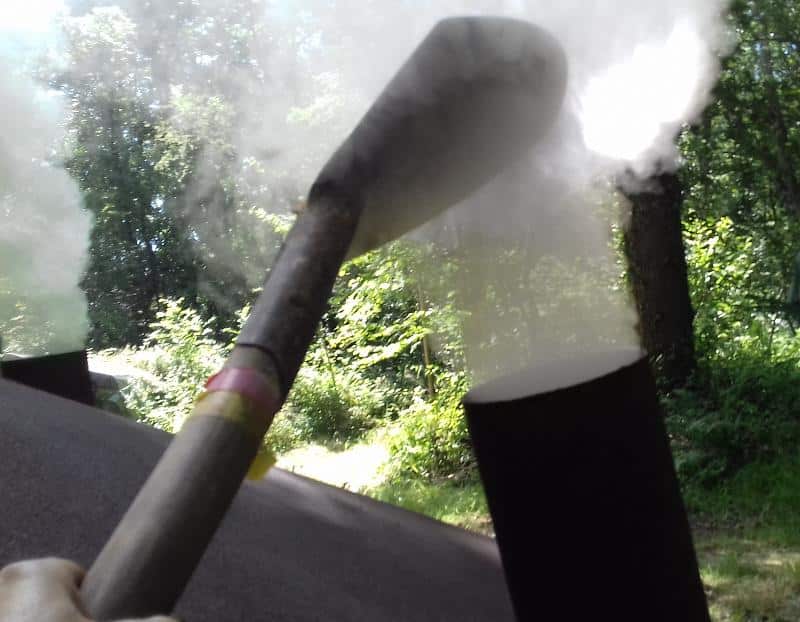
Larger kilns can take 24 or 30 hours to run their course, but this little one normally takes 10 to 12 hours, so a (very) long day if I start it early in the morning. I light the kindling in the centre of the kiln using the traditional rag-on-a-stick method, shoved through one of the ports. As the kindling and firewood in the centre start to burn, huge amounts of smoke billow out from the lid.

After about half an hour the fire has spread around the kiln and can be seen through the ports. The aim is to let the fire burn long enough to raise the temperature over 400C and kick off the process, but the longer the fire is burning uncontrolled like this, then the more of the charge is being consumed.
At this point, I take the props out from under the lid and pile soil up around the base so that the air can now only enter through the ports. The chimneys are placed on alternate ports, and they start puffing steady streams of smoke. The smoke at this point is thick yellowish-white, and as it builds volume from the chimneys, I go around the rim of the lid with sand to block any gaps.
The air is drawn in through the ports, these areas of the kiln get hottest as the fire is drawn to the oxygen. I swap the chimneys around every hour or so in order to spread the fire around the kiln and even out the heating.
Pyrolysis
For the charcoaling process (pyrolysis) to happen, the wood needs heating to 400-470C with as little oxygen present as possible. If it doesn’t get hot enough then the wood won’t be fully converted, too hot (or the temperature is raised too fast) then the charcoal is ‘blown’. That means when you look at the end of a charcoaled stick, it is very open-textured with massive splits; the resulting charcoal is fragile and breaks up easily in the bag or the fire.
The perfect top quality charcoal is dense and has a glassy ‘tinkle’ when tapped together or the bag jostled. That shows that the pyrolysis was total and the wood is close to 100% pure carbon with no impurities (causing smoke), wasn’t overcooked and will sustain its form well in the bag and in use.
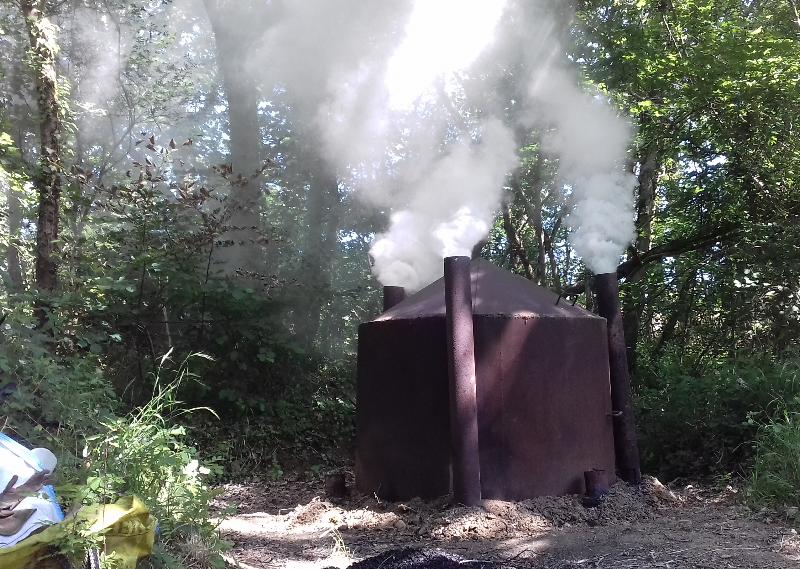
As the day wears on the thick yellowish smoke turns white and is mostly steam being driven off. After maybe 8 hours the amount of steam/smoke is greatly diminished, and some of the chimneys may start to produce flames, this is woodgas being burnt off and suggests that the charge is getting hot throughout and almost done. Once the smoke has virtually stopped or has become very thin with a slight blue tint (which is a little too far as that means the charcoal is now burning!), the burn is almost complete.
Cooling down
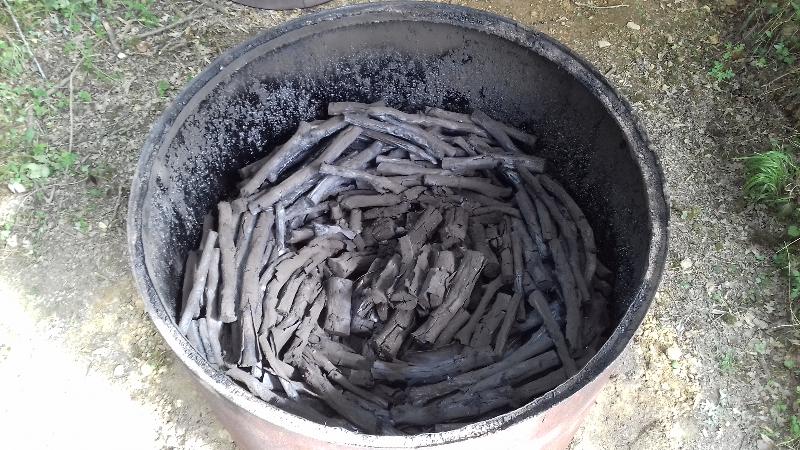
I remove the chimneys and fill the ports with soil, completely shutting the kiln down by cutting off the air. I check on it for leaks half an hour later and then go to bed!
A kiln this size will take another 12 hours to cool down enough to empty. If any embers remain, the whole lot can reignite and burn away to nothing.
One mistake that colliers in a hurry make is to take a peek under the lid to see if it is out. When they do that, oxygen gets in, and the hot woodgas ignites; resulting in the lid blowing off and taking the colliers face with it! I prefer to leave it a day or so to be on the safe side 😉 When the kiln is cold, I remove the lid and start emptying it with a malt shovel.
Grading
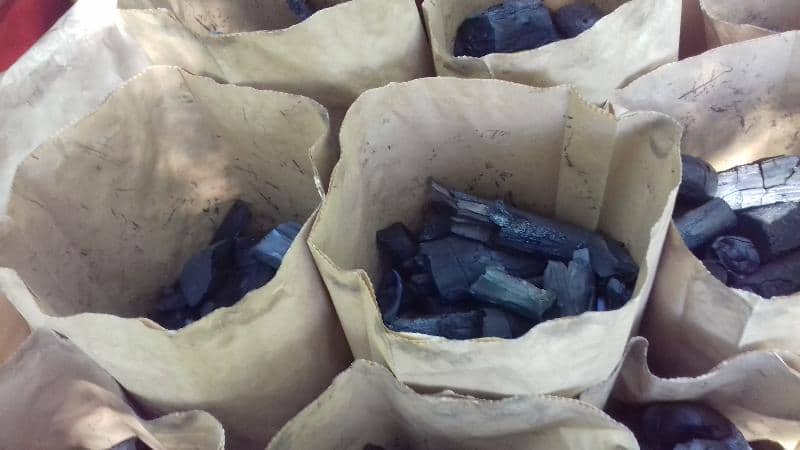
The charcoal is graded for different uses by passing it over sieves of various sizes. Pieces over 25mm in size are usually sold as barbecue charcoal, between 12 and 25mm is forge fuel (also great in wood burners) and anything smaller for soil improvement.
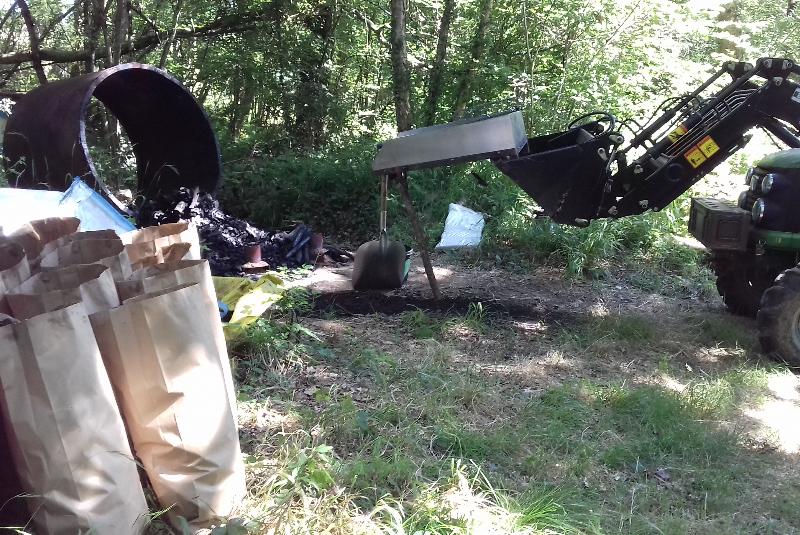
Since I rarely sell my charcoal, I throw mine over a 12mm mesh and burn everything in the forge. The small stuff still gets burnt, but I use it separately as it requires different fire management to avoid ending up all over the place. Aside from grading the charcoal, the sieving also helps to remove stones, sand, ash and unburnt wood.
The partially converted wood is known as ‘brown ends’ and is traditionally put back into the next kiln as part of the next burn. A better use for it is in the campfire. It has already had much of the volatile material burnt off and is super dry, so when burnt, it produces lots of bright flames and very little smoke.
The more modern method of making charcoal is the use of a retort kiln. This means that you place the wood in a sealed container and then heat it from the outside, just like making charcloth in a campfire using a syrup tin. Many retorts have a way of redirecting the woodgas into the combustion chamber to economise on fuel.
The benefits of a retort are that you get no contamination from stones/soil, you don’t lose some of your charge through heating it up, and it produces far less smoke in the early stages; so is much more neighbour/environmentally friendly.
Retort kilns are however very expensive to buy and though you can build them yourself, are not easy to make. They still need watching and feeding with fuel, so are no less labour intensive than a ring kiln, but you can use the brash to fuel it that would otherwise be wasted (chipped, etc). I looked into one that makes a similar amount of charcoal as my little kiln; it was £15 grand! Maybe one day I will make a small one based around an oil drum, but the ring kiln works fine for now.
Dave Budd is a world renowned smith specialising in historic weapons and other period steelwork, he runs knife and axe making courses amongst other things from his woodland in rural Devon.
You can see some of his work and contact him through his website DaveBudd.com