Ive always been impressed by those stories of Finnish backwoodsmen carrying a saw blade in their belt and then knocking up a bucksaw over a cup of camp coffee. It would make setting up a camp so much easier if I could have a bucksaw that I could make from natural material.
So with Mors Kochanskis Bushcraft as a guide I thought Id see what I could do. The rules for my bushcraft projects usually are use only what is available and use only what you would bring into the bush which is just knife and cord normally
I went okay until I had to make the slots for the blade. I cant make an end nock as narrow as a saw blade. Mors says use a knife so I very gingerly tried a tap with a baton on my Frost Mora but even this slim blade this soon showed a crack developing in the wood so I stopped. Mors also says that you can use the saw blade but I dont see how. I tried holding it in my hand and sawing the end but I couldnt get a groove going and the blade kept on slipping off and threatening to gash my other hand. So I cheated and use a small bow saw.
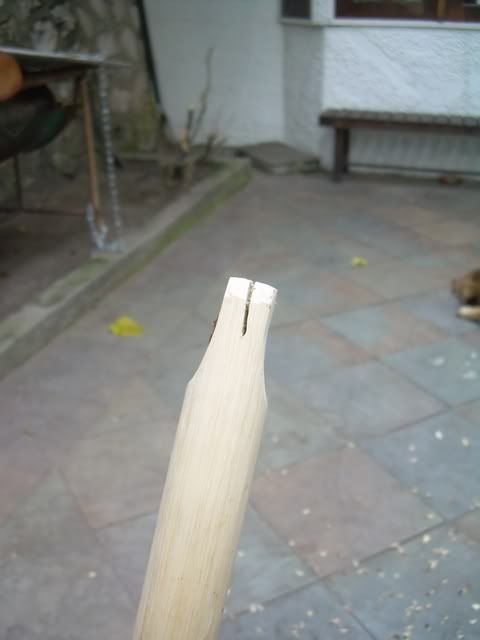
Can anyone tell me how I can make the slots with just a knife or saw? Mors doesnt elaborate on how to do it. Do you baton the end and then lash the split?
After cheating with the saw, I realise that instead of boring a hole with my knife, I could make holes for the bolts if I used a bow drill so I made a slim drill and got busy. This made me feel better. To my surprise, I got good quality dust. I had selected Hevea Brasiliensis (the real rubber tree) and did not think that such a sappy wood would be good for a fire drill.
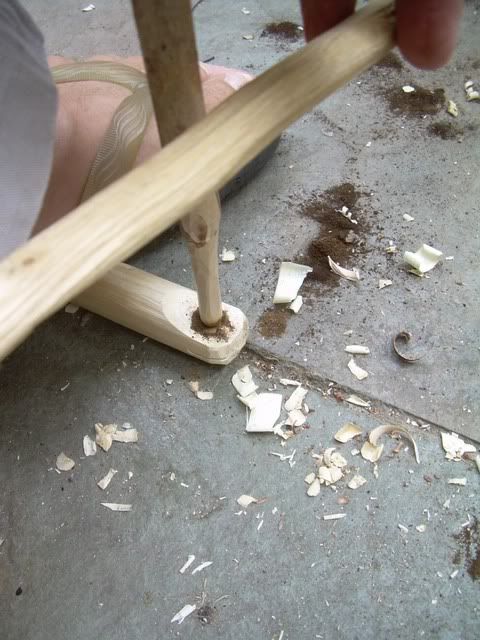
I then realized that the slot I had cut for the blade was acting as a conduit for air to reach the hot dust and that a tiny ember had formed in the slot! You can faintly make out the smoke and see the ember in the slot in this photo. So if you are heading out to the Amazon or South East Asia you know what wood to use for your bow drill
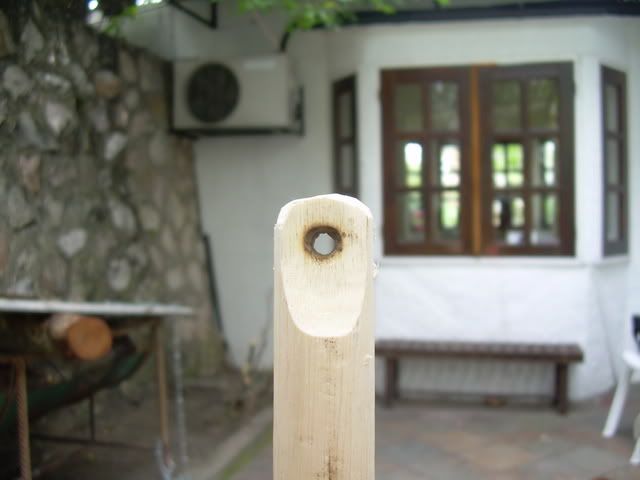
I then drilled through the end as this photo shows.
Assembling the saw, was not that easy, and I realised that I should have cut straight cross braces/supports instead of using the bent wood that I had.
Mors also mentions small nails knocked into the end of the cross braces to stabilize it. Does anyone know a way to avoid using nails (cos that means a hammer has to be brought in to the jungle as well)
Here is the final product inspired by the masters book.

Does it work? Yes.
IS the right hand side less than 90 degrees? Yes, I am afraid so.
I promise to do better next time and am open to suggestions on minimalist construction techniques.
I think a couple of wooden dowels could replace the bolts. What do you think?
So with Mors Kochanskis Bushcraft as a guide I thought Id see what I could do. The rules for my bushcraft projects usually are use only what is available and use only what you would bring into the bush which is just knife and cord normally
I went okay until I had to make the slots for the blade. I cant make an end nock as narrow as a saw blade. Mors says use a knife so I very gingerly tried a tap with a baton on my Frost Mora but even this slim blade this soon showed a crack developing in the wood so I stopped. Mors also says that you can use the saw blade but I dont see how. I tried holding it in my hand and sawing the end but I couldnt get a groove going and the blade kept on slipping off and threatening to gash my other hand.
So I cheated and use a small bow saw.
Can anyone tell me how I can make the slots with just a knife or saw? Mors doesnt elaborate on how to do it. Do you baton the end and then lash the split?
After cheating with the saw, I realise that instead of boring a hole with my knife, I could make holes for the bolts if I used a bow drill so I made a slim drill and got busy. This made me feel better. To my surprise, I got good quality dust. I had selected Hevea Brasiliensis (the real rubber tree) and did not think that such a sappy wood would be good for a fire drill.
I then realized that the slot I had cut for the blade was acting as a conduit for air to reach the hot dust and that a tiny ember had formed in the slot! You can faintly make out the smoke and see the ember in the slot in this photo. So if you are heading out to the Amazon or South East Asia you know what wood to use for your bow drill
I then drilled through the end as this photo shows.
Assembling the saw, was not that easy, and I realised that I should have cut straight cross braces/supports instead of using the bent wood that I had.
Mors also mentions small nails knocked into the end of the cross braces to stabilize it. Does anyone know a way to avoid using nails (cos that means a hammer has to be brought in to the jungle as well)
Here is the final product inspired by the masters book.
Does it work? Yes.
IS the right hand side less than 90 degrees? Yes, I am afraid so.
I promise to do better next time and am open to suggestions on minimalist construction techniques.
I think a couple of wooden dowels could replace the bolts. What do you think?
