This tutorial will cover the tools, methods and materials used to make a folding wire billy can / pot hanger used at a cooking fire with two Y sticks and a cross pole.
I use fencing wire 2.5 mm as I found it be the most flexible.
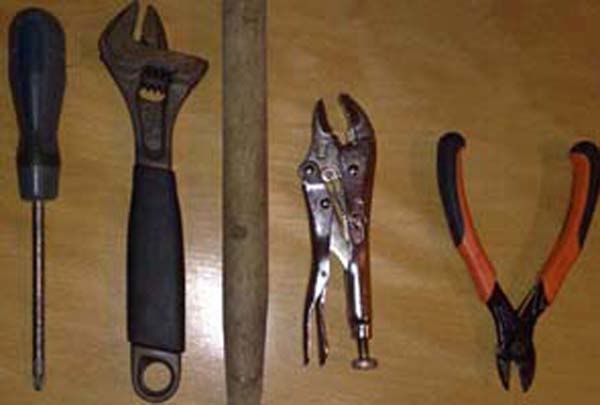
The tools used are basic Wire snips large, Adjustable spanner small 8", Vice grips very small, screw driver large as you have or metal bar 8mm ish and a round piece of wood 1"
There are 4 pieces to make up this hanger two are the same the other two are different
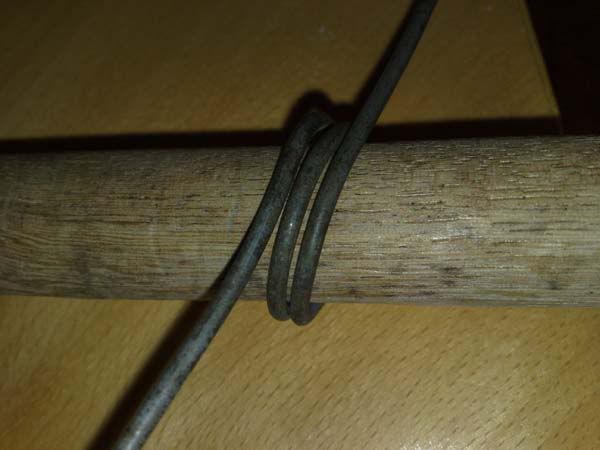
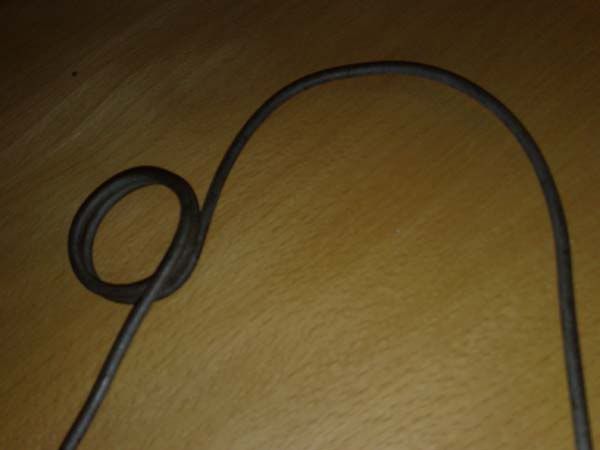
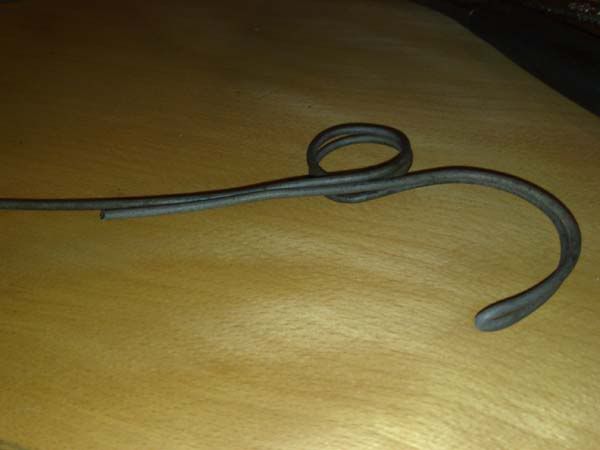
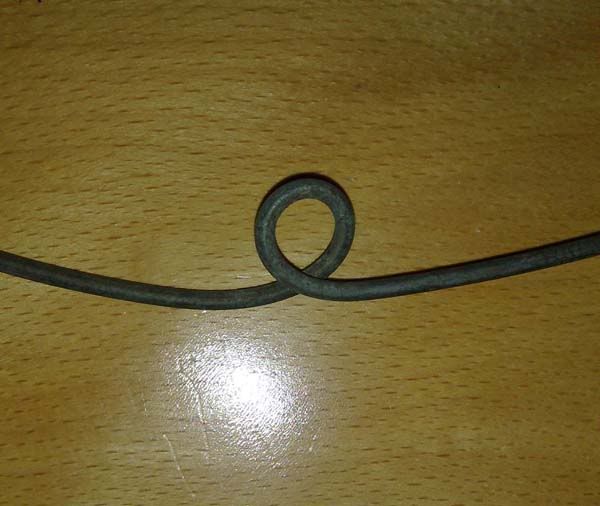
To start take a piece of wire 2.5ft long and wrap it around the wood twice at the center of the wire.
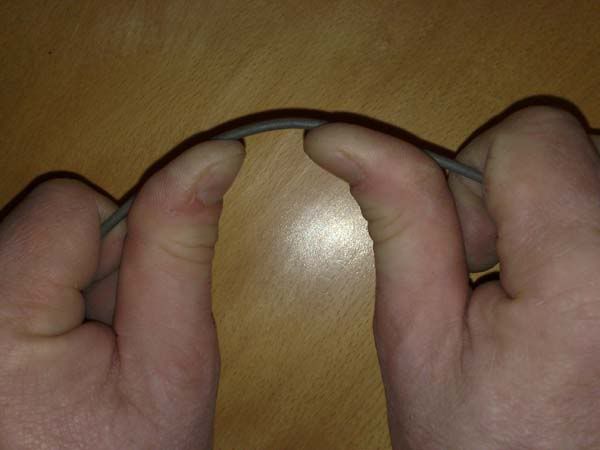
When it looks like the pic above remove the wood and start to make a bend on one end while straightening the other end.
Bending the wire should be done little and often moving 1/2 " at a time this makes it easier and gives a better result
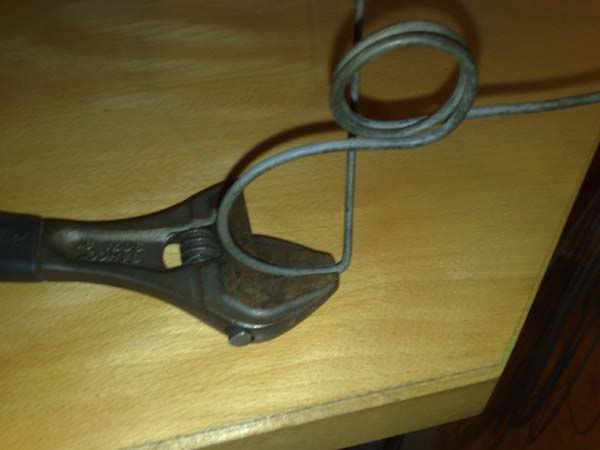
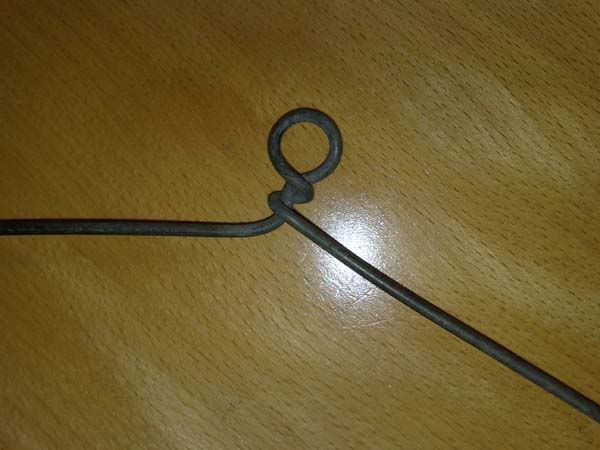
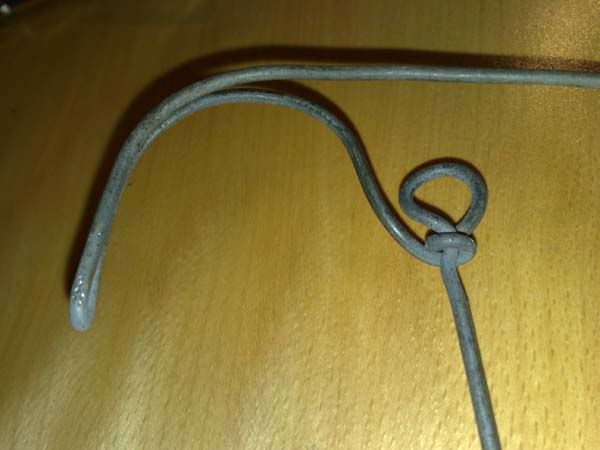
When you have the bend looking like the pic above you need to double the wire back, make a u turn on the wire, start by making an L shaped bend
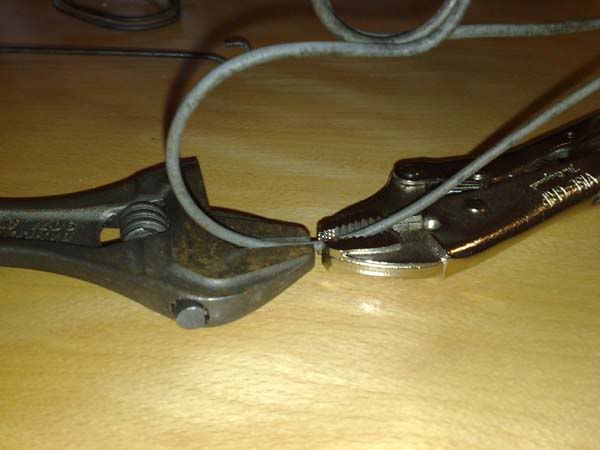
You can now complete the u turn by hand and finish it off with the vice grips
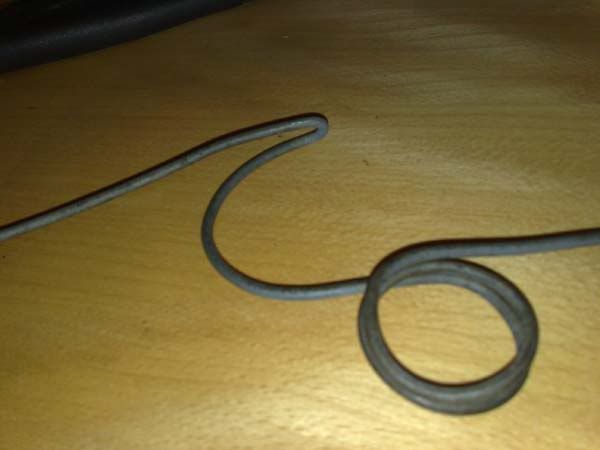
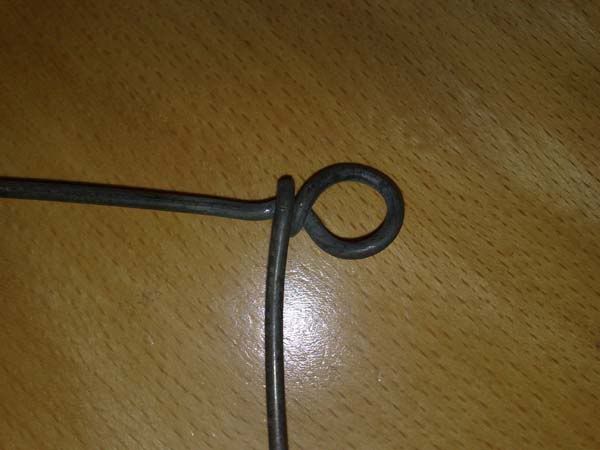
You now need to make the same bend in the wire until its looks like the pic below
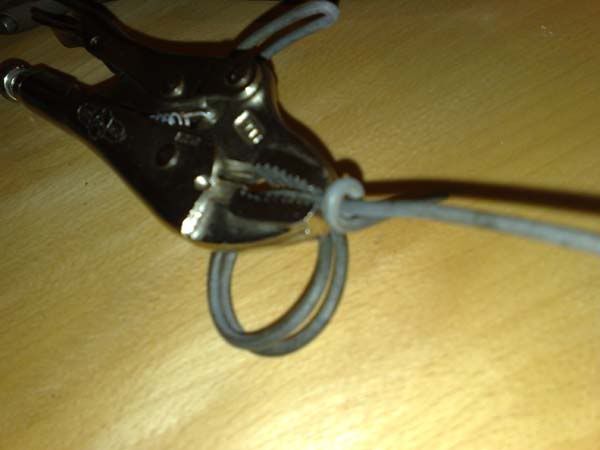
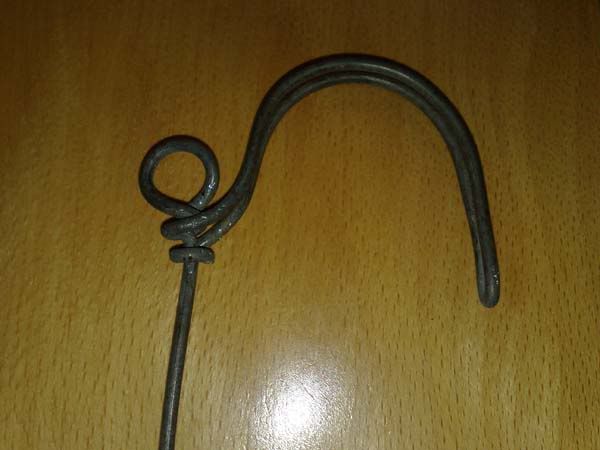
This trailing piece of wire now needs to tied off and cut, to do this it needs to be wrapped around the longer wire in as tight a loop as you can, if you clamp the other wires with the vice grips it makes it easier, when snipping off the excess wire leave only 3/4 of the circle of the loop you have just made and squeeze it closed with the vice grips this makes it a much stronger joint and gets rid of a sharp edge.
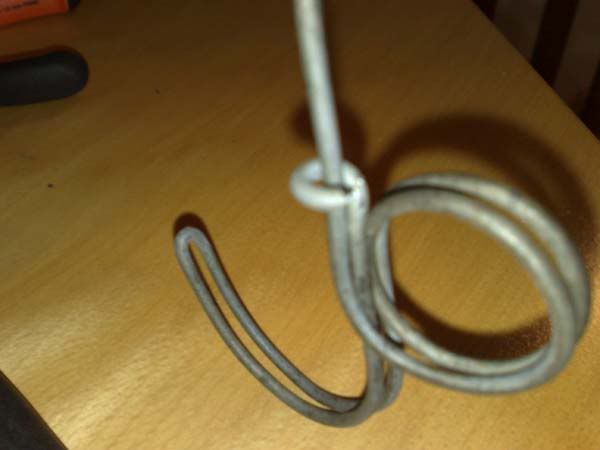
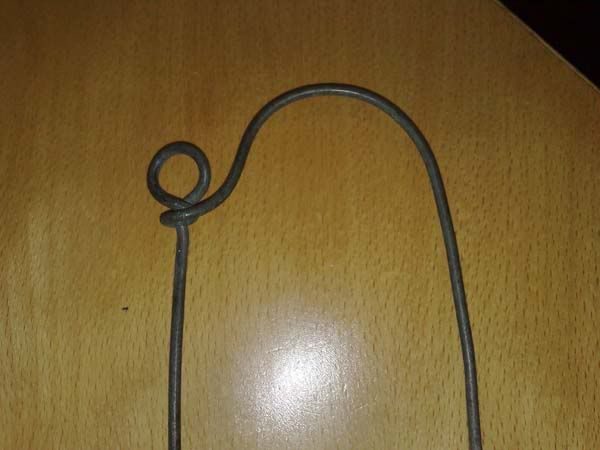
To finish this section you need to make a small loop at the end of the straight wire the position of this will dictate the overall length and how much you raise the pot out of the fire, I make them about 4" the loop should look like the pic below and at 90 from the hook and finger loop as this allows it to fold flat.
Don't fully close this loop as this is done at final assembly
This piece is finished for now, on to the next part for this you need a 2ft wire and form a small loop 2/3 along the wire with the screwdriver as per pic below
When this is done make a full twist in the two trailing wires as per pic below.
One of the wires naturally go in a downwards direction and the other across this one should be the longer one
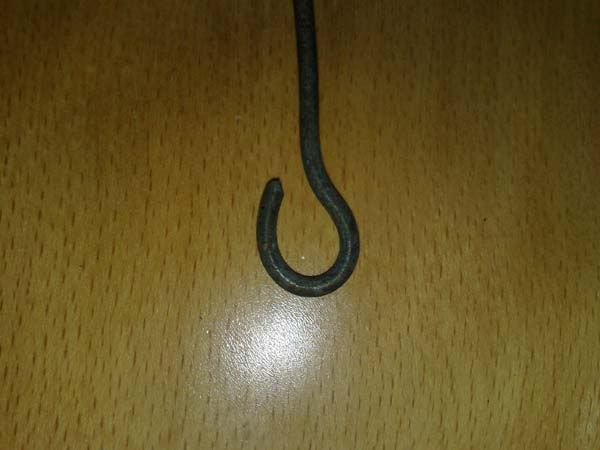
Now you start to make the curve for the hook out of this.
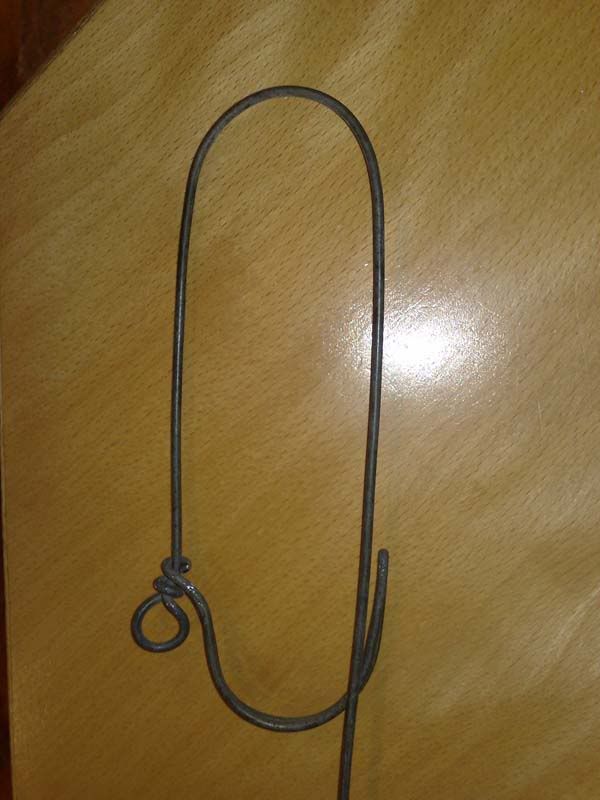
When the curve looks the same as before you make a U turn as you did on the first part. It should now look like the pic below.
Now tie off the returning wire as you did before and it should look like the pic below
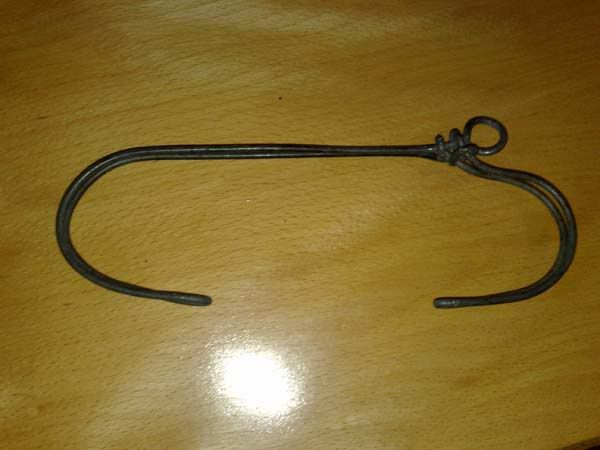
This part will be finished for now when the small loop is made 4" at the end of the straight wire.
The next part is the same as the part you just made so just repeat that section and you now have 3 parts and on to the last part.
For this part 2.5ft of wire is used. Make a small loop 2/3 along the wire and put one full twist into it as in the last part and it will look like the pic below
You now make a hook with a U turn and tie it off under the small loop as before.
The straight wire going downwards needs a hook 4" down with a U turn and this should be tied off on the top hook as this is a load bearing section and need the double strength.
It is difficult to neatly tie off this wire as this point is very busy so take care to plan the path of these wires before making the U turn I should have said this before all U turns as you have the option of going left or right.
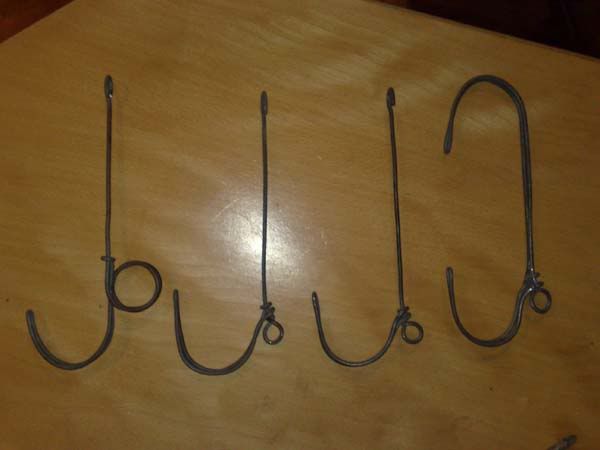
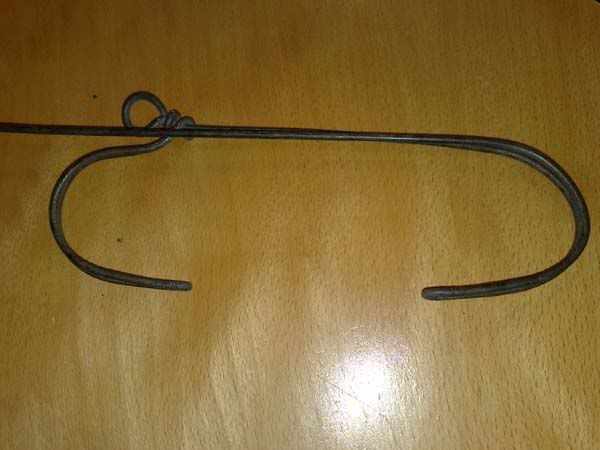
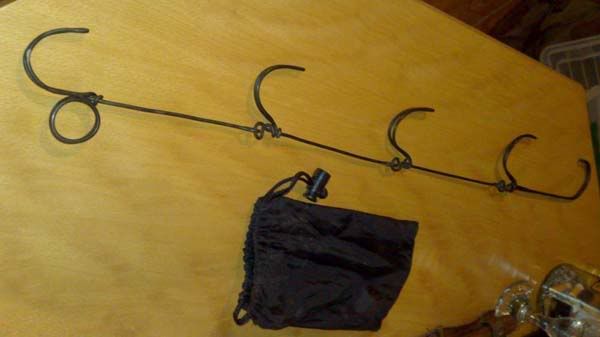
You now have all 4 parts made and you do the final assembley
by squeezing the small loops with the vice grips
When fully assembled it should look like the pic below and should fold up like the last pic

I need to sign off now as I have to get ready for a river canoe trip tomorrow, I will finish this off in the next day or so, Alan.
Had a great day on the river about 4 hrs downstream over weirs and falls two canoes got swamped and we didn't get a pic of it.
I try to finish this tonight. Alan,
I use fencing wire 2.5 mm as I found it be the most flexible.
The tools used are basic Wire snips large, Adjustable spanner small 8", Vice grips very small, screw driver large as you have or metal bar 8mm ish and a round piece of wood 1"
There are 4 pieces to make up this hanger two are the same the other two are different
To start take a piece of wire 2.5ft long and wrap it around the wood twice at the center of the wire.
When it looks like the pic above remove the wood and start to make a bend on one end while straightening the other end.
Bending the wire should be done little and often moving 1/2 " at a time this makes it easier and gives a better result
When you have the bend looking like the pic above you need to double the wire back, make a u turn on the wire, start by making an L shaped bend
You can now complete the u turn by hand and finish it off with the vice grips
You now need to make the same bend in the wire until its looks like the pic below
This trailing piece of wire now needs to tied off and cut, to do this it needs to be wrapped around the longer wire in as tight a loop as you can, if you clamp the other wires with the vice grips it makes it easier, when snipping off the excess wire leave only 3/4 of the circle of the loop you have just made and squeeze it closed with the vice grips this makes it a much stronger joint and gets rid of a sharp edge.
To finish this section you need to make a small loop at the end of the straight wire the position of this will dictate the overall length and how much you raise the pot out of the fire, I make them about 4" the loop should look like the pic below and at 90 from the hook and finger loop as this allows it to fold flat.
Don't fully close this loop as this is done at final assembly
This piece is finished for now, on to the next part for this you need a 2ft wire and form a small loop 2/3 along the wire with the screwdriver as per pic below
When this is done make a full twist in the two trailing wires as per pic below.
One of the wires naturally go in a downwards direction and the other across this one should be the longer one
Now you start to make the curve for the hook out of this.
When the curve looks the same as before you make a U turn as you did on the first part. It should now look like the pic below.
Now tie off the returning wire as you did before and it should look like the pic below
This part will be finished for now when the small loop is made 4" at the end of the straight wire.
The next part is the same as the part you just made so just repeat that section and you now have 3 parts and on to the last part.
For this part 2.5ft of wire is used. Make a small loop 2/3 along the wire and put one full twist into it as in the last part and it will look like the pic below
You now make a hook with a U turn and tie it off under the small loop as before.
The straight wire going downwards needs a hook 4" down with a U turn and this should be tied off on the top hook as this is a load bearing section and need the double strength.
It is difficult to neatly tie off this wire as this point is very busy so take care to plan the path of these wires before making the U turn I should have said this before all U turns as you have the option of going left or right.
You now have all 4 parts made and you do the final assembley
by squeezing the small loops with the vice grips
When fully assembled it should look like the pic below and should fold up like the last pic
I need to sign off now as I have to get ready for a river canoe trip tomorrow, I will finish this off in the next day or so, Alan.
Had a great day on the river about 4 hrs downstream over weirs and falls two canoes got swamped and we didn't get a pic of it.
I try to finish this tonight. Alan,
Last edited:
")