Part 1 - Growing the beet
I bought a small bag of sugar beet seeds over winter. In the middle of March I sowed them into a commercial module...I had no idea as to germination rates so I decided to sow in modules and transplant in order to ensure the 50 square feet test area was fully populated. The module was put into an unheated greenhouse

1) Sugar beet module by British Red, on Flickr
The first seeds broke the surface a week later
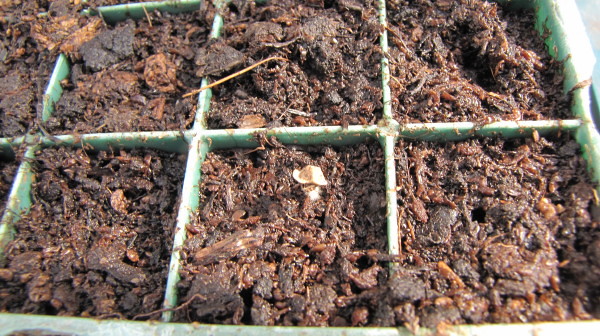
2) Sugar beet germination by British Red, on Flickr
Two weeks after sowing we had about 50% germination
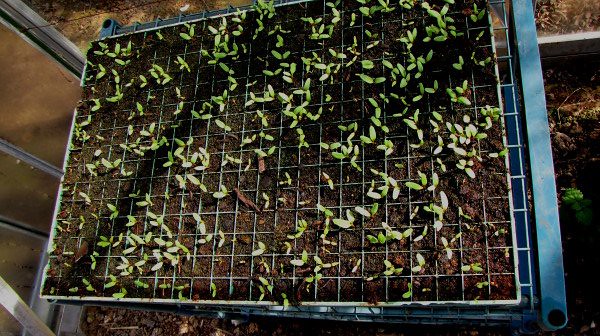
3) Sugar Beet Seedlings by British Red, on Flickr
After about a month (mid April) secondary leaves developed and the roots were beginning to emerge from the modules
4) Sugar beet seedling 13-4 by British Red, on Flickr
Some seedlings were potted on into 3" pots at this stage to determine whether pot growing in the greenhouse and planting out later would improve beet size (it doesn't!)
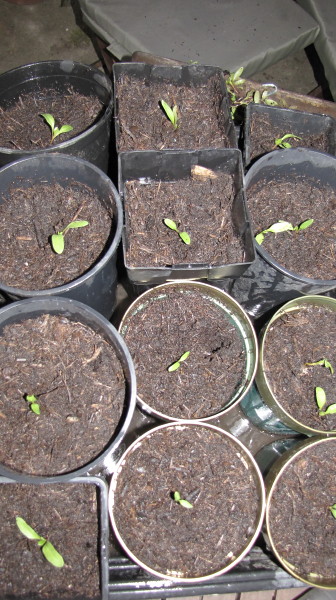
Sugar beet potted on 13-4 by British Red, on Flickr
By the end of April (six weeks after planting) we had achieved 100% germination and strong secondary leaves
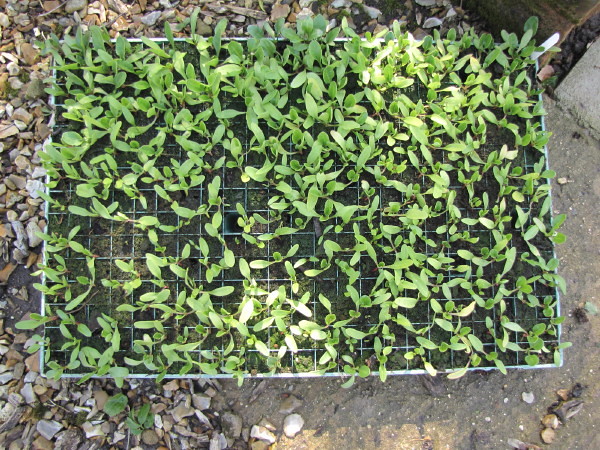
Sugar Beet 30-04 by British Red, on Flickr
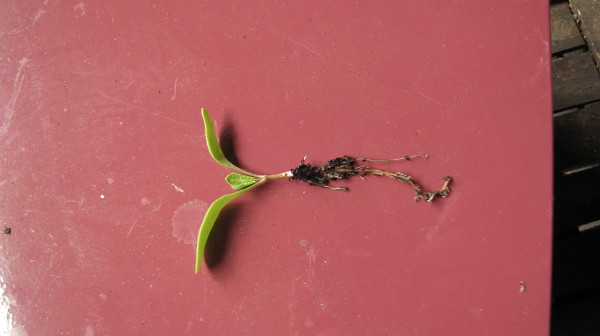
Inspecting the plugs showed decent roots - although I believe they could safely be grown on in modules for up to eight weeks
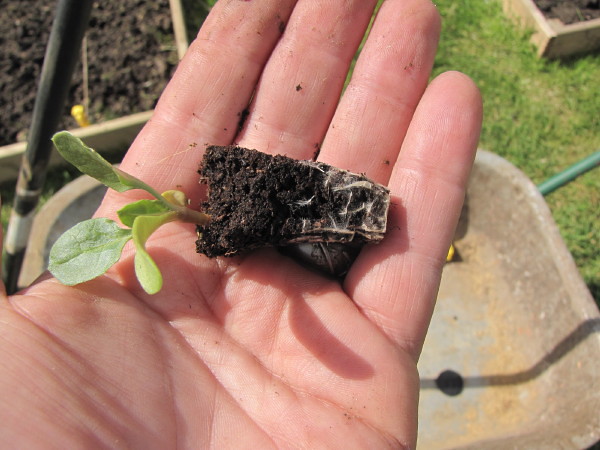
5) Sugar Beet Plug by British Red, on Flickr
Now, it needs to borne in mind that I had no planting or propagating instructions, so a bit of Google had already come in to play as to when to plant. I had to look up how to space the plants. Consensus appeared to be in rows one foot apart and at one foot intervals - this worked out about right - there is a lot of top growth that needs room to photosynthesise.
We marked out three rows a foot apart and six inches in from the edge of the bed
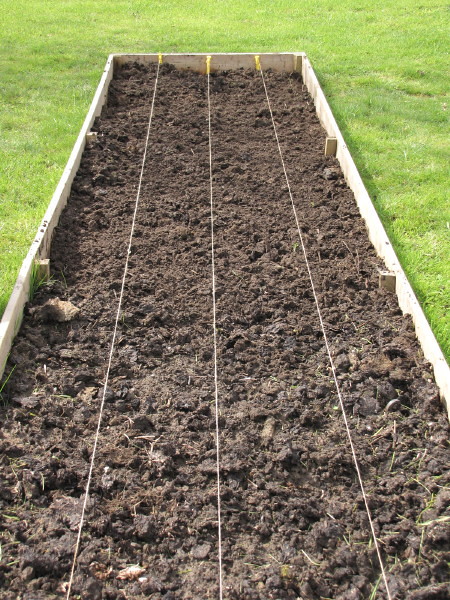
6) Sugar Beet Bed Marked Up by British Red, on Flickr
A one foot length of wood (or anything) certainly assists in spacing evenly - a dibber makes planting out quicker
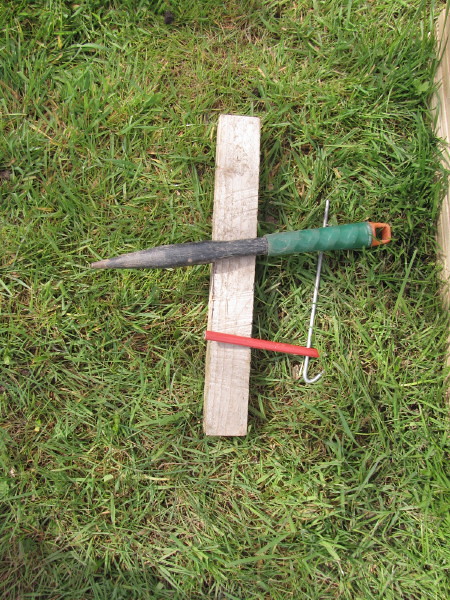
7) Peg, Dibber and mark template for Sugar Beet by British Red, on Flickr
Here they are all laid out
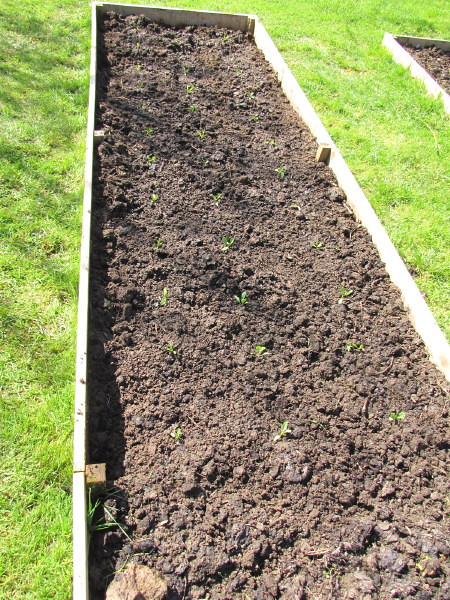
8) Planted Sugar Beet plugs 30 -04 by British Red, on Flickr
Its important to keep them wet to begin with if there is a Spring drought...the roots aren't deep yet
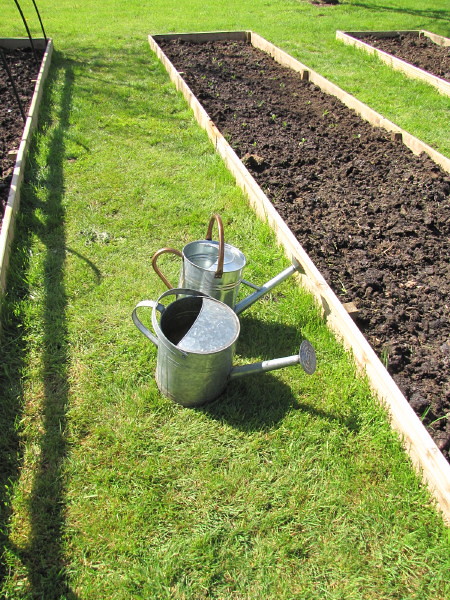
9) Watered in Sugar Beet by British Red, on Flickr
I confess - by early June I was quite worried - they had grown - but not as much as I had expected
10) Sugar Beet 04-06 by British Red, on Flickr
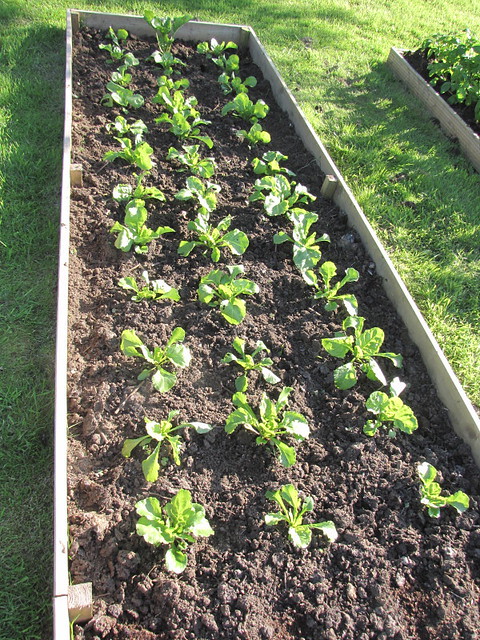
Our Summer rains seemed to help though - a couple of weeks made a dramatic difference
11) Sugar Beet 22-06 by British Red, on Flickr
I was very pleased to see beets starting to develop
12) Sugar Beet 22-06 by British Red, on Flickr
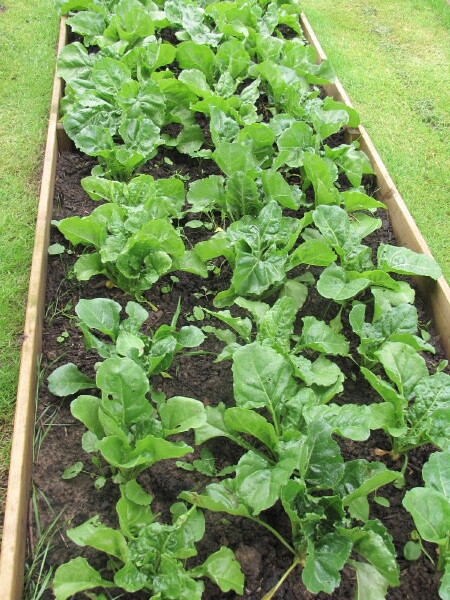
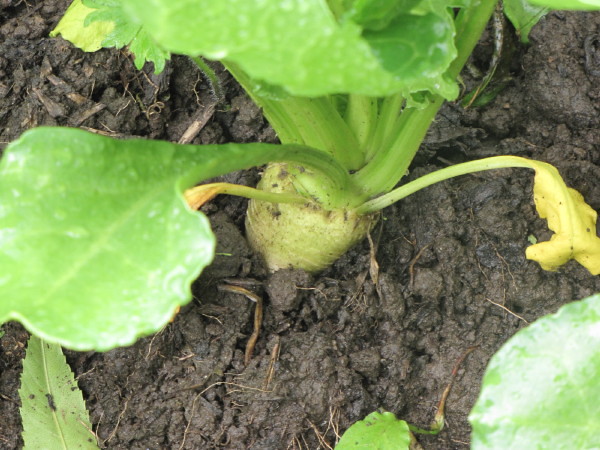
By mid July it became clear that those one foot spacings were needed!
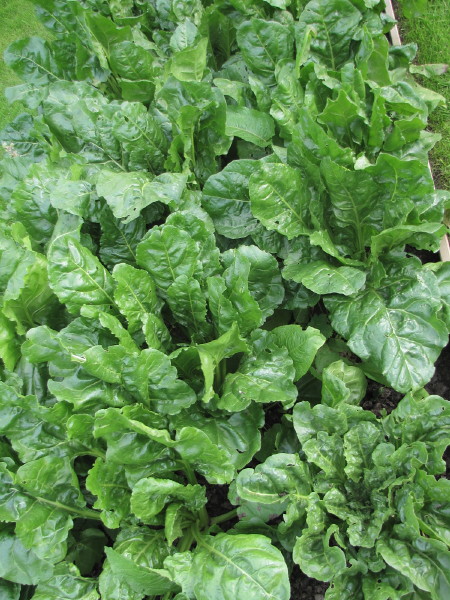
13) Sugar Beet 17/07 by British Red, on Flickr
Once they achieve this size, the top growth doesn't seem to change much - the energy is going into the root
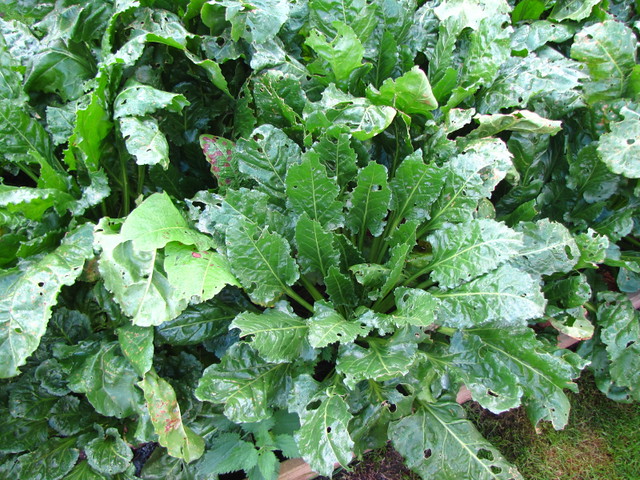
14) Sugar Beet 22/09 by British Red, on Flickr
As you can see - in two months the top growth is a little more bushy - but not dramatically so - most of the growing is happening below
Part 2 - lifting the beet and extracting raw syrup
The traditional time for lifting and processing Sugar Beet is September. I'm told by neighbours that all crops are running behind this year - so I have left some for later harvest to understand the difference. Some will be left over to next year in order that I can "close the circle" and produce our own seed.
First beet lifted
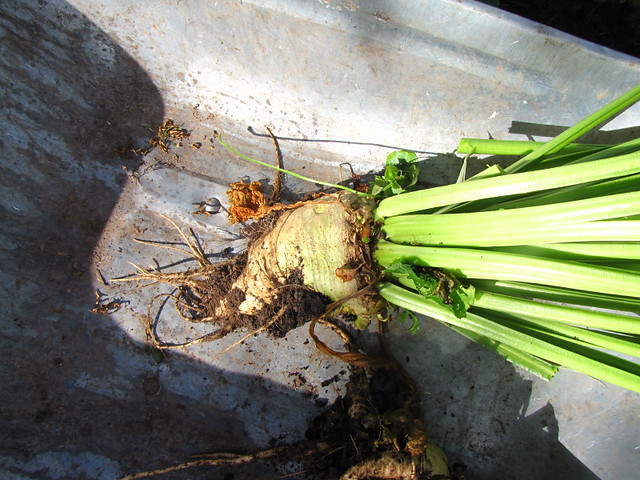
15) Lifted Sugar Beet by British Red, on Flickr
When lifting, the leaves can be used as food. They can be eaten like lettuce, wilted like spinach, fried or used as animal fodder. They are actually very tasty!
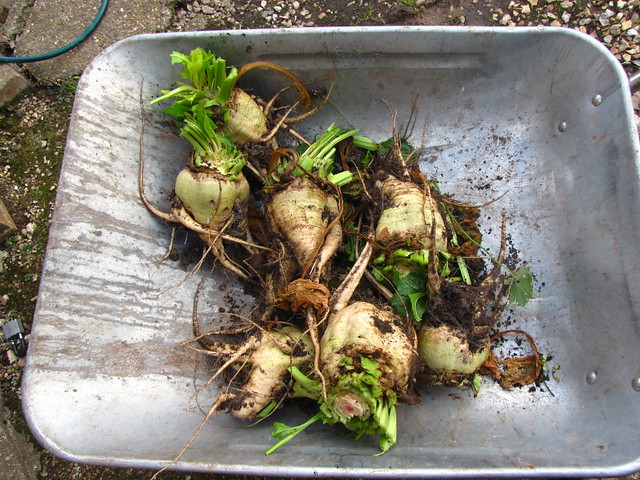
16) Sugar Beet Tops cut by British Red, on Flickr
To process the beet cut away the tops. Two things of note here:
A) Some of my Beet have forked - this is not good as it makes them harder to process. I heavily suspect that this is as a result of having manured the bed they are growing in over Winter. Root crops should not be grown in freshly manured beds - my mistake.
B) There are hollow, dirt filled areas in the crowns of some of the larger beet - no idea what causes this....but its wasteful
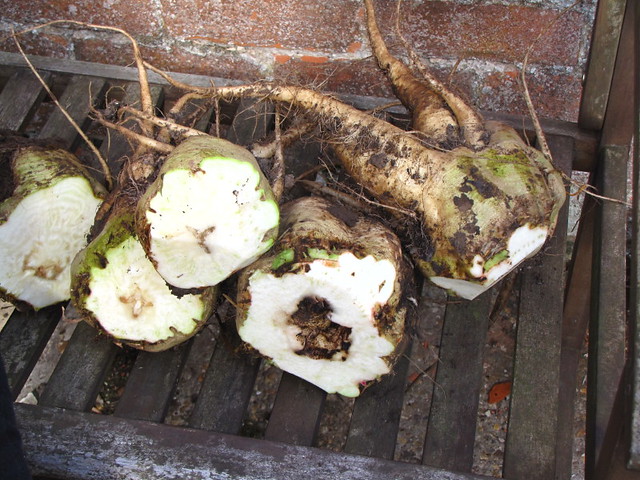
17) Sugar beet tops cut by British Red, on Flickr
The beet were peeled - and scrubbed - some were divided to aid peeling the "legs"
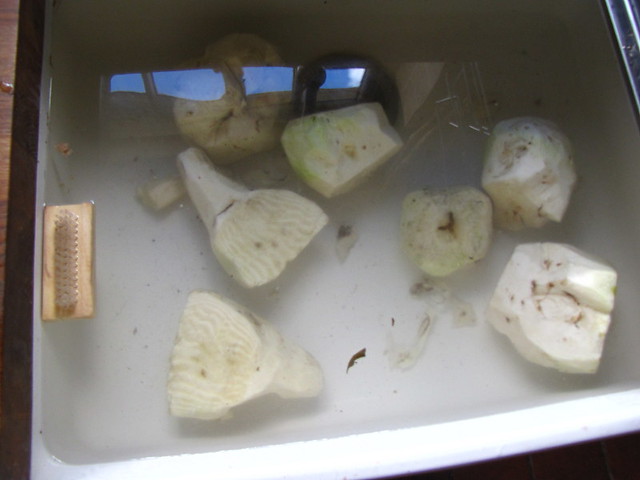
18) Sugar Beet Peeled and Trimmed by British Red, on Flickr
The beet were then grated into a large pan - for trial purposes I was using a 4 gallon stock pot. For any significant processing, my 10 gallon pot will come out - in fact I might make an oil drum boiler. Something like an apple pulper or old manual swede chopper would certainly speed this step up. Grating is not really necessary - thin slicing or chopping up like fries will do the job - the more surface are you make, the easier it is to dissolve out the sugar - don't go too fine though - you don't want the beet to turn into mush.
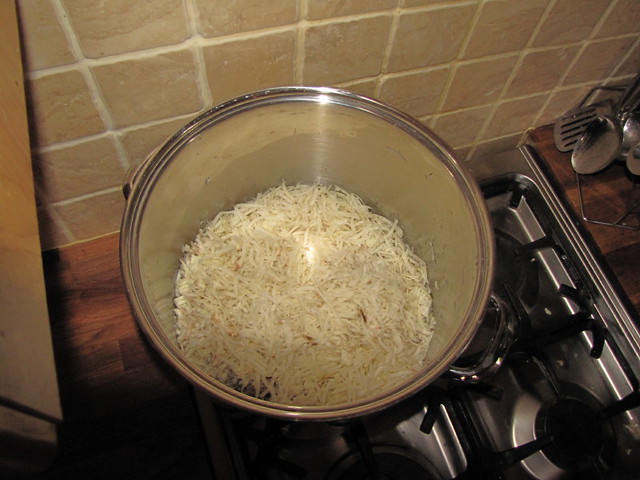
19) Grated Sugar Beet by British Red, on Flickr
The beet are barely covered with water - bear in mind that a pint of water can dissolve two pounds of sugar - too much water at this step is just more to boil off later.
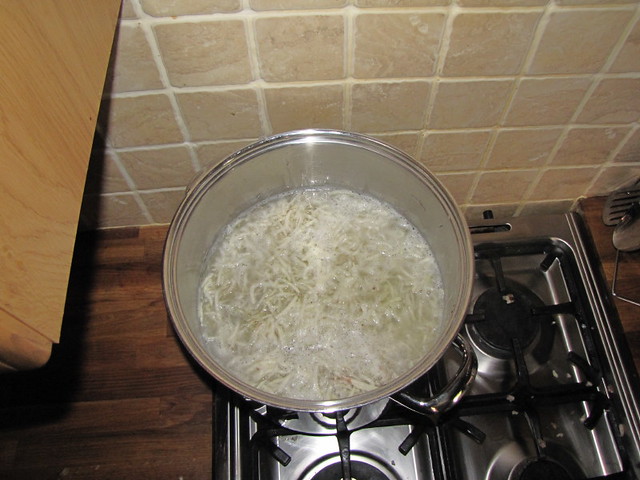
20)Grated sugar beet Scant cover with water by British Red, on Flickr
Bring the water to the boil and simmer for an hour - the water will dissolve out the sugar from the beet. I was surprised by the smell - like boiling parsnips or other root veg mixed with old socks - no real sweetness and not a great smell. Gradually a faint sweetness can be detected when tasting though - but in a muddy way.
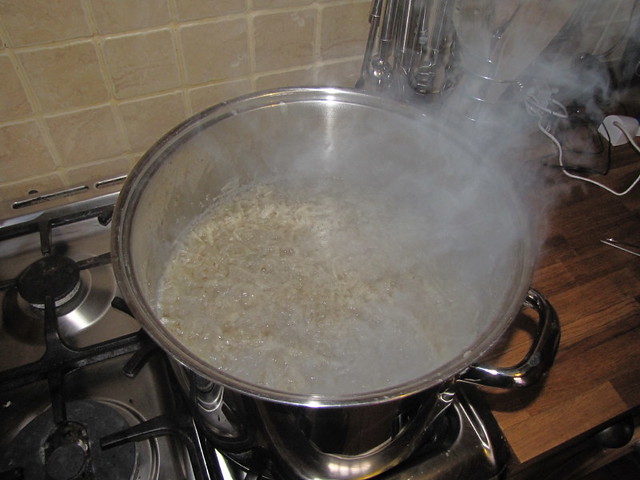
21) Grated Sugar Beet boiled for an hour by British Red, on Flickr
Strain the water from the beet pressing any juice from the pulp. A sieve and ladle works okay - but for large scale I will use a soil sieve and a fruit press to squeeze the pulp.
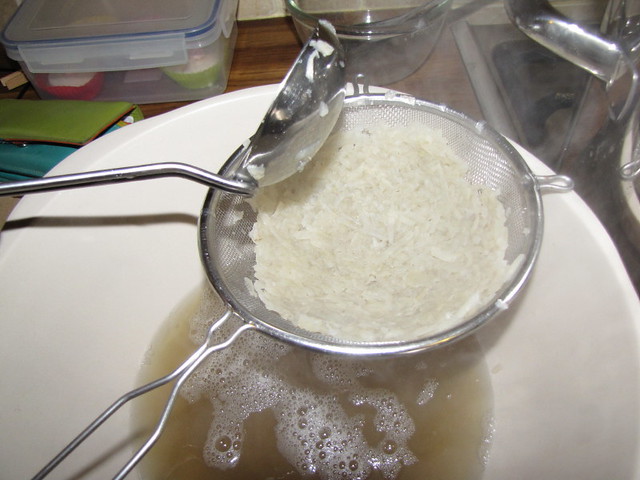
21) Sugar syrup squeezed from beet by British Red, on Flickr
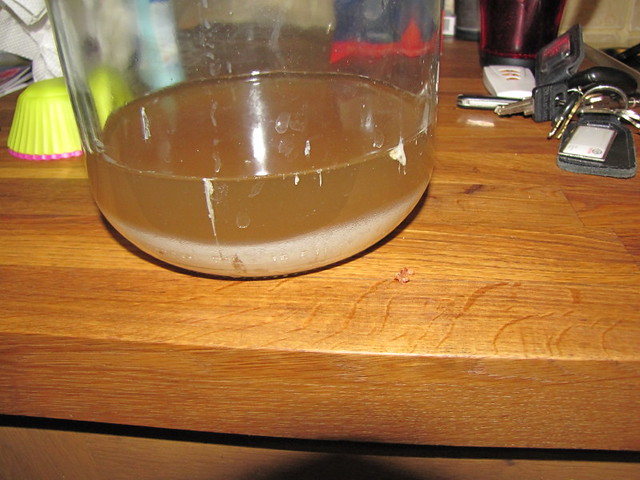
What we are left with is this - a highly polluted light sugar syrup. It doesn't taste nice to be honest.
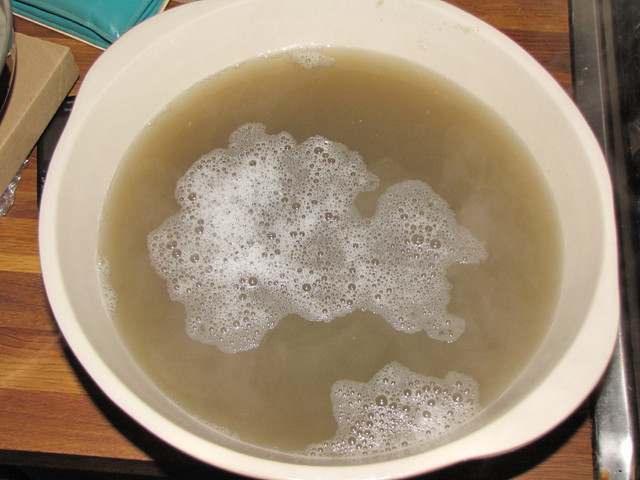
22) Light Sugar beet syrup by British Red, on Flickr
The discarded beet is perfectly okay to add to stews - its quite "turnip" like - or it can be fed to stock or composted.
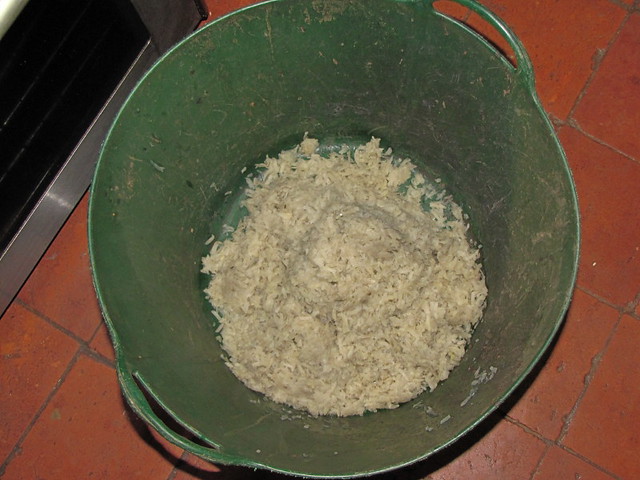
23) Discarded Sugar Beet by British Red, on Flickr
Part 3 - purifying and extracting the syrup
The next steps we need to do is extract as much "non sugar" from the syrup as possible - the first step is to filter out any dirt, beet fibres etc. You need a fine filter here. I am using a jelly bag (the stand helps a lot), but you could use a sieve covered in multiple layers of cloth (you can see layers of muslin lining my bag - this increases the effective fineness). A Milbank bag would work - as would a fine biodiesel filer bag (I have several - down to 1 micron that I will use on a stand for larger batches)
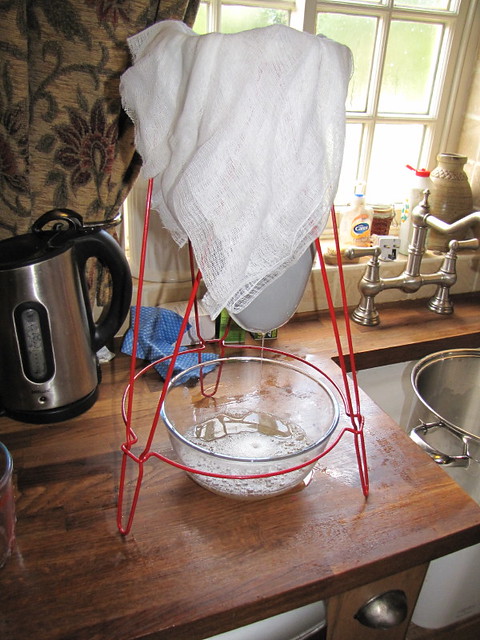
24) Sugar syrup filtration by British Red, on Flickr
After filtering you can see that the bag has trapped dirt
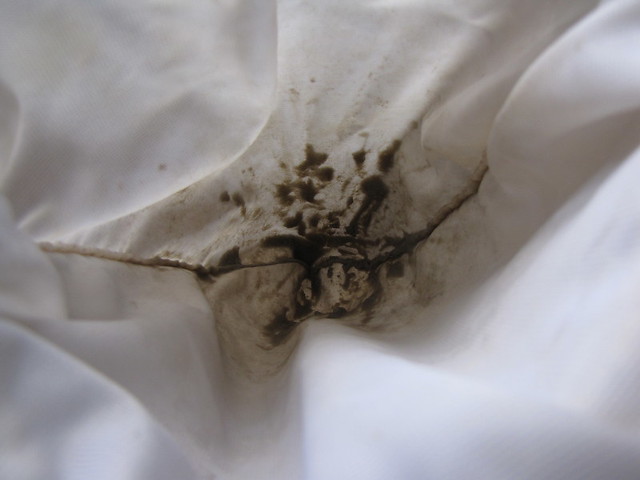
25) Filtered dirt by British Red, on Flickr
The cloth has caught a lot of grey beet fibres
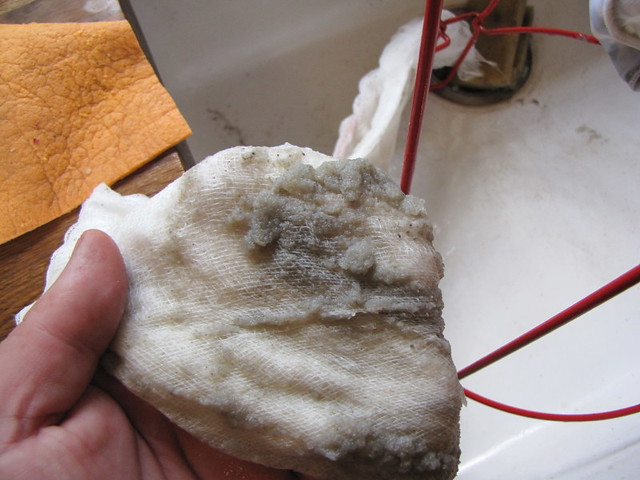
26) Removed Sugar Beet Pulp by British Red, on Flickr
So we have removed the bulkier stuff - but there still a lot of microscopic contaminants in there. Factories use chemical precipitation to settle out these impurities - and so will we. To do this, we will use calcium hydroxide mixed in the syrup and add carbon dioxide - this causes calcium carbonate (chalk) to precipitate out. As the calcium carbonate forms it draws the impurities to it and they settle out together - rather like adding "finings" to wine.
I know this sounds complicated, but it really isn't. This is calcium hydroxide
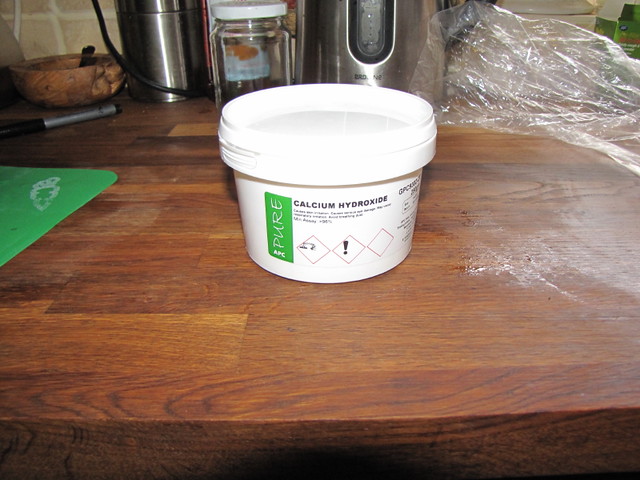
27) Calcium Hydroxide by British Red, on Flickr
This stuff is available all over the place. As a chemical. As agricultural lime. As "pickling lime". Its old name was "slaked lime". To make it add limestone or chalk (calcium carbonate) to a kiln and get it hot this forms calcium oxide - also known as quicklime. Add water to quicklime and you get slaked lime - calcium hydroxide. Firing quicklime is dirty and dangerous - so learn how to do it safely!
Now we need to made "milk of lime" - a tiny amount of slaked lime is mixed with hot water - where it partially dissolves and is partially held in suspension
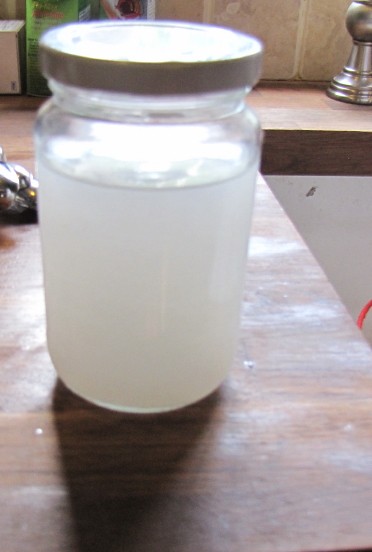
28) Milk of Lime by British Red, on Flickr
The milk of lime is added to the filtered syrup
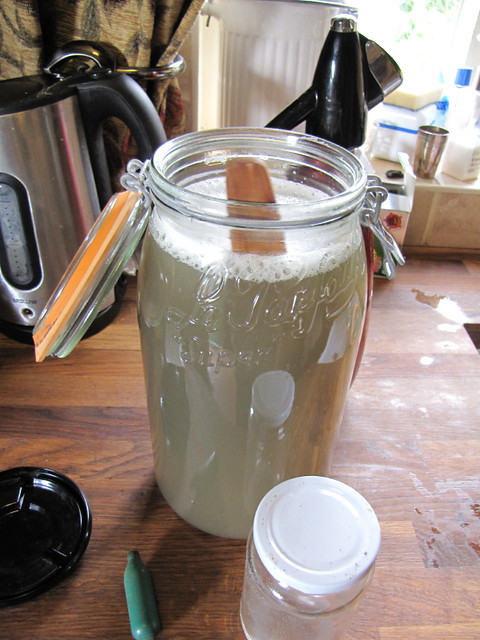
29) Mixed milk of lime and soda water by British Red, on Flickr
We have to now get some carbon dioxide in there. In the final part of this post I will show you how to build a carbon dioxide generator, but, if you don't want to go that far, add some sparkling water or use a soda syphon to make very fizzy water and add that.
Quickly you will see layers form - intially its all cloudy, but then you get clearer syrup at the top and sediment at the bottom
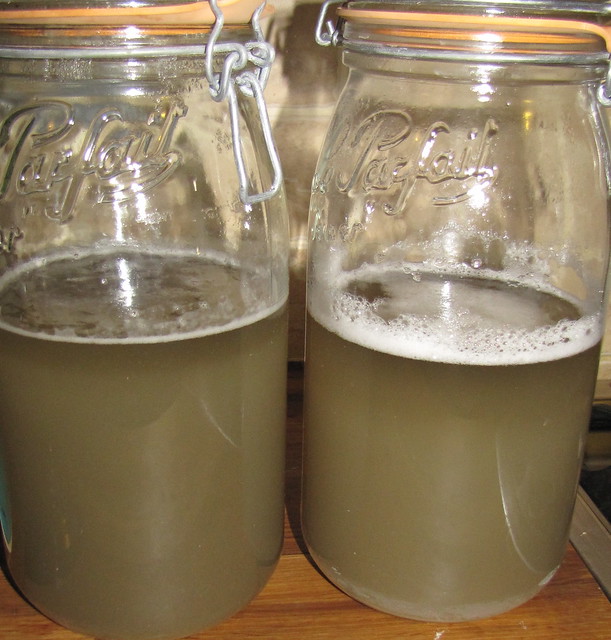
Sugar solution precipitation by British Red, on Flickr
In a factory they would use a centrifuge to settle out the chalk - I just used patience! When it settled, I syphoned off the cleaned syrup. On a larger scale, I would use a beer brewing vessel with a tap an inch up the side to draw the syrup off
30) Separated layers - siphoned off by British Red, on Flickr
Part 4 - Sugar Extraction
So, we have some filtered and purified light syrup
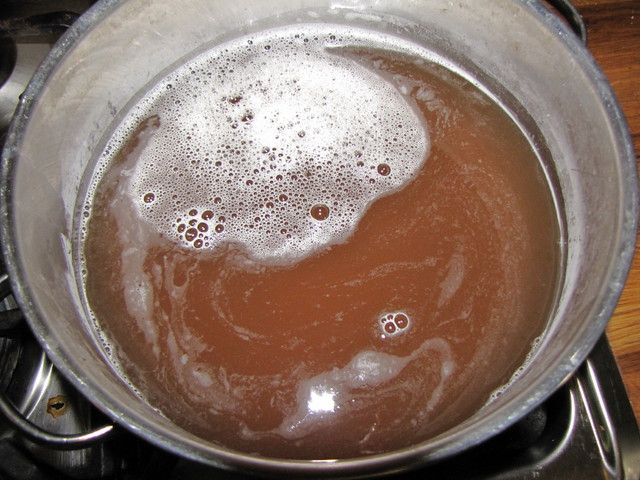
31) Cleaned syrup by British Red, on Flickr
The next step is to concentrate that syrup down by gently heating - don't heat to hot - or you get caramel
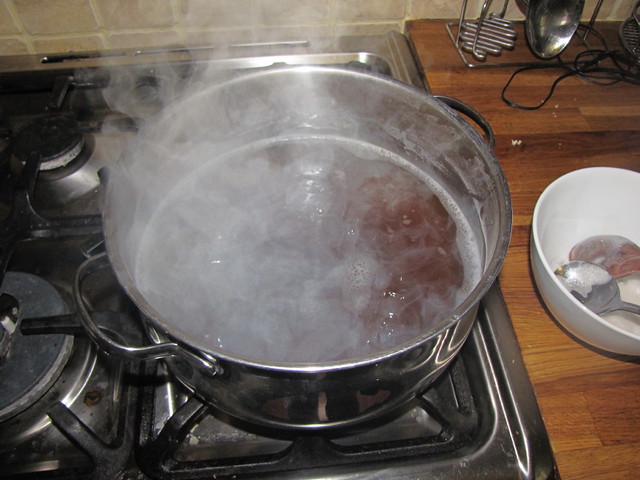
31) Boiling sugar syrup by British Red, on Flickr
You can taste the syrup getting sweeter as it reduces. I transferred to a smaller pan after two thirds of the liquid was gone to avoid it getting too shallow
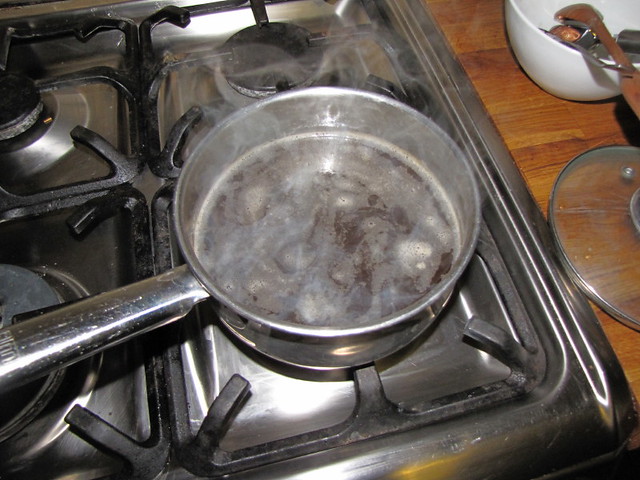
32) Smaller pan by British Red, on Flickr
A little scum may form initially (tiny fibres etc.). Skim these off but leave any froth
33) Forming concentrated syrup by British Red, on Flickr
Eventually you will get what I will call a medium syrup - not as thick as molasses - think maple syrup. Now a factory at this stage will drop sugar crystals in and centrifuge out the sugar. I read a great tutorial by John Maniatty on making sugar from maple syrup where he used a blender - so I decided to give that a go. Actually a hand cranked whisk would work fine.

34) Whip syrup by British Red, on Flickr
So - did it spin off sugar?
Nope
What I got was a really dense foam - and a bad case of the blues!
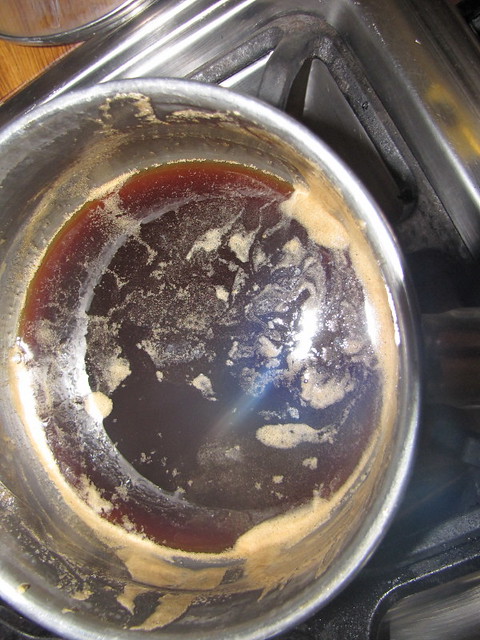
35) Settle molasses by British Red, on Flickr
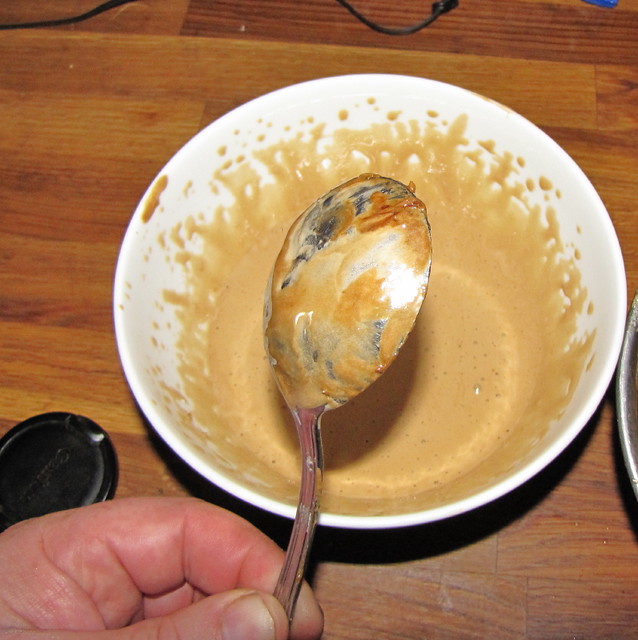
I left this overnight. In the morning I poked it with a spoon and found the thick foam was floating on molasses / treacle. Then inspiration struck. I skimmed off the foam onto sheets in my dehydrator
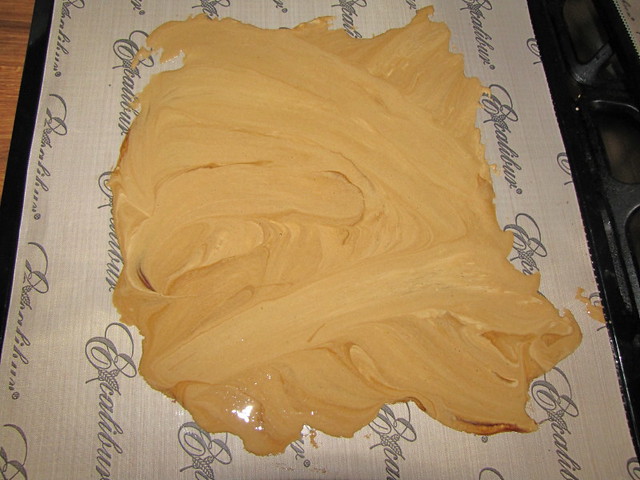
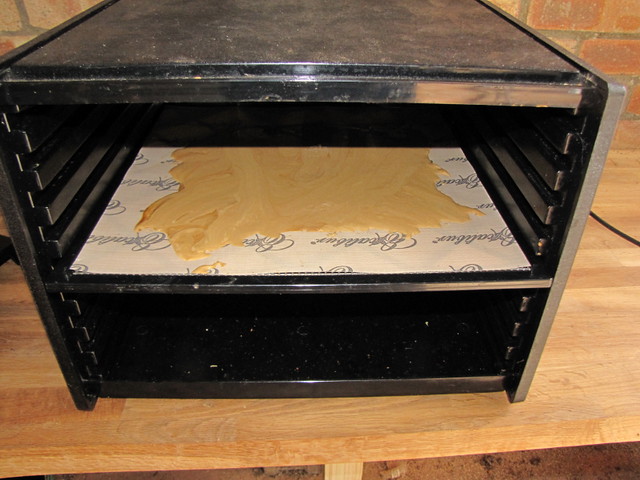
36) Spread foam by British Red, on Flickr
A few hours in the dehydrator and it was rock hard
37) Dry Foam by British Red, on Flickr
I broke up the sheet and pulverised it
38) Grind dried sugar by British Red, on Flickr
...and here we have it. Its not crystals - more a coarse powder. But its delicious (like a sort or slightly cinder toffee tasting sugar), no beet or veg taste - really nice
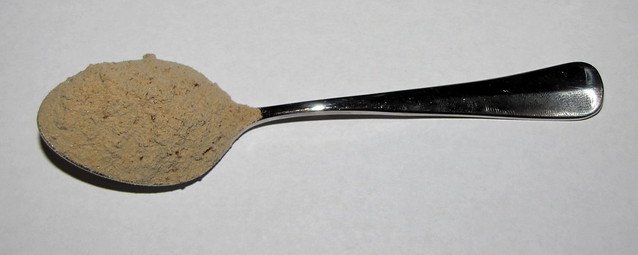
39) Home grown, home refined sugar by British Red, on Flickr
There are many parts of this process that need to be scaled and refined ....but its sugar.
Part 5 - Post Script - How to make a Carbon Dioxide Generator
One of the things I like to do is to figure out how to make everything I need for a process. Using sparkling water or a soda syphon is not self reliant. So I needed to make a CO2 generator.
To do this you will need:
Some 8mm OD microbore (or the outside of a biro, an elder twig, any tube)
A bung
Some plastic tubing with an 8mm hole
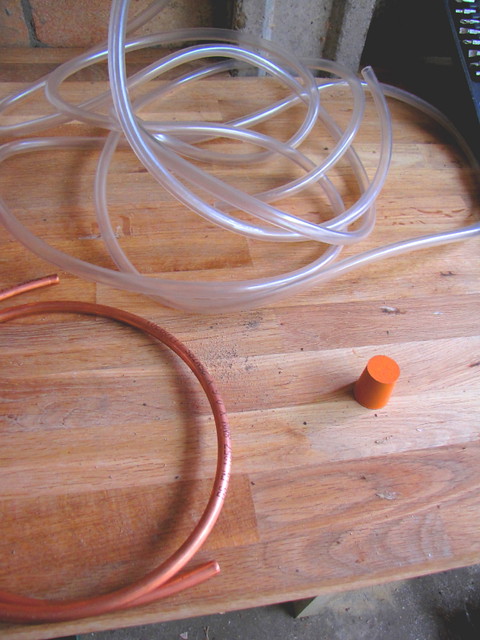
38) co2 generator parts by British Red, on Flickr
Clamp your bung in a vice
38) co2 generator parts by British Red, on Flickr
and fit a 7mm drill bit (we are going to want a tight fit)

40) 7mm drill bit by British Red, on Flickr
Drill a 7mm hole through the bung

41) Drilled bung by British Red, on Flickr
Take a hacksaw and cut a piece of microbore a couple of inches longer than the bung
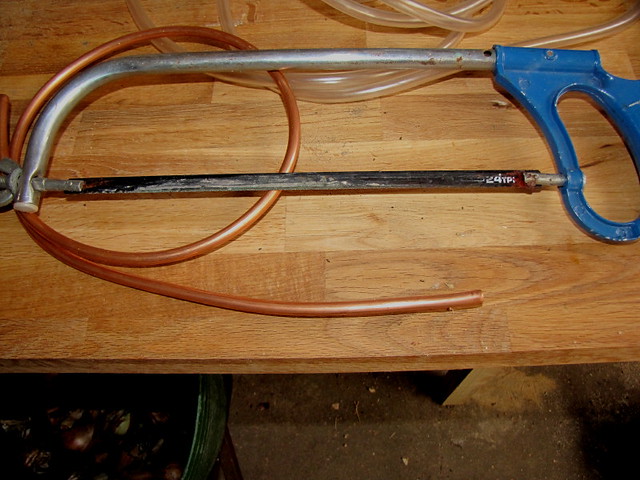
42) microbore cut by British Red, on Flickr
Push the short piece of microbore through the bung hole
43) bung with pipe stud by British Red, on Flickr
Heat the plastic pipe in some hot water and force it onto the microbore stud
44) Tube attached to stud by British Red, on Flickr
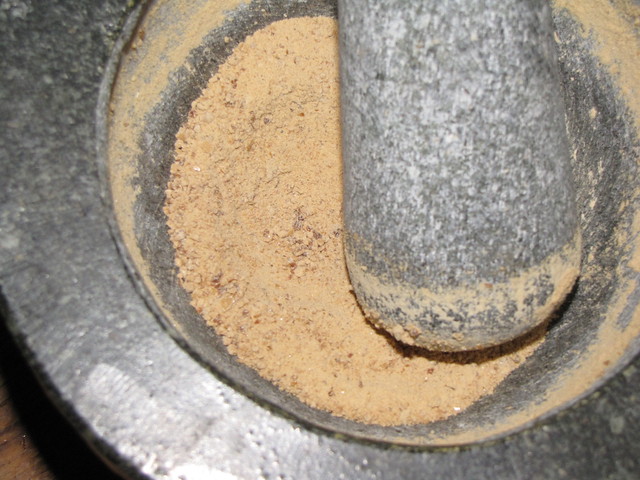
Next you need some calcium carbonate - chalk, limestone, eggshells - or the powder we precipitated out earlier! Grind to a powder
45) Ground chalk by British Red, on Flickr
Now take a pop bottle a funnel and some vinegar (there is a tutorial on making vinegar elsewhere)
46) Remaining parts by British Red, on Flickr
Pour the vinegar and chalk into the pop bottle and force the bung into the neck
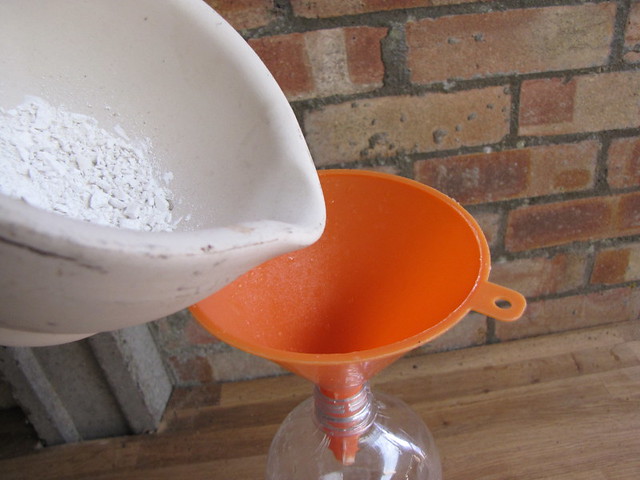
47) Chalk and vinegar in by British Red, on Flickr
Take the free end of the tube and put it into your sugar solution - I 've used a glass of water so you can see the bubbles - those bubbles are CO2.
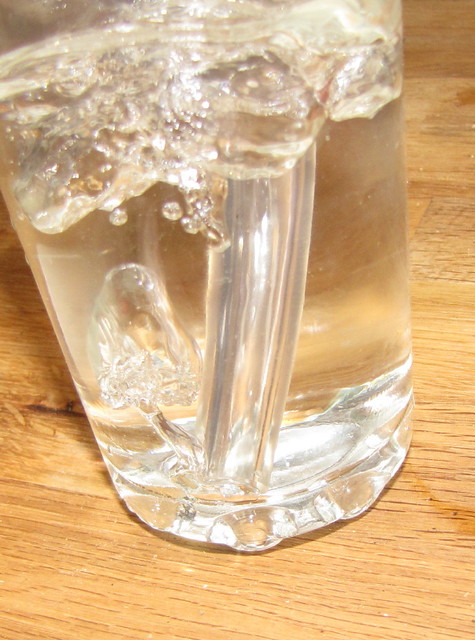
48) CO2 Out by British Red, on Flickr
Having done all this, it occurred to me that, if I couldn't even get eggshells, for the first batch I could take a demijohn of home brew wine, cider or any fermenting alcohol, remove the airlock, add a microbore stud and run the CO2 given off by the yeast during fermentation into my sugar. This appeals as it uses a by-product!. After the first go, there would be chalk settling out that I could use to make more slaked lime etc.
Well, thats it. Another foray into self sufficiency - and another thing we can make for ourselves. I need to get better at every aspect from growing, to bed rotation, to extracting, to scaling the process., to saving my own seed But I know it can be done.
Red
I bought a small bag of sugar beet seeds over winter. In the middle of March I sowed them into a commercial module...I had no idea as to germination rates so I decided to sow in modules and transplant in order to ensure the 50 square feet test area was fully populated. The module was put into an unheated greenhouse
1) Sugar beet module by British Red, on Flickr
The first seeds broke the surface a week later
2) Sugar beet germination by British Red, on Flickr
Two weeks after sowing we had about 50% germination
3) Sugar Beet Seedlings by British Red, on Flickr
After about a month (mid April) secondary leaves developed and the roots were beginning to emerge from the modules
4) Sugar beet seedling 13-4 by British Red, on Flickr
Some seedlings were potted on into 3" pots at this stage to determine whether pot growing in the greenhouse and planting out later would improve beet size (it doesn't!)
Sugar beet potted on 13-4 by British Red, on Flickr
By the end of April (six weeks after planting) we had achieved 100% germination and strong secondary leaves
Sugar Beet 30-04 by British Red, on Flickr
Inspecting the plugs showed decent roots - although I believe they could safely be grown on in modules for up to eight weeks
5) Sugar Beet Plug by British Red, on Flickr
Now, it needs to borne in mind that I had no planting or propagating instructions, so a bit of Google had already come in to play as to when to plant. I had to look up how to space the plants. Consensus appeared to be in rows one foot apart and at one foot intervals - this worked out about right - there is a lot of top growth that needs room to photosynthesise.
We marked out three rows a foot apart and six inches in from the edge of the bed
6) Sugar Beet Bed Marked Up by British Red, on Flickr
A one foot length of wood (or anything) certainly assists in spacing evenly - a dibber makes planting out quicker
7) Peg, Dibber and mark template for Sugar Beet by British Red, on Flickr
Here they are all laid out
8) Planted Sugar Beet plugs 30 -04 by British Red, on Flickr
Its important to keep them wet to begin with if there is a Spring drought...the roots aren't deep yet
9) Watered in Sugar Beet by British Red, on Flickr
I confess - by early June I was quite worried - they had grown - but not as much as I had expected
10) Sugar Beet 04-06 by British Red, on Flickr
Our Summer rains seemed to help though - a couple of weeks made a dramatic difference
11) Sugar Beet 22-06 by British Red, on Flickr
I was very pleased to see beets starting to develop
12) Sugar Beet 22-06 by British Red, on Flickr
By mid July it became clear that those one foot spacings were needed!
13) Sugar Beet 17/07 by British Red, on Flickr
Once they achieve this size, the top growth doesn't seem to change much - the energy is going into the root
14) Sugar Beet 22/09 by British Red, on Flickr
As you can see - in two months the top growth is a little more bushy - but not dramatically so - most of the growing is happening below
Part 2 - lifting the beet and extracting raw syrup
The traditional time for lifting and processing Sugar Beet is September. I'm told by neighbours that all crops are running behind this year - so I have left some for later harvest to understand the difference. Some will be left over to next year in order that I can "close the circle" and produce our own seed.
First beet lifted
15) Lifted Sugar Beet by British Red, on Flickr
When lifting, the leaves can be used as food. They can be eaten like lettuce, wilted like spinach, fried or used as animal fodder. They are actually very tasty!
16) Sugar Beet Tops cut by British Red, on Flickr
To process the beet cut away the tops. Two things of note here:
A) Some of my Beet have forked - this is not good as it makes them harder to process. I heavily suspect that this is as a result of having manured the bed they are growing in over Winter. Root crops should not be grown in freshly manured beds - my mistake.
B) There are hollow, dirt filled areas in the crowns of some of the larger beet - no idea what causes this....but its wasteful
17) Sugar beet tops cut by British Red, on Flickr
The beet were peeled - and scrubbed - some were divided to aid peeling the "legs"
18) Sugar Beet Peeled and Trimmed by British Red, on Flickr
The beet were then grated into a large pan - for trial purposes I was using a 4 gallon stock pot. For any significant processing, my 10 gallon pot will come out - in fact I might make an oil drum boiler. Something like an apple pulper or old manual swede chopper would certainly speed this step up. Grating is not really necessary - thin slicing or chopping up like fries will do the job - the more surface are you make, the easier it is to dissolve out the sugar - don't go too fine though - you don't want the beet to turn into mush.
19) Grated Sugar Beet by British Red, on Flickr
The beet are barely covered with water - bear in mind that a pint of water can dissolve two pounds of sugar - too much water at this step is just more to boil off later.
20)Grated sugar beet Scant cover with water by British Red, on Flickr
Bring the water to the boil and simmer for an hour - the water will dissolve out the sugar from the beet. I was surprised by the smell - like boiling parsnips or other root veg mixed with old socks - no real sweetness and not a great smell. Gradually a faint sweetness can be detected when tasting though - but in a muddy way.
21) Grated Sugar Beet boiled for an hour by British Red, on Flickr
Strain the water from the beet pressing any juice from the pulp. A sieve and ladle works okay - but for large scale I will use a soil sieve and a fruit press to squeeze the pulp.
21) Sugar syrup squeezed from beet by British Red, on Flickr
What we are left with is this - a highly polluted light sugar syrup. It doesn't taste nice to be honest.
22) Light Sugar beet syrup by British Red, on Flickr
The discarded beet is perfectly okay to add to stews - its quite "turnip" like - or it can be fed to stock or composted.
23) Discarded Sugar Beet by British Red, on Flickr
Part 3 - purifying and extracting the syrup
The next steps we need to do is extract as much "non sugar" from the syrup as possible - the first step is to filter out any dirt, beet fibres etc. You need a fine filter here. I am using a jelly bag (the stand helps a lot), but you could use a sieve covered in multiple layers of cloth (you can see layers of muslin lining my bag - this increases the effective fineness). A Milbank bag would work - as would a fine biodiesel filer bag (I have several - down to 1 micron that I will use on a stand for larger batches)
24) Sugar syrup filtration by British Red, on Flickr
After filtering you can see that the bag has trapped dirt
25) Filtered dirt by British Red, on Flickr
The cloth has caught a lot of grey beet fibres
26) Removed Sugar Beet Pulp by British Red, on Flickr
So we have removed the bulkier stuff - but there still a lot of microscopic contaminants in there. Factories use chemical precipitation to settle out these impurities - and so will we. To do this, we will use calcium hydroxide mixed in the syrup and add carbon dioxide - this causes calcium carbonate (chalk) to precipitate out. As the calcium carbonate forms it draws the impurities to it and they settle out together - rather like adding "finings" to wine.
I know this sounds complicated, but it really isn't. This is calcium hydroxide
27) Calcium Hydroxide by British Red, on Flickr
This stuff is available all over the place. As a chemical. As agricultural lime. As "pickling lime". Its old name was "slaked lime". To make it add limestone or chalk (calcium carbonate) to a kiln and get it hot this forms calcium oxide - also known as quicklime. Add water to quicklime and you get slaked lime - calcium hydroxide. Firing quicklime is dirty and dangerous - so learn how to do it safely!
Now we need to made "milk of lime" - a tiny amount of slaked lime is mixed with hot water - where it partially dissolves and is partially held in suspension
28) Milk of Lime by British Red, on Flickr
The milk of lime is added to the filtered syrup
29) Mixed milk of lime and soda water by British Red, on Flickr
We have to now get some carbon dioxide in there. In the final part of this post I will show you how to build a carbon dioxide generator, but, if you don't want to go that far, add some sparkling water or use a soda syphon to make very fizzy water and add that.
Quickly you will see layers form - intially its all cloudy, but then you get clearer syrup at the top and sediment at the bottom
Sugar solution precipitation by British Red, on Flickr
In a factory they would use a centrifuge to settle out the chalk - I just used patience! When it settled, I syphoned off the cleaned syrup. On a larger scale, I would use a beer brewing vessel with a tap an inch up the side to draw the syrup off
30) Separated layers - siphoned off by British Red, on Flickr
Part 4 - Sugar Extraction
So, we have some filtered and purified light syrup
31) Cleaned syrup by British Red, on Flickr
The next step is to concentrate that syrup down by gently heating - don't heat to hot - or you get caramel
31) Boiling sugar syrup by British Red, on Flickr
You can taste the syrup getting sweeter as it reduces. I transferred to a smaller pan after two thirds of the liquid was gone to avoid it getting too shallow
32) Smaller pan by British Red, on Flickr
A little scum may form initially (tiny fibres etc.). Skim these off but leave any froth
33) Forming concentrated syrup by British Red, on Flickr
Eventually you will get what I will call a medium syrup - not as thick as molasses - think maple syrup. Now a factory at this stage will drop sugar crystals in and centrifuge out the sugar. I read a great tutorial by John Maniatty on making sugar from maple syrup where he used a blender - so I decided to give that a go. Actually a hand cranked whisk would work fine.
34) Whip syrup by British Red, on Flickr
So - did it spin off sugar?
Nope
What I got was a really dense foam - and a bad case of the blues!
35) Settle molasses by British Red, on Flickr
I left this overnight. In the morning I poked it with a spoon and found the thick foam was floating on molasses / treacle. Then inspiration struck. I skimmed off the foam onto sheets in my dehydrator
36) Spread foam by British Red, on Flickr
A few hours in the dehydrator and it was rock hard
37) Dry Foam by British Red, on Flickr
I broke up the sheet and pulverised it
38) Grind dried sugar by British Red, on Flickr
...and here we have it. Its not crystals - more a coarse powder. But its delicious (like a sort or slightly cinder toffee tasting sugar), no beet or veg taste - really nice
39) Home grown, home refined sugar by British Red, on Flickr
There are many parts of this process that need to be scaled and refined ....but its sugar.
Part 5 - Post Script - How to make a Carbon Dioxide Generator
One of the things I like to do is to figure out how to make everything I need for a process. Using sparkling water or a soda syphon is not self reliant. So I needed to make a CO2 generator.
To do this you will need:
Some 8mm OD microbore (or the outside of a biro, an elder twig, any tube)
A bung
Some plastic tubing with an 8mm hole
38) co2 generator parts by British Red, on Flickr
Clamp your bung in a vice
38) co2 generator parts by British Red, on Flickr
and fit a 7mm drill bit (we are going to want a tight fit)
40) 7mm drill bit by British Red, on Flickr
Drill a 7mm hole through the bung
41) Drilled bung by British Red, on Flickr
Take a hacksaw and cut a piece of microbore a couple of inches longer than the bung
42) microbore cut by British Red, on Flickr
Push the short piece of microbore through the bung hole
43) bung with pipe stud by British Red, on Flickr
Heat the plastic pipe in some hot water and force it onto the microbore stud
44) Tube attached to stud by British Red, on Flickr
Next you need some calcium carbonate - chalk, limestone, eggshells - or the powder we precipitated out earlier! Grind to a powder
45) Ground chalk by British Red, on Flickr
Now take a pop bottle a funnel and some vinegar (there is a tutorial on making vinegar elsewhere)
46) Remaining parts by British Red, on Flickr
Pour the vinegar and chalk into the pop bottle and force the bung into the neck
47) Chalk and vinegar in by British Red, on Flickr
Take the free end of the tube and put it into your sugar solution - I 've used a glass of water so you can see the bubbles - those bubbles are CO2.
48) CO2 Out by British Red, on Flickr
Having done all this, it occurred to me that, if I couldn't even get eggshells, for the first batch I could take a demijohn of home brew wine, cider or any fermenting alcohol, remove the airlock, add a microbore stud and run the CO2 given off by the yeast during fermentation into my sugar. This appeals as it uses a by-product!. After the first go, there would be chalk settling out that I could use to make more slaked lime etc.
Well, thats it. Another foray into self sufficiency - and another thing we can make for ourselves. I need to get better at every aspect from growing, to bed rotation, to extracting, to scaling the process., to saving my own seed But I know it can be done.
Red
Last edited: